Cars: Muscle Cars
60's & 70's Classics
AMT new tool Chrysler 300C (commissioned)
Szmann
_VISITCOMMUNITY
Netherlands Antilles
Joined: September 02, 2014
KitMaker: 1,977 posts
Auto Modeler: 1,371 posts
Posted: Friday, December 28, 2018 - 03:11 PM UTC
Hi, guys!

I was contacted by a Classic Car Club to do some builds for them. This is going to be the first one, followed by another 7 or 8, if everything goes smooth in both sides.
This first build is a trial for me because after my failure to finish the B17G, I tried to stay away from commissioned builds, until today.


This car is going to be built for an Italian guy, who's father used to own one. Requirements: OOB, color "aquamarine" (see infra more about the color), stock, white wall tires.

The first issue was already identifying the correct color. The customers said "aquamarine", but Chrysler has no aquamarine for 1957. There actually six (!) different colors that can be related with the name, but the customer wasn't sure. Eventually we have narrowed the choices to only two: parade green and Indian turquoise. Apparently parade green was sold only as metallic and only by a LA dealer - so that was excluded too. Comparing the image on the box cover, which coincidentally is "aquamarine", and the Indian turquoise achieved by RGB modeling, I have achieved a quite sensitive difference, with the RGB reconstituted color much more greener and darker, very close to parade green actually. I not even tried to find the color by any supplier, because I don't want to wait another three weeks for a bottle of paint and the perfect match is still questionable, so I have mixed it myself from Rust-oleum paints and submitted it to customer for approval - confirmation pending:


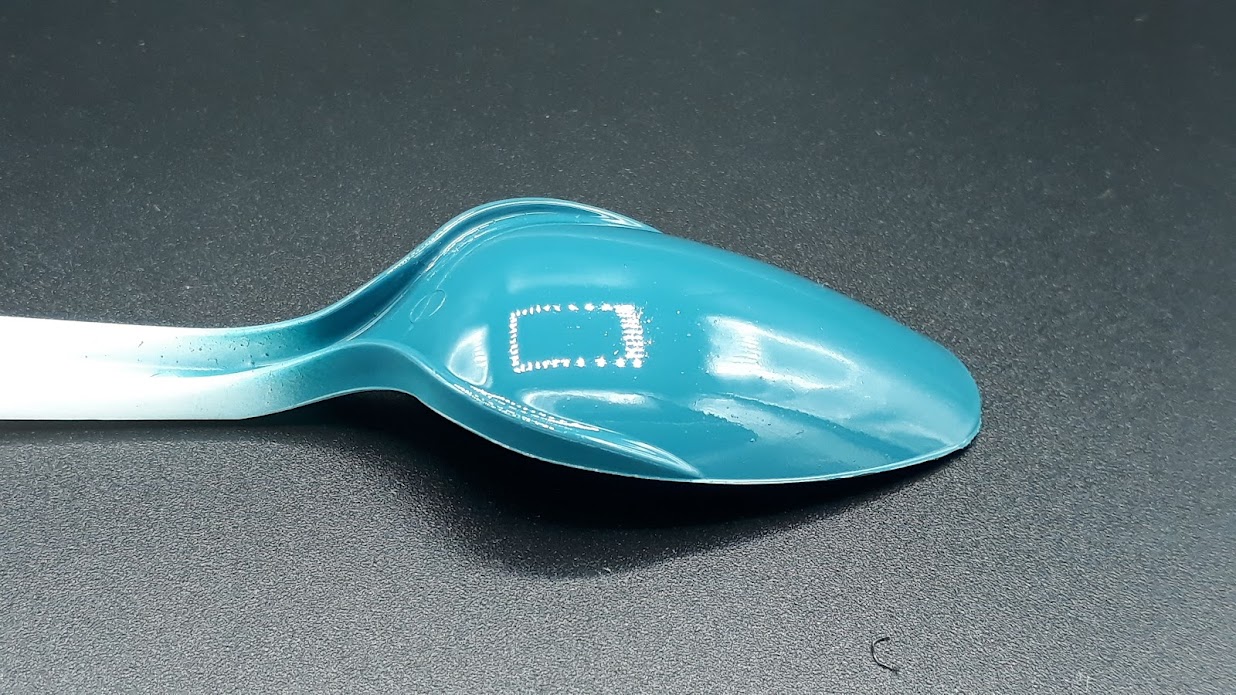
I think I am close enough - I just needed a stronger blue pigment - unfortunately I don't have it.
I'm really eager to start this build because I sort of fell in love with this car doing my research - but I forbade myself to cut any sprue before I finish the ongoing VW build.

Cheers!
Gabriel
Joel_W
Staff MemberAssociate Editor
AUTOMODELER
_VISITCOMMUNITY
New York, United States
Joined: December 04, 2010
KitMaker: 11,666 posts
Auto Modeler: 2,974 posts
Posted: Saturday, December 29, 2018 - 03:07 AM UTC
Gabriel,
Oh my!! Do I remember those boats, and they were that big. One of my friends bought a used one in Black, and by today's standards it was the size of a mini bus.

I checked my sources and came up with just two officially listed colors that come close to what you're looking for. With that said, I wouldn't try using the box as the definitive color, just as a starting point.

MCW paints, which specialize in the Big 3 paint colors, I found two Chrysler colors that seem to be what you're looking for:


and

]

The Aqua looks closer to the box top, but the Riveria Turq. looks closer to your spoons.

Joel
Szmann
_VISITCOMMUNITY
Netherlands Antilles
Joined: September 02, 2014
KitMaker: 1,977 posts
Auto Modeler: 1,371 posts
Posted: Saturday, December 29, 2018 - 04:20 AM UTC

Quoted Text


Gabriel,
Oh my!! Do I remember those boats, and they were that big. One of my friends bought a used on in Black, and by today's standards it was the size of a mini bus.


Hi, Joel! Tank you for joining me for the ride.
Yup, the size of those beasts are impressive for today's standards. At the time, it was considered a rather small car, since the regular cars used to accommodate six persons, while Chrysler 300 was a 2+2 which it gained the cognomen of "the banker's hot rod".


Quoted Text

I checked my sources and came up with just two officially listed colors that come close to what you're looking for. With that said, I wouldn't try using the box as the definitive color, just as a starting point.


For 1957 Dietzler catalog lists for Chrysler the following colors

Indian Turquoise


Parade green


The color on the cover is somewhat too blue... but the memories of the Italian could be faded...
Anyhow, let's see what he is remembering

Gabriel
Joel_W
Staff MemberAssociate Editor
AUTOMODELER
_VISITCOMMUNITY
New York, United States
Joined: December 04, 2010
KitMaker: 11,666 posts
Auto Modeler: 2,974 posts
Posted: Saturday, December 29, 2018 - 05:27 AM UTC
Gabriel,
Of course I'll be along for the ride. Who else will keep you pointed in the right direction.

Memories have a nasty way of fading over the years. I'll be very interested in what your client decides on.

Joel
Hwa-Rang
_VISITCOMMUNITY
Kobenhavn, Denmark
Joined: June 29, 2004
KitMaker: 6,760 posts
Auto Modeler: 2,182 posts
Posted: Sunday, December 30, 2018 - 10:24 AM UTC
I wouldn't miss this one either. Horizon blue, regatta blue poly(West og east coast) or indian turqouise, I'm sure og will look grand.
Szmann
_VISITCOMMUNITY
Netherlands Antilles
Joined: September 02, 2014
KitMaker: 1,977 posts
Auto Modeler: 1,371 posts
Posted: Sunday, December 30, 2018 - 02:39 PM UTC
Thanks, Jesper! I know you are a big Mopar fan and a Hemi even more! Letter C and a short series from D are the last ones to be fitted with Hemis, then they changed for a flathead.
Honestly, I think any color will do. The car is a beauty in herself. If it would be mine, I'll try that dark reddish-brown of which only one is preserved...
I just warned the guys I'm not gonna do any color shift gimmicks
Ironically, I've tried a few lacquer polishes and the results were brilliant!

Thanks for stopping by!
Gabriel
AussieReg
Staff MemberAssociate Editor
AUTOMODELER
#007
_VISITCOMMUNITY
Victoria, Australia
Joined: June 09, 2009
KitMaker: 8,156 posts
Auto Modeler: 2,953 posts
Posted: Wednesday, January 02, 2019 - 12:32 PM UTC
Interesting build for sure, I will be following along!

Cheers, D
Szmann
_VISITCOMMUNITY
Netherlands Antilles
Joined: September 02, 2014
KitMaker: 1,977 posts
Auto Modeler: 1,371 posts
Posted: Thursday, January 03, 2019 - 01:19 AM UTC

Quoted Text


Interesting build for sure, I will be following along!

Cheers, D


Thanks, D.! I'm still waiting for customer's approval on the color - he's off reach until January 5th but I might start today the engine because the things are clear in the motor bay.

Cheers!
Gabriel
Szmann
_VISITCOMMUNITY
Netherlands Antilles
Joined: September 02, 2014
KitMaker: 1,977 posts
Auto Modeler: 1,371 posts
Posted: Saturday, January 05, 2019 - 03:06 PM UTC
Hi, guys!

UPDATE

I've got the approval today for the color and all it's set. I was quite eager to start airbrushing, but I had too much work to do on the body and I ran late. The engine block / transmission was assembled the night before, but I needed to let it dry clamped down because the transmission halves were divergent. I cleaned up the seam lines, but I still need some filler by the oil pan and at the bottom of the transmission:


The mold lines were marked down with marker for easy sanding but the main problem was the shallow panel lines which I had to deepen:


The most demanding was the trunk: it had a parting line all across and the panel line was way too shallow, especially on the vertical end (now properly done):


First time using the scriber from Squadron. I'ts OK for following rounded corners but the angle of attack is very shallow and sometimes difficult to follow compound surfaces, as the angle changes. I would have preferred it a little sharper also, but generally speaking I find is a good tool and once you get used with the working angle you can get good consistent results:


Maybe I will get the chance to prime it in the next session, after some minor flash will be removed.

As first impressions, I have to say that "new tool" from AMT is not that "new" after all - some roughness on the surface pointing out that is rather a restored mold. However, the flash is considerably less present on the sprues, especially on the small parts and some finesse can be observed here and there. It is some improvement to speak about, but certainly not enough.

Cheers!
Gabriel
Stickframe
#362
_VISITCOMMUNITY
California, United States
Joined: December 01, 2013
KitMaker: 1,661 posts
Auto Modeler: 431 posts
Posted: Saturday, January 05, 2019 - 07:42 PM UTC
Hi Gabriel - nice bodywork you’ve done! It’s too bad the parts aren’t actually “new tool” - your work though is really pulling it together convincingly - looking forward to your progress

Cheers
Nick
Joel_W
Staff MemberAssociate Editor
AUTOMODELER
_VISITCOMMUNITY
New York, United States
Joined: December 04, 2010
KitMaker: 11,666 posts
Auto Modeler: 2,974 posts
Posted: Sunday, January 06, 2019 - 05:47 AM UTC
Gabriel
Finally, you're off and running on this build from the days of Detroit Iron. So far you're making the prep work look easy, and I know just how demanding it can be with mold lines in places that are really hard to work in.

I haven't been around lately, as I broke down and bought a new state of the art PC that I needed for photo processing. My old PC was nearly 5 years old with a Duel core CPU. I did upgrade the graphics card last year, but a total upgrade wouldn't have been worth the time and effort. It's taken two full days to get it up to specs and where I want it.


Joel
AussieReg
Staff MemberAssociate Editor
AUTOMODELER
#007
_VISITCOMMUNITY
Victoria, Australia
Joined: June 09, 2009
KitMaker: 8,156 posts
Auto Modeler: 2,953 posts
Posted: Sunday, January 06, 2019 - 03:01 PM UTC
Great to see this one start to take shape Gabriel, definitely looking forward to each update!

Cheers, D
Hwa-Rang
_VISITCOMMUNITY
Kobenhavn, Denmark
Joined: June 29, 2004
KitMaker: 6,760 posts
Auto Modeler: 2,182 posts
Posted: Sunday, January 06, 2019 - 06:09 PM UTC
Looking good my friend.
goodn8
_VISITCOMMUNITY
Berlin, Germany
Joined: October 12, 2008
KitMaker: 709 posts
Auto Modeler: 21 posts
Posted: Monday, January 07, 2019 - 12:24 AM UTC

Gabriel,
thanks for showing up what would be another fine build!
Good start to date.

Followed up the car works now for a little while and must say that you and recently Joel done a great job. Truely you both can name yourself "influencer"

Sorry for the damage on your Porsche but the Beetle turned out fantastic.

Joel,
time consuming work to get a new PC properly running, I can feel the pain.
Countless times I`ve done new setup's since starting with DOS-powered engines (anyone remember?).


keeep on the good work
Th mas
Szmann
_VISITCOMMUNITY
Netherlands Antilles
Joined: September 02, 2014
KitMaker: 1,977 posts
Auto Modeler: 1,371 posts
Posted: Monday, January 07, 2019 - 01:02 AM UTC

Quoted Text

Hi Gabriel - nice bodywork you’ve done! It’s too bad the parts aren’t actually “new tool” - your work though is really pulling it together convincingly - looking forward to your progress

Cheers
Nick


Thanks, Nick!
Some of interior parts are certainly new. The body shell is somewhat strange and I found a stamp inside which reads "Copyright and Trademark PCA 2018". So it is new, but perhaps made by some Round2 subsidiaries... not sure.
I am humbled by your interest, and I'll try not to be disappointing!

Gabriel
Szmann
_VISITCOMMUNITY
Netherlands Antilles
Joined: September 02, 2014
KitMaker: 1,977 posts
Auto Modeler: 1,371 posts
Posted: Monday, January 07, 2019 - 01:18 AM UTC

Quoted Text

Gabriel
Finally, you're off and running on this build from the days of Detroit Iron. So far you're making the prep work look easy, and I know just how demanding it can be with mold lines in places that are really hard to work in.


Yup, it's up and running! Unfortunately my bench time is seriously restricted these days by the overload at work. We are in full turistic season right now in Caribbean as the cold chases your fellow Americans over here
Truth be said, the parting lines were quite easy to deal with, except for the demarcation lines between the window vents and the ones in the fore corners, running across details. Another thing I haven't noticed at the time is a sink mark inside the left rear fin which I have to fill up. After the primer we'll see how bad it is.


Quoted Text


I haven't been around lately, as I broke down and bought a new state of the art PC that I needed for photo processing. My old PC was nearly 5 years old with a Duel core CPU. I did upgrade the graphics card last year, but a total upgrade wouldn't have been worth the time and effort. It's taken two full days to get it up to specs and where I want it.


This is the reason why I build my own PCs (work stations I call them, to differentiate from my laptops and tablets ). I always buy military specs MBs and top of the game processors / cooling systems. I ensure I buy high compatibility parts and in the last 12 years I changed three times the configurations because they have became obsolete. I have recorded single component failure: a nVidia video board and since there I switched to AMD self powered (with a spare power bank), self cooled and with stand alone processor.
I'm glad you're back online and that you can carry on as usual.

Cheers!
Gabriel
Szmann
_VISITCOMMUNITY
Netherlands Antilles
Joined: September 02, 2014
KitMaker: 1,977 posts
Auto Modeler: 1,371 posts
Posted: Monday, January 07, 2019 - 01:25 AM UTC

Quoted Text

Great to see this one start to take shape Gabriel, definitely looking forward to each update!

Cheers, D


Thanks, D! I feel honored by your interest and I'm really looking myself to do my best on this one.

Gabriel
Szmann
_VISITCOMMUNITY
Netherlands Antilles
Joined: September 02, 2014
KitMaker: 1,977 posts
Auto Modeler: 1,371 posts
Posted: Monday, January 07, 2019 - 01:30 AM UTC

Quoted Text

Looking good my friend.


Thank you, Jesper. Yes, it start looking decent - I just cannot stop wowing myself at the sheer size of this thing! 4410 lbs curb weight for a two door car!

Cheers!
Gabriel
Szmann
_VISITCOMMUNITY
Netherlands Antilles
Joined: September 02, 2014
KitMaker: 1,977 posts
Auto Modeler: 1,371 posts
Posted: Monday, January 07, 2019 - 01:49 AM UTC

Quoted Text


Gabriel,
thanks for showing up what would be another fine build!
Good start to date.

Followed up the car works now for a little while and must say that you and recently Joel done a great job. Truely you both can name yourself "influencer"

Sorry for the damage on your Porsche but the Beetle turned out fantastic.

Joel,
time consuming work to get a new PC properly running, I can feel the pain.
Countless times I`ve done new setup's since starting with DOS-powered engines (anyone remember?).


keeep on the good work
Th mas


Thomas, what a nice surprise to have you here! Welcome!
I know you're an aircraft die-hard and there are similitude between aircraft and cars, as Joel is discovering now The cars in the 30s and early 40s are hugely influenced by aircraft design. At the other end, today's super-sports are planes on wheels: 1000+hp, ride-by-wire, variable air intakes and variable spoiler geometry - all these are aircraft characteristics!

Thank you for adding so much glamour to my name - I feel honored - but to be honest I owe pretty much all in this business to Damian and Jesper. They really can pull awesome builds when they have the bench time and when they put their mind to it!

The Porsche seems it will enjoy a new "after-life" - some friend of mine that does junk yard diorama stuff - and it does it beautifully - wants the wreck to make it as a car over which a tree has collapsed. He said that if he wanted to, he couldn't achieve such "lateral impact effect". Well, one cannot argue about the taste! LOL!

Of course I remember those DOS days: "C:gamespop.exe" That was something! Now I really get annoyed by too many features I never asked for on my mobile phone!

Cheers!
Gabriel
Joel_W
Staff MemberAssociate Editor
AUTOMODELER
_VISITCOMMUNITY
New York, United States
Joined: December 04, 2010
KitMaker: 11,666 posts
Auto Modeler: 2,974 posts
Posted: Monday, January 07, 2019 - 03:38 AM UTC

Quoted Text


Joel,
time consuming work to get a new PC properly running, I can feel the pain.
Countless times I`ve done new setup's since starting with DOS-powered engines (anyone remember?).


keeep on the good work
Th mas


Thomas,
I more then remember the old MS-DOS days, and no plug & play. Actually, from start to finish everything went like clock work. The biggest change for me is now having more then one internal drive to work with as my SSD is only 256mb. But talk about speed. OMG, I need a seatbelt on my chair.

Joel
Joel_W
Staff MemberAssociate Editor
AUTOMODELER
_VISITCOMMUNITY
New York, United States
Joined: December 04, 2010
KitMaker: 11,666 posts
Auto Modeler: 2,974 posts
Posted: Monday, January 07, 2019 - 03:43 AM UTC
Gabriel,
I was going to build my own computer, but with the current prices up here for components, I went with a small USA based computer company, and I really got the most bang for my buck. the case alone has 3 120mm fans and there is so much venting, it heats my model/computer room into the 70s while the house is only 68-69.

My only issue is that I went with a 256mb SSD and a 1TB mechanical drive. I should have opted for a min of 500mb SSD that would have made my life so much easier.

Joel
Szmann
_VISITCOMMUNITY
Netherlands Antilles
Joined: September 02, 2014
KitMaker: 1,977 posts
Auto Modeler: 1,371 posts
Posted: Monday, January 07, 2019 - 12:46 PM UTC

Quoted Text


My only issue is that I went with a 256mb SSD and a 1TB mechanical drive. I should have opted for a min of 500mb SSD that would have made my life so much easier.


Joel that'll be relatively easy to upgrade whenever you have enough financial breathing room and the patience to lose two days to re-install all the required software!
For storage I went wild from the start and now I'm congratulating myself because I have tonnes of videos after I have started my YT channel.

Internal I have a 1TB hybrid (they were en vogue some three years ago ) for boot / OS / Master, a 4TB mechanical slave for software / games / video archives and two 1TB externals for backups / saves / swaps.

But I'm guessing by what you're saying you're not too bad either: and yes, at first my genuine 4 core Intel gave me nausea with how fast it seemed!

Gabriel
Joel_W
Staff MemberAssociate Editor
AUTOMODELER
_VISITCOMMUNITY
New York, United States
Joined: December 04, 2010
KitMaker: 11,666 posts
Auto Modeler: 2,974 posts
Posted: Tuesday, January 08, 2019 - 05:41 AM UTC

Quoted Text


Quoted Text


My only issue is that I went with a 256mb SSD and a 1TB mechanical drive. I should have opted for a min of 500mb SSD that would have made my life so much easier.


Joel that'll be relatively easy to upgrade whenever you have enough financial breathing room and the patience to lose two days to re-install all the required software!
For storage I went wild from the start and now I'm congratulating myself because I have tonnes of videos after I have started my YT channel.

Internal I have a 1TB hybrid (they were en vogue some three years ago ) for boot / OS / Master, a 4TB mechanical slave for software / games / video archives and two 1TB externals for backups / saves / swaps.

But I'm guessing by what you're saying you're not too bad either: and yes, at first my genuine 4 core Intel gave me nausea with how fast it seemed!

Gabriel


Gabriel,
I'm going to add one more 1TB mechanical drive so I have two, plus I have an external HD for financial and personal info. The CPU I went with is a Intel I5 8400 6 core 12 thread, so it flies compared to my old I3 cpu.


Joel
Szmann
_VISITCOMMUNITY
Netherlands Antilles
Joined: September 02, 2014
KitMaker: 1,977 posts
Auto Modeler: 1,371 posts
Posted: Tuesday, January 08, 2019 - 02:32 PM UTC

Quoted Text


Gabriel,
I'm going to add one more 1TB mechanical drive so I have two, plus I have an external HD for financial and personal info. The CPU I went with is a Intel I5 8400 6 core 12 thread, so it flies compared to my old I3 cpu.


Joel


Yes, that's the way I went too: I have an older than yours I5 4 core / 8 threads, but I have disabled the threading because I wanted the raw power not the multi-tasking. Great choice for processor you made!

UPDATE
Well, my current working schedule it is killing almost all my bench time, but I still can find a hour / day. Here is the sink mark on the fin covered with Tamiya White Putty. If someone wonders why the putty is pink, it is because I used as applicator a Tamiya mixing paddle that still had some remnant of red paint on it. I did it deliberately, knowing beforehand that the solvent present into the putty will interact with the paint. I wanted the putty slightly colored for better contrast over white plastic. I would normally have used Squadron green putty, but I just found out it expired:


And,of course, the trademark Round2 pin marks were sanded down but they are sunk with raised edges and need filler too!


on this door something very strange is going on: theere is some sort of yellow swirl inside the plastic from one side to another. I cannot tell what is it and I cover it with putty just to make sure: I don't know how the "yellow thing" will react with the primer:


Another Round2 trademark: never the transmission parts won't fit properly. I have used acrylic Vallejo putty to fill up the gap between the oil pan and the engine block:


One more sanding session and ready for primer!

REFERENCES
I should have posted the following pictures much earlier in the thread but I just omitted it. Damian's white Corvette reminded me of my mini collection:

The white version of it - Land Yacht it is not an exaggeration!


The red version - I told ya? it is as long as the sailing yacht behind!


This one is my favorite and belongs to an American couple. Probably if would have been my build, I would have chosen the chestnut brown as my color. For what I know, this is the only "C" originally preserved in this color. For more information, please read the scribbling in the right corner of the photo, down:


And, finally, this is "our" color. Interesting smudged background effect obtained by spreading vaseline on the lenses. No Photoshop and no smart cameras in '57!


Cheers!
Gabriel
Szmann
_VISITCOMMUNITY
Netherlands Antilles
Joined: September 02, 2014
KitMaker: 1,977 posts
Auto Modeler: 1,371 posts
Posted: Thursday, January 10, 2019 - 01:50 PM UTC
Hi, guys!

UPDATE - The first date

The first date of the kit with the airbrush was quite successful. I used for primer Mr. Surfacer gray 1500, thinned down with Mr. Levelling thinner (approx. 50 / 50) sprayed at 20psi thru my H&S Evolution with .4mm setup. For the first time I have used the aftermarket tail piece which came with throttle stop. Worked like a charm! There is, of course, a little grain here and there and also a couple spots which require sanding, a couple of scratches but nothing to write home about. Busisess as usual:


In the same painting session I primed the inside of the hood. You might have noticed already some scratches resulted from using a low grit Dremel implement to reach the pin marks (the customer wants to have the option to display the hood open):


The engine block / transmission assembly was sprayed with Krylon gloss black enamel, followed by a dimmed down silver (Krylon silver chrome + 1 drop of gloss black from the same range). I have painted by hand with a 00 brush the starter (not visible) and the oil filter. I used for this task Liquitex acrylics which I am in love with:


Next step is going to be spraying the padding on the inside of the hood, masking off and spraying the body color after. The body will be refined / sanded and the engine assembly will continue with the manifolds, carburetors, air cleaners and such. These last mentioned details have a different color and that's why I didn't attached them to the engine block first.

Thanks for following!
Cheers!
Gabriel