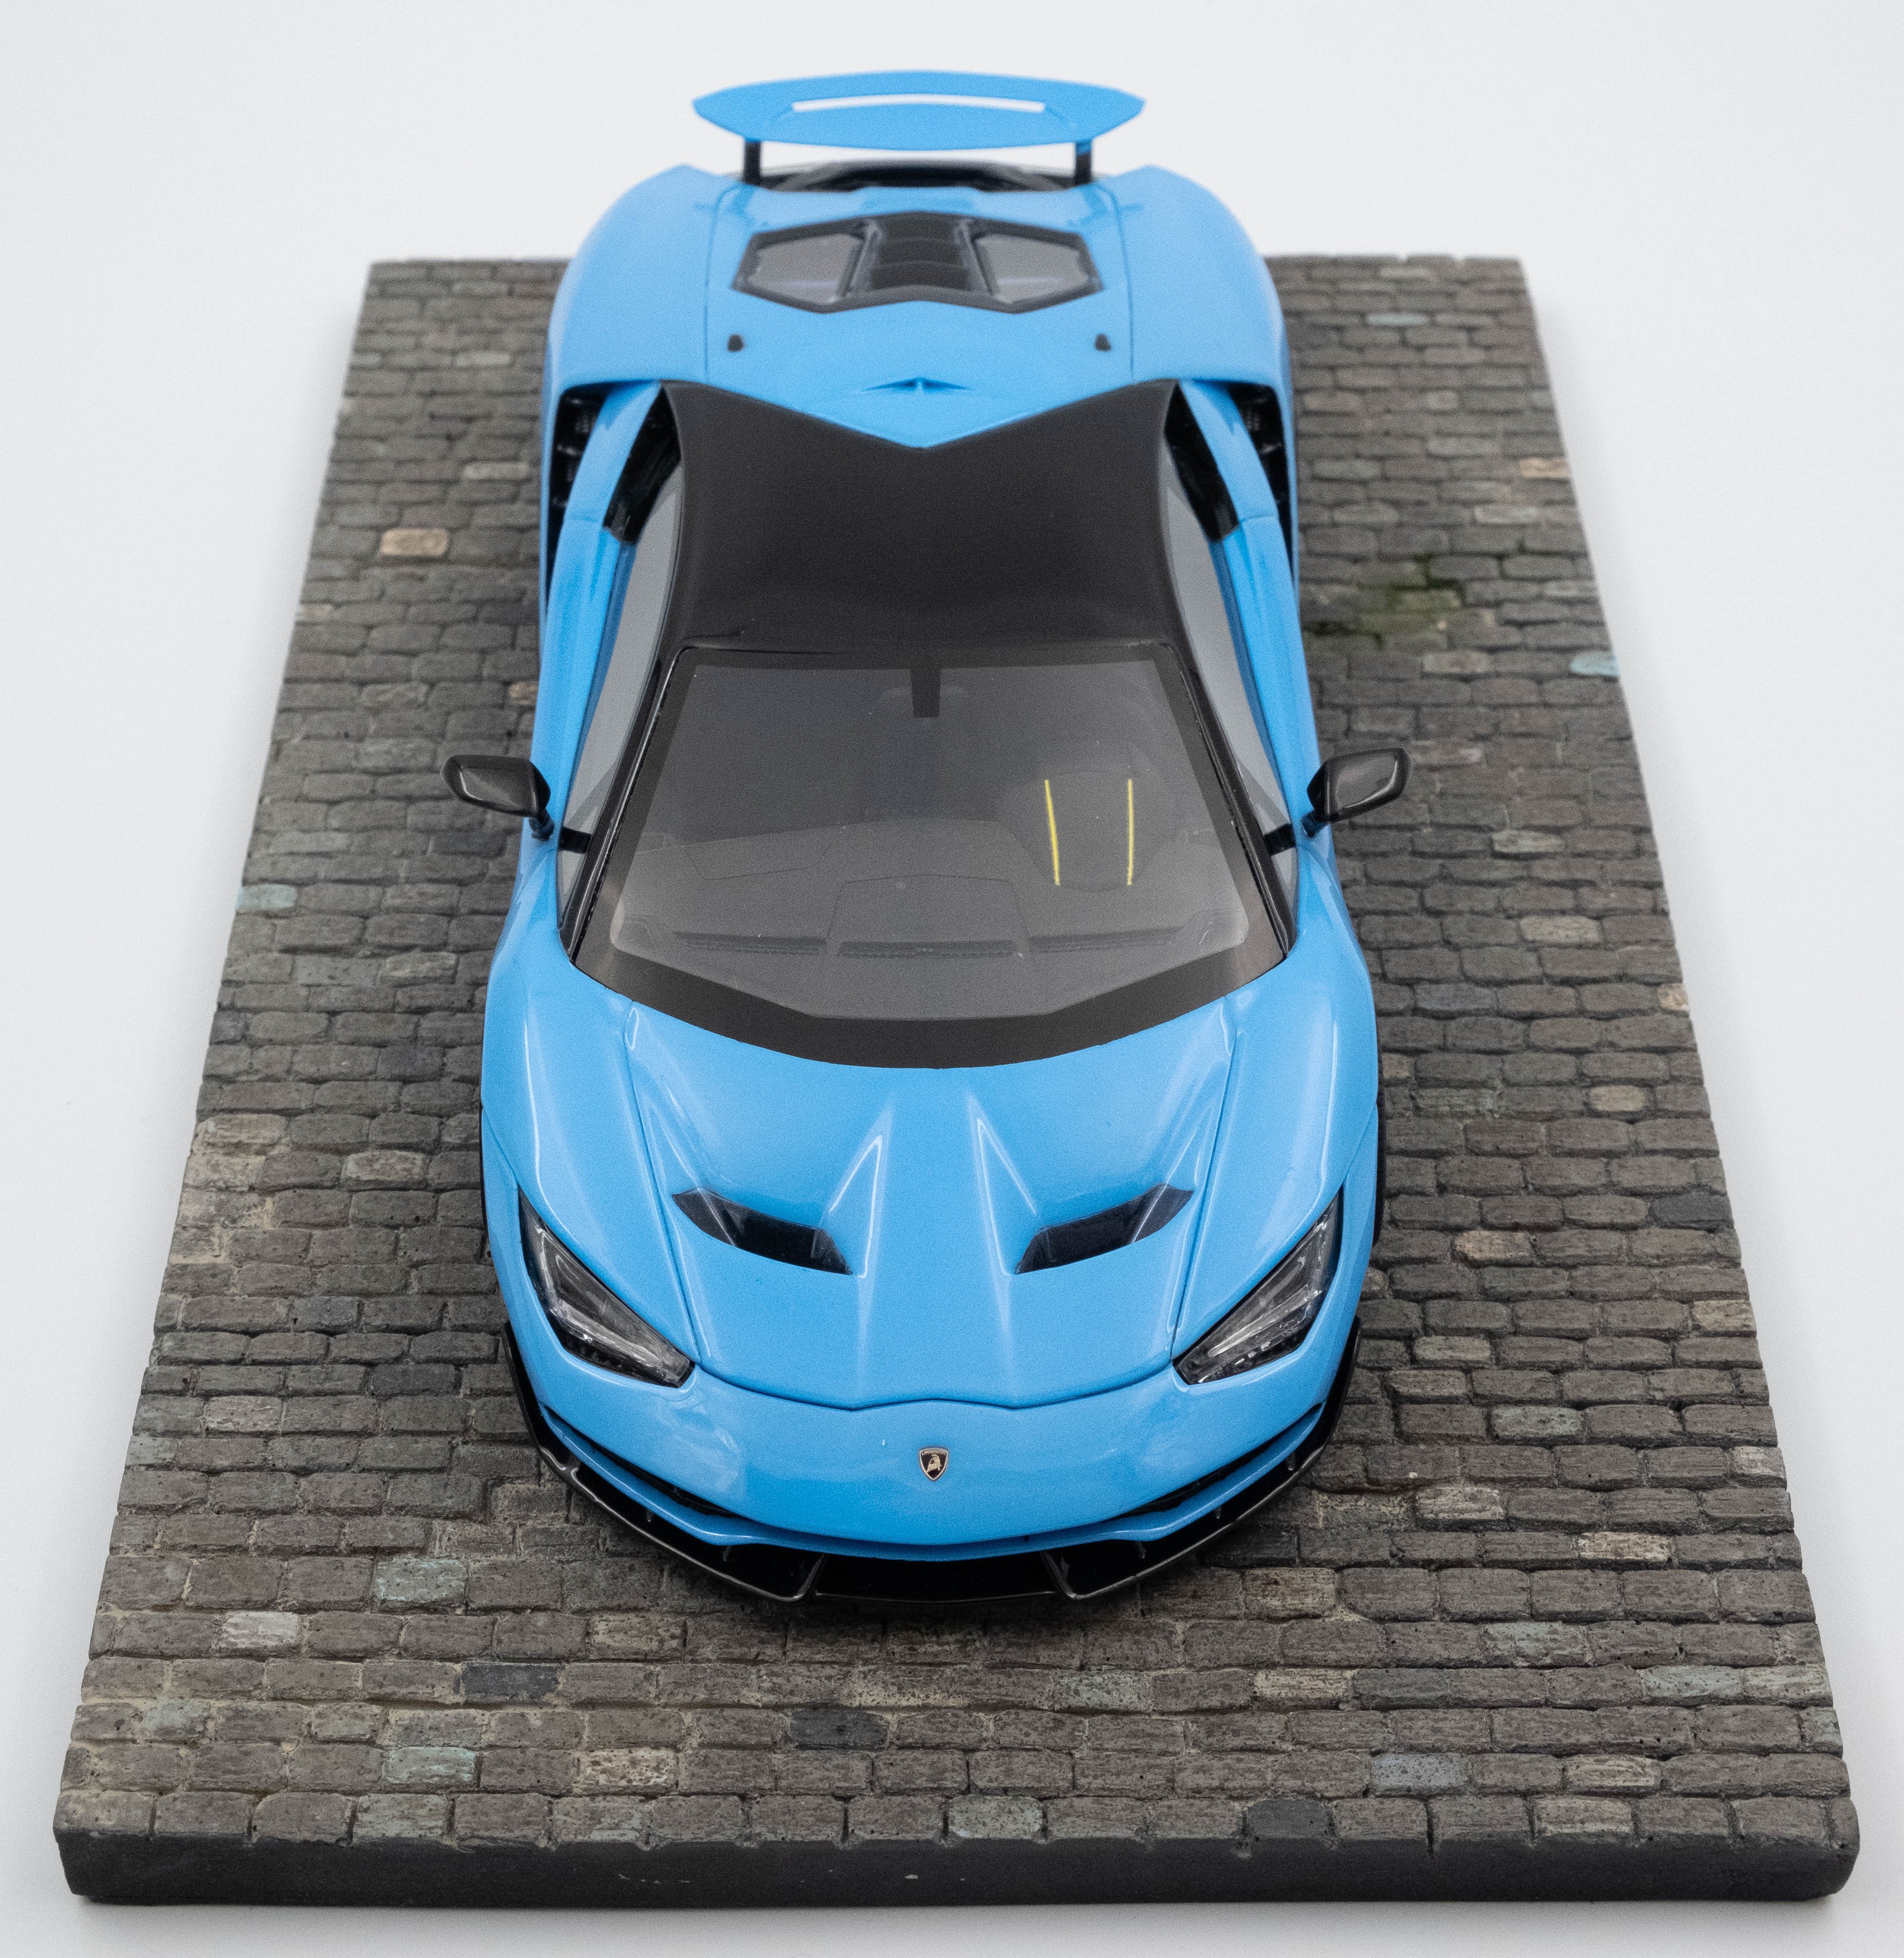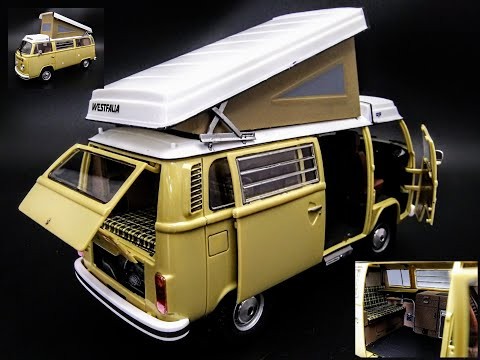


I've always been a fan of exotic cars ever since I was a kid and pretty much fell in love with the Lamborghini Murcielago when I played Need For Speed Hot Pursuit way back when. The Centenario has always stood out as something special to me, just like the Murcielago did back then. I was excited to see that Alpha Model was working on creating a 1/24th version and got my hands on one as soon as I could. I was a little nervous to dive into building the kit as it was my first all resin build and have seen some resin kits that require a hefty amount of work to get right. This kit was not one of those.
Kit Contents
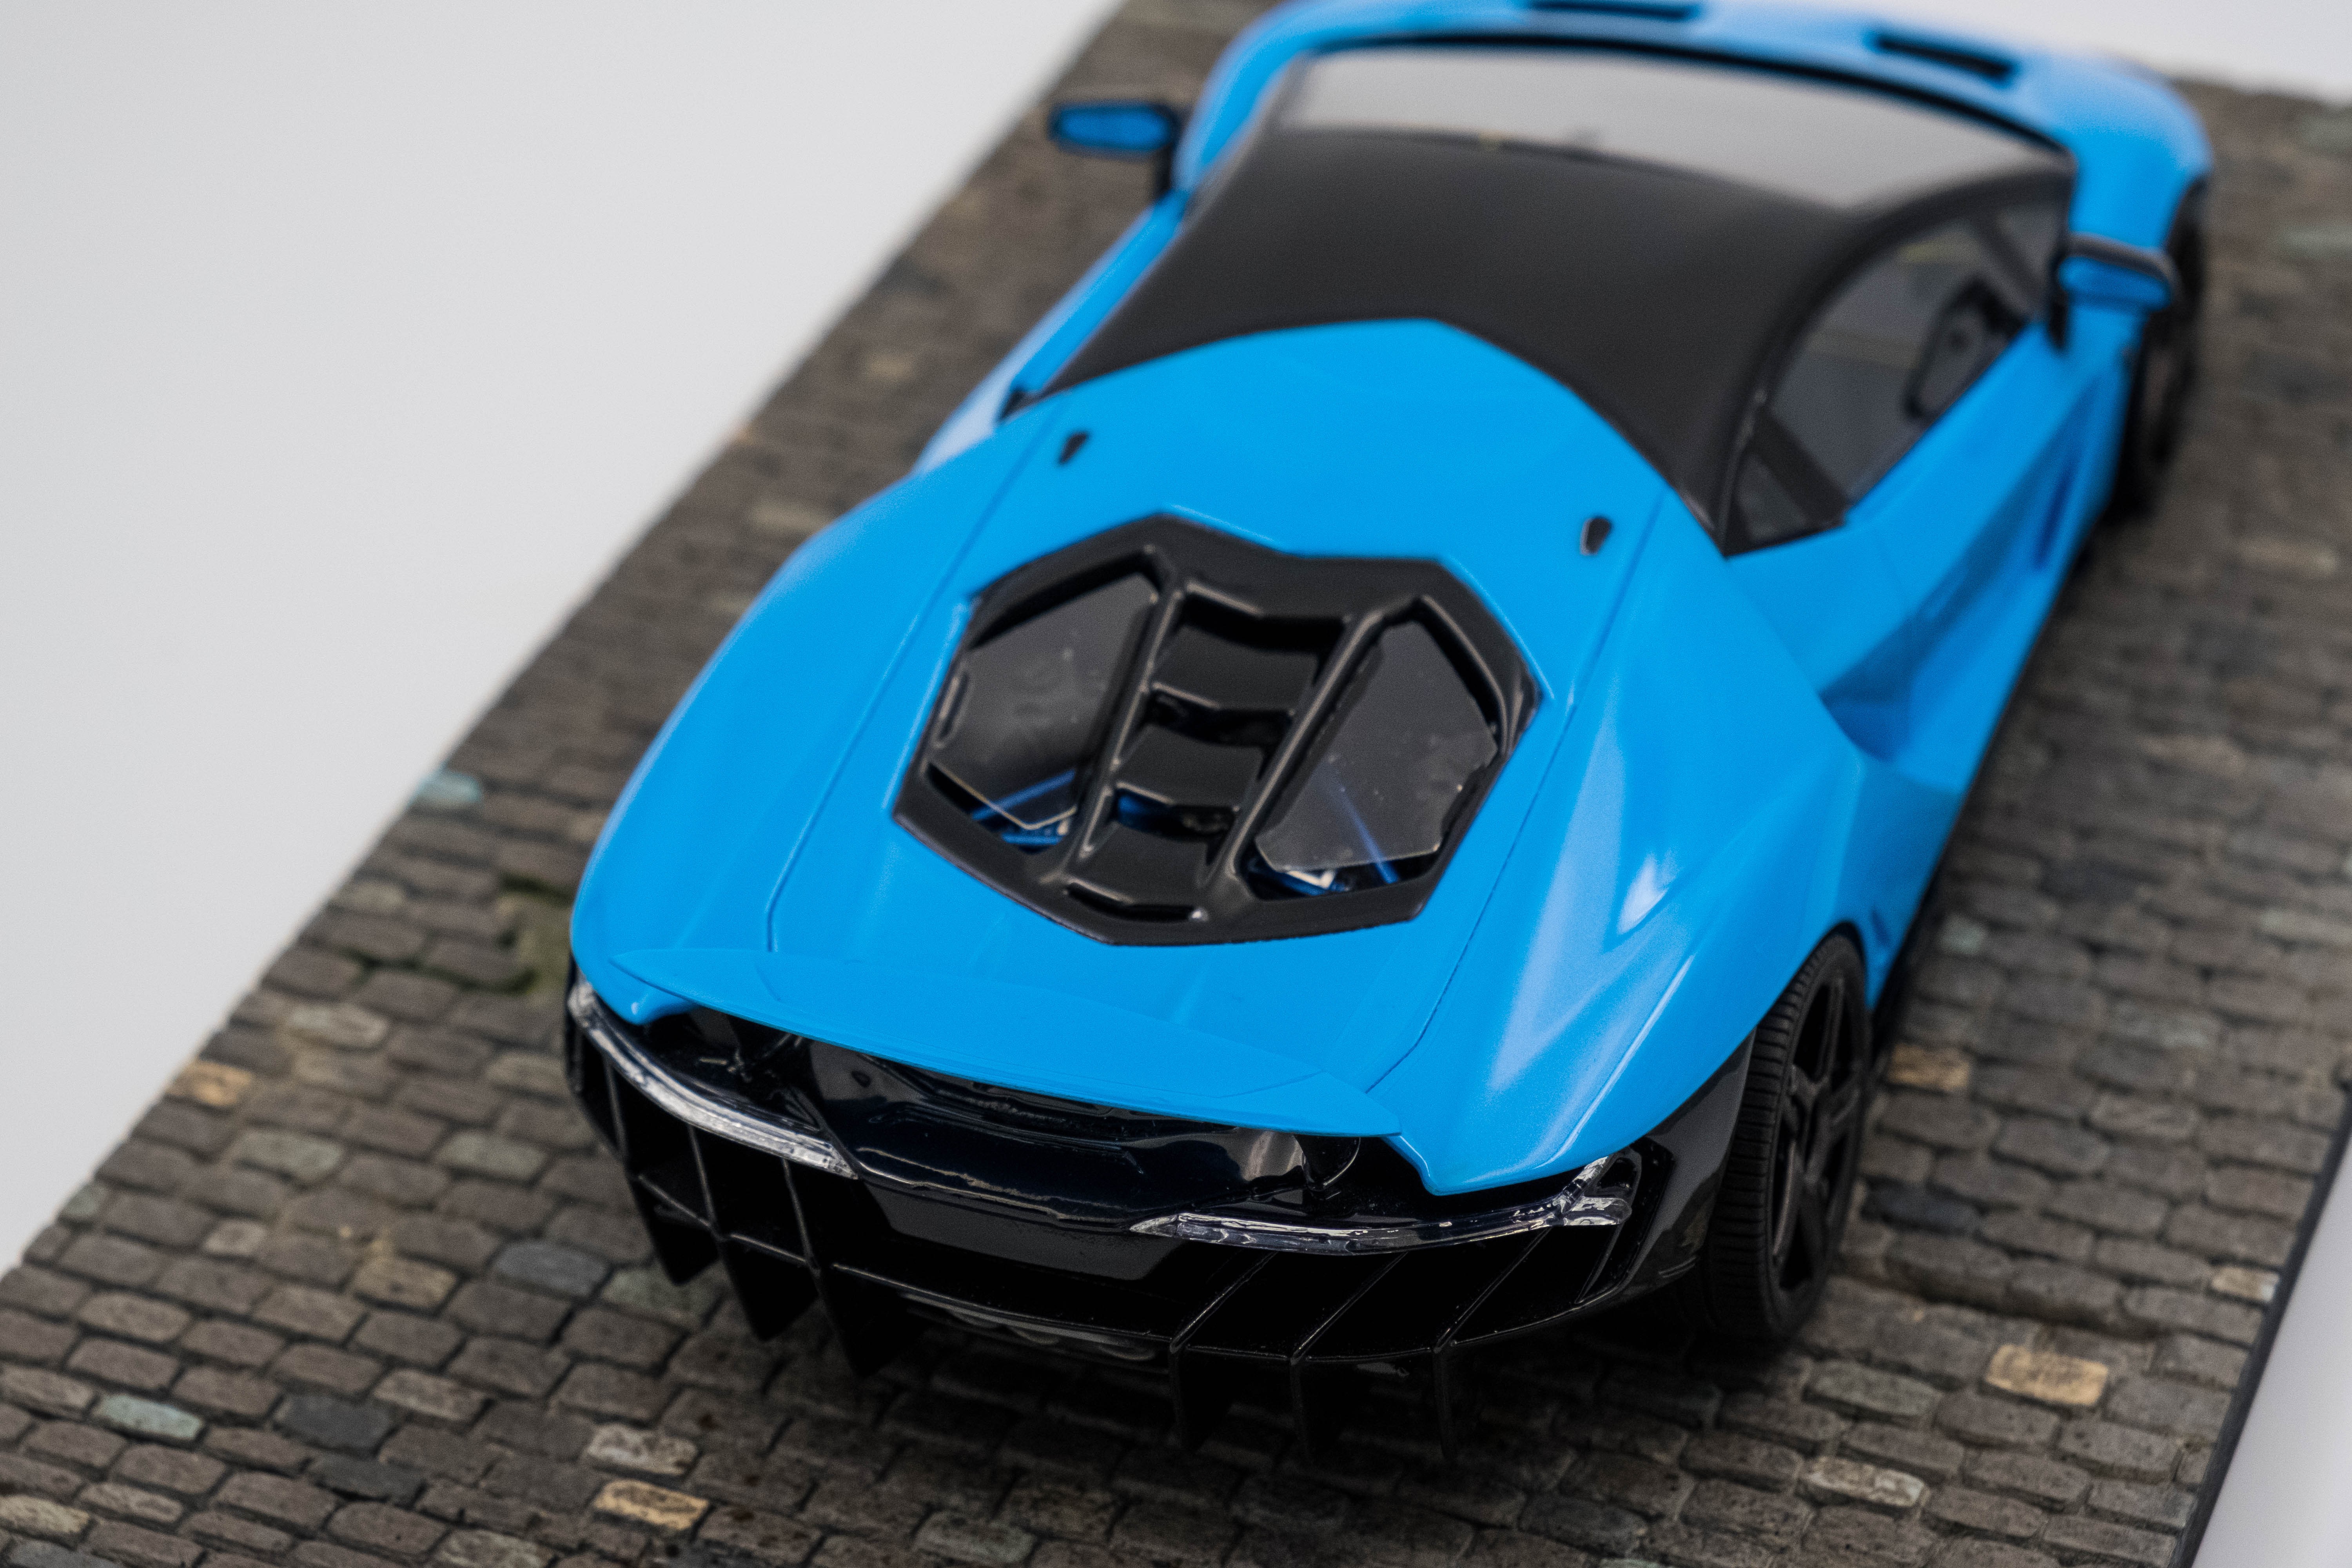
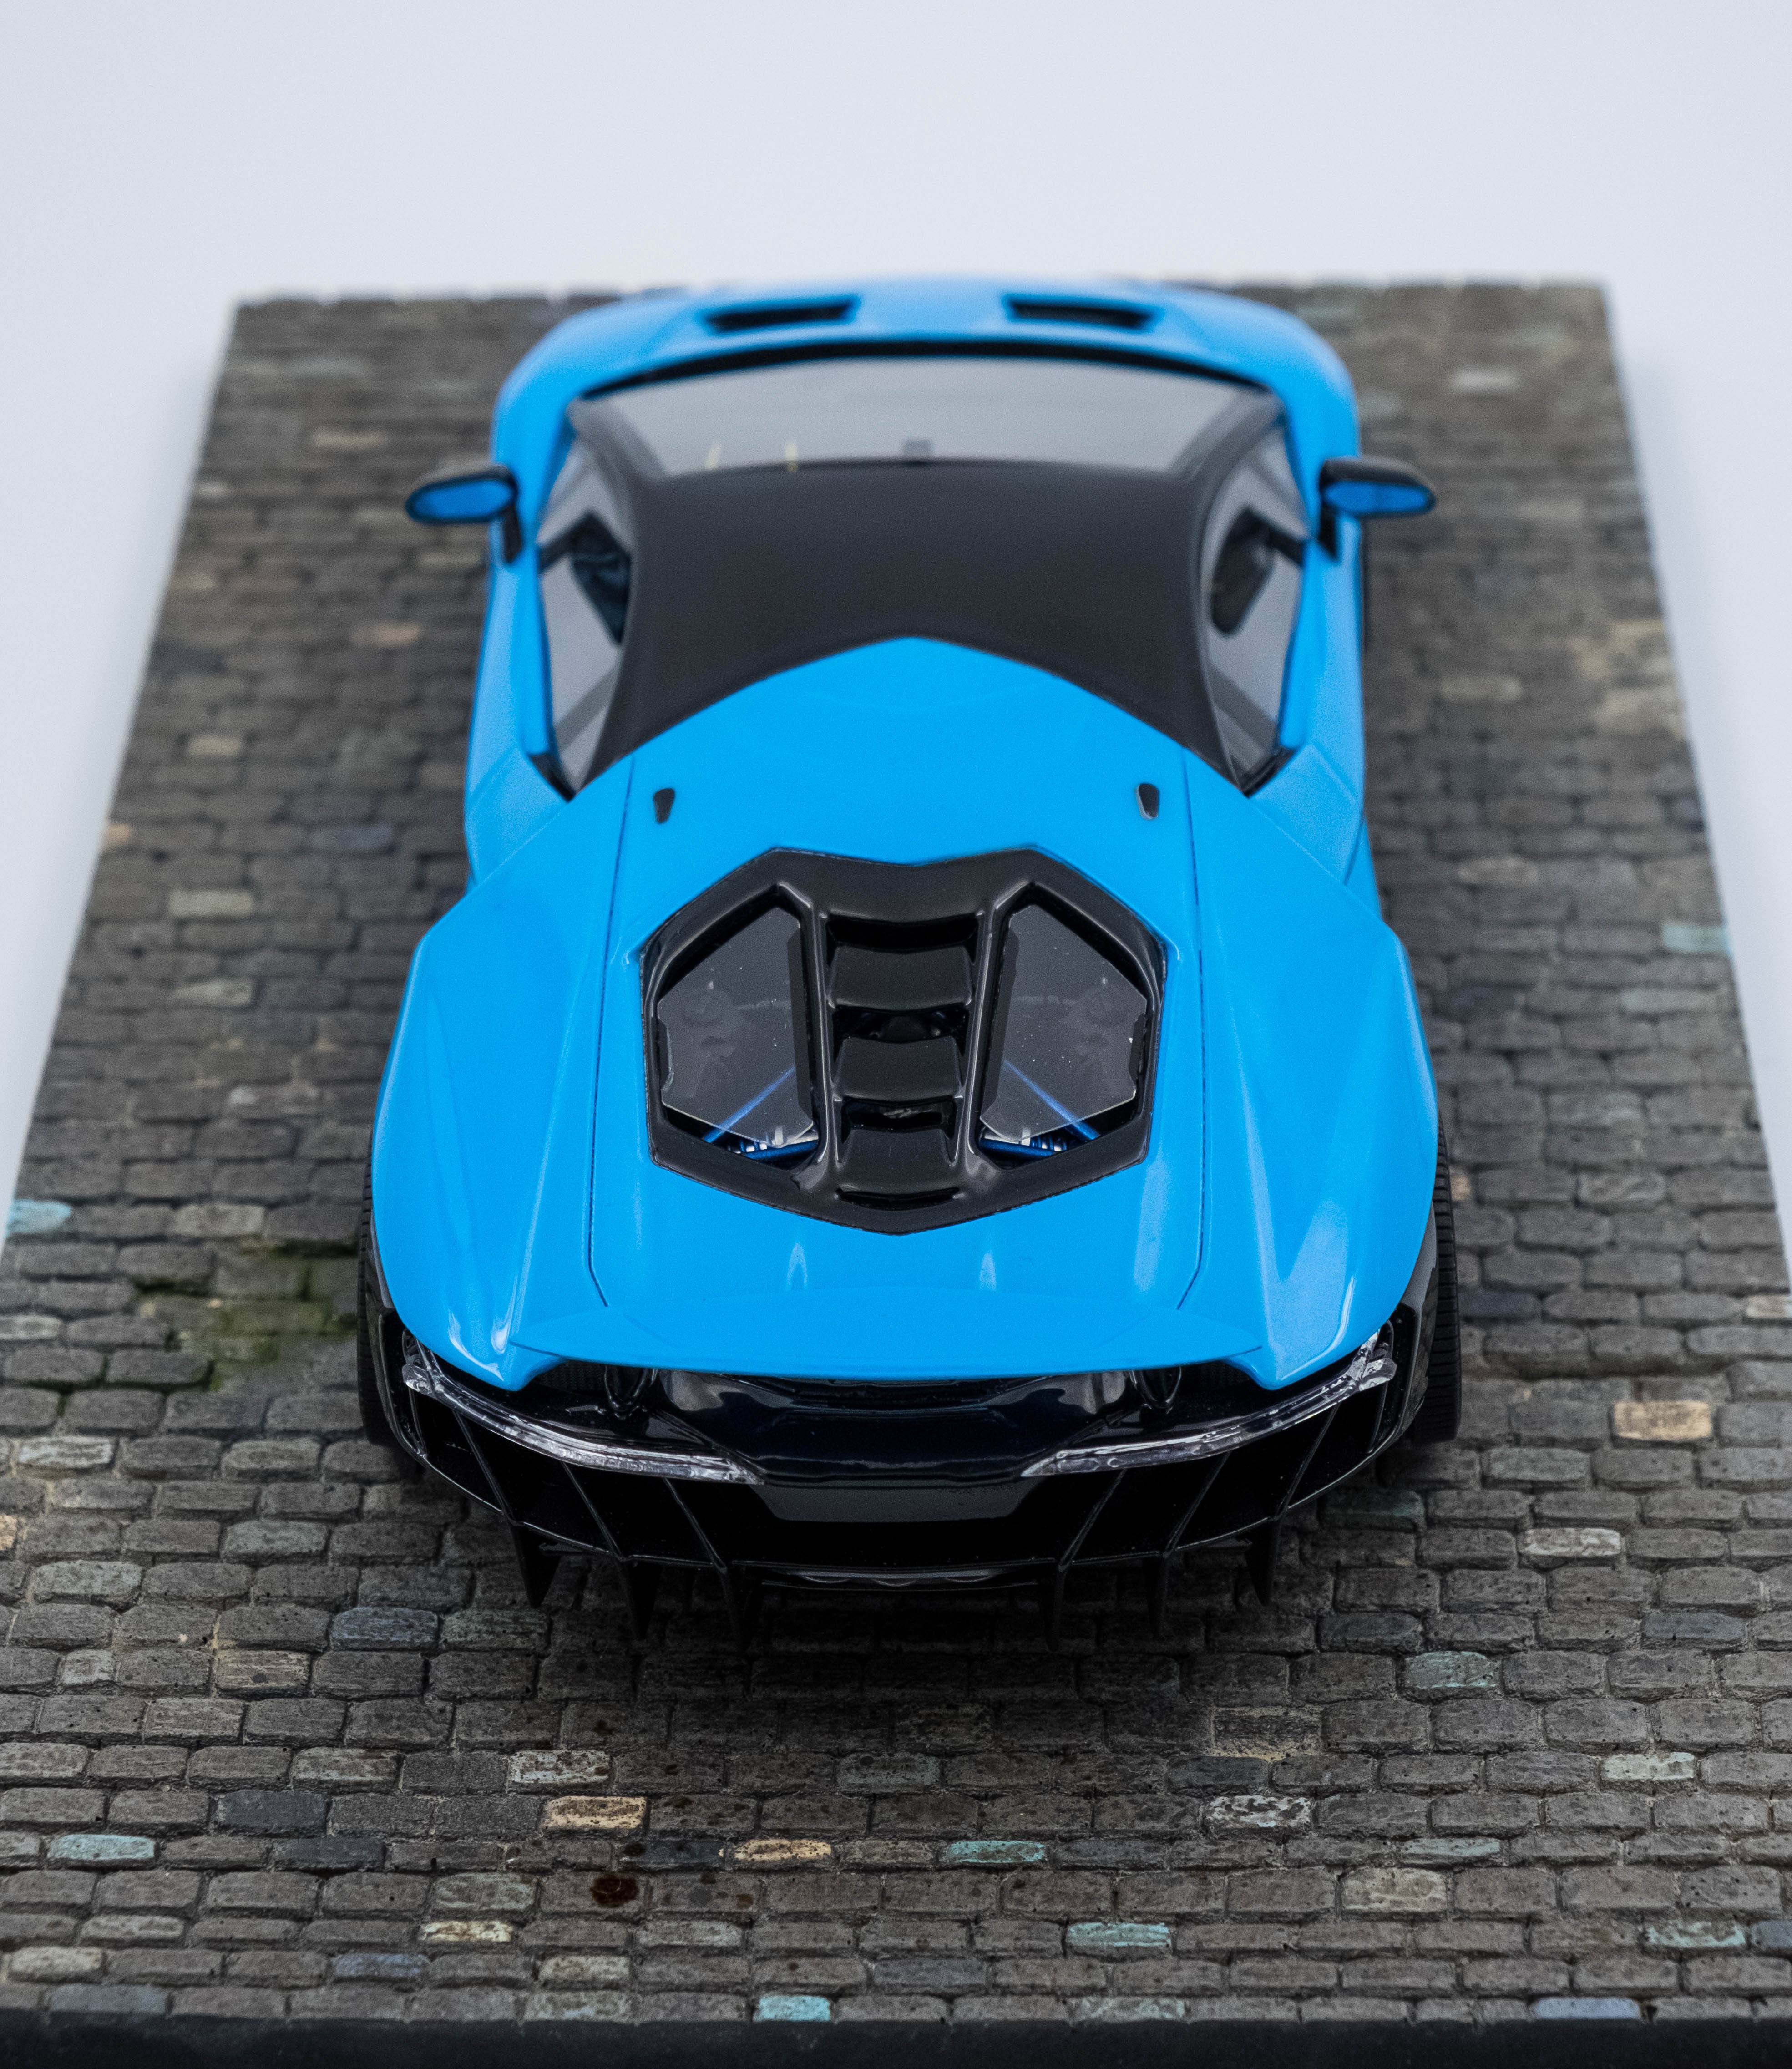
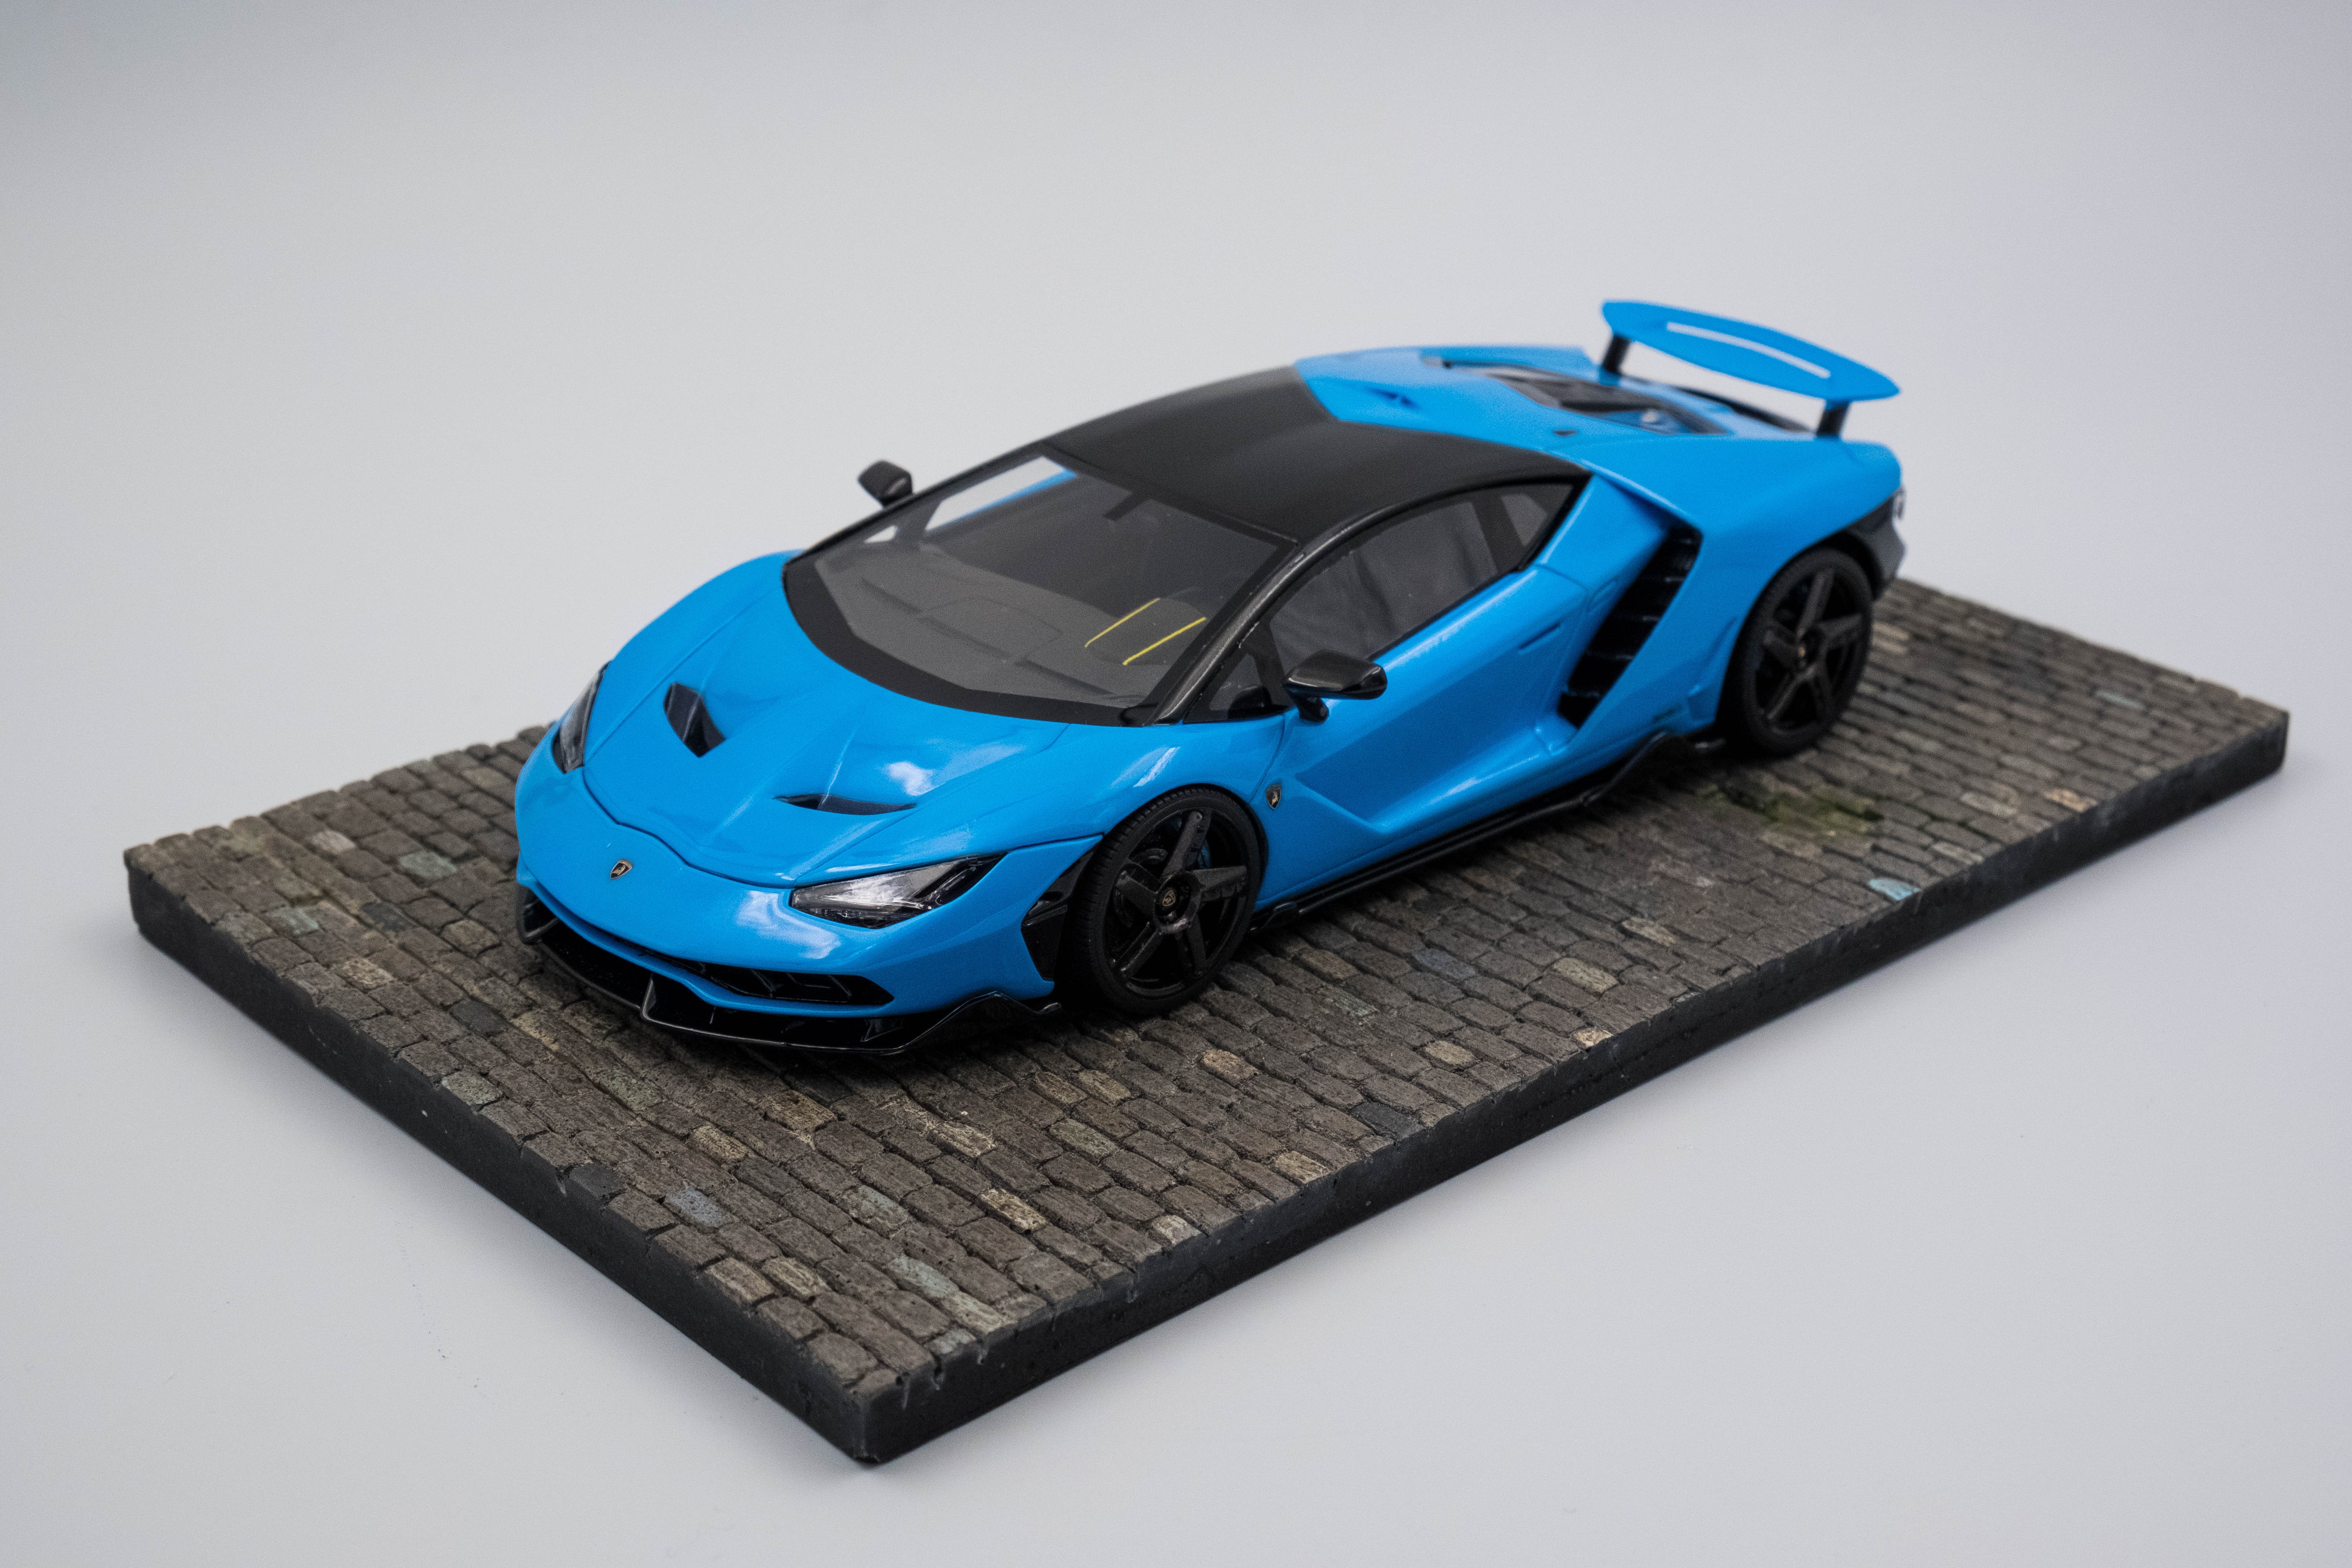
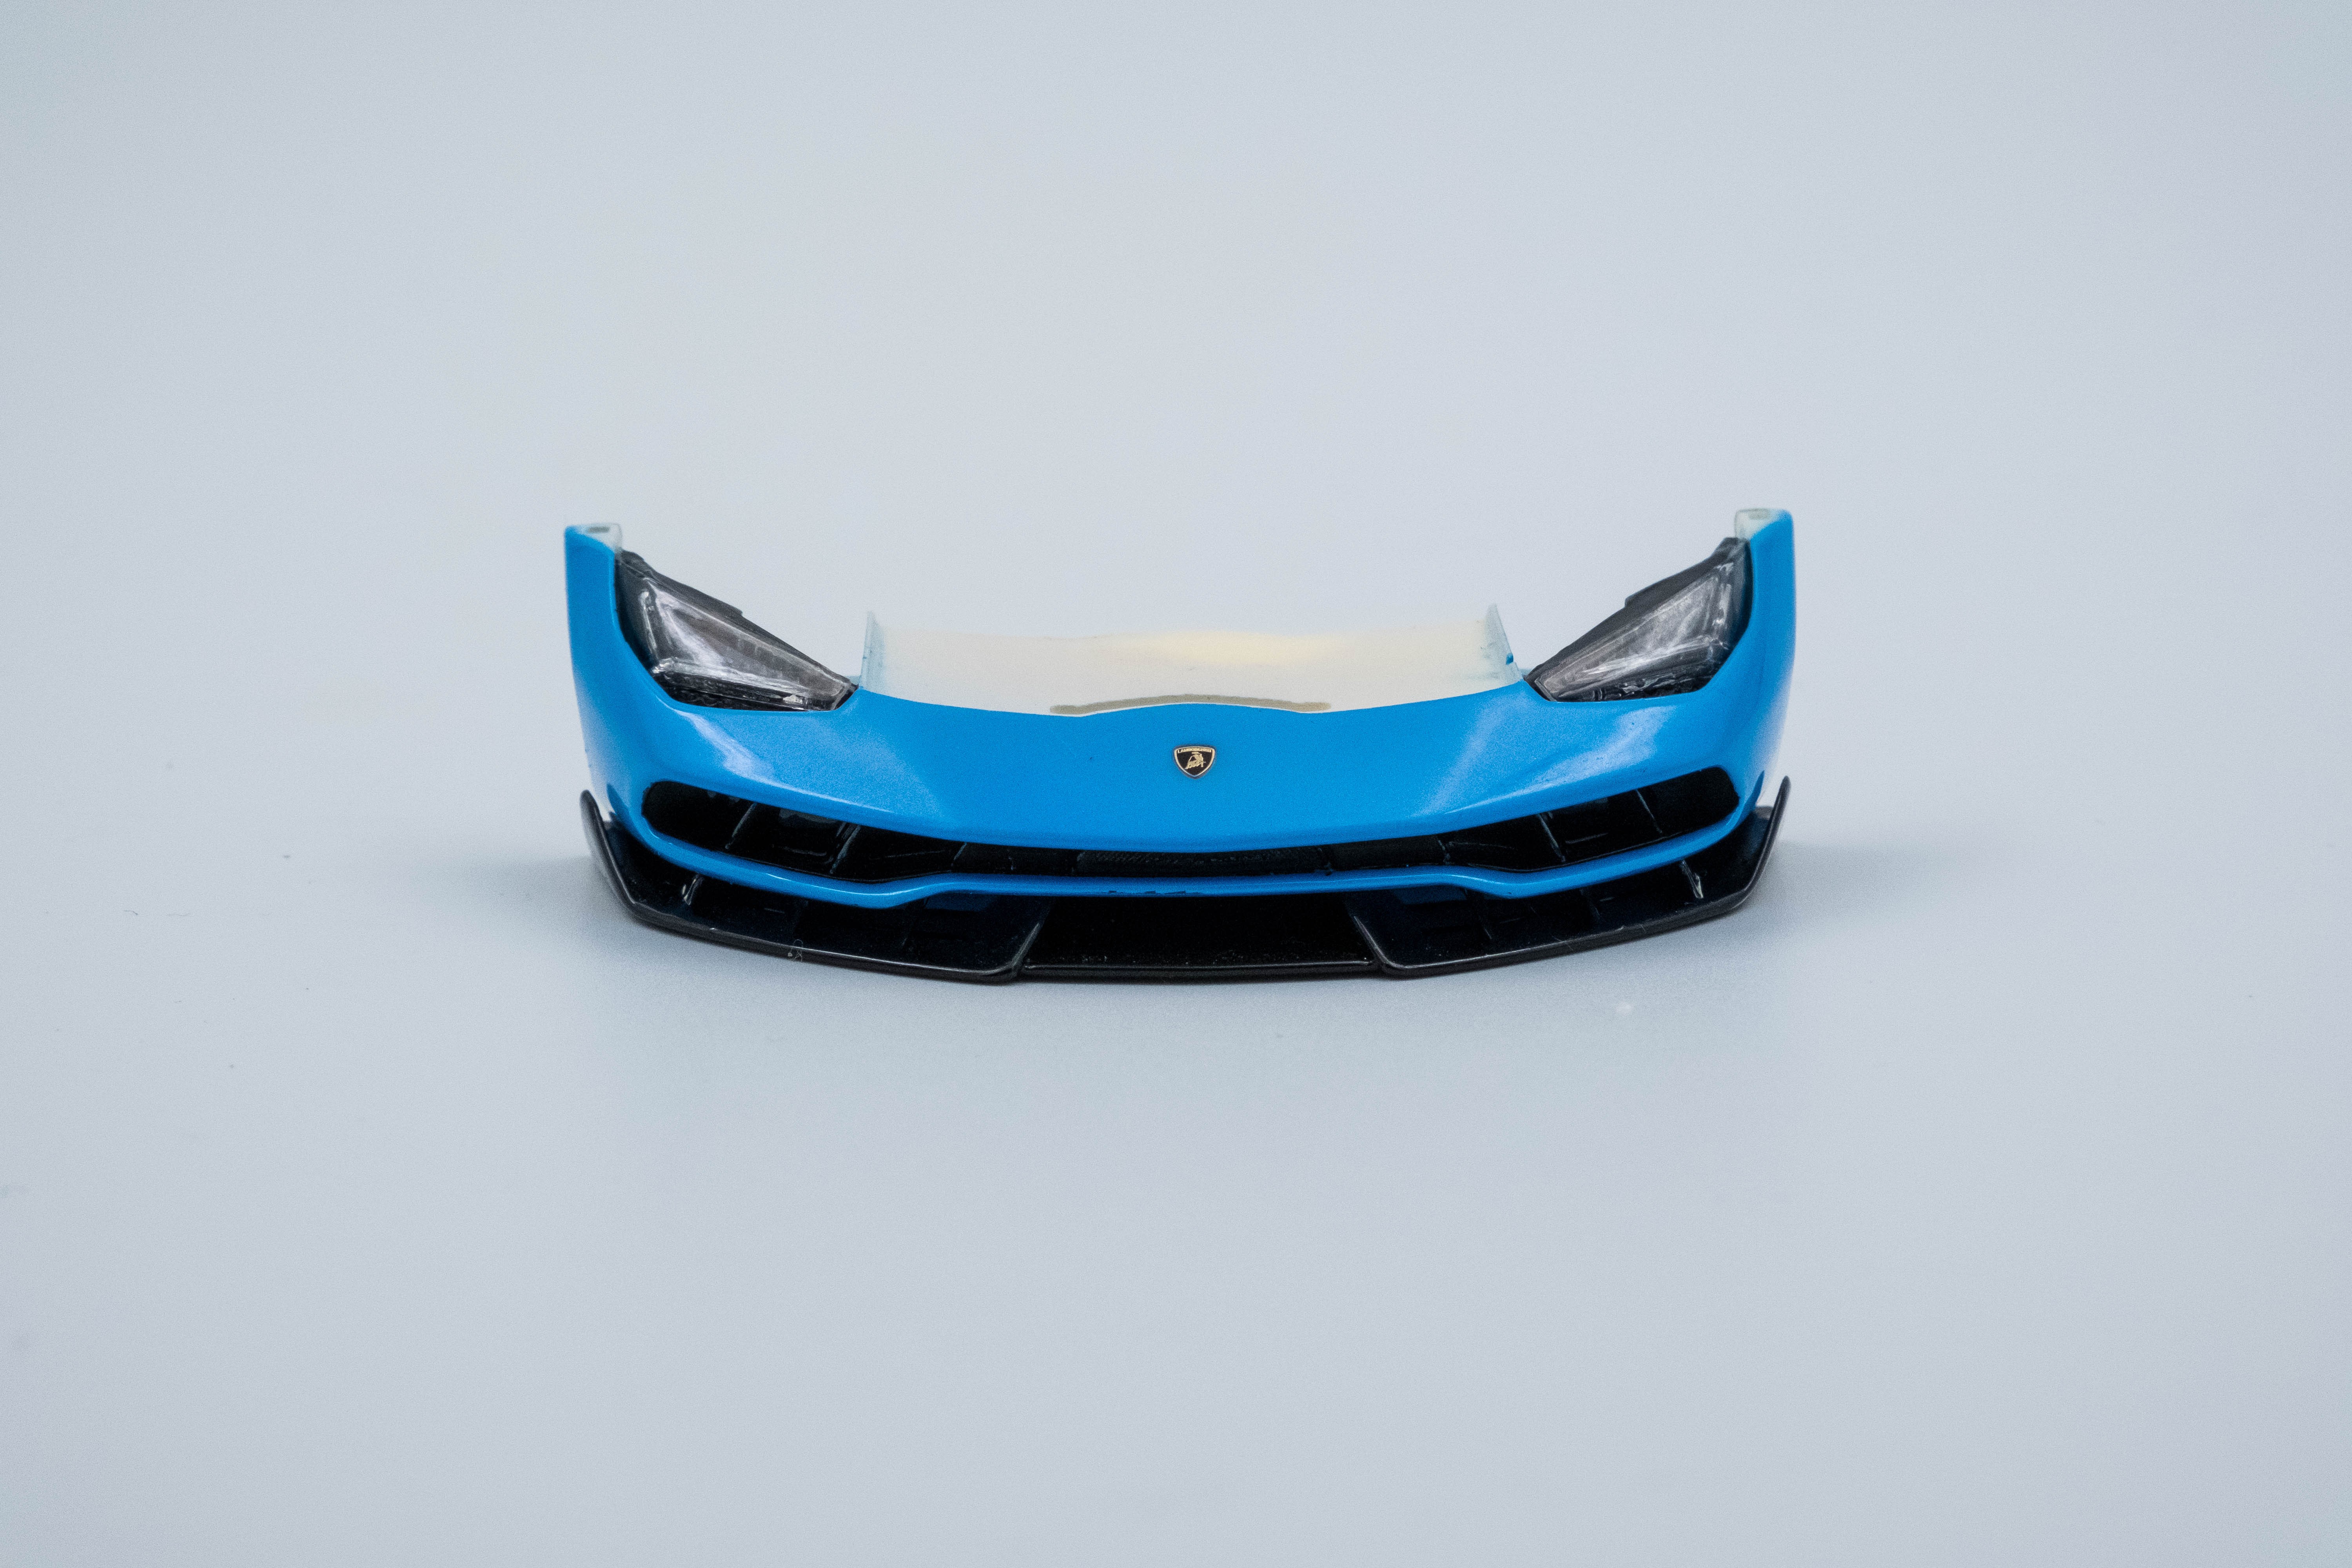
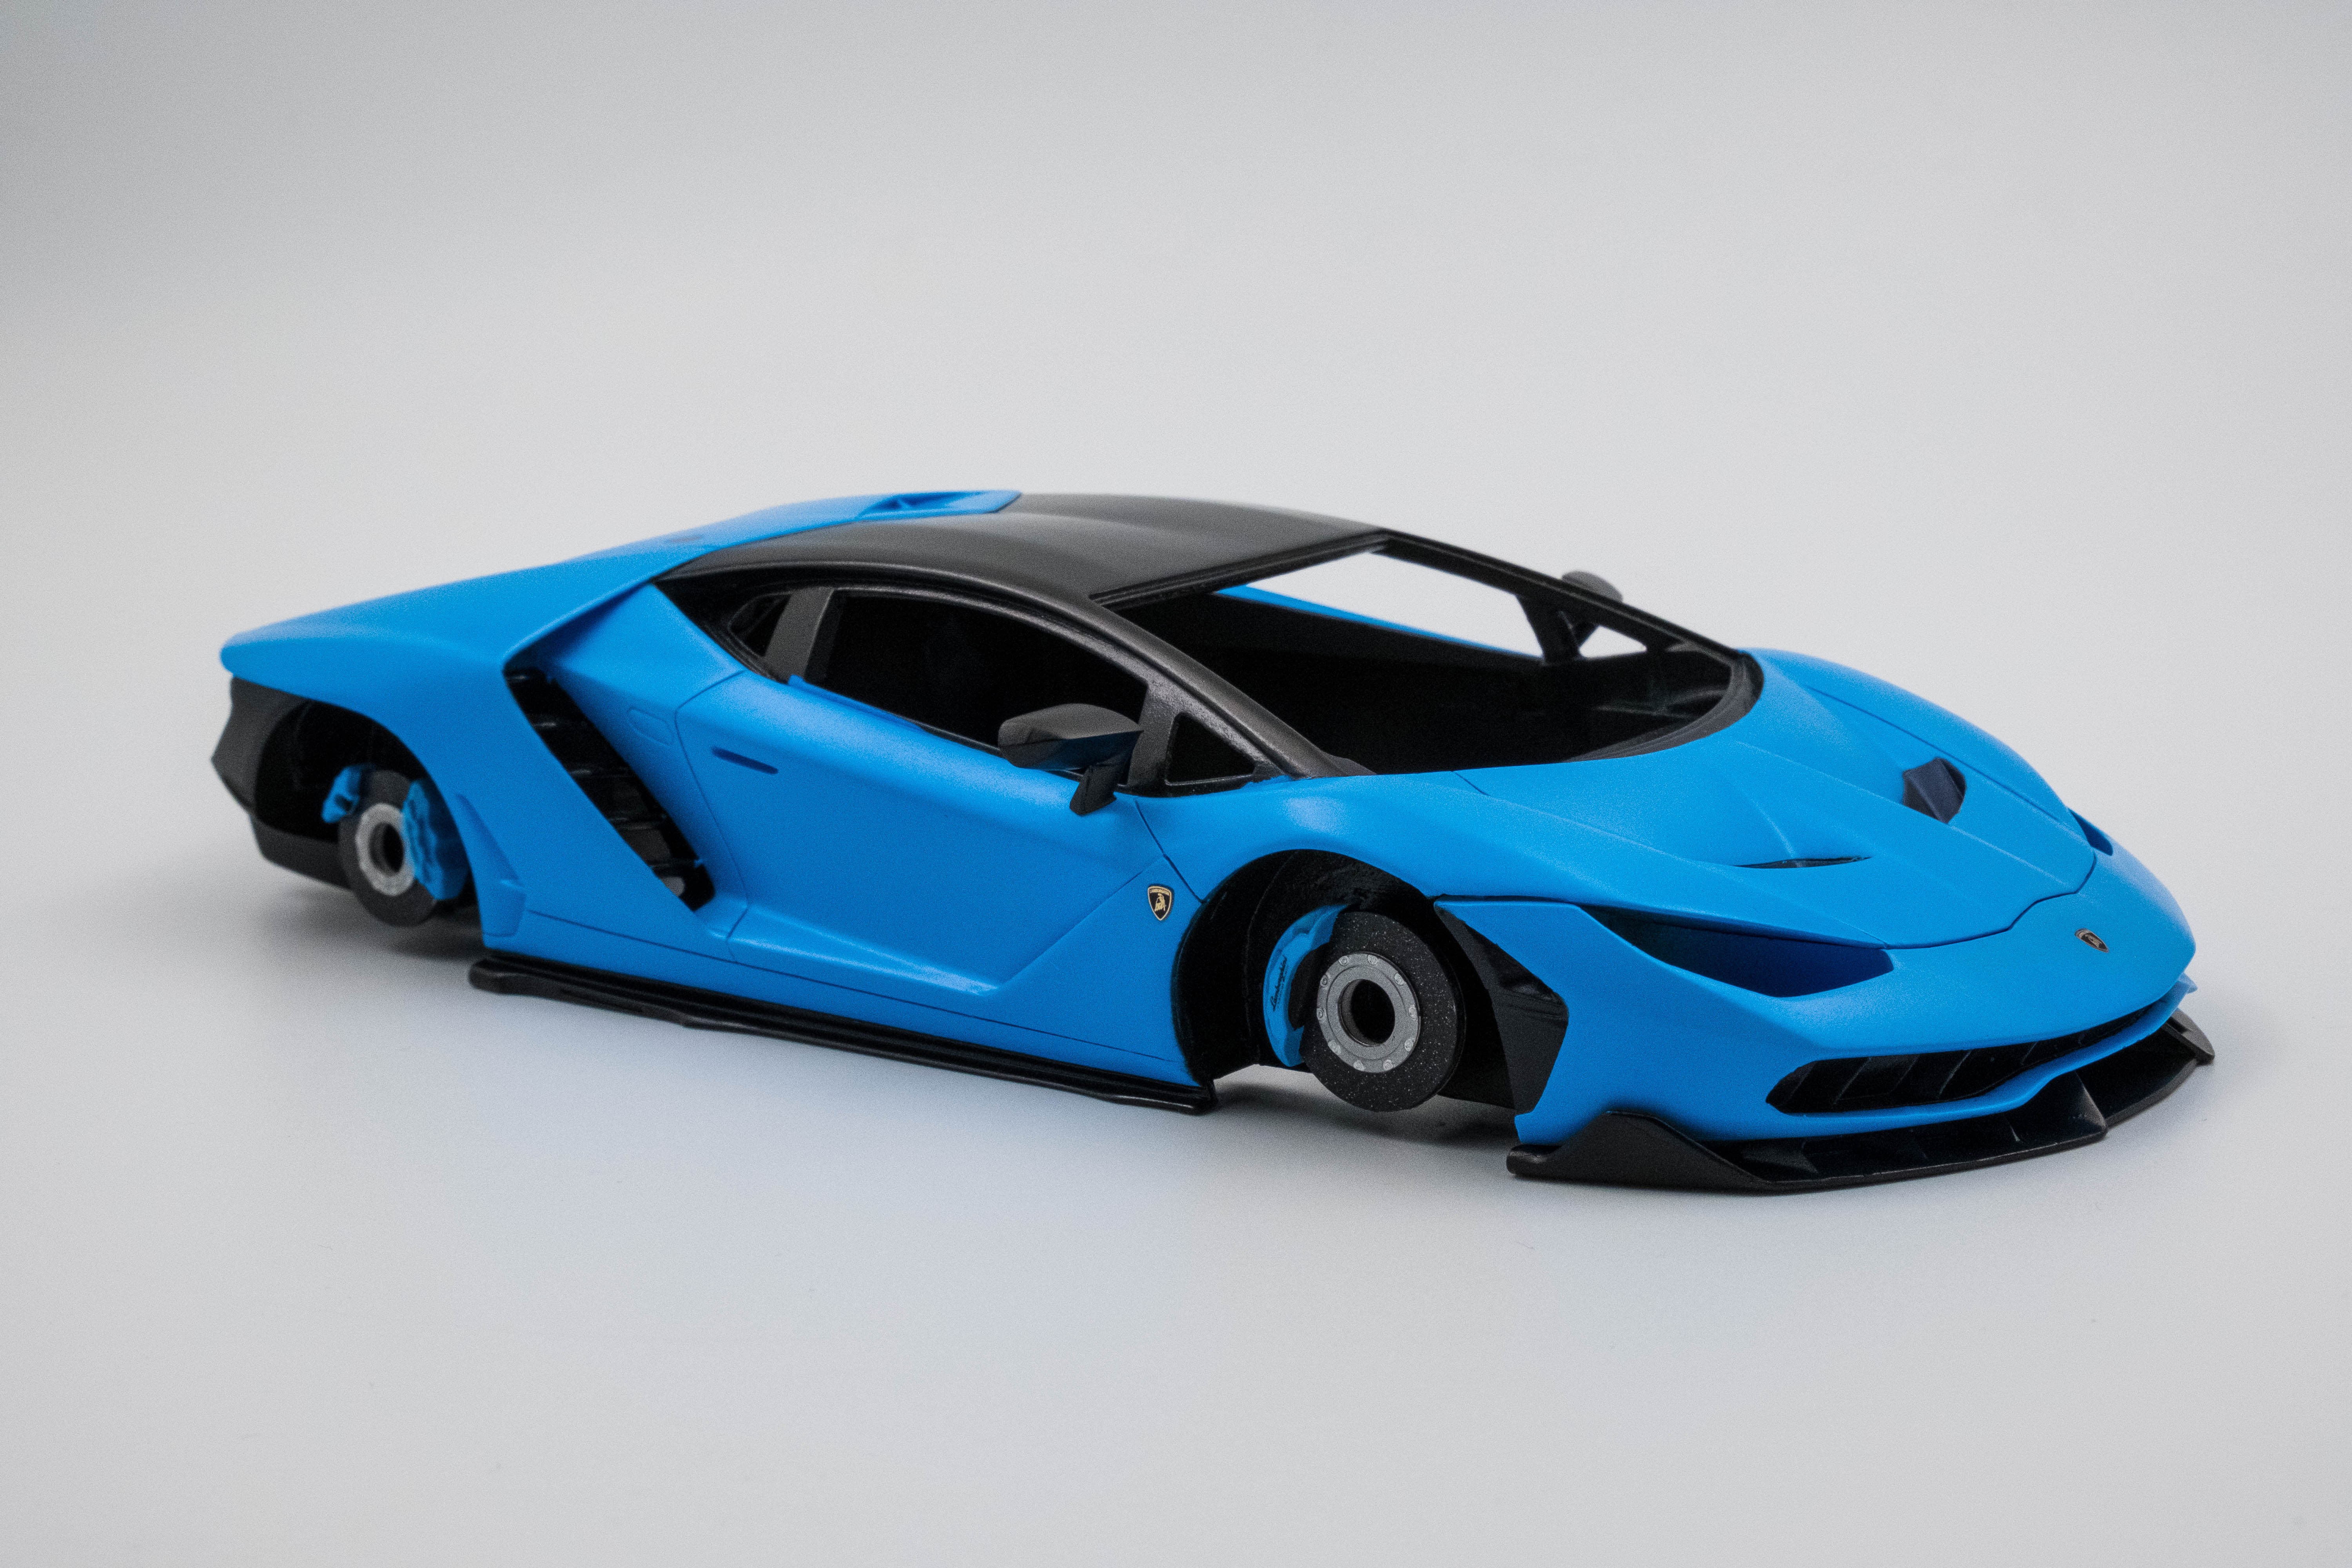
The quite intricate rear bumper/diffuser assembly of the Centenario is provided as one piece and separate from the body to allow for easy painting without too much hassle masking the rest of the body off. Likewise is the front bumper and front splitter, allowing for easy painting of the splitter and front bumper separate from the body of the car. The headlights slip into slots in the front bumper and must be installed before the bumper is affixed to the rest of the body. There's three parts to each headlight, the housing itself, the lens, and then the "Y" shaped turn signal.
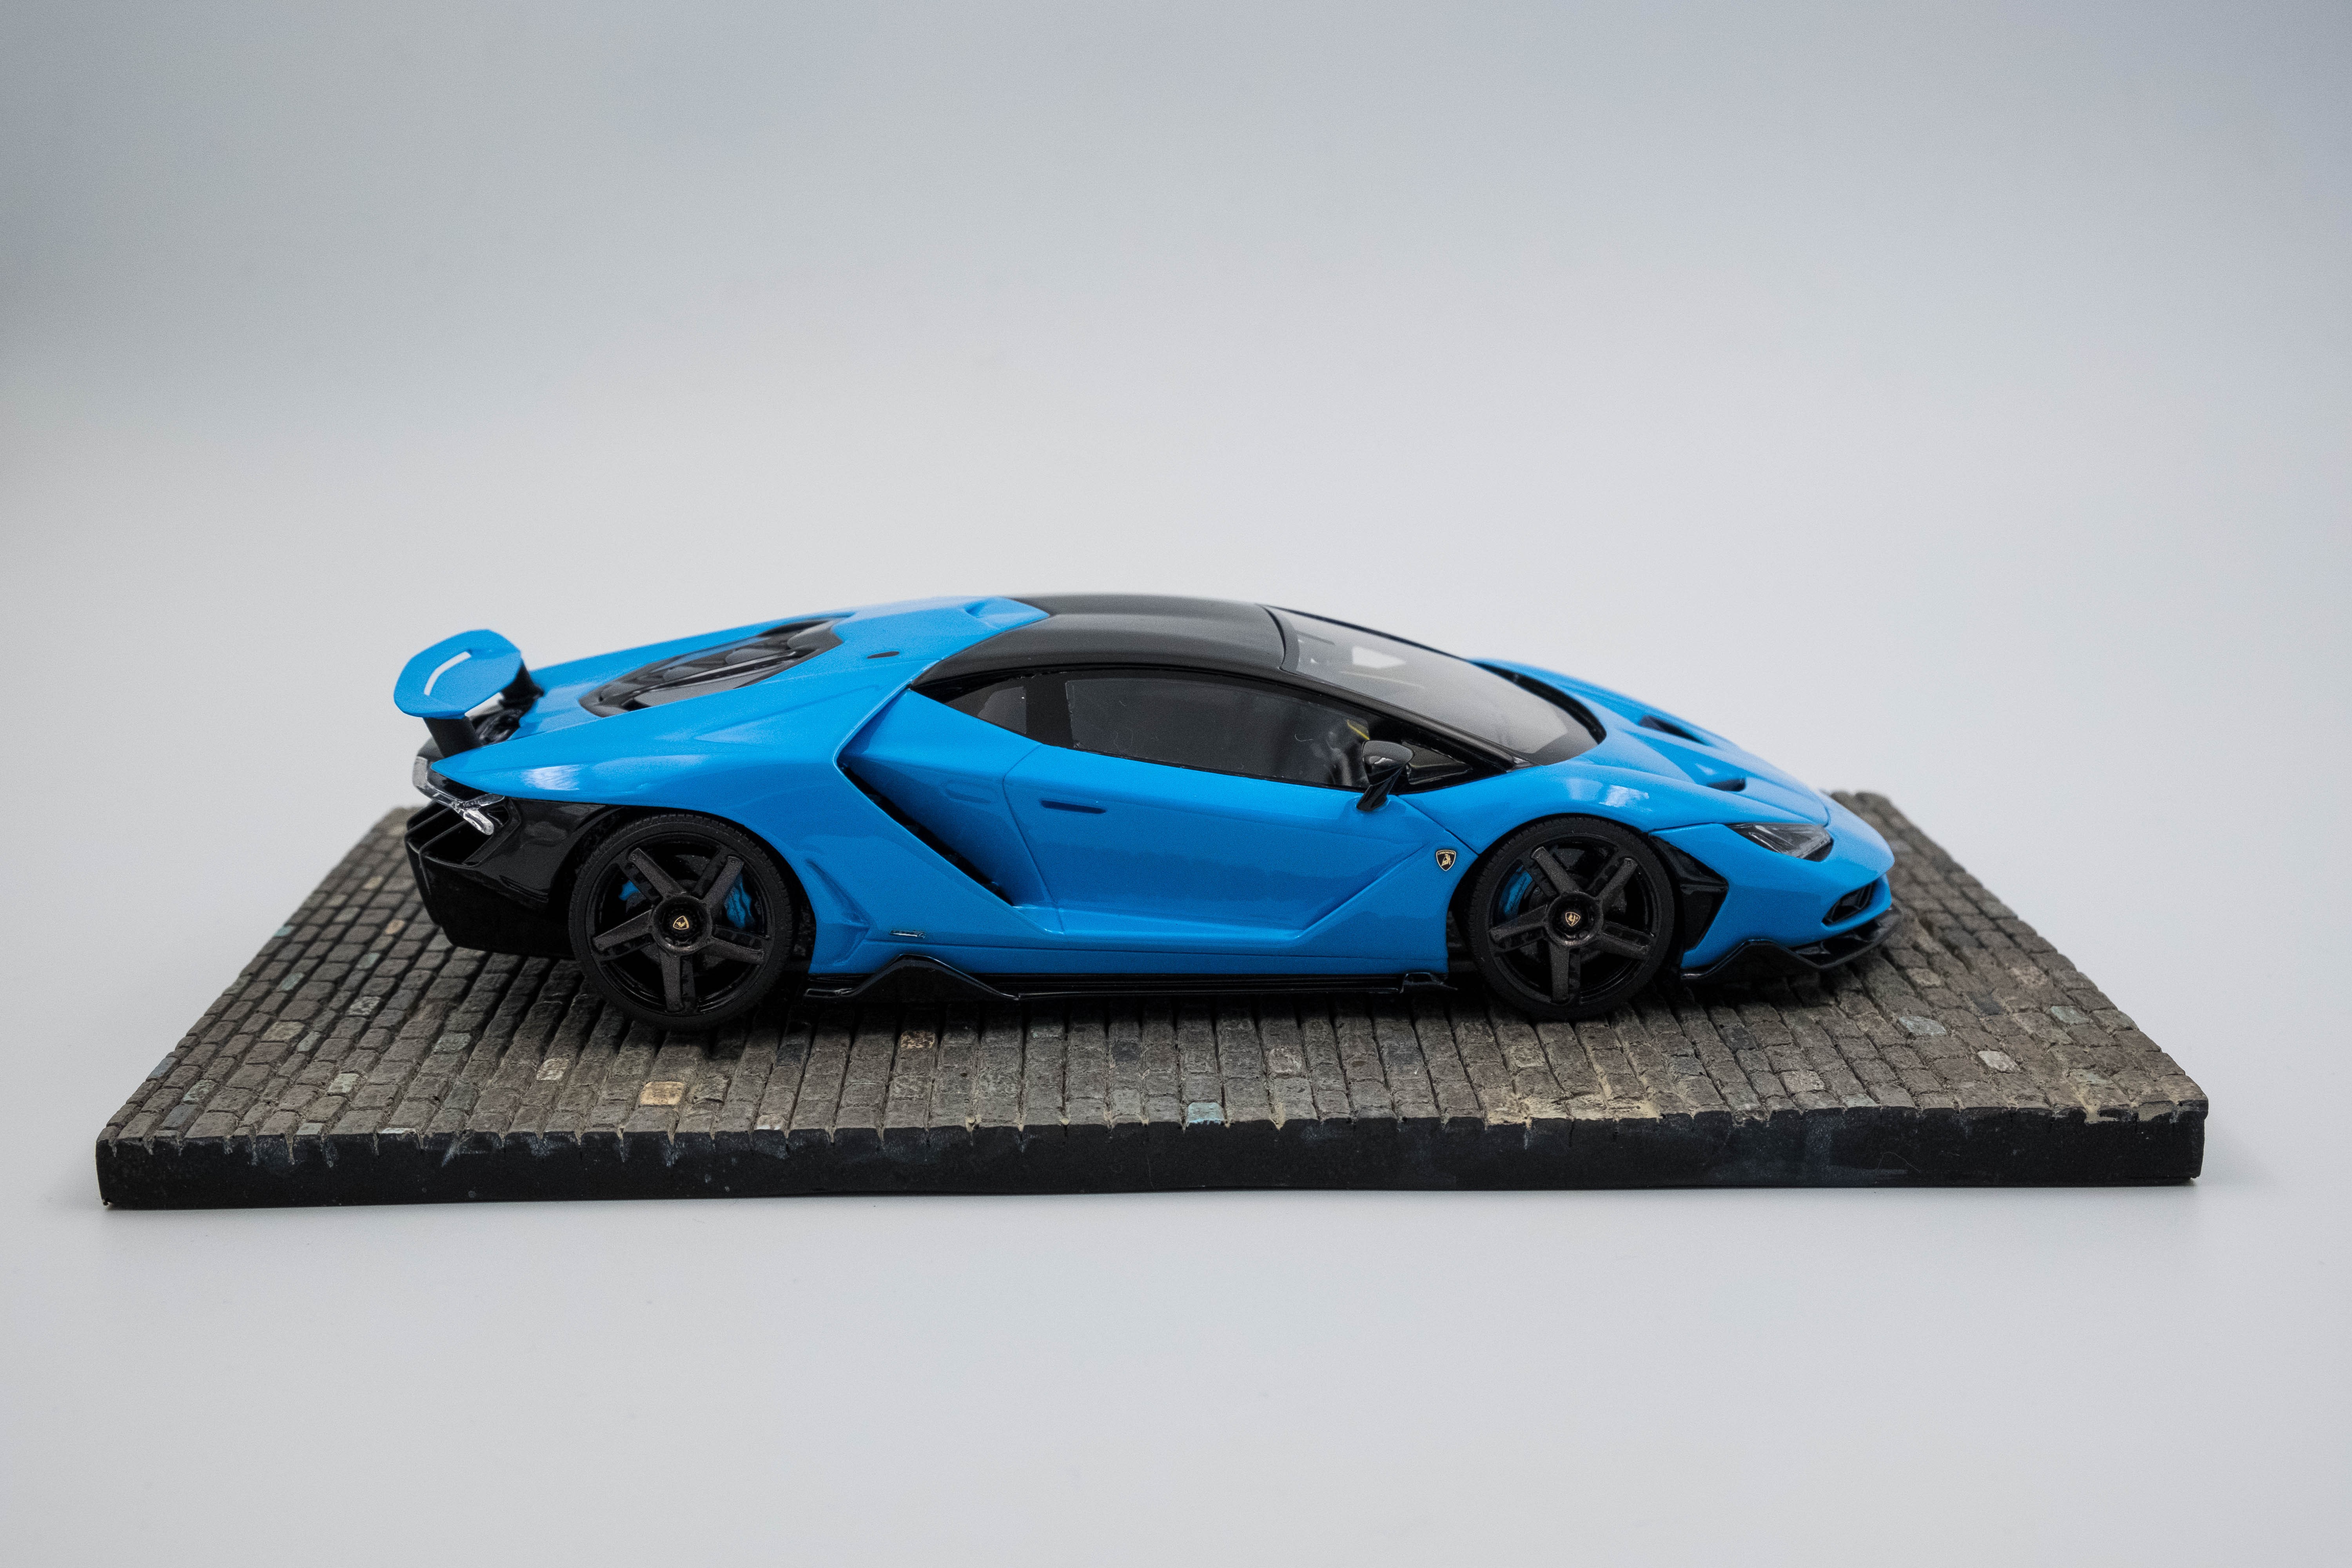
I was pleased when all the parts fit together nicely without any hassle. There was some minor flash to clean up around the rear bumper/diffuser assembly but a quick trace around the edges with a knife took care of this. The rest of the kit went together in a breeze and it was off to painting. I have started to keep photo etched grilles and other parts separate from the kit while painting so I can avoid some masking when possible. While this car doesn't have too many grilles to deal with, each one was provided as a photo etched part. The kit also includes some metallic decals for the logos on the car and on the center caps of the wheels. On most of the Centenarios, there are accents on the canards and slats that make up the front and rear bumpers. The kit provides waterslide decals for this if you would like to use them - however they are only in yellow so keep this in mind when choosing colors. You can also choose to leave off the accents entirely as I did. The rear wing is provided with parts that enable you to place it in the "up" position, but would not require too much to be able to have it down.
Painting
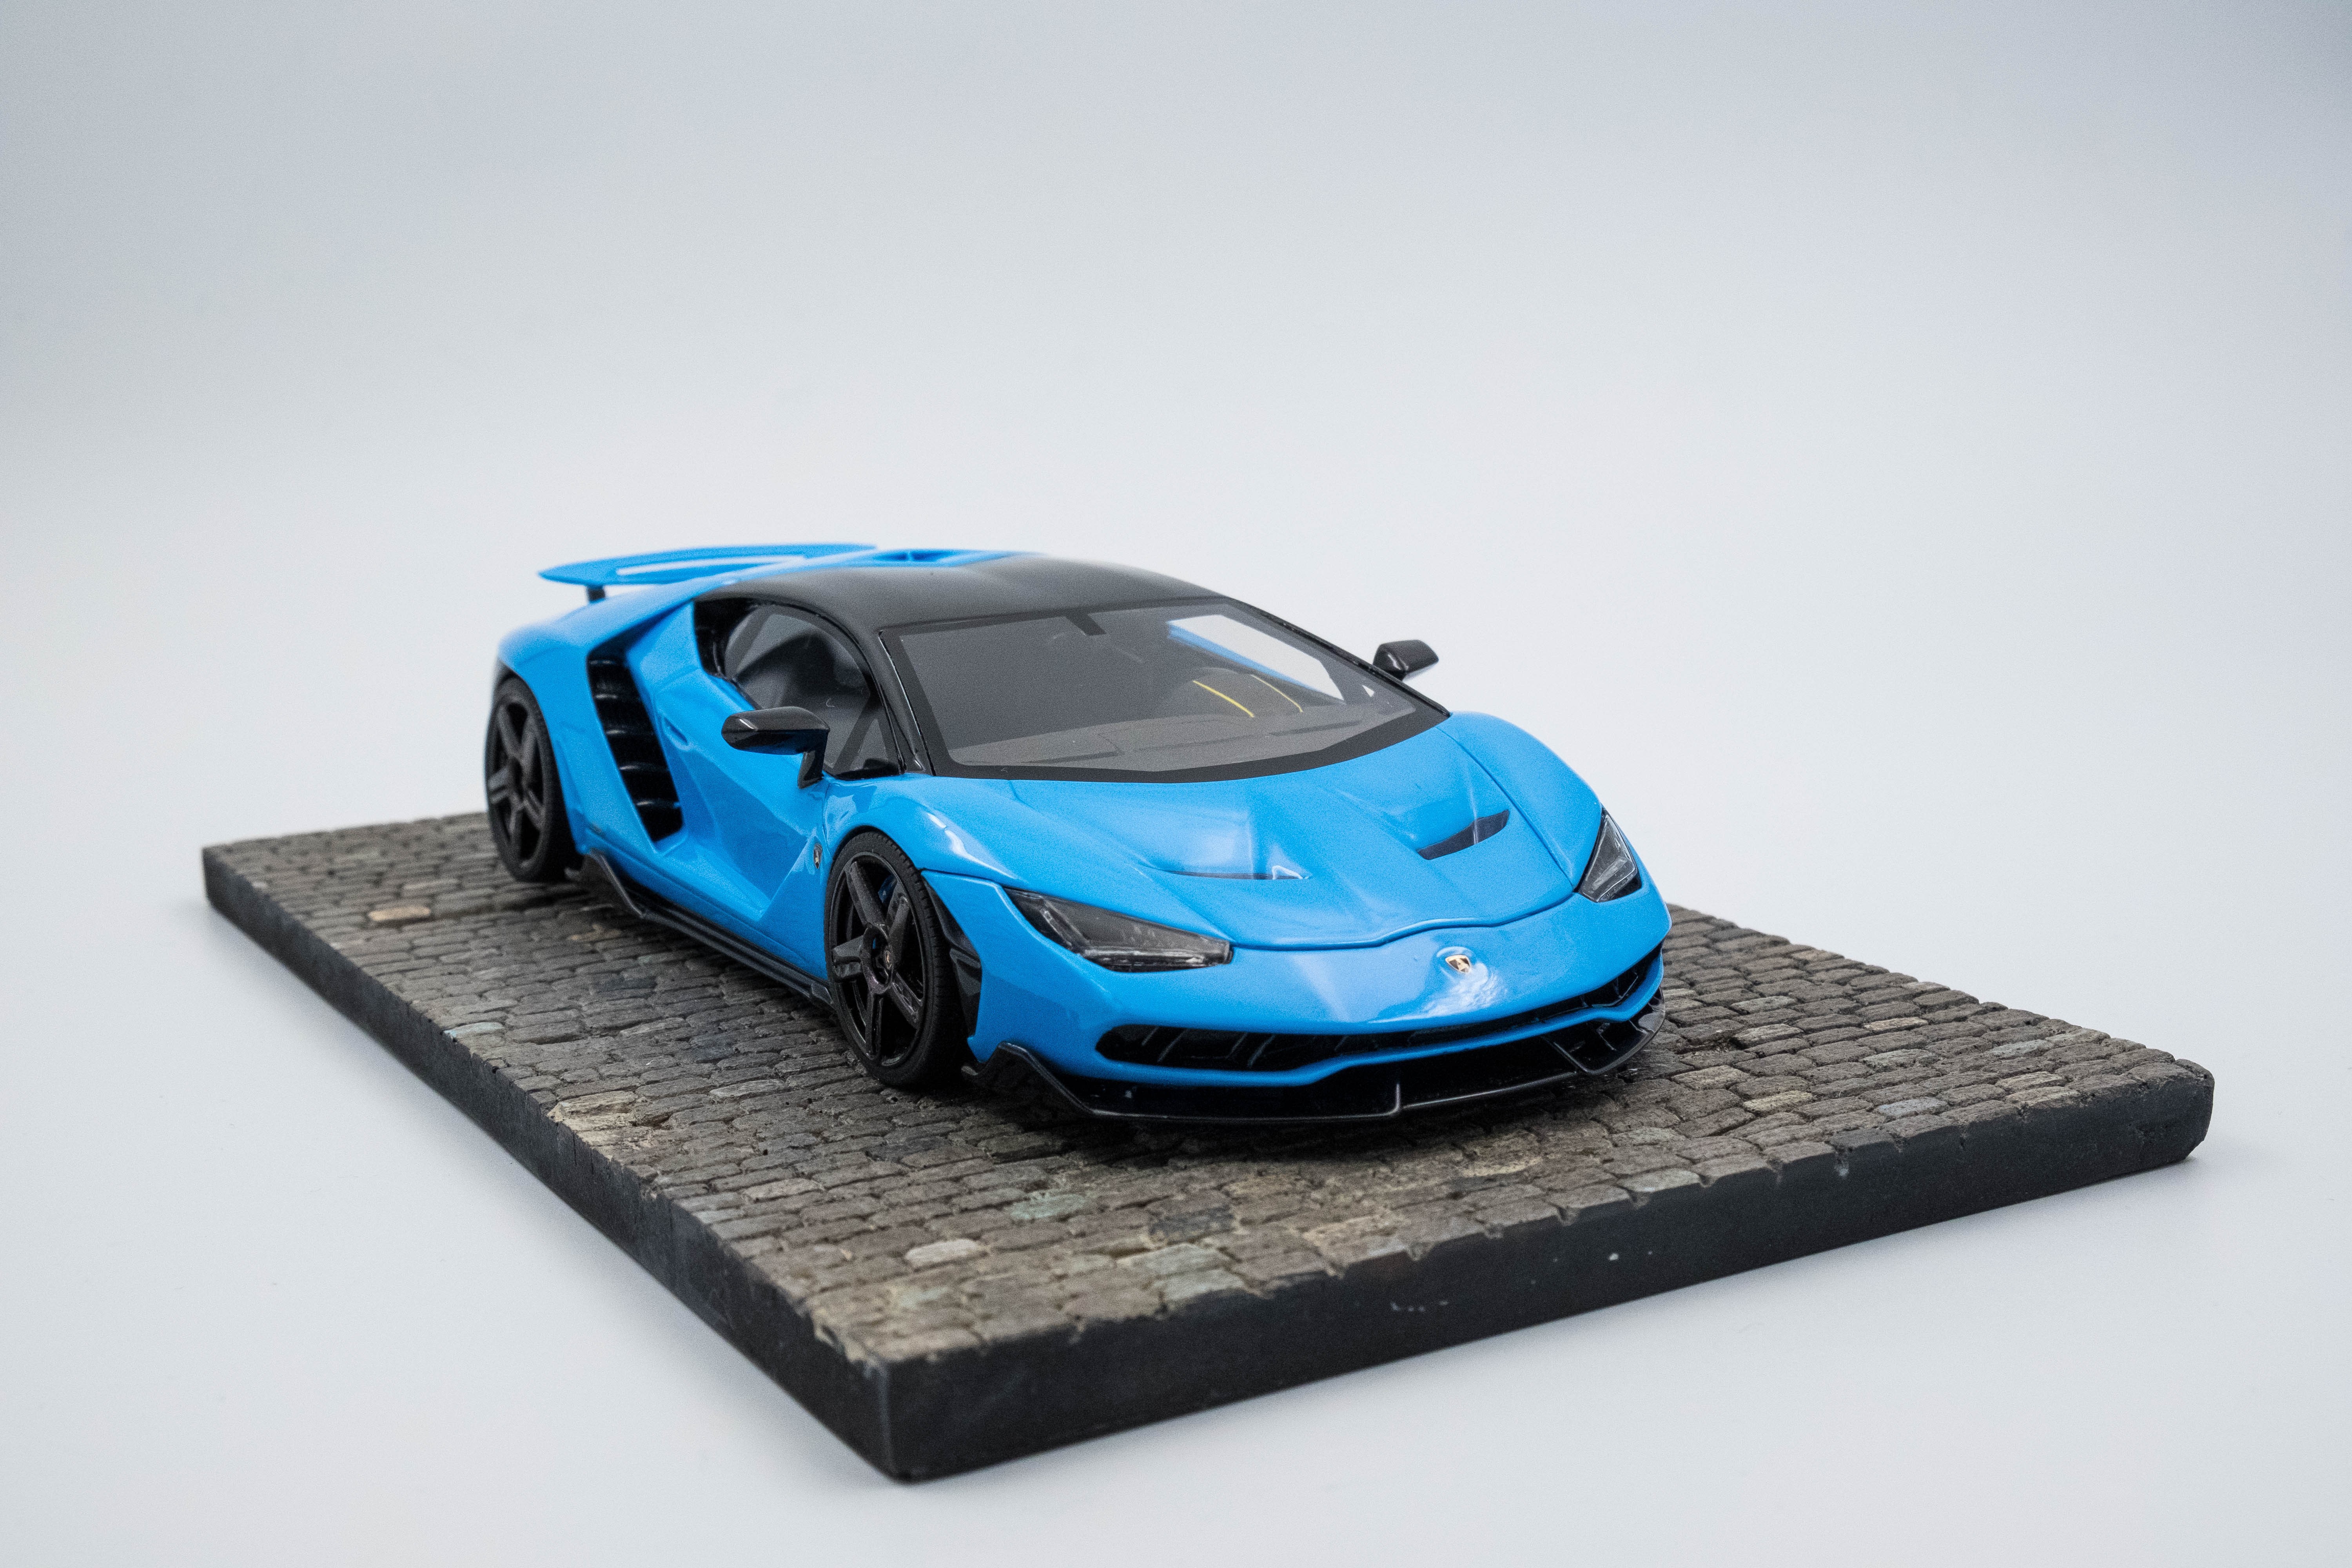
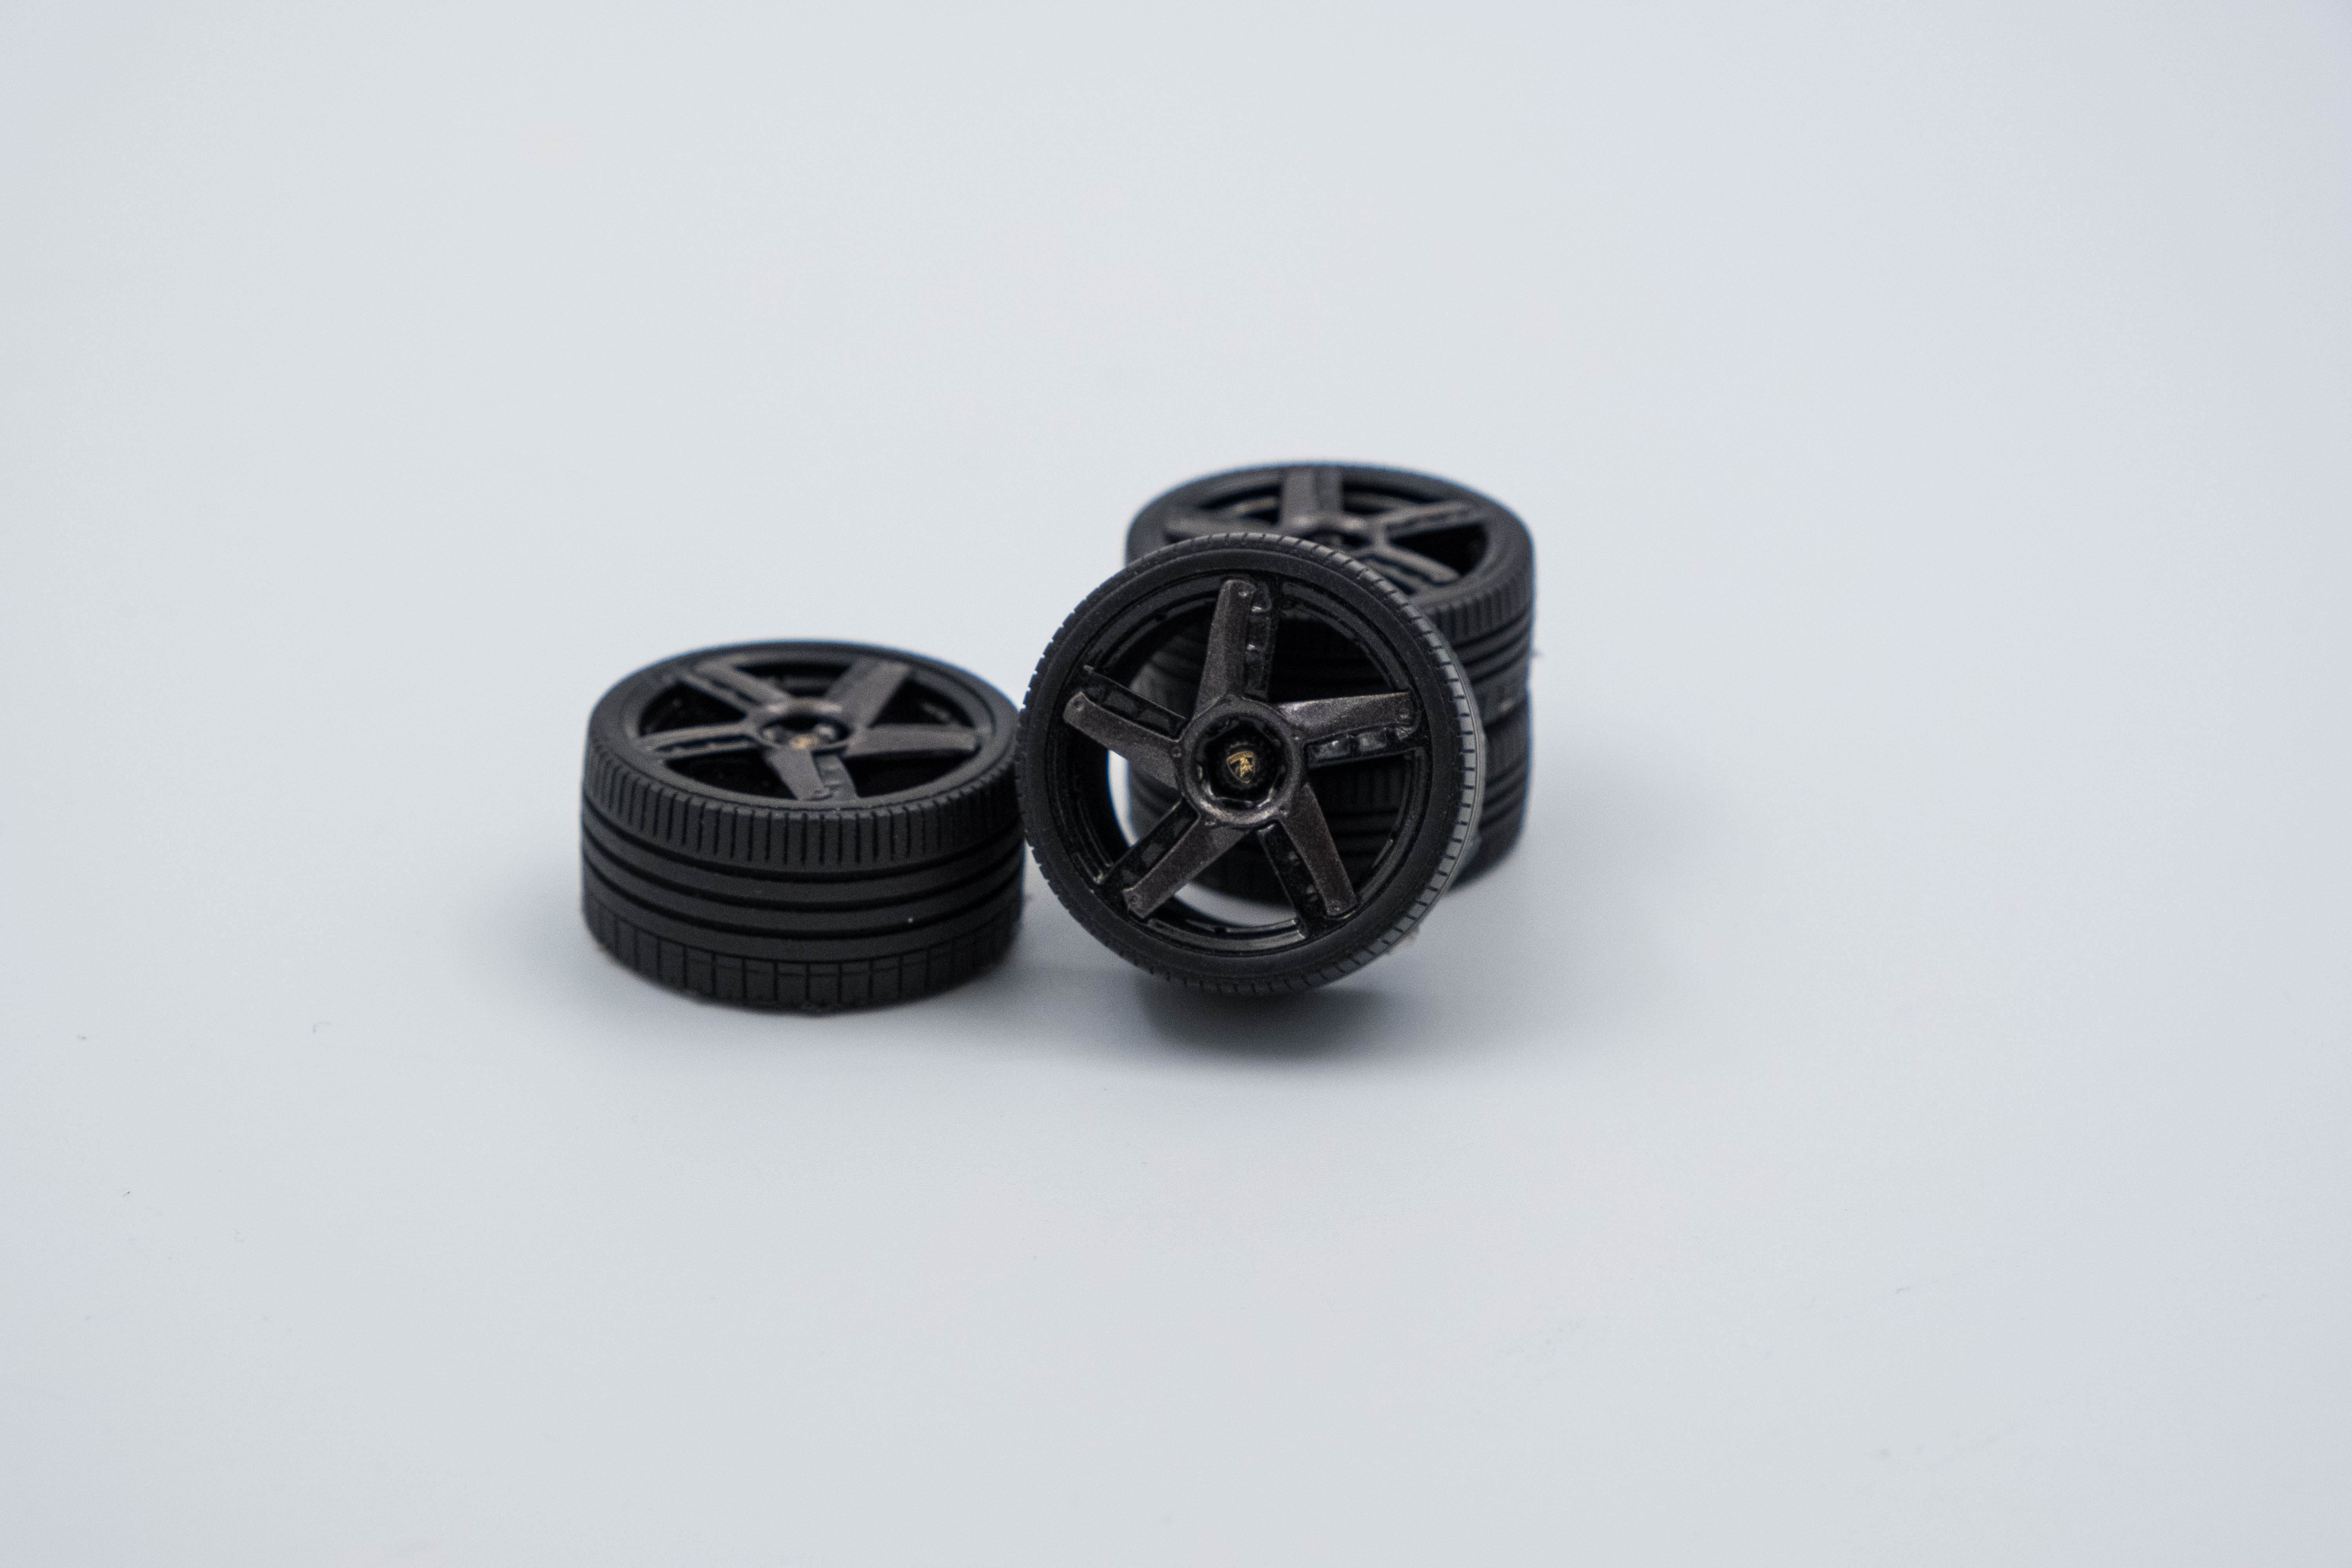
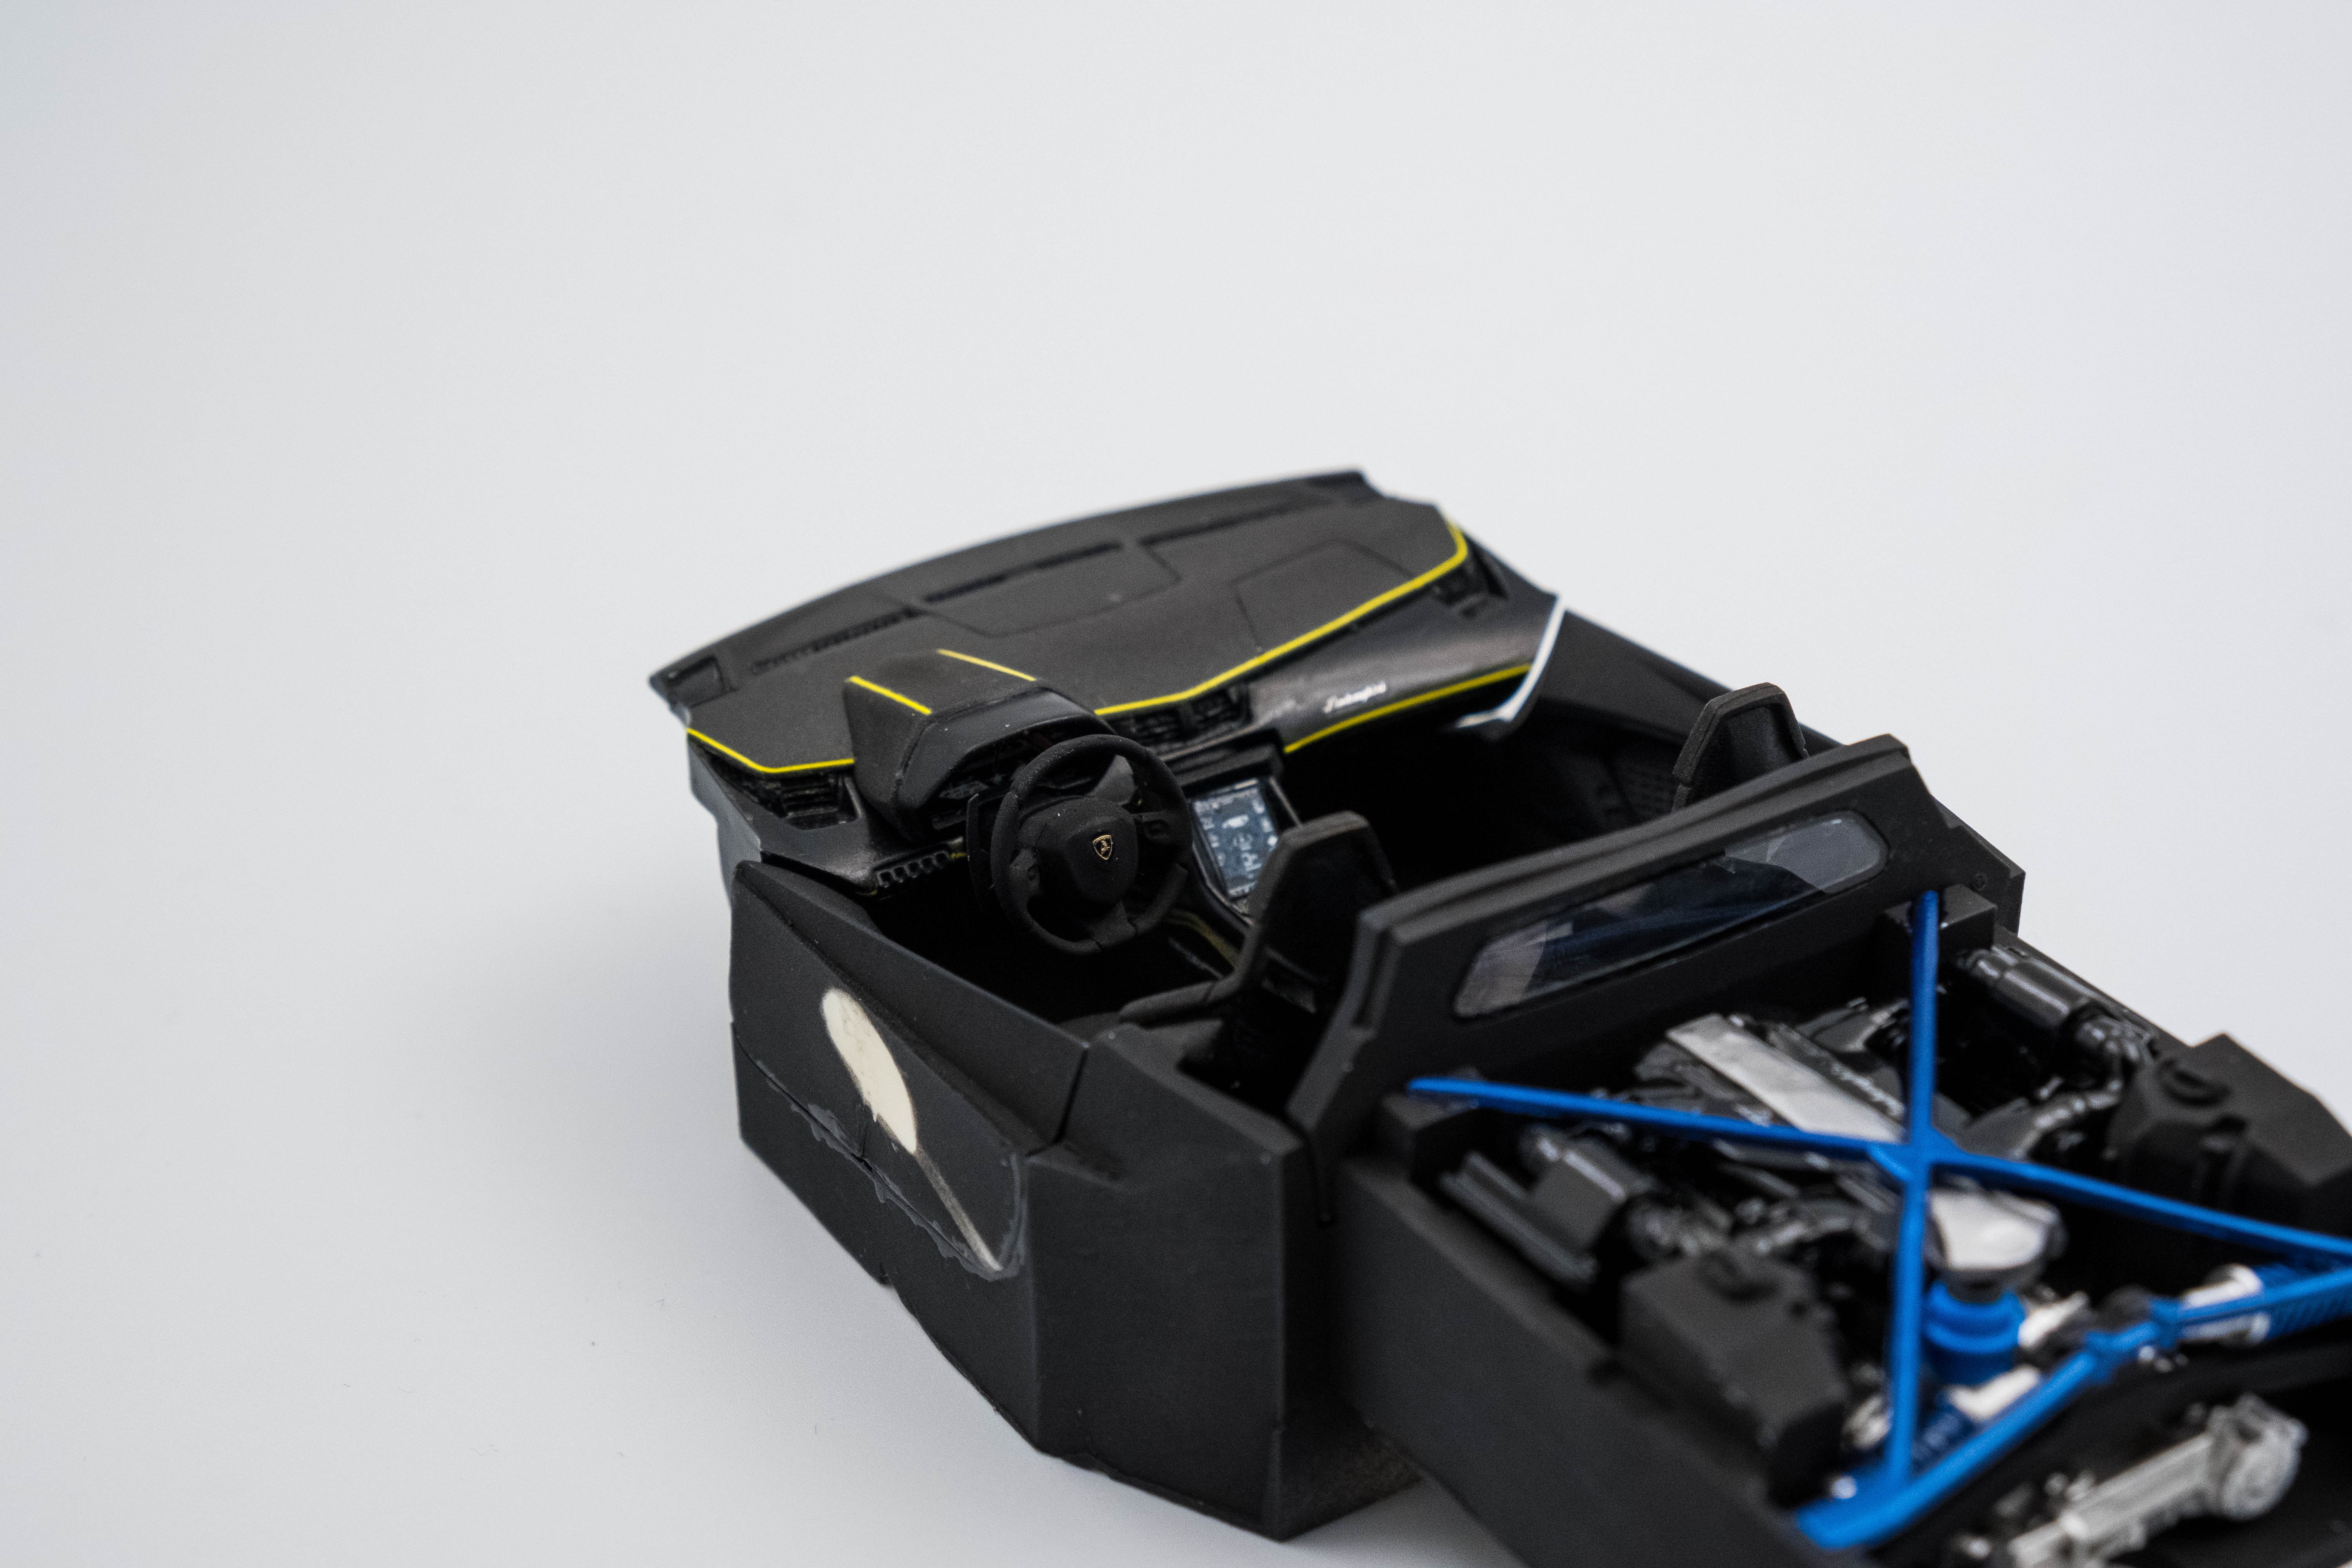
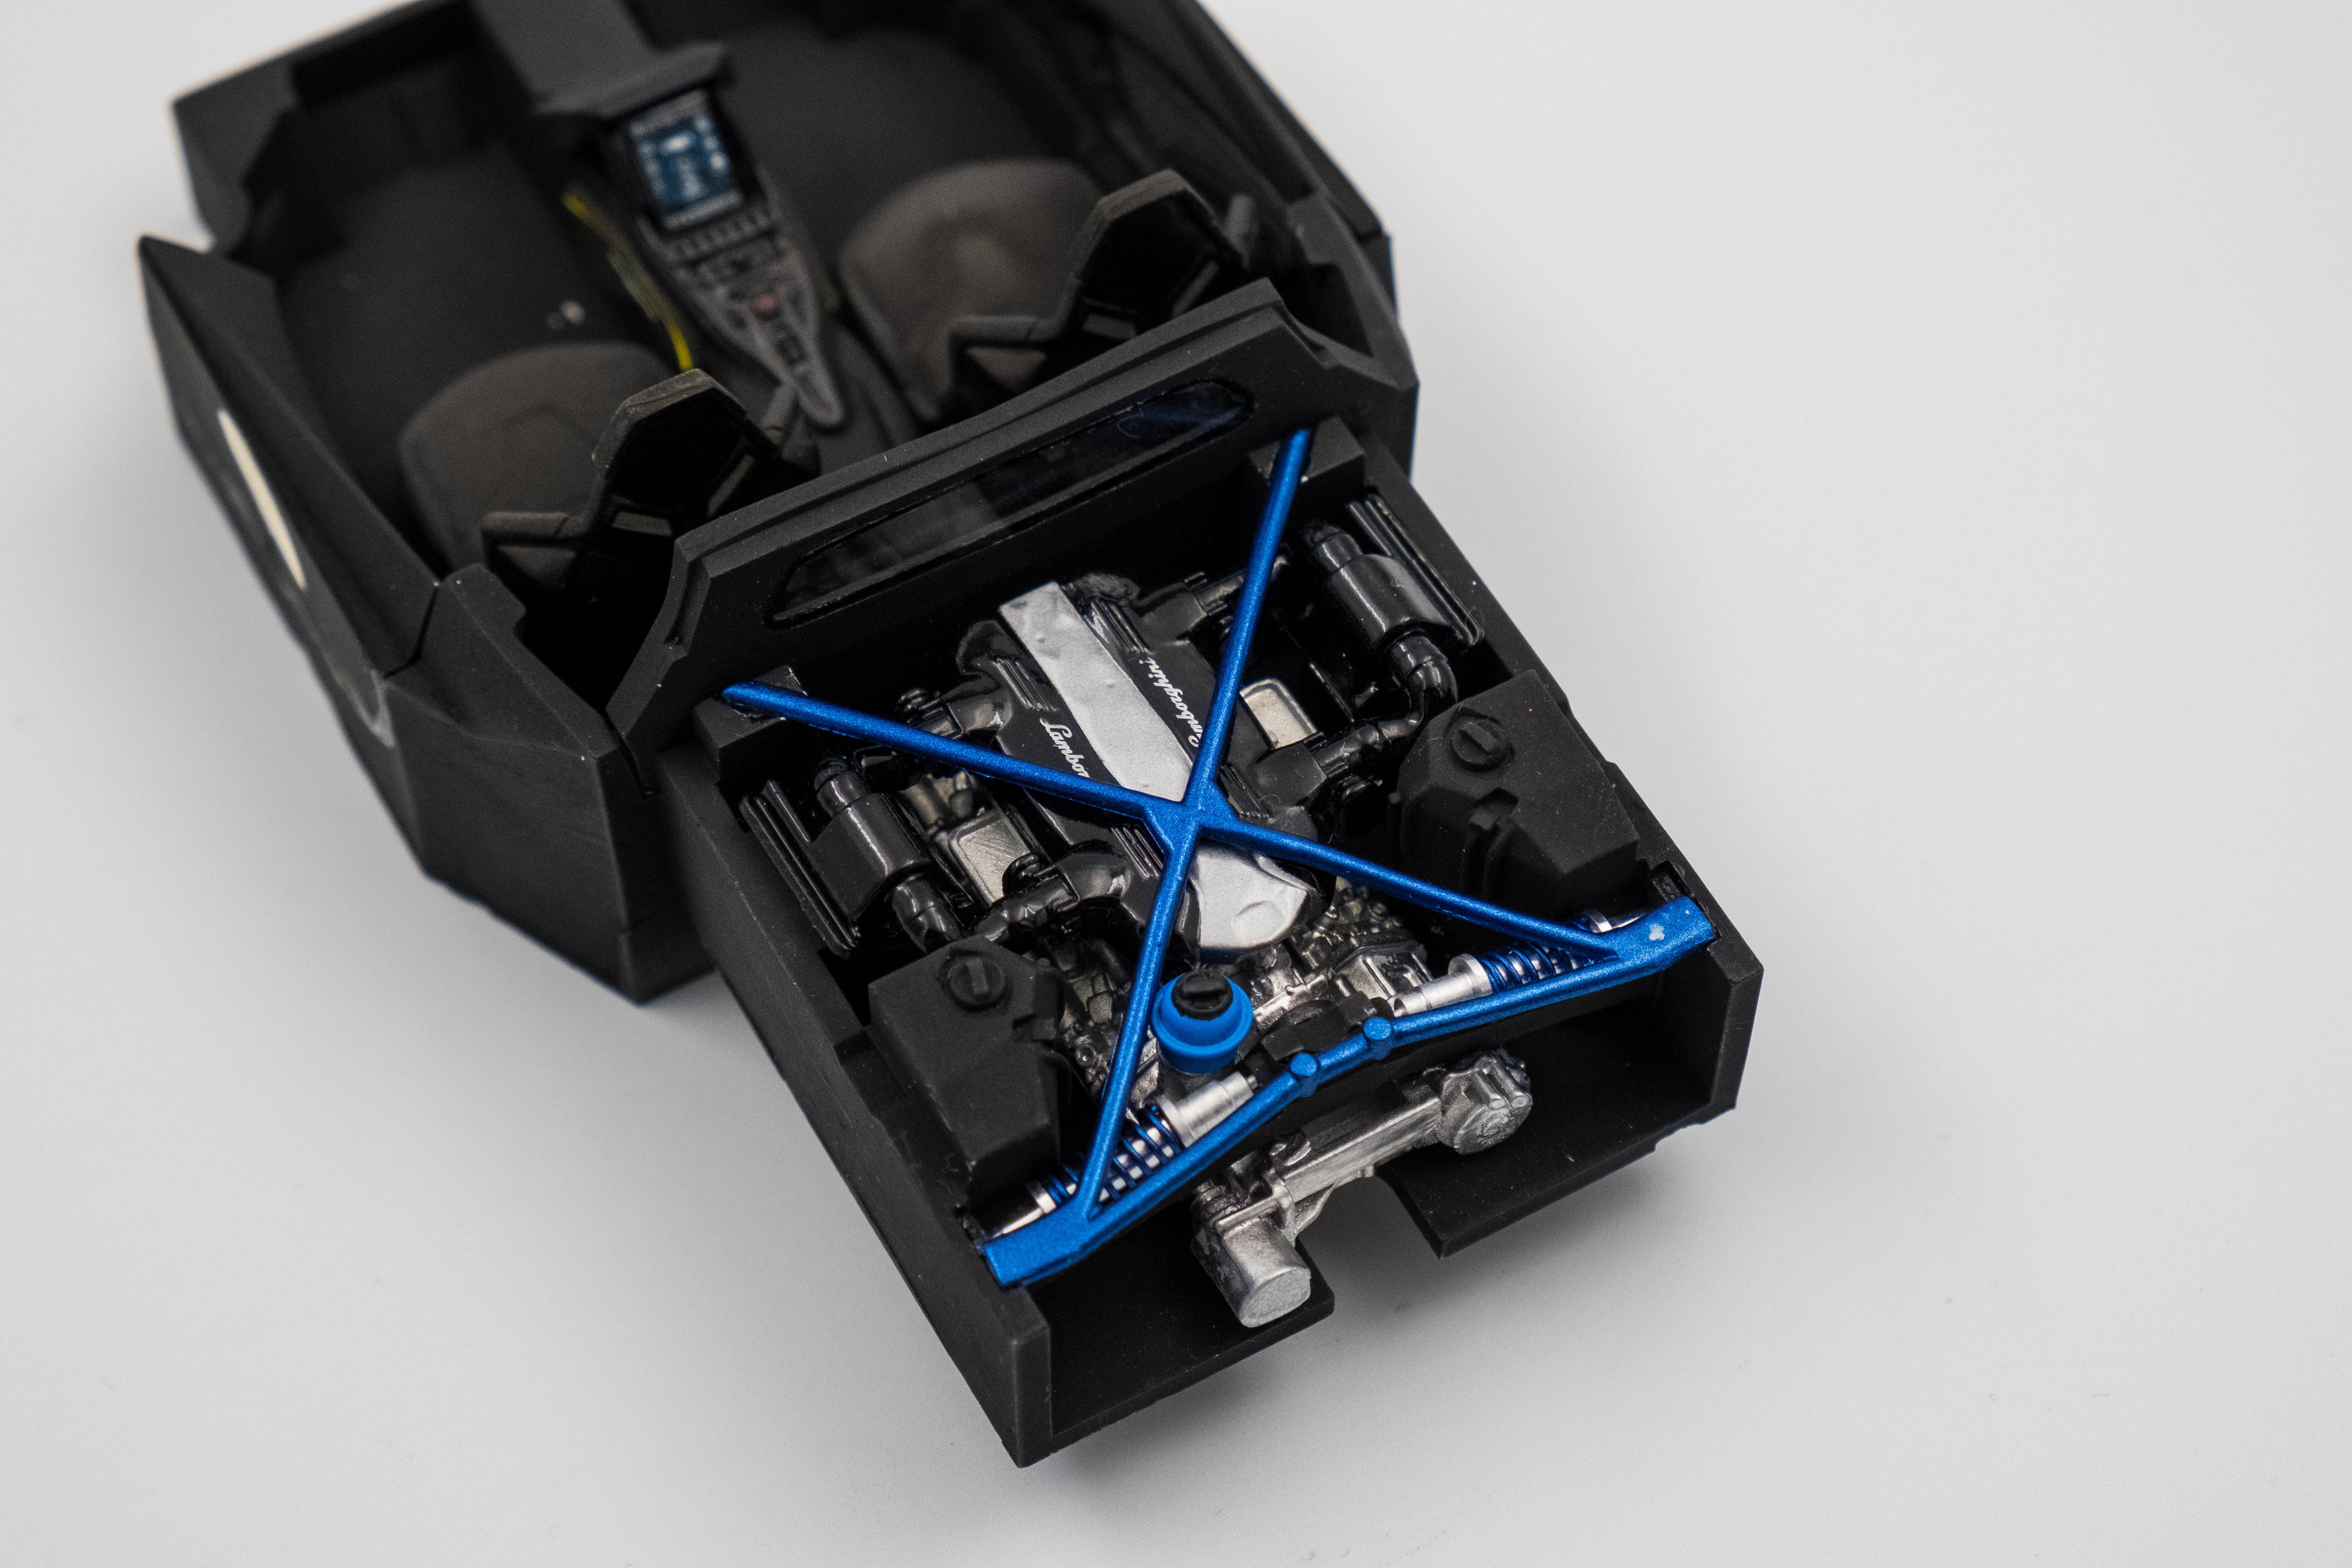
With the parts given a good wash and the sub assemblies together it was time to paint. I chose Blu Cepheus as the color for this car, and used the two part offering from Zero Paints. The first part is the base color, with the pearl being sprayed overtop. Like most pearls, it doesn't pop yet until clear is on the car. The car was painted in Blu Cepheus before being masked to paint the black. The brake calipers were painted to match, with the rotors being painted in Zero Paint's carbon brake disc color. The hubs were painted using a combination of AK Xtreme Metal Stainless Steel on the body and Alclad 2 Titanium on the tabs. The two part wheels were painted black with the inserts painted RS Watanabe grey from Zero Paints.


Interior Painting
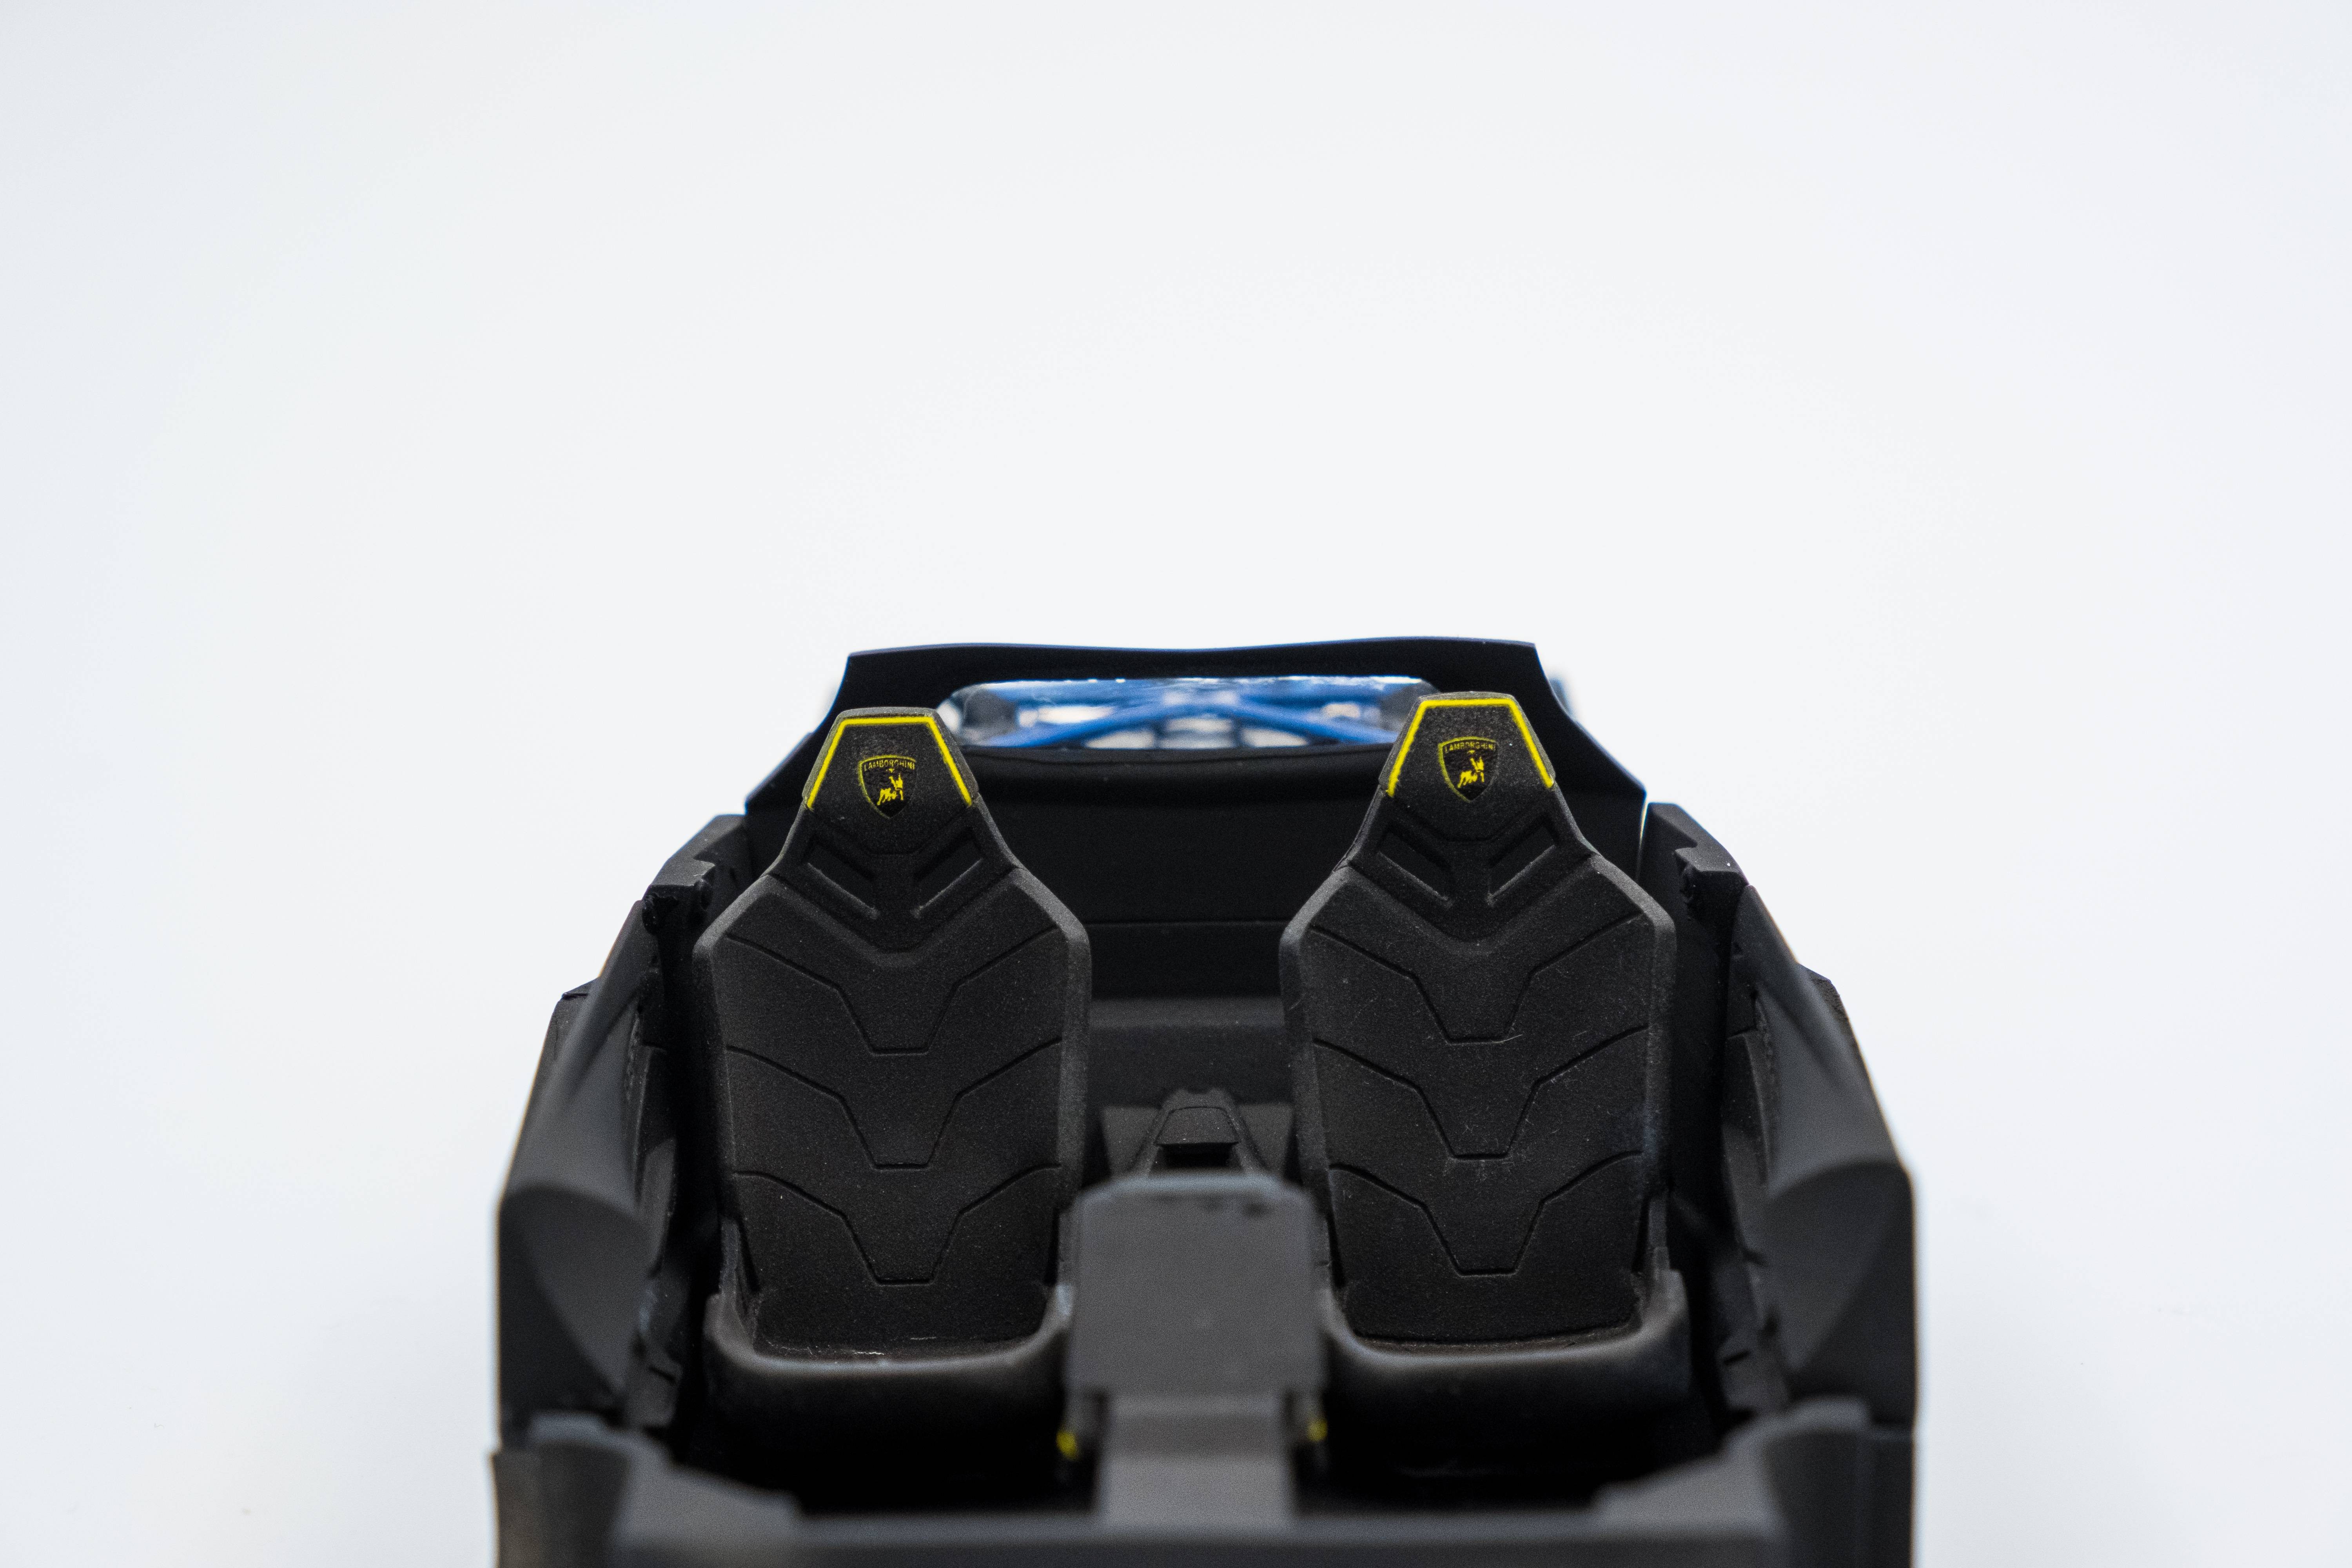
Painting of the interior was straightforward, with accents being painted in Zero Paint's charcoal grey texture and the rest being painted black. The kit decals took care of most of the interior detailing, only requiring a dot of red for the start/stop button. As much as I like exotic cars, I always veer away from the bright interior colors that some end up with.
Creating the base
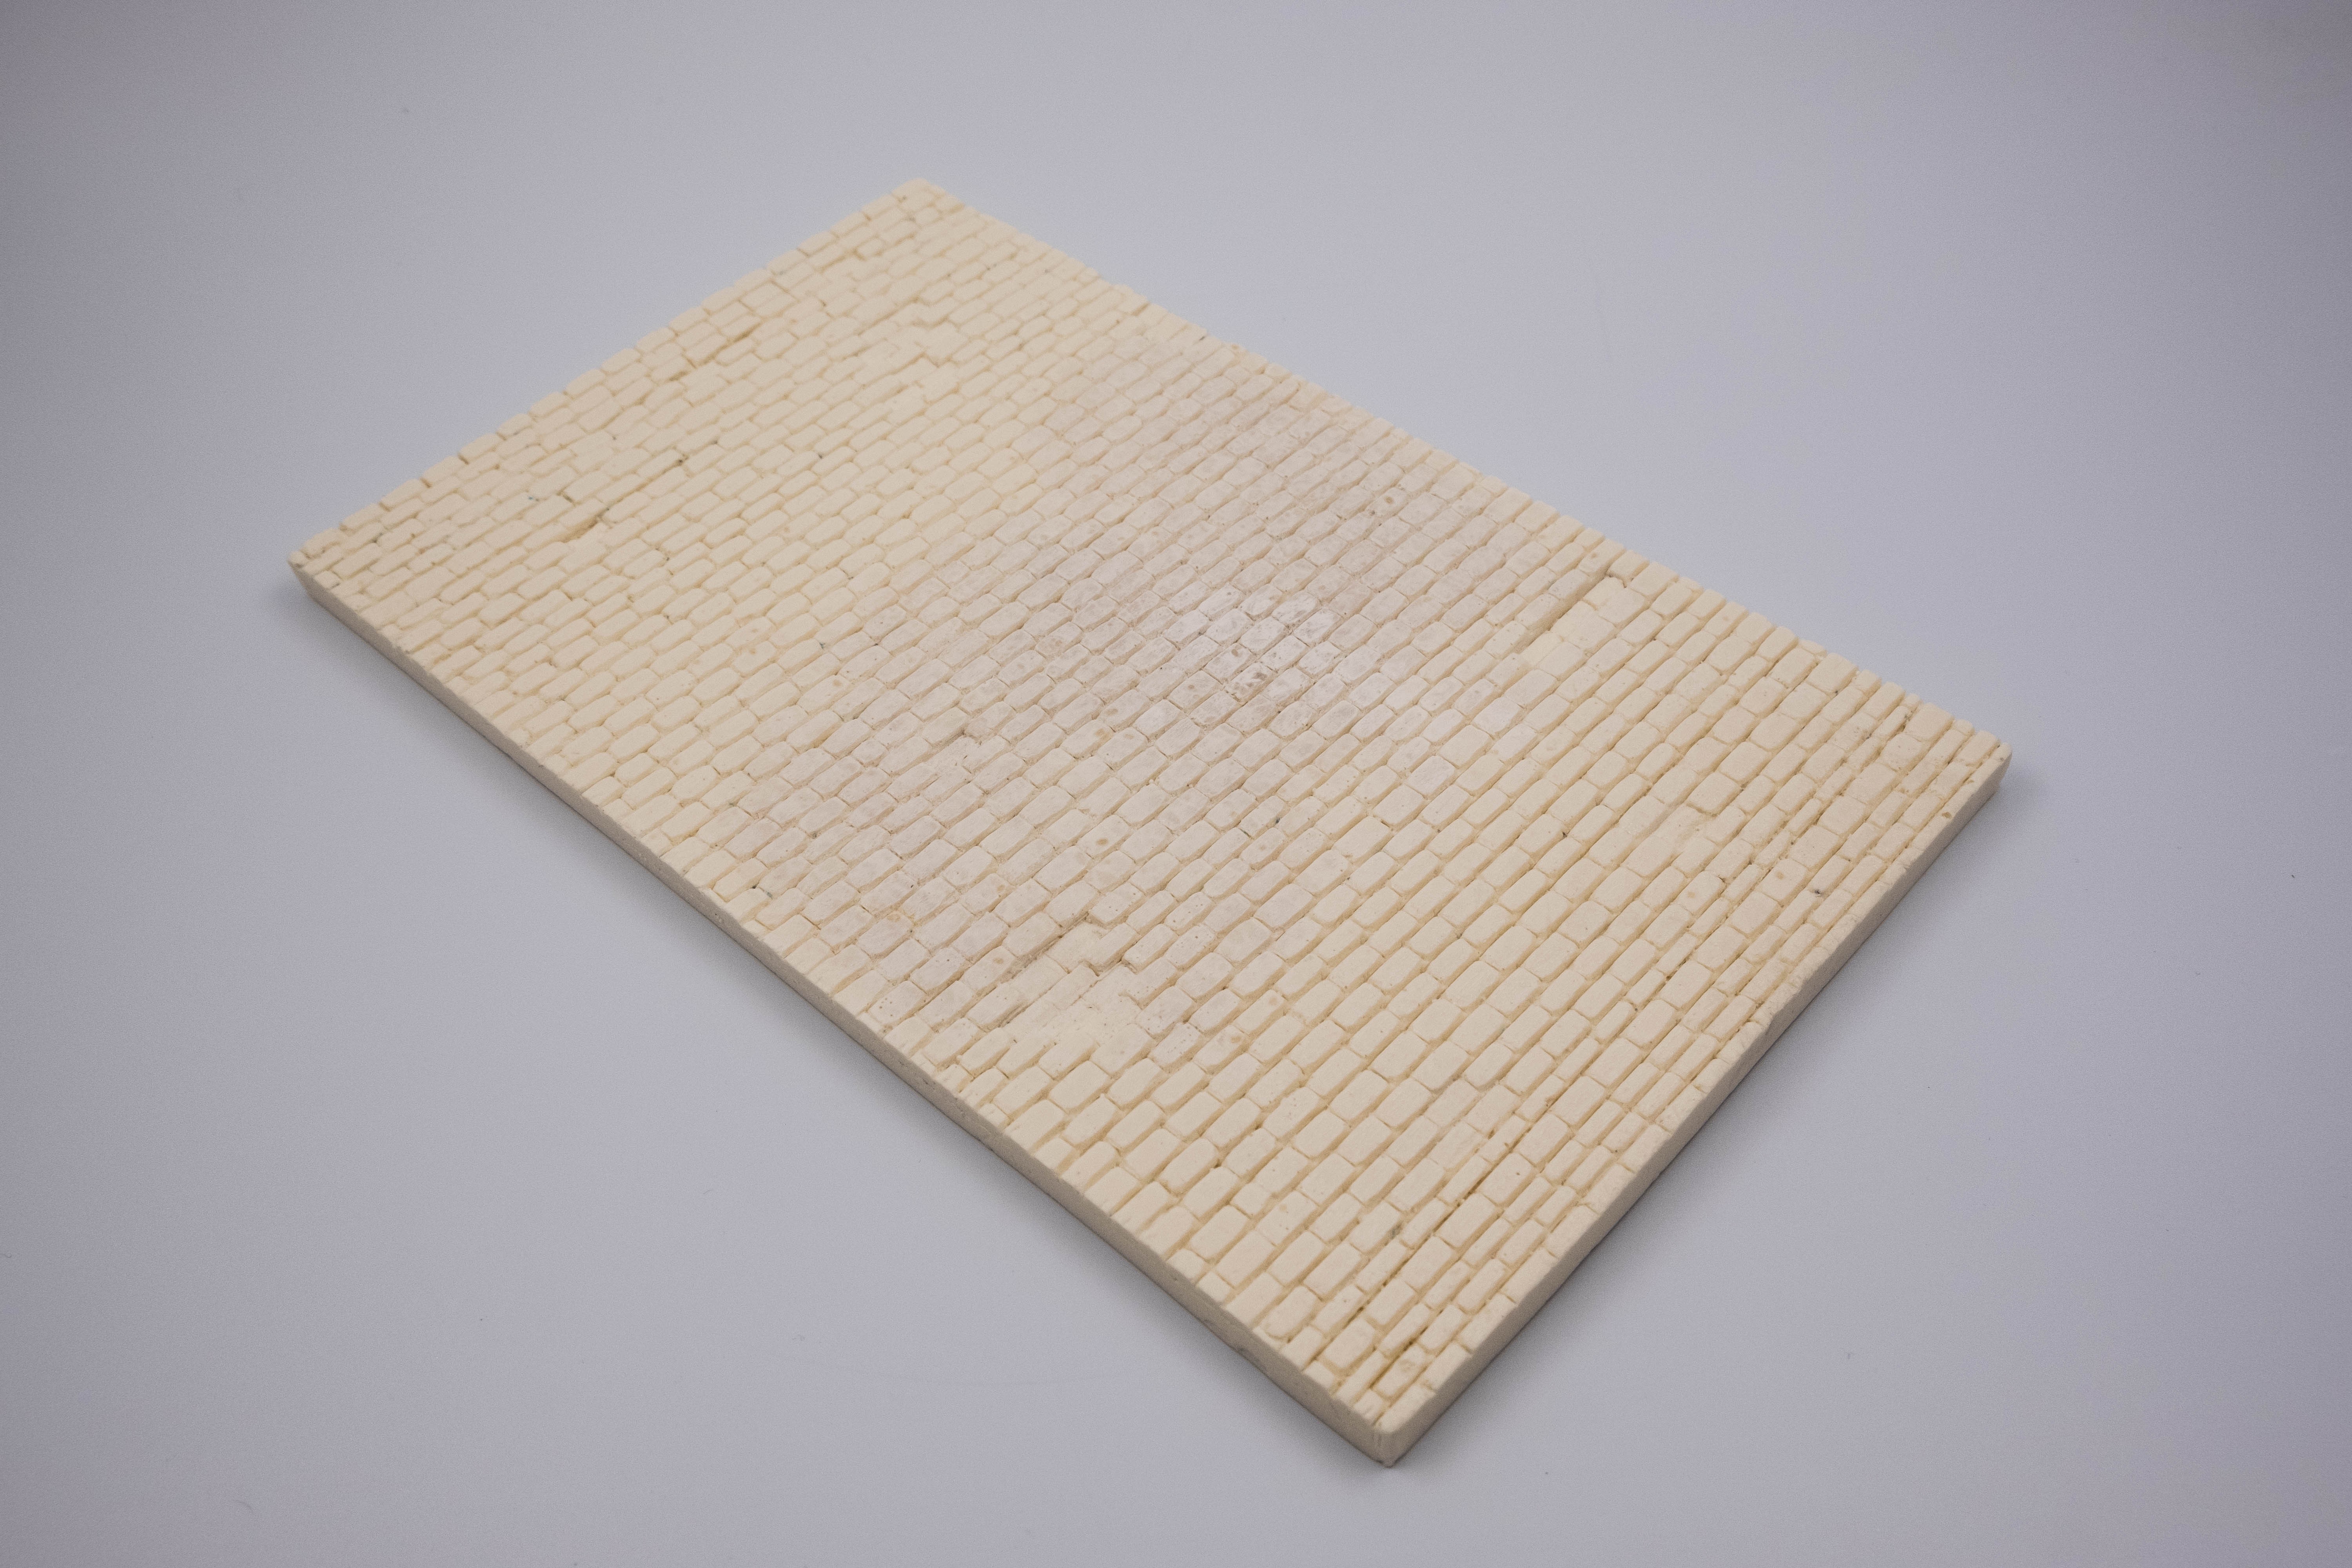
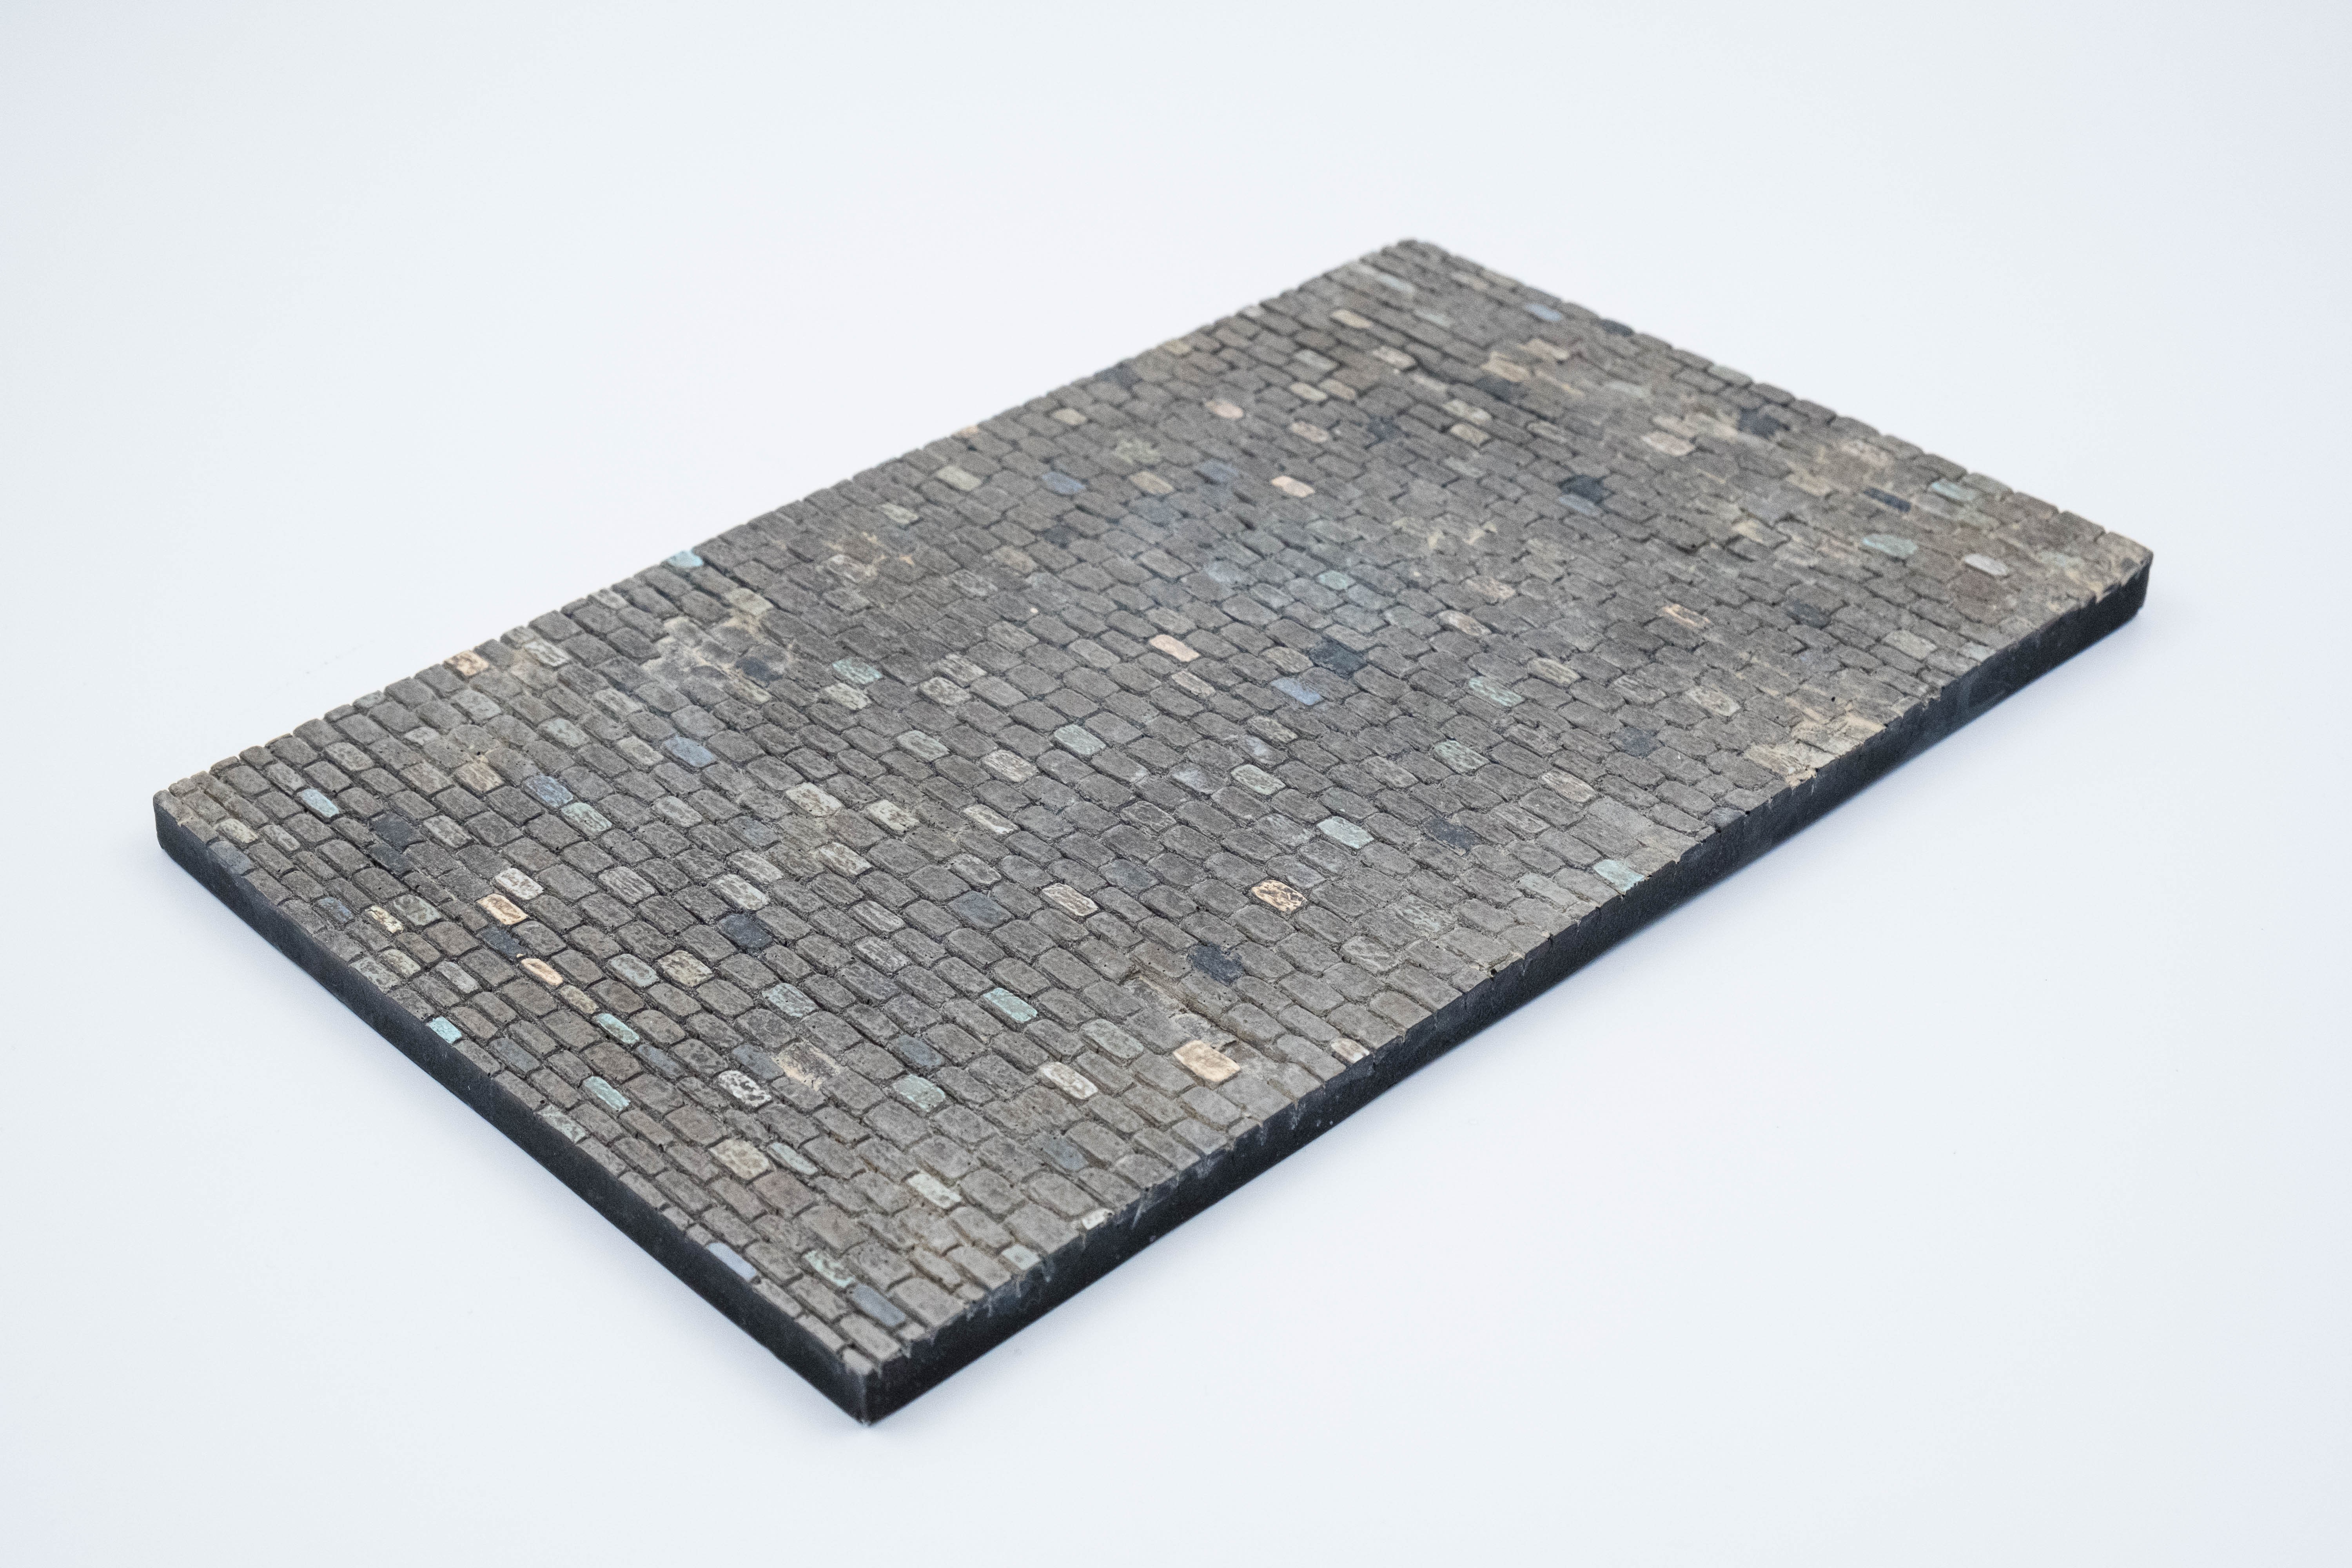
There's something about the juxtaposition of a modern supercar on an old European Cobblestone road that is picturesque in my mind. I set to work getting reference images of old cobblestone roads to figure out weathering and size of the Belgian blocks in 1/24 scale. Now that I knew the size of the blocks I set to work rolling out a pancake of clay. After putting in too many hours on this method and struggling to keep a consistent size of the blocks, I grabbed a panel of pink insulation foam, cut it to size and set to carving them out. The rows were carved first, and then the individual bricks were cut into the rows. After the pattern was created, the corners of each brick were rounded and then the top edges of each brick were rounded to give them the complete Belgian block look. Adding in some sunken sections and damaged bricks rounded out the creation of the master pattern and it was now ready to create a mold.

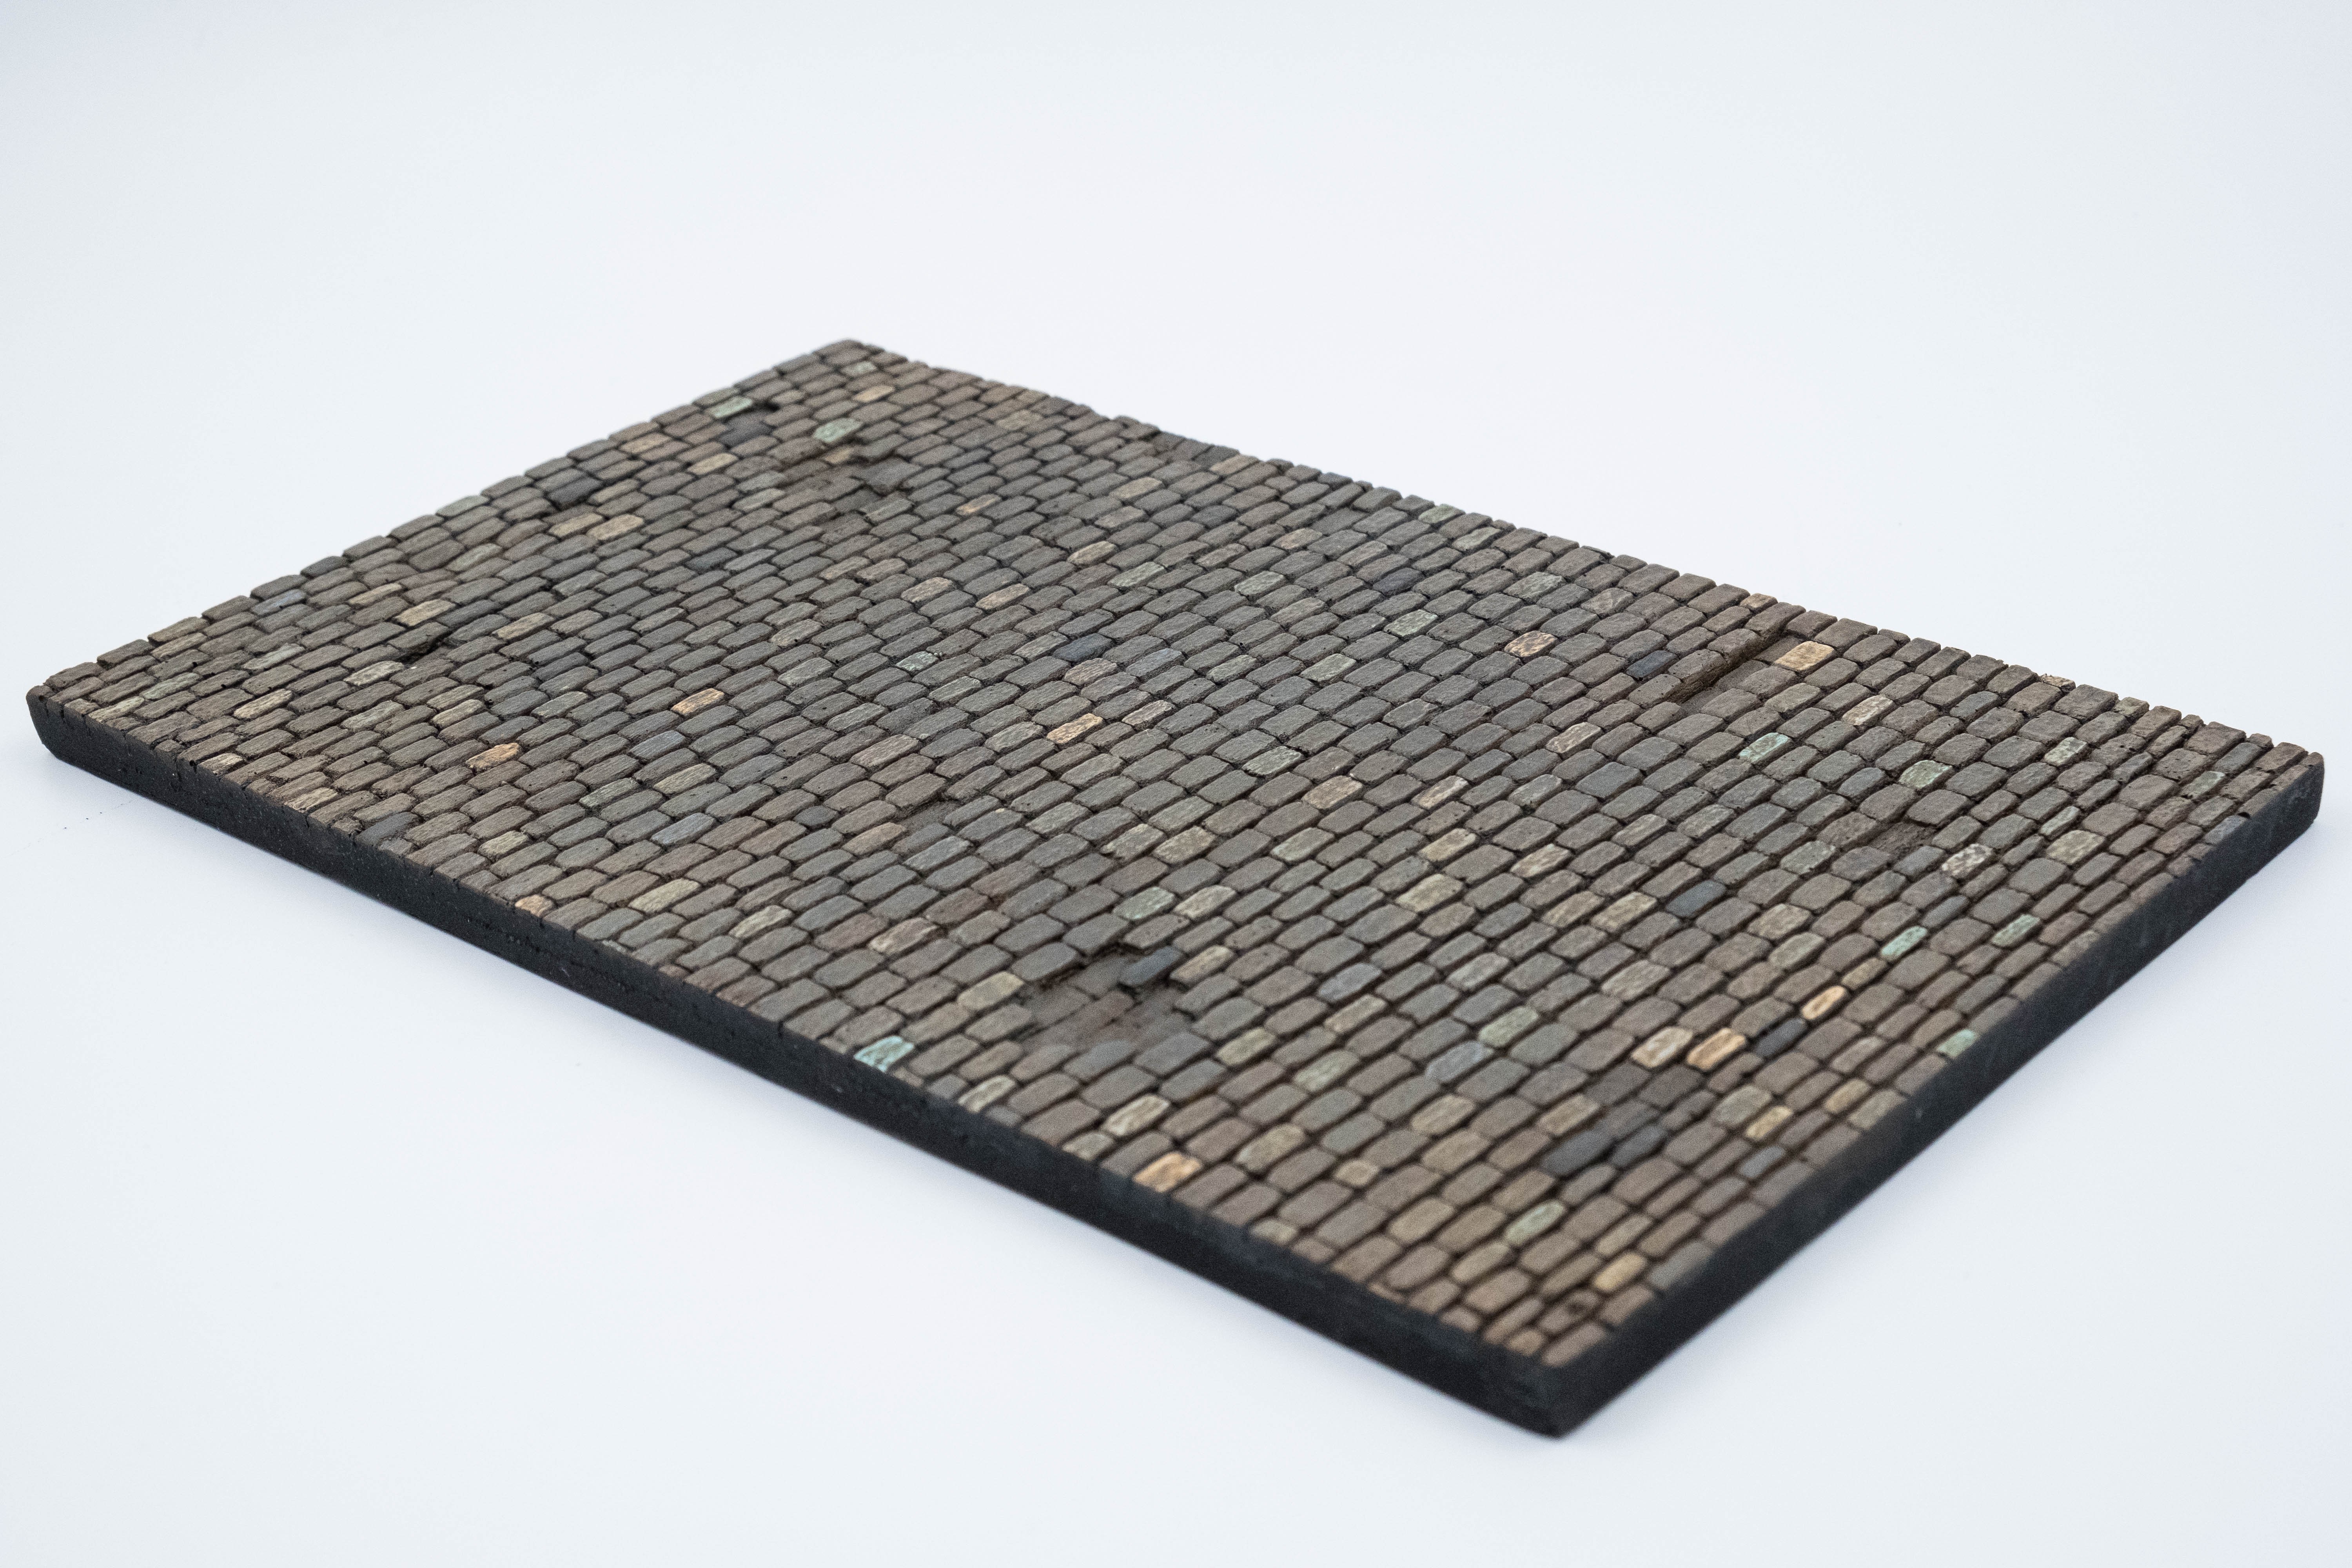
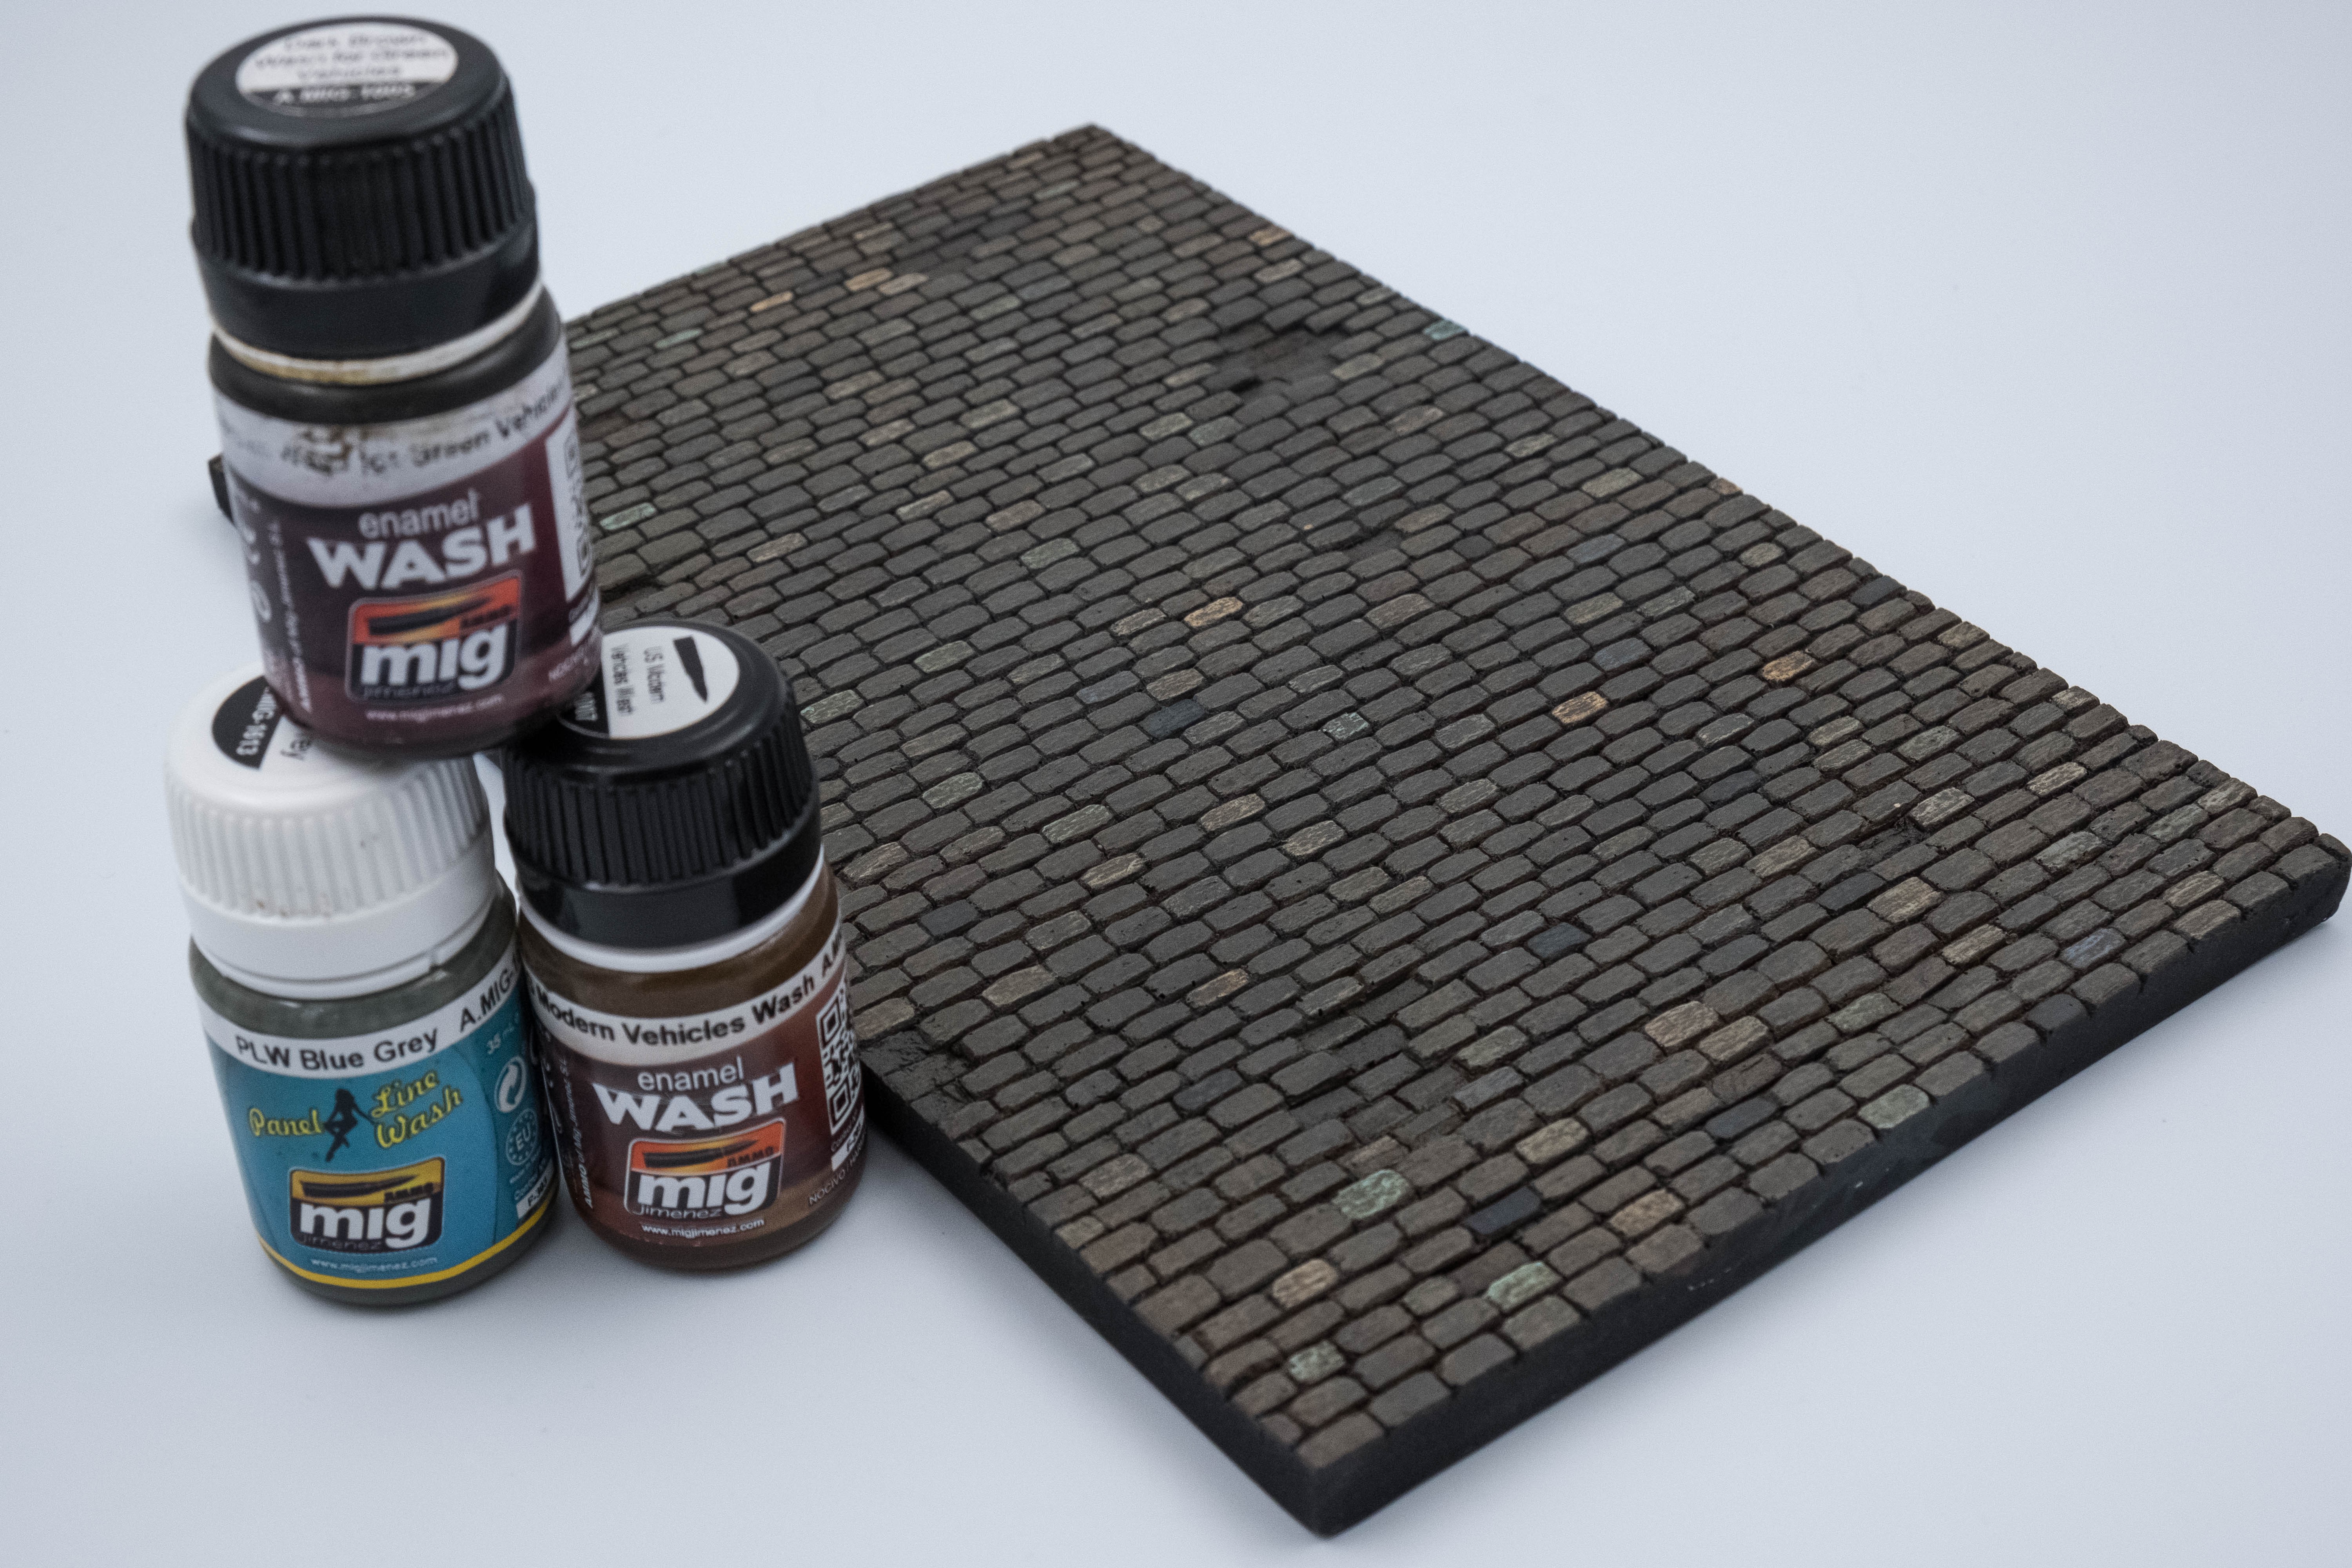
Painting the base
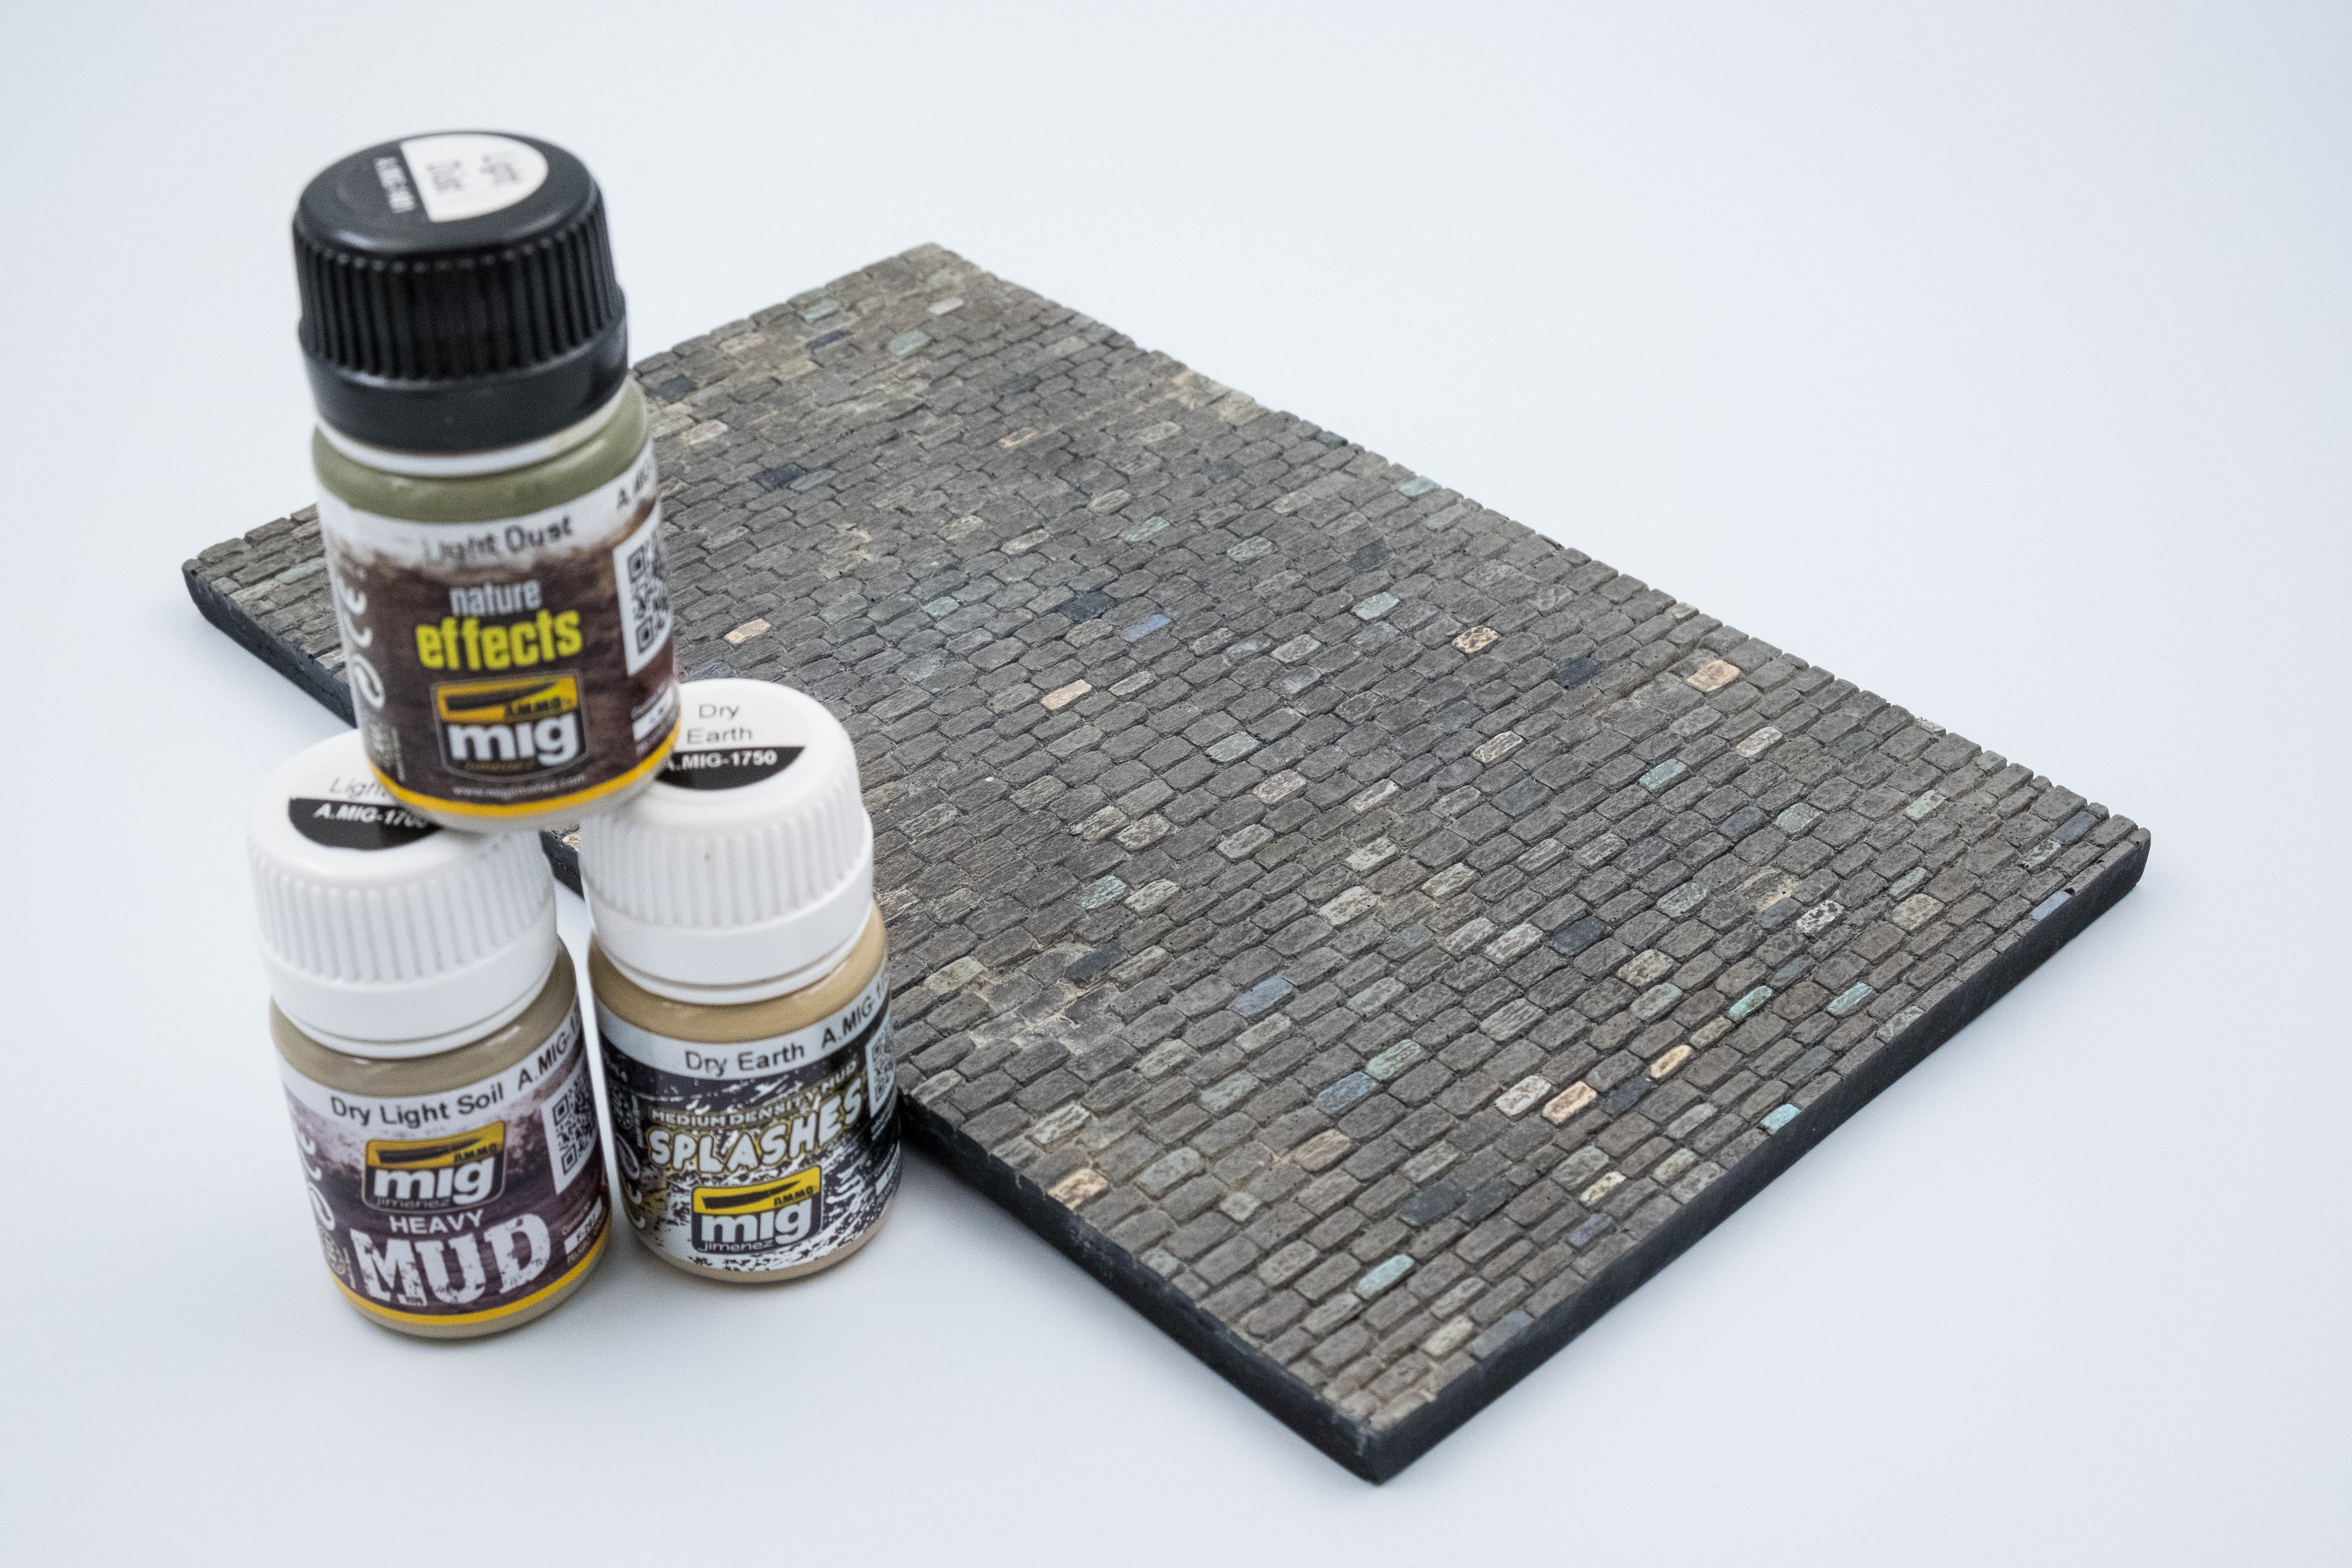
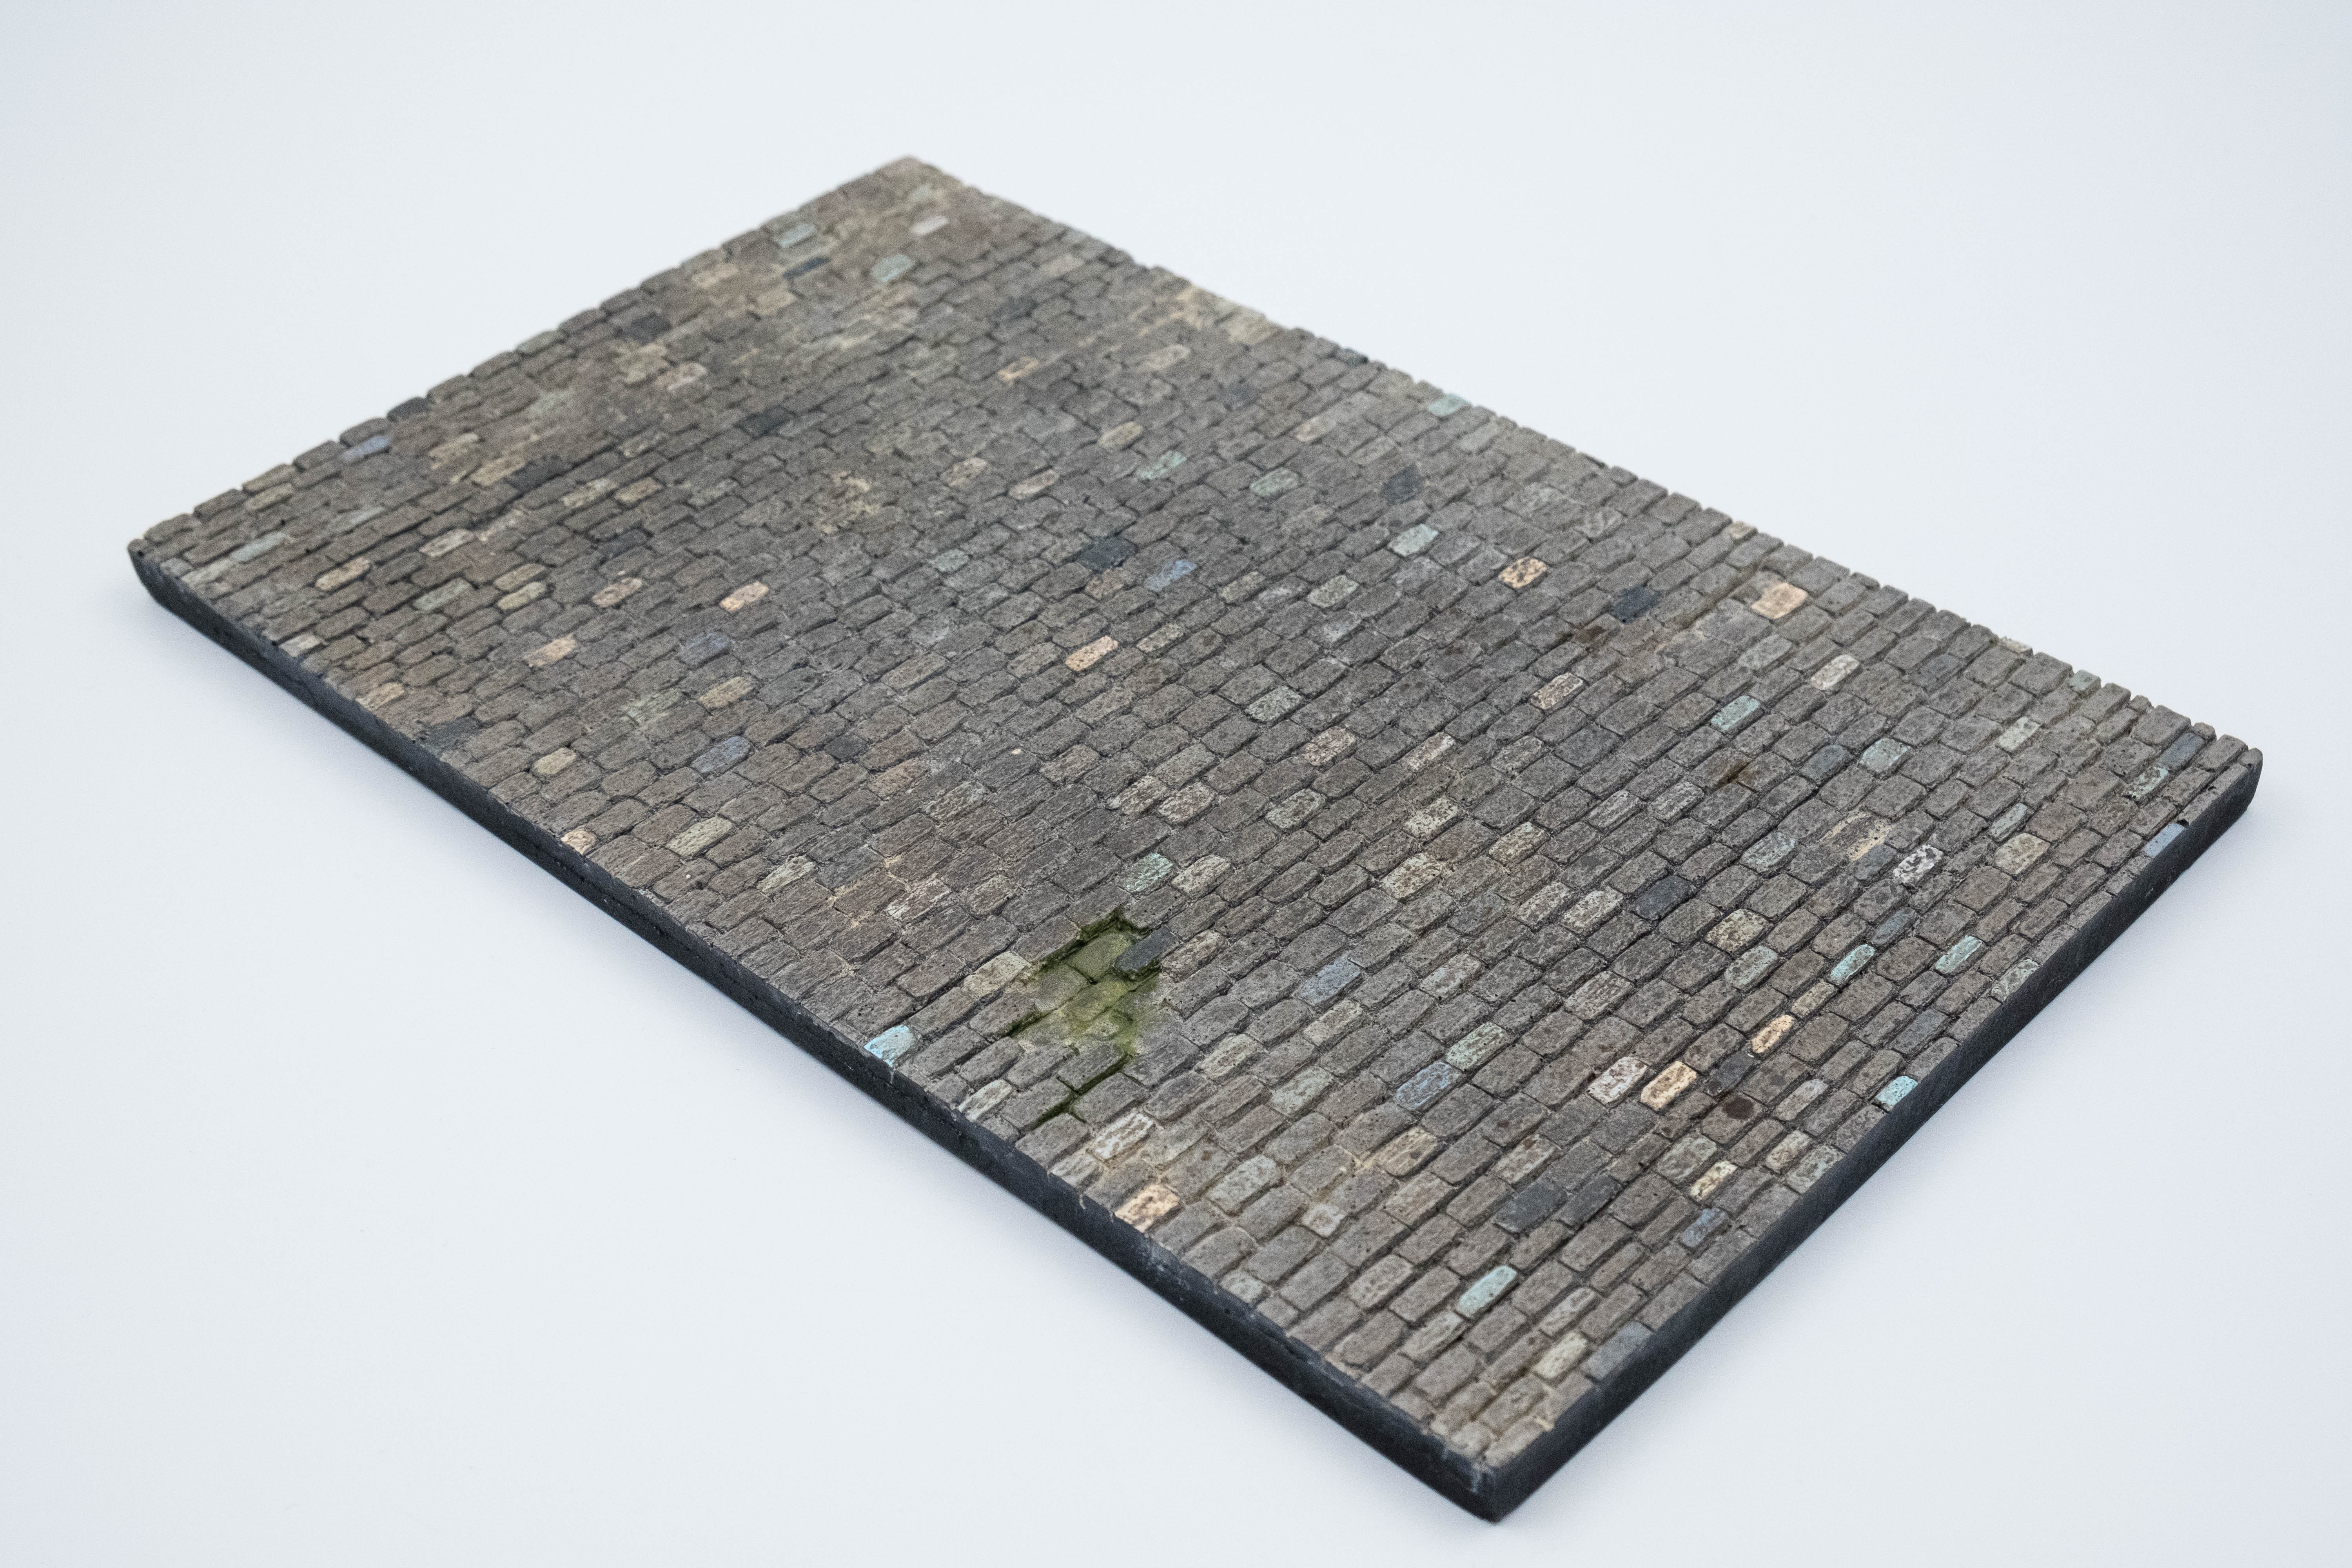
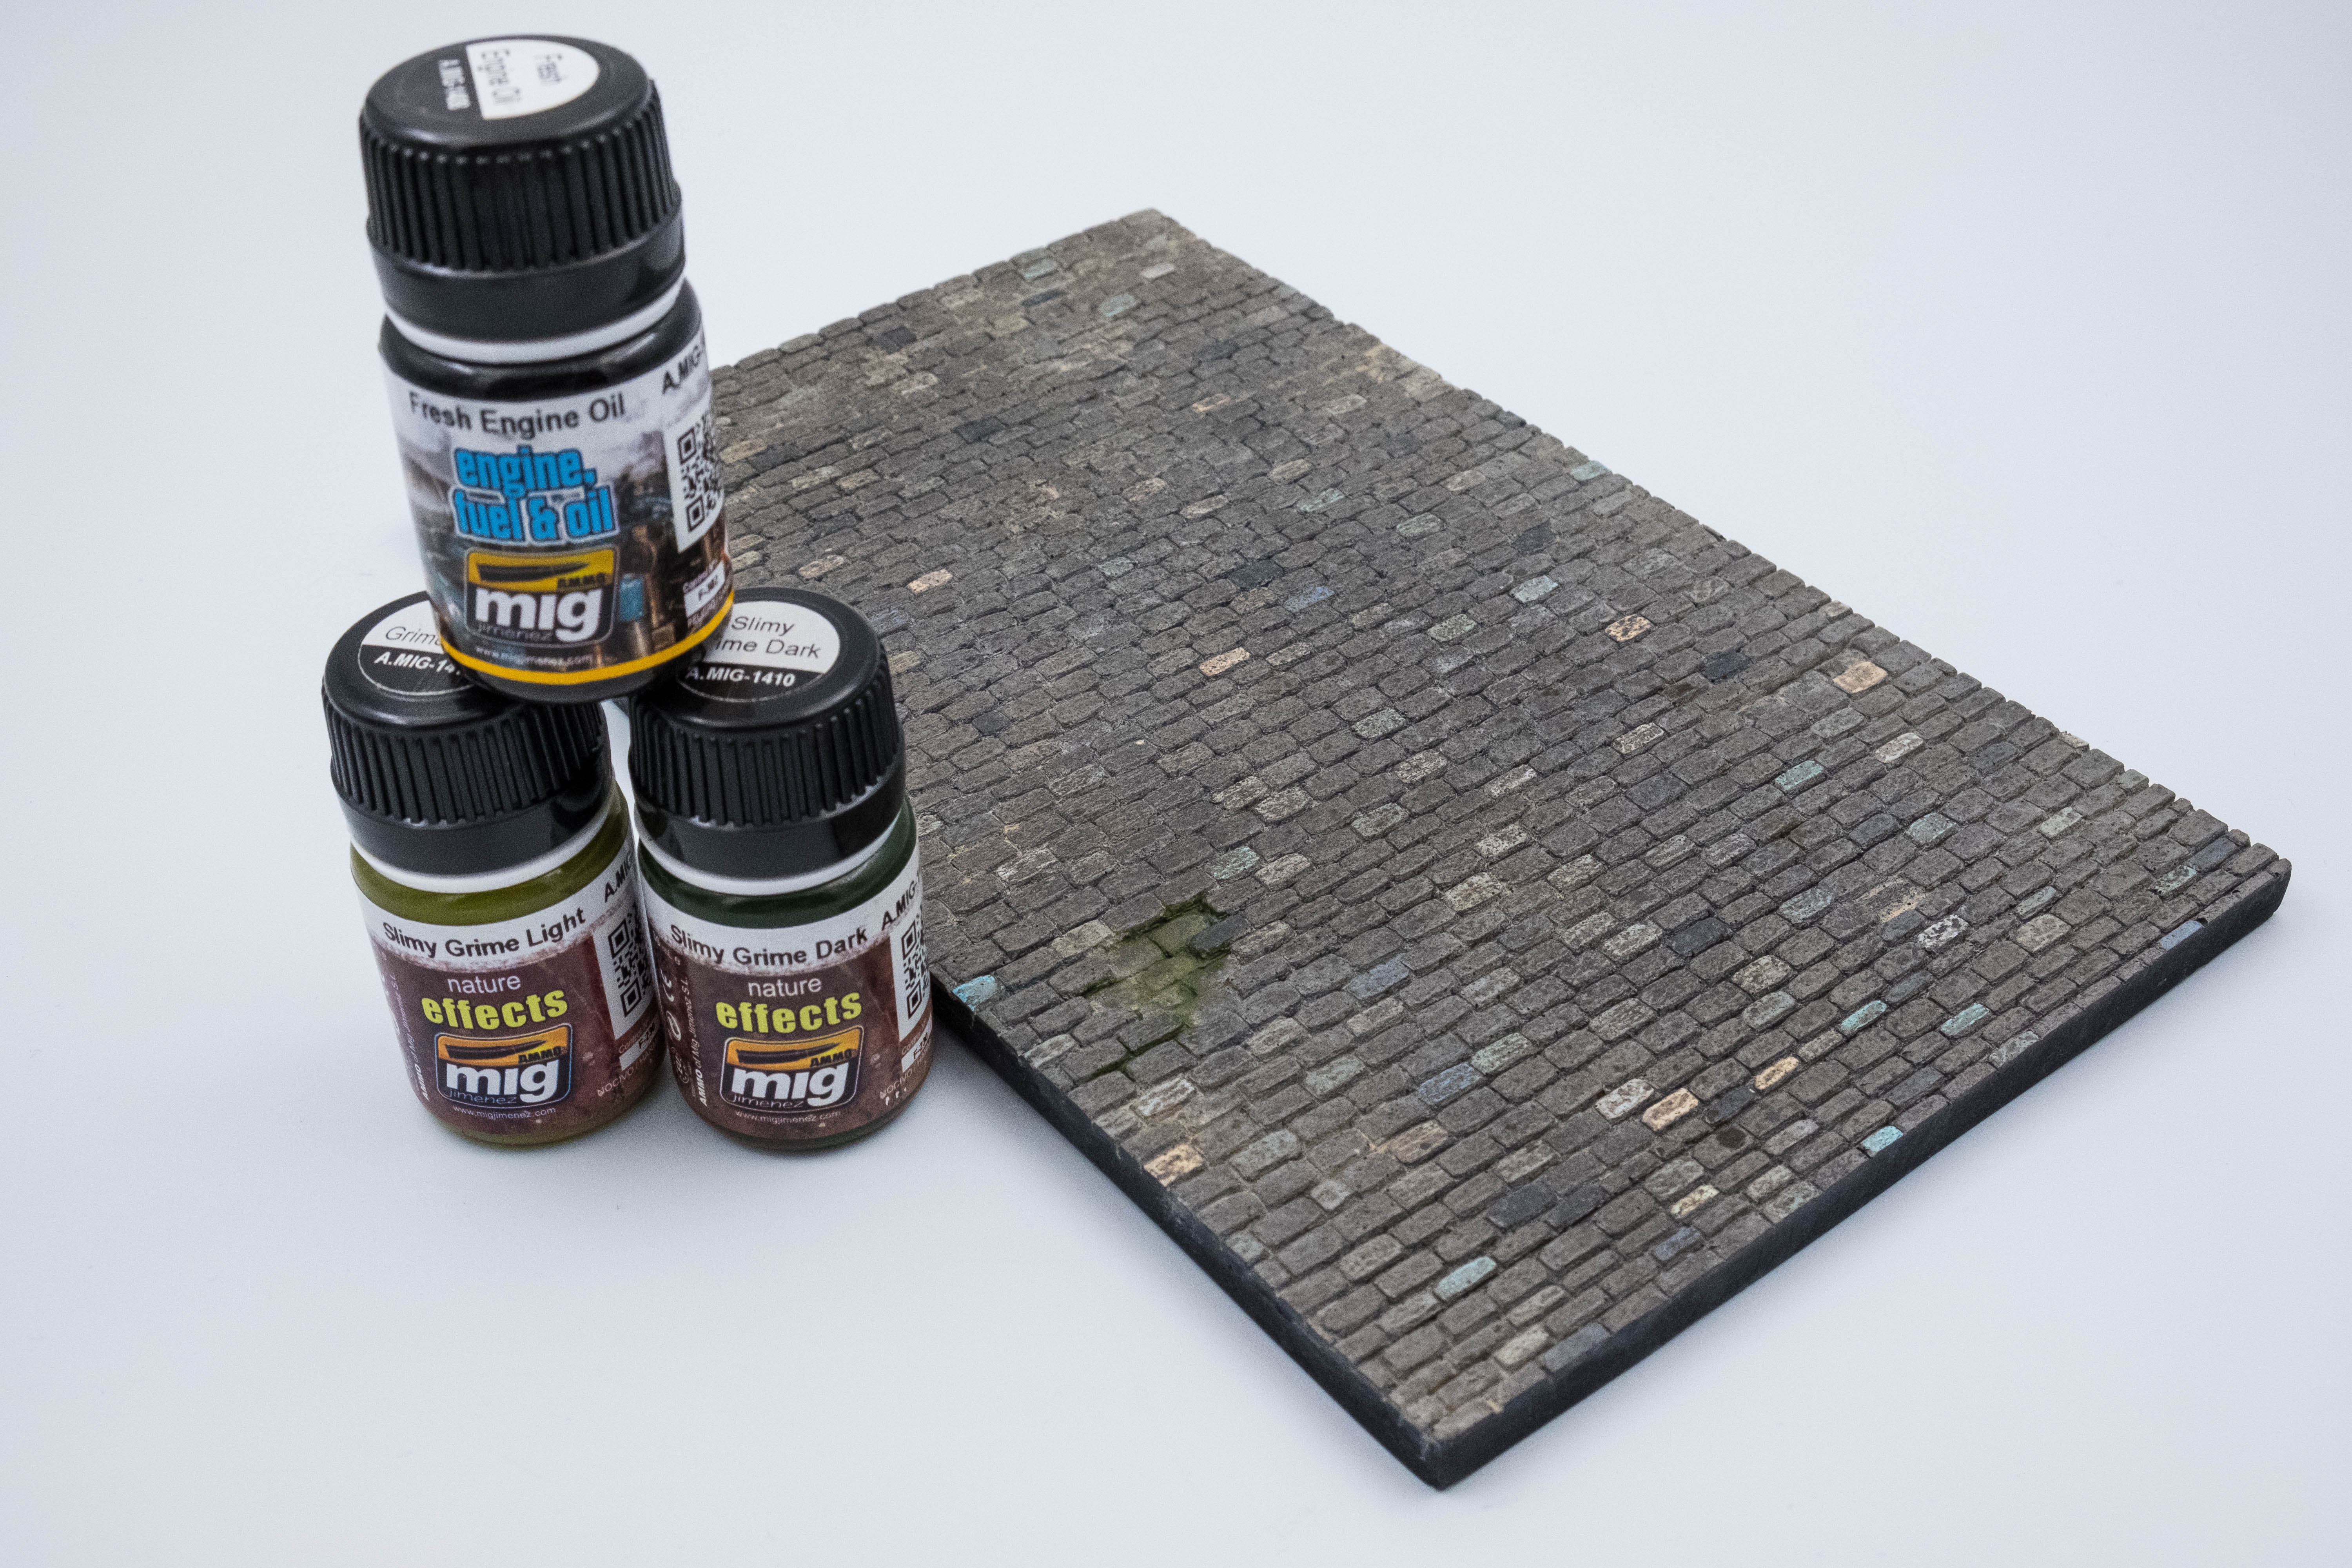
With a mold made, the base could now be cast in resin and painted. With the help of reference images and AK's Diorama FAQ, I set out on painting some of the bricks individually to add some variance to each one. Now that the bricks were painted, it was time to start weathering. I started out with doing a wash to tone down the colors and provide some unity between different colors. I wanted to go for a summertime road so I added some dust and topped it off with some oil stains and moss/grime hiding in the low spots. I showed each of the paints I used at each step because if you're like me, I had no clue what to do when painting the cobblestones.
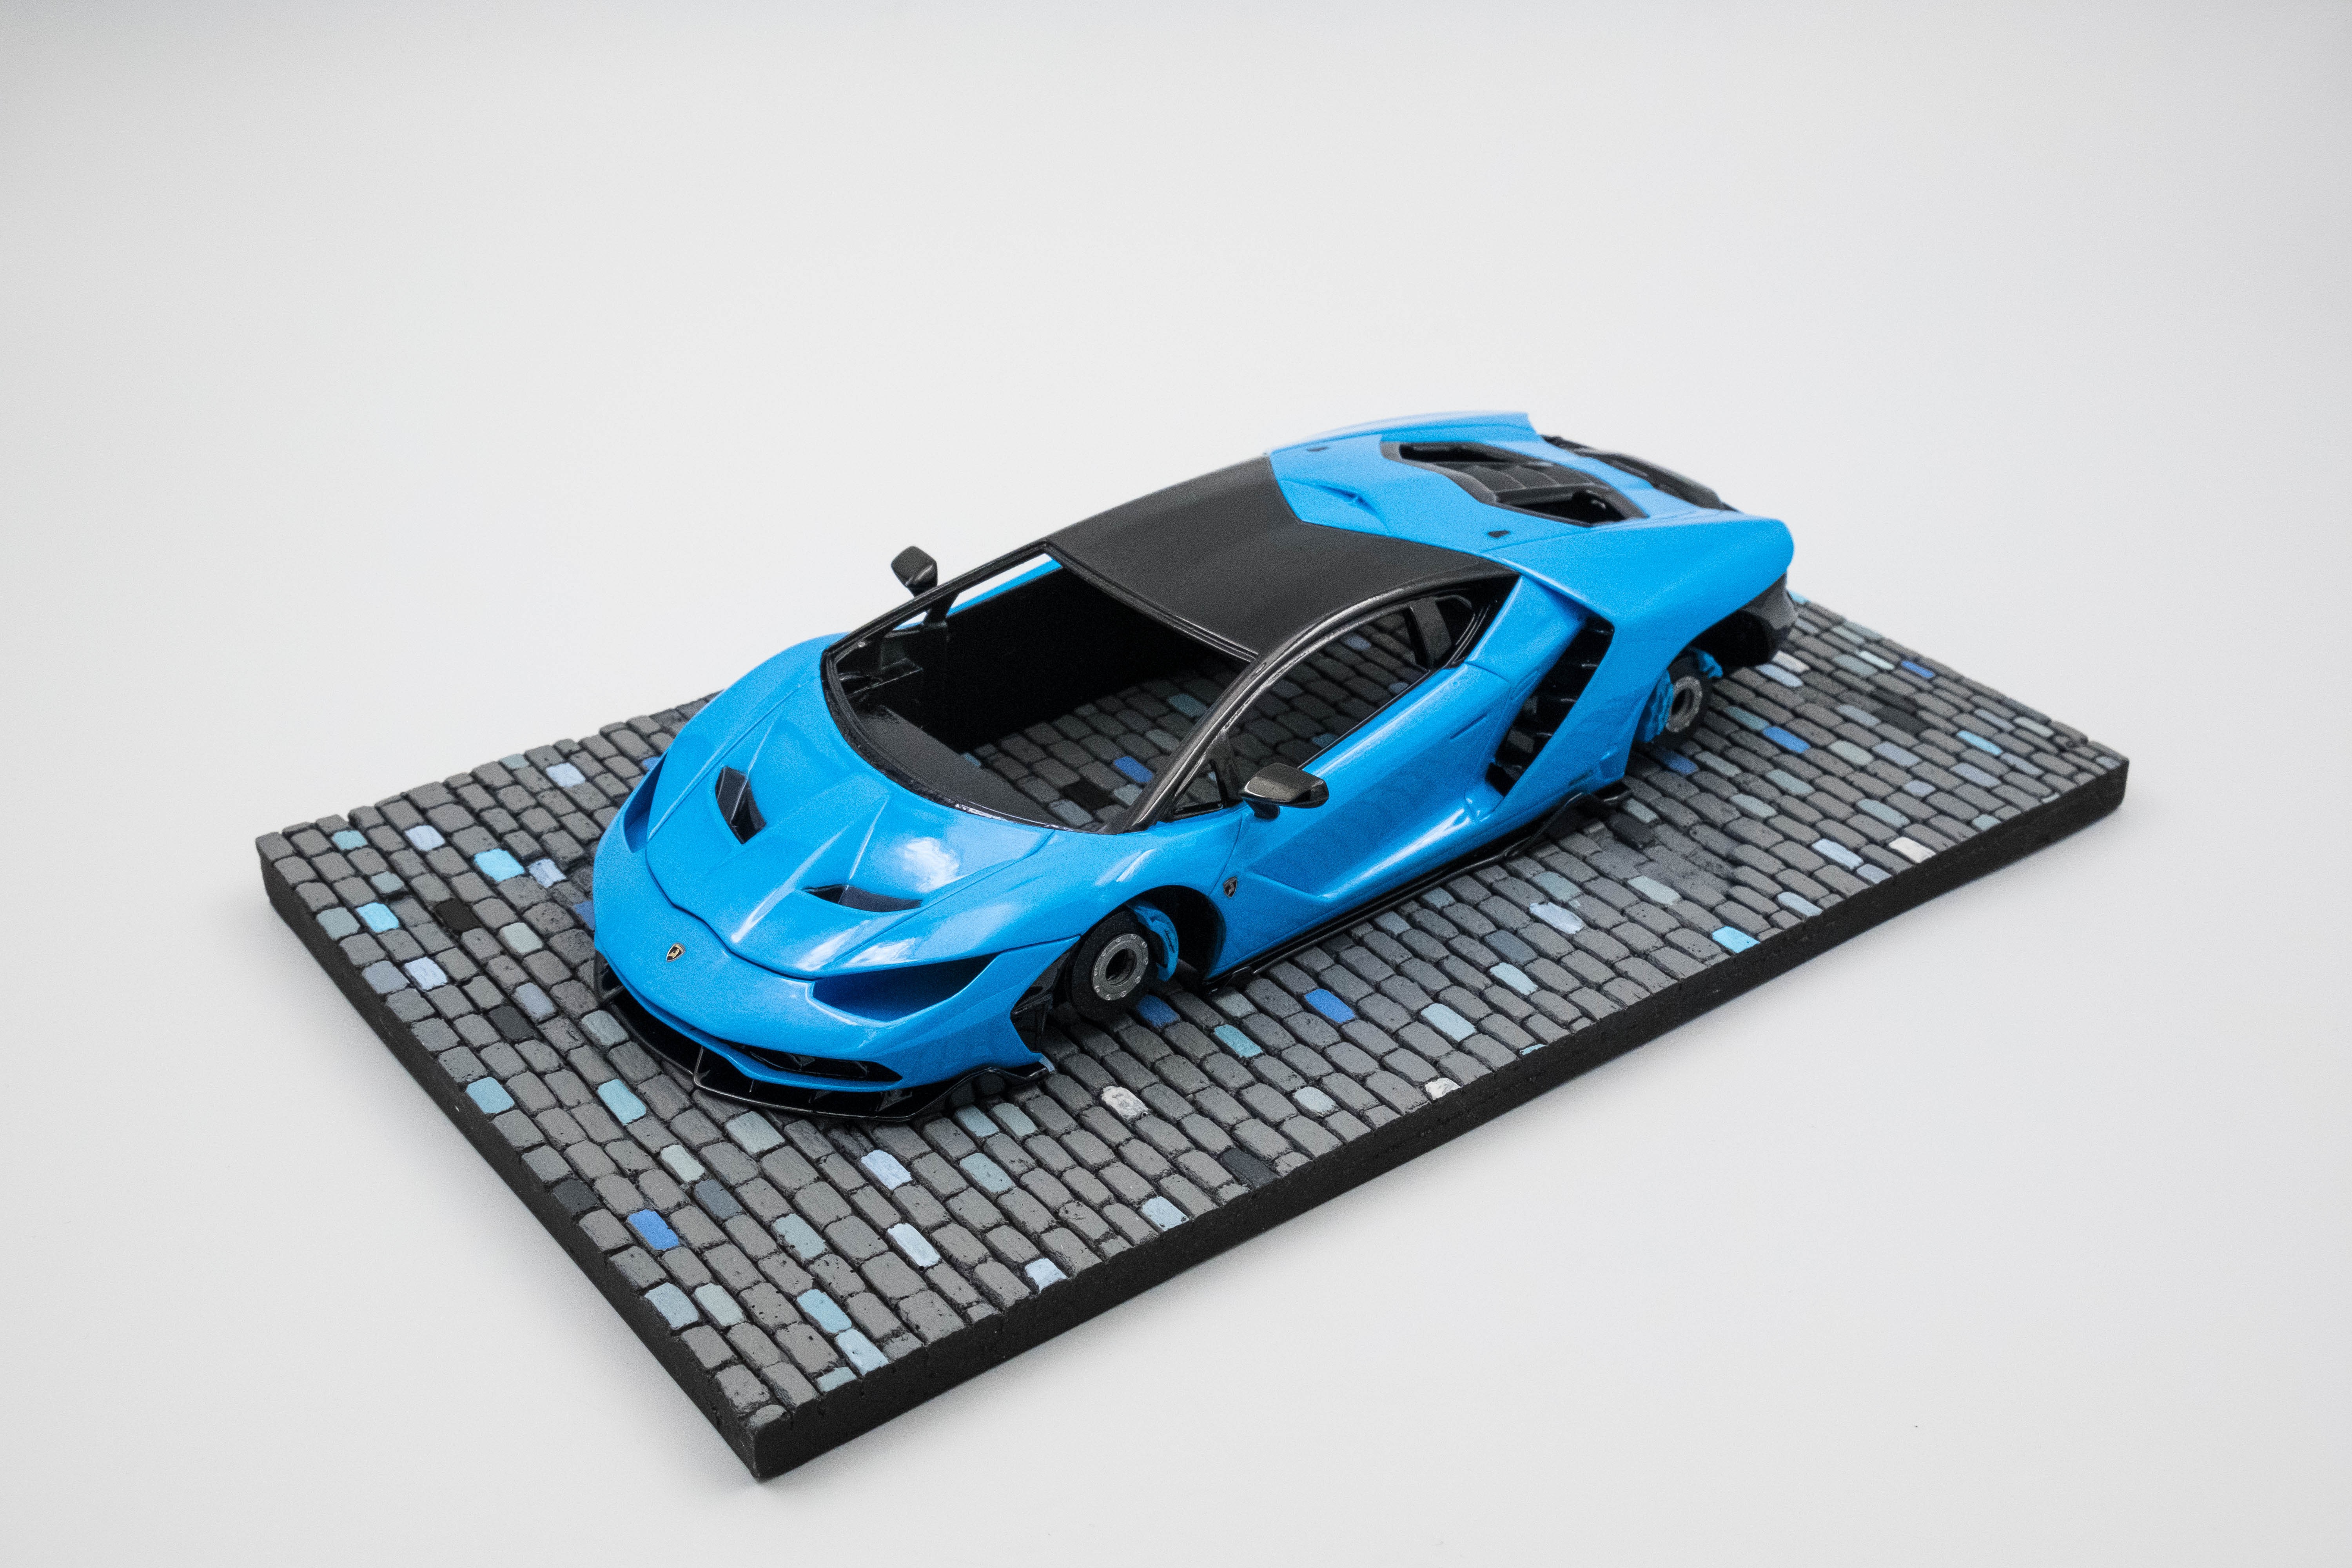
Now that the base is finished, it was time to marry the car to the base and wrap it up. Overall it was a fun build and believe it or not, I quite enjoyed carving all the bricks. I'm really happy with how the overall scene came out and I hope you like looking at it as much as I do. If you want to make your own diorama using this base, it can be found on our website; mamodelworks.com
Thanks for following along and I hope you enjoyed seeing a behind the scenes of how we make some of our bases. I plan on doing more of these as we create more bases, and I look forward to your feedback.