

There are many techniques to attack painting, chipping and finally weathering different models to get the realistic feel we are looking for. We all learn these different techniques either from trial and error, reading articles and following builds online or if we are lucky enough, to have one or more of the so called "experts" show us some of the tricks.
Here is a "small" SBS on Painting, rusting, Hair Spray/Chipping Fluids, weathering in layers to help understand the use of some products and the applications of layers to help bring depth to a project. I am no expert by any means. I have only picked up some tricks here and there and want to help some who wants to learn the basics to rusting and weathering. So, if you wanted to try and rust an old model or tried and failed or just want to learn one more tool to help you get there, I hope this will help some understand a few processes in making, painting and finally weathering.
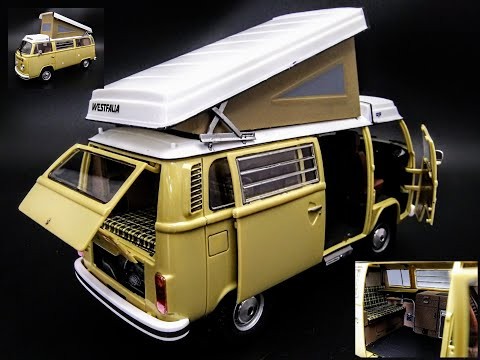
First thing that needs to be understood, and not everyone will agree with this, is that you do not always need the expensive kit that is loaded with parts and tons of PE to have fun and finally create something you can be happy with. This kit was given to me by a friend and I think he paid $5 USD. Worth it all day long!!
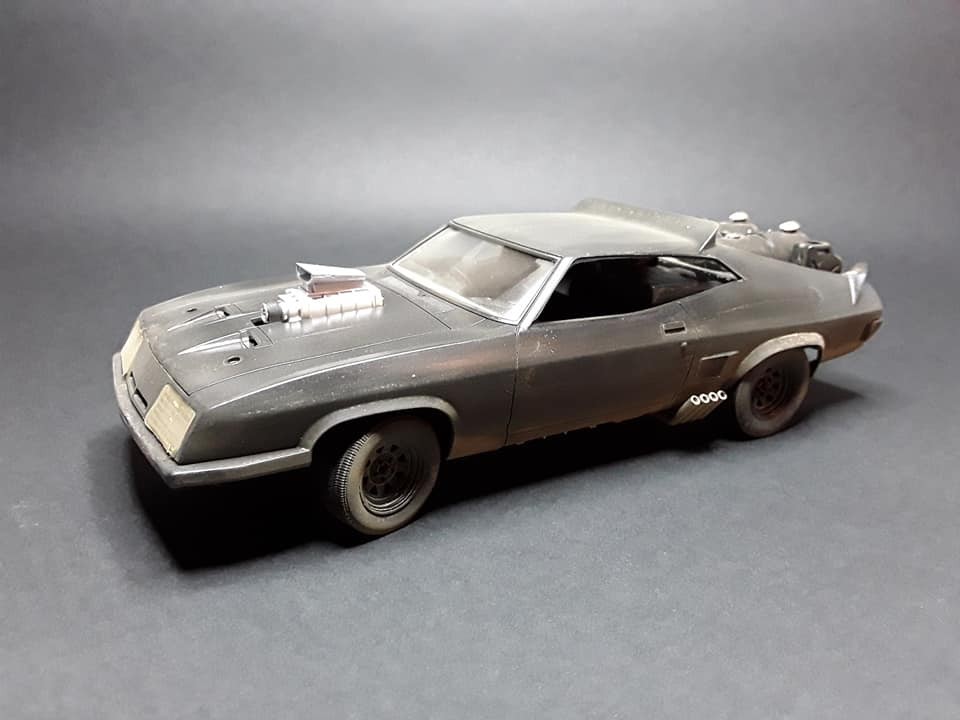
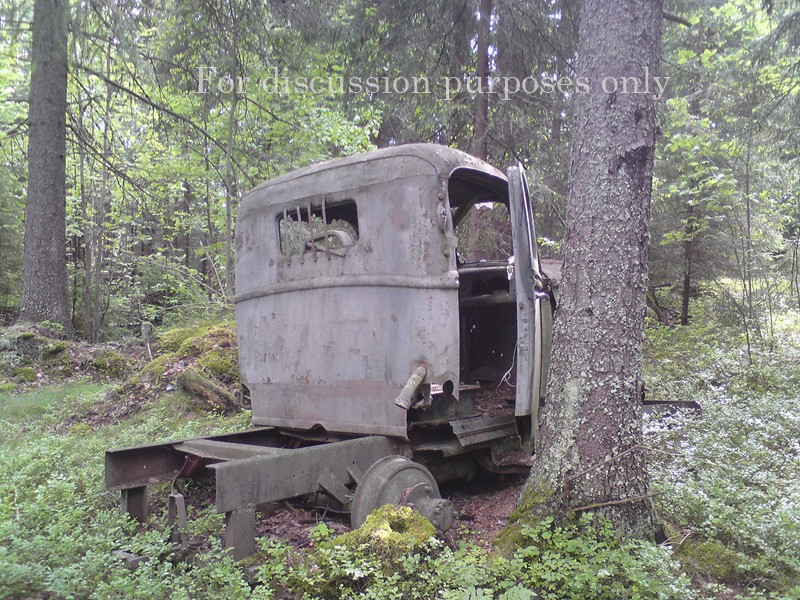
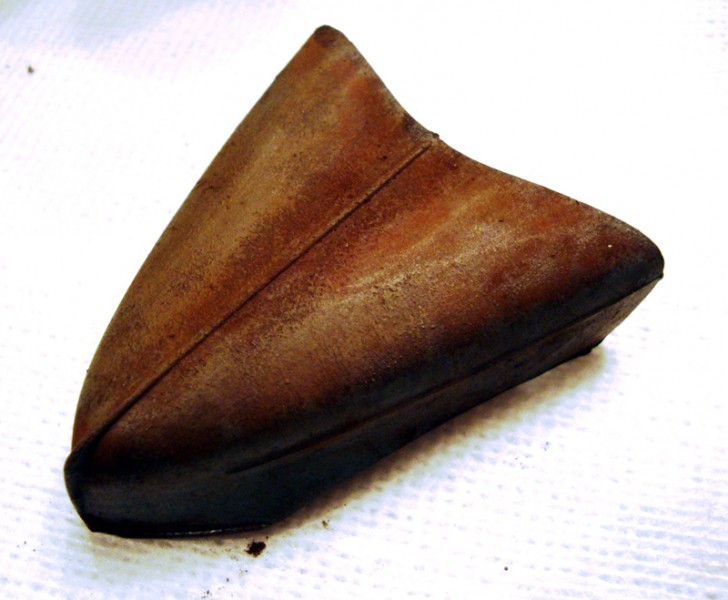
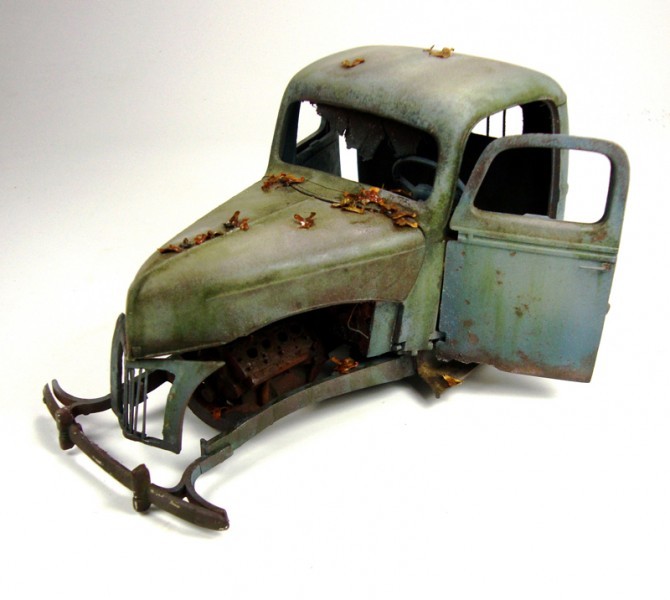
The Inspiration
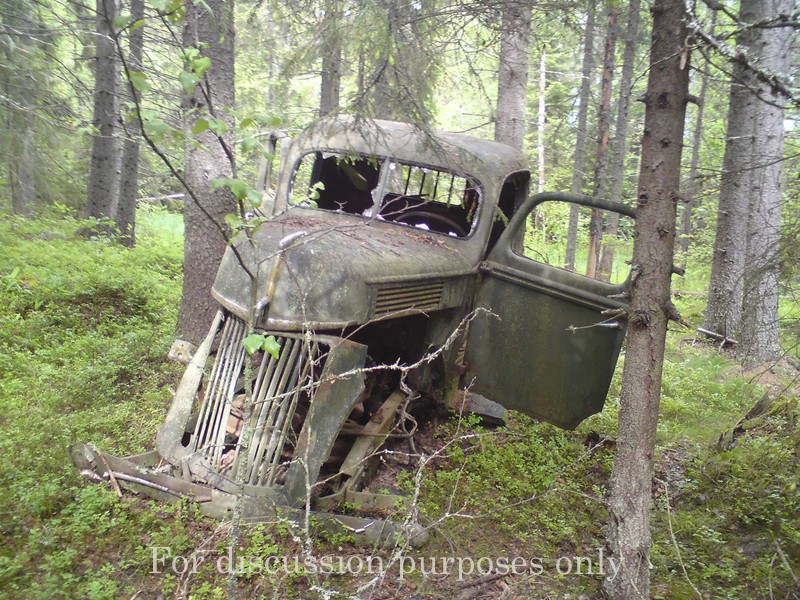
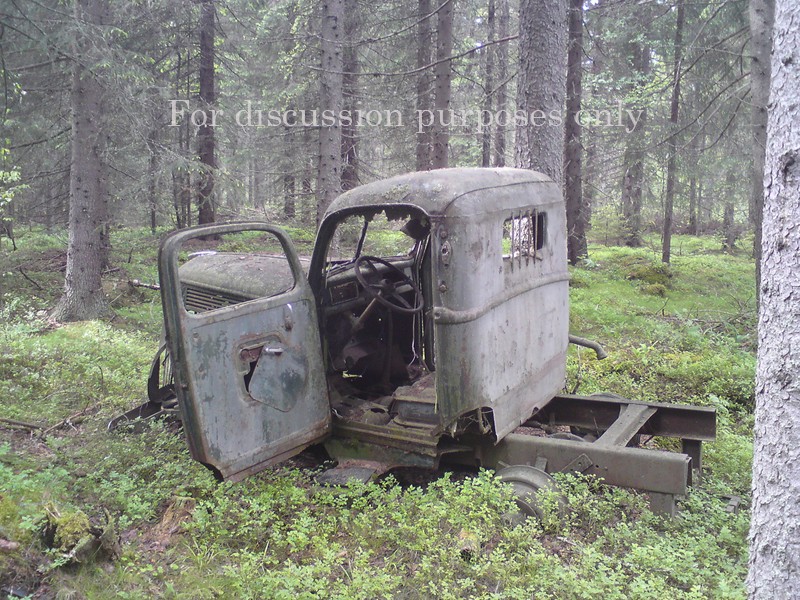
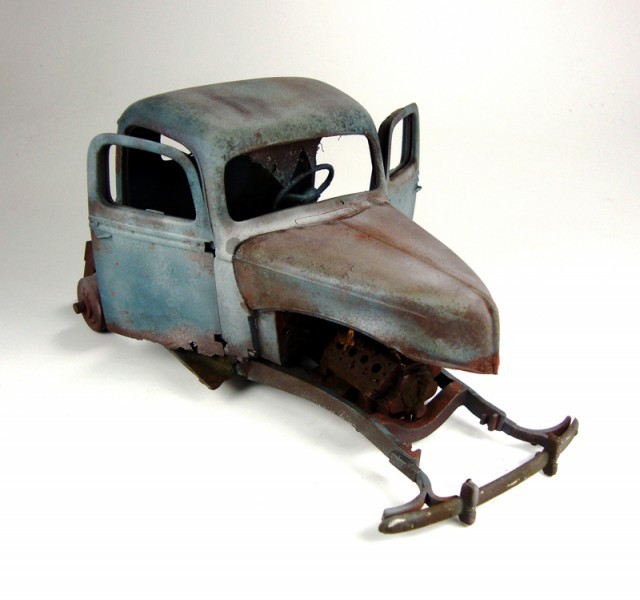
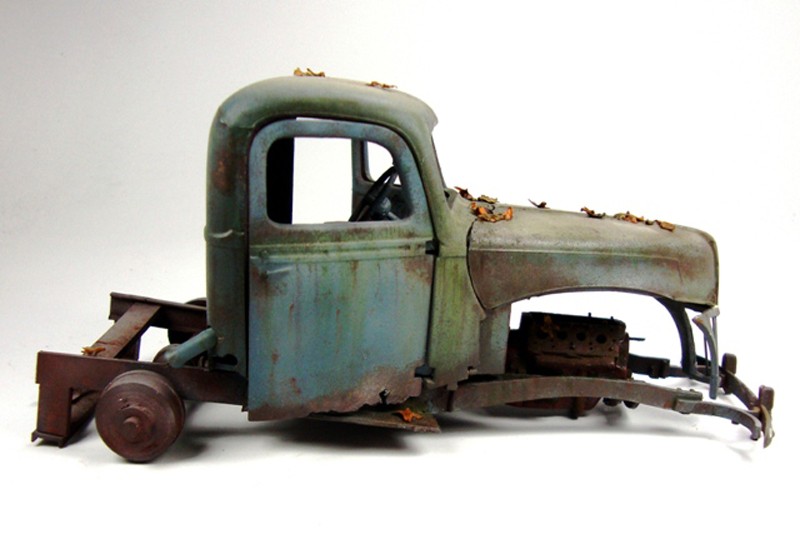
I found 5 outstanding shots of this truck online. With the old kit, some inspiration and some time, anything is possible. It is time to dig in and have at it.
At this point the hardest part for most will occur...the cut!
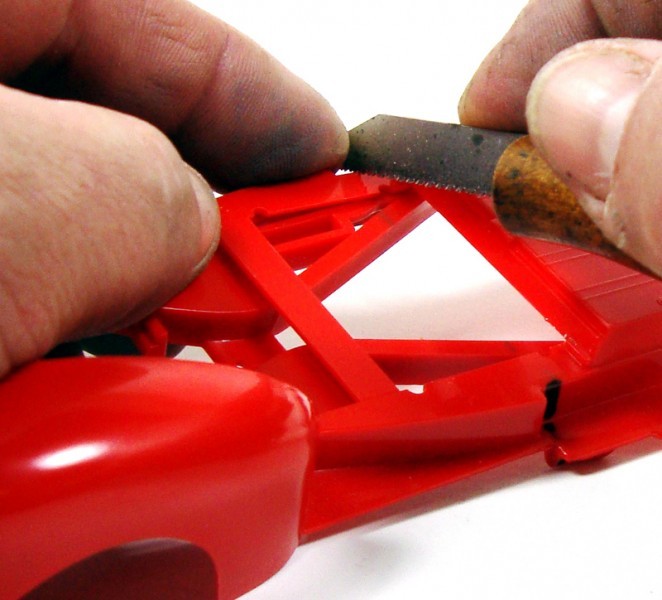
Committing to actually cutting a perfectly good model is the hardest obstacle any modeler will encounter when building. My only advice is that first, anything can be fixed with enough plastic and glue and second is to just DO IT! It gets easier. Before you know it you will want to cut apart that $70 Dragon kit and wreck something.
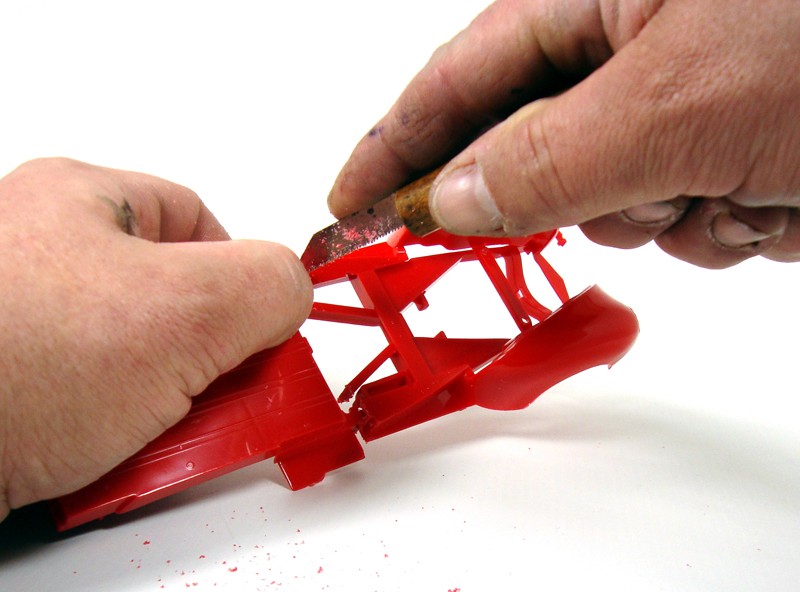

After separating a few parts the building is soon to begin. We will need to add some damage to show rusting later on in the painting stages. I took my cordless Dremel and with an engraving tip ground various areas that would be damaged on the truck from being abandoned in the woods.
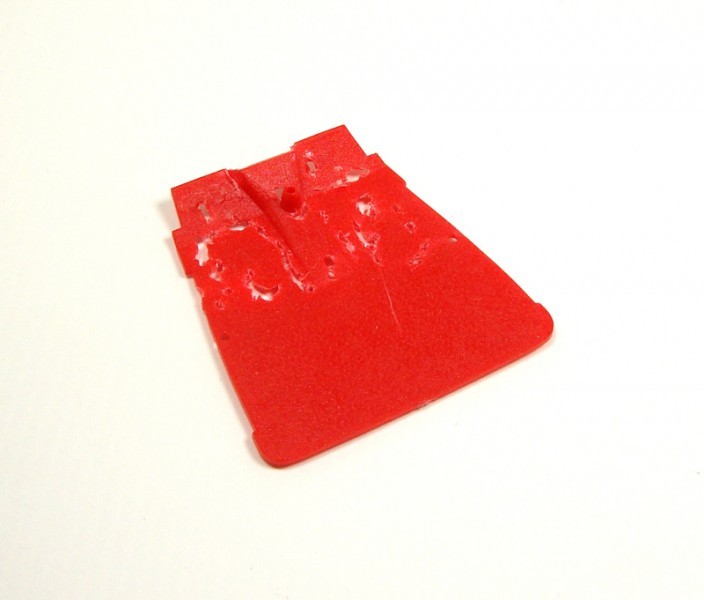
The floor boards would be rotted out from sitting close to the ground, and using the picture as references for some other damages, I moved forward.
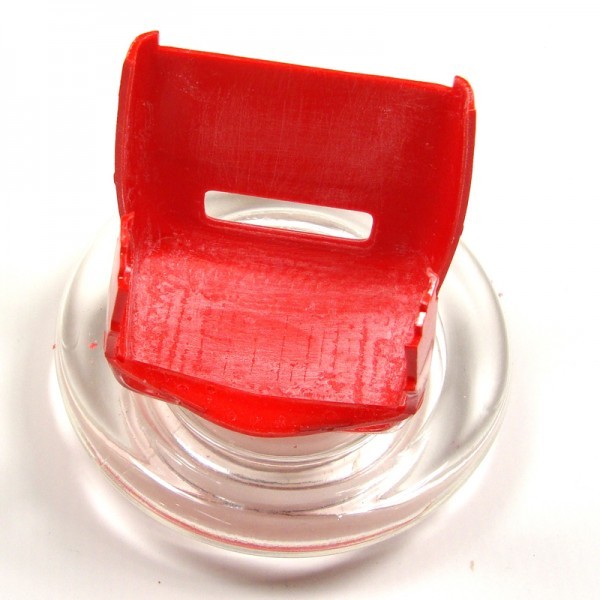
At the moment I am attaching some parts instead of breaking them. I added the section of the chassis to the floorboards.

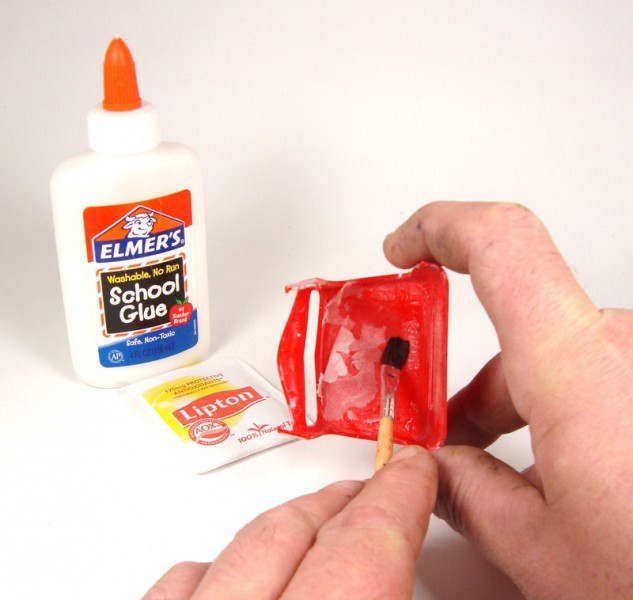
I wanted to create the torn headliner that can be seen in one of the pictures. I cut apart a teabag and with a little PVA began gluing the headliner in place. Tea bags work great for this and even better for making tarps and blankets to add some realism to your builds.
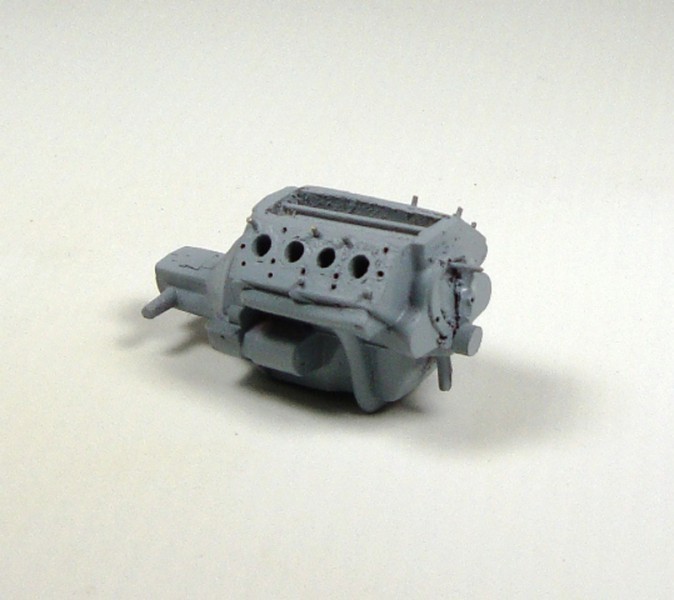
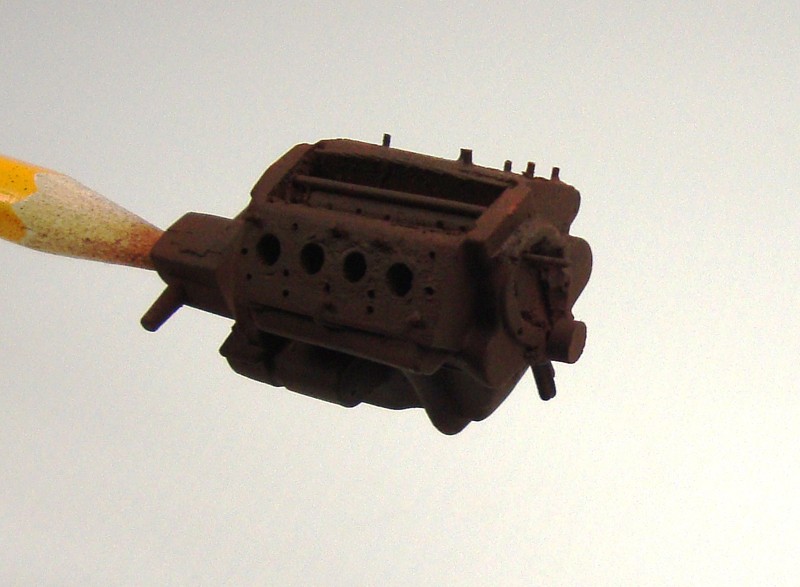
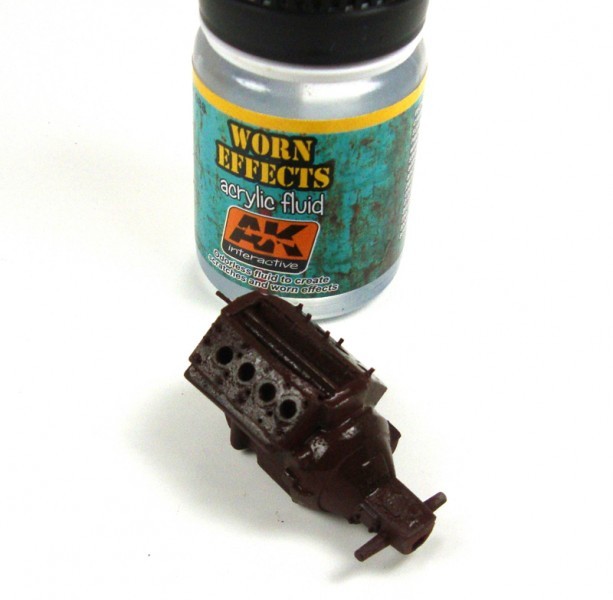
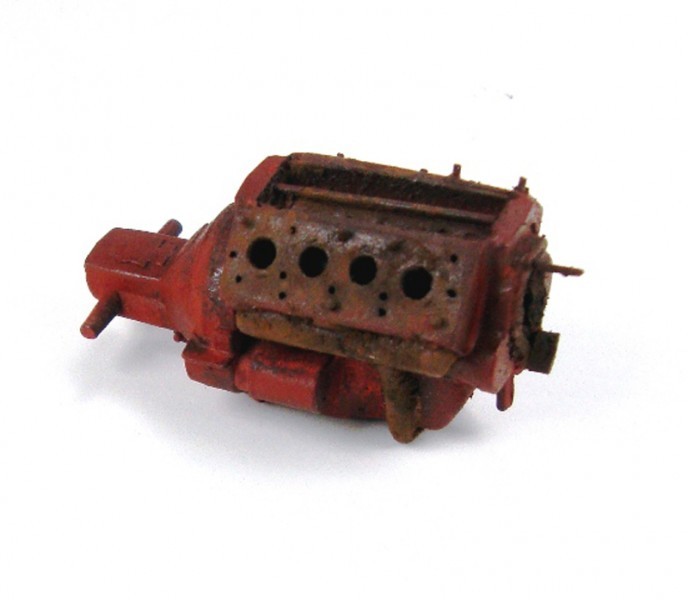
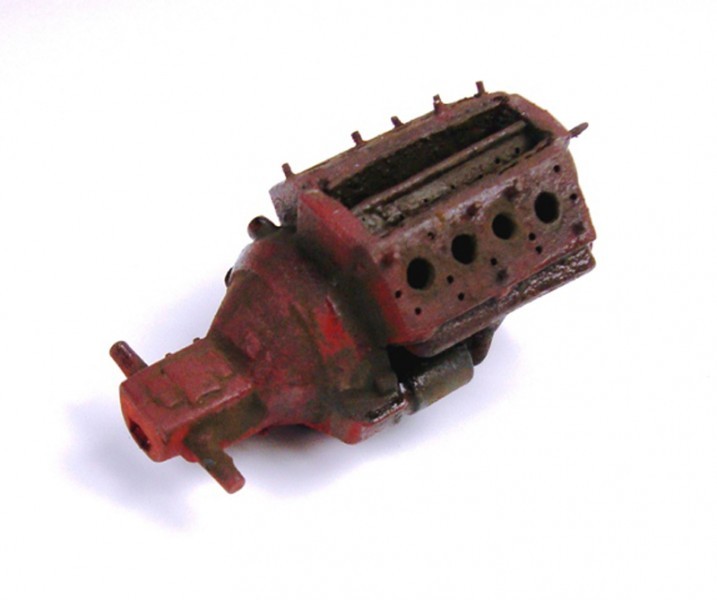
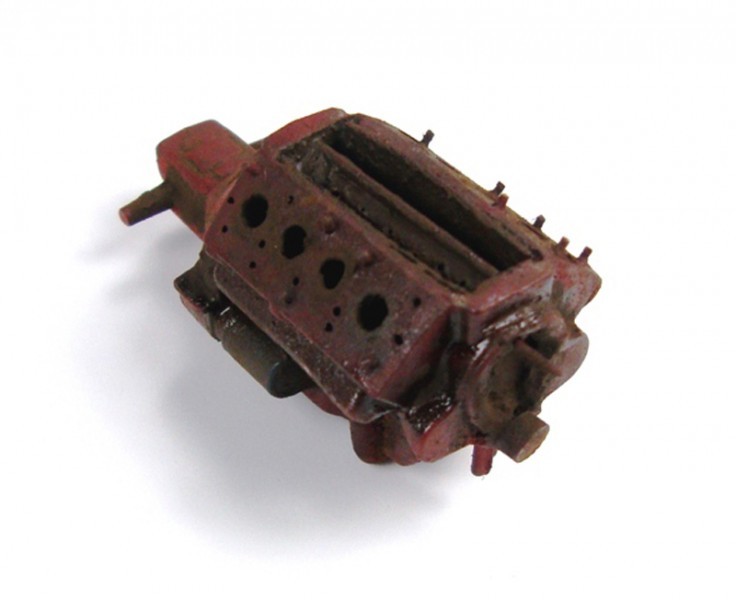
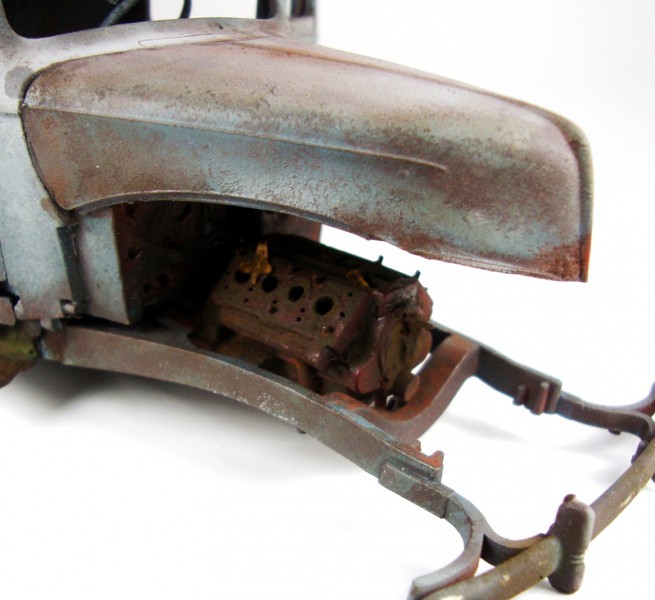
The Donkey...Lump...Motor, was next on the chopping block.
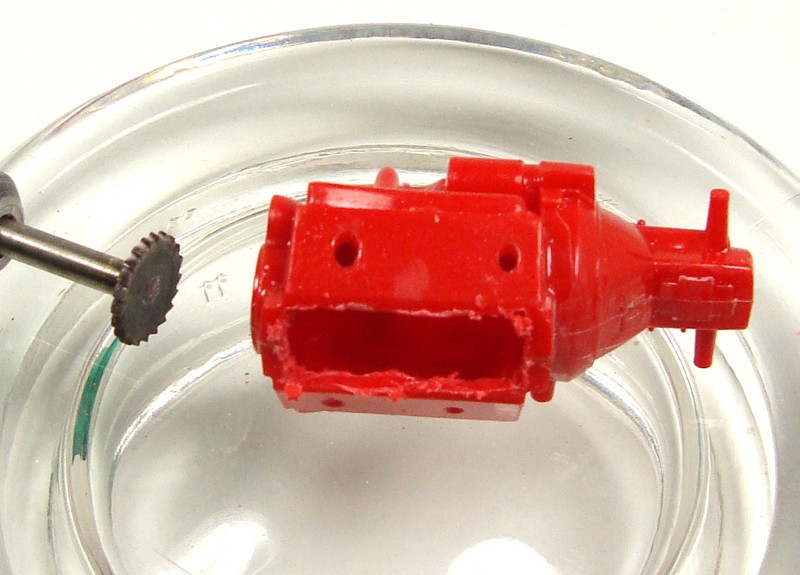
In an effort to speed this up, I cut out the intake manifold section, drilled out the cylinders added some small bobbles and the motor was ready.

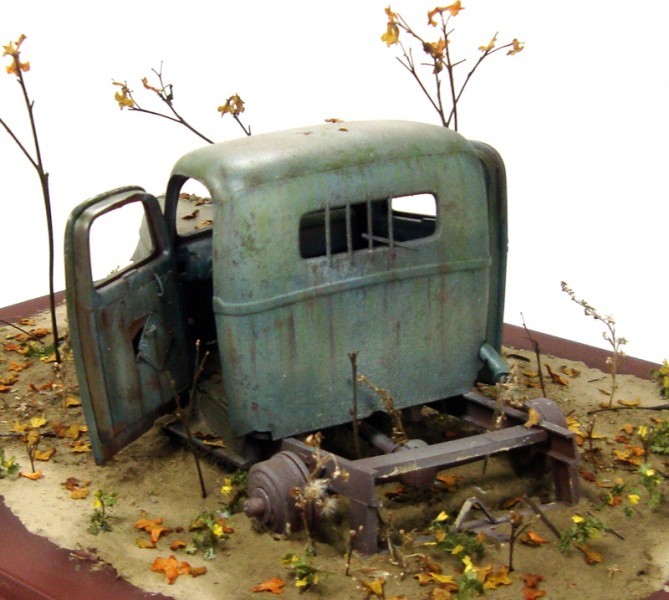
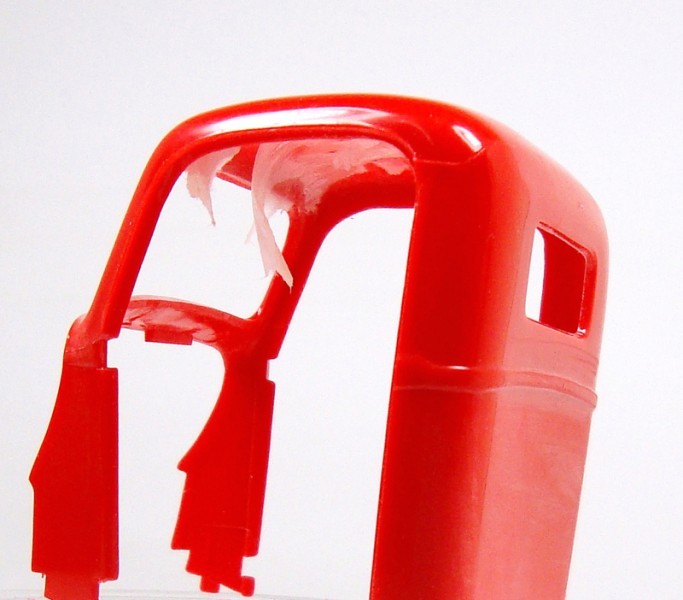
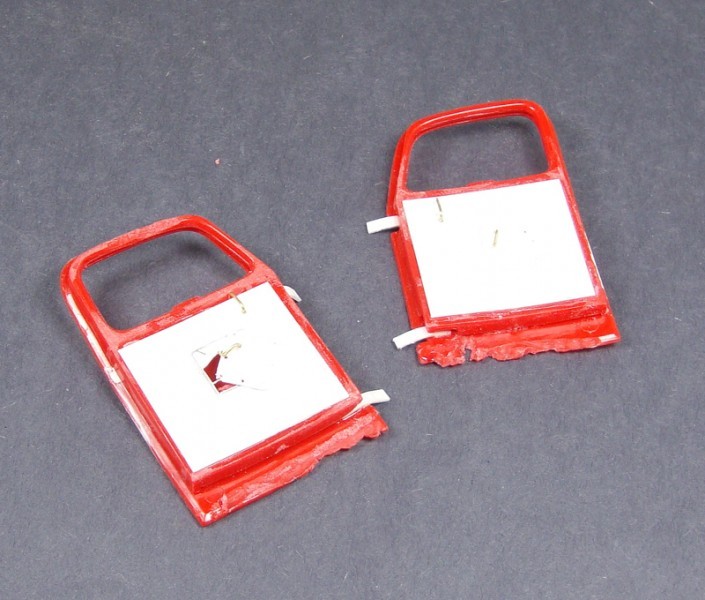
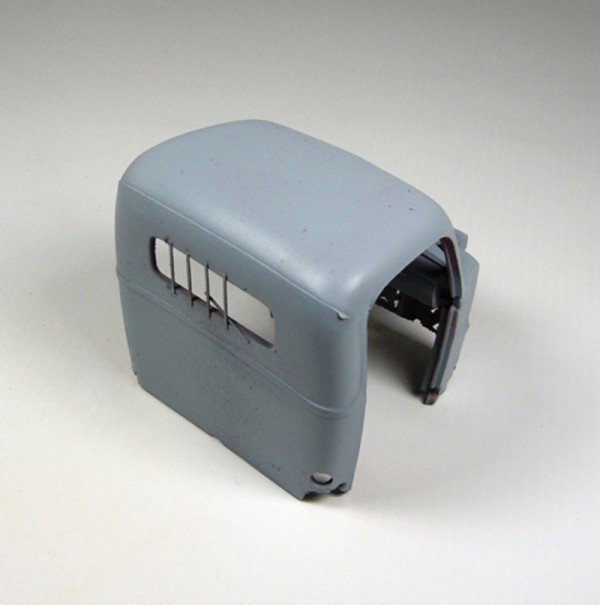
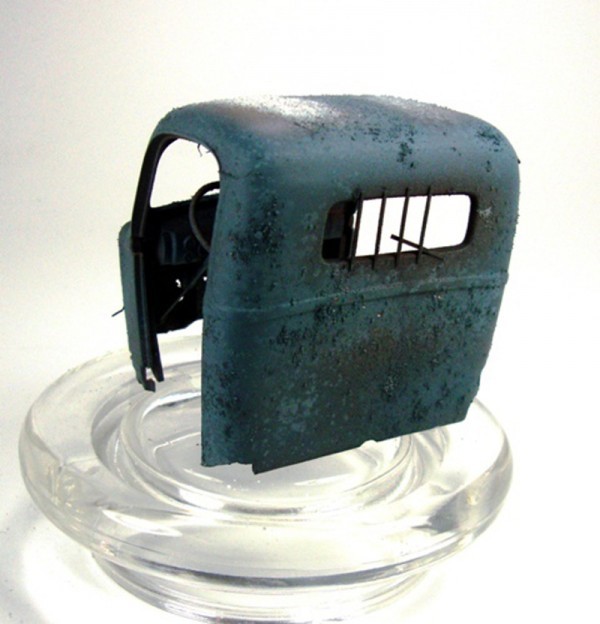
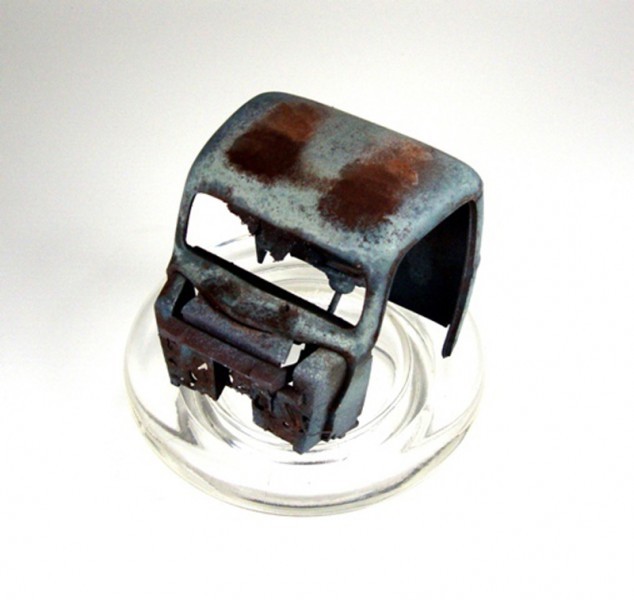
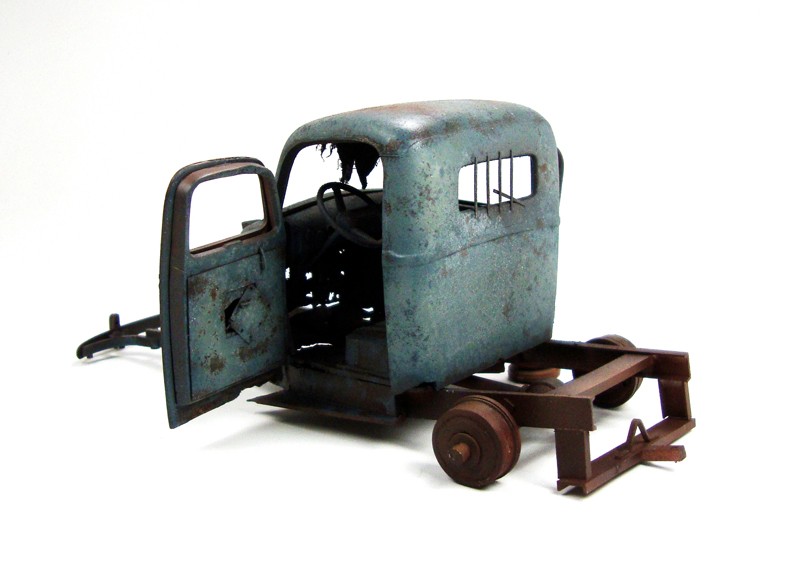
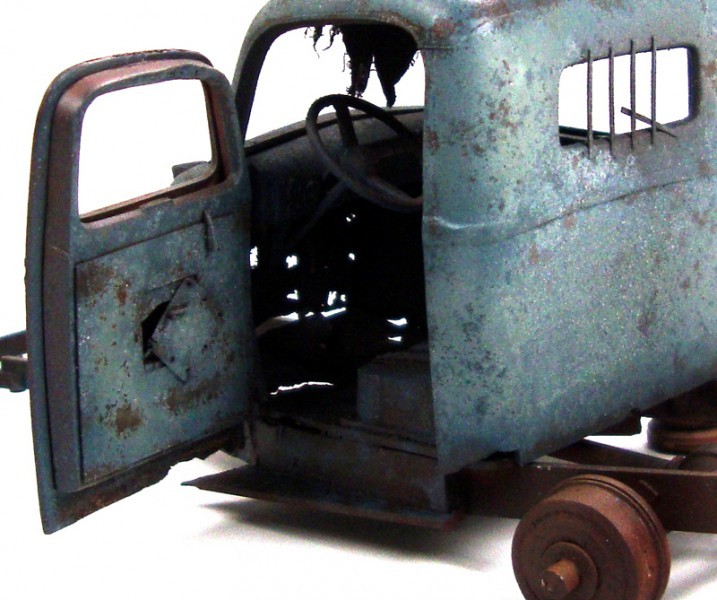
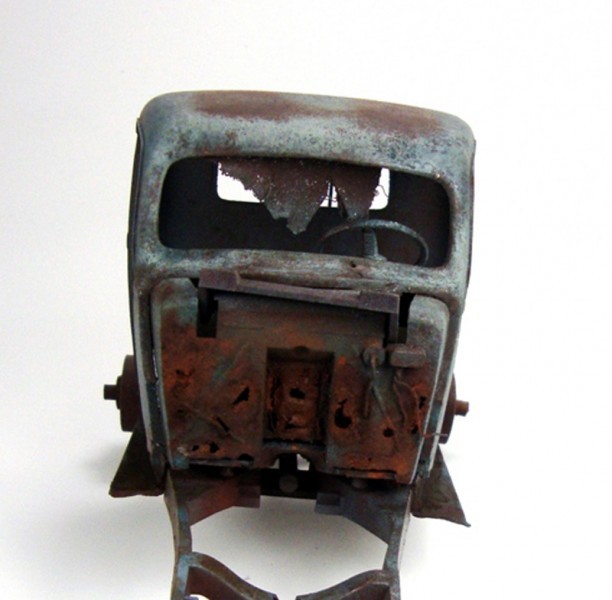
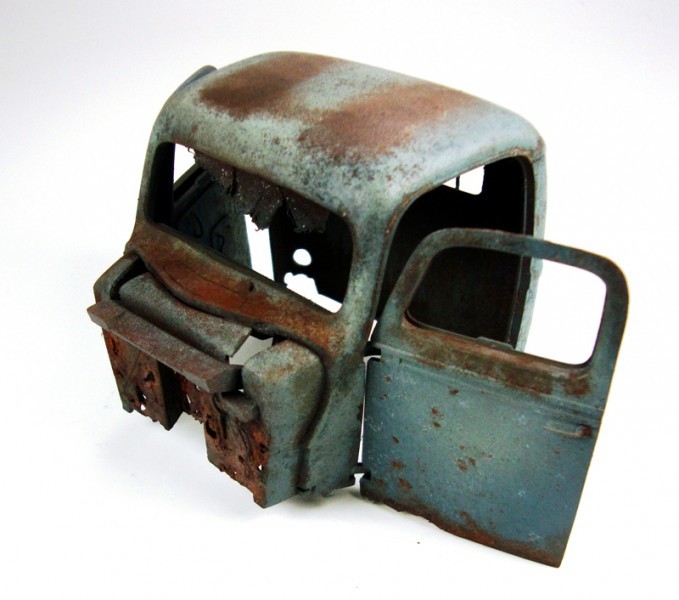
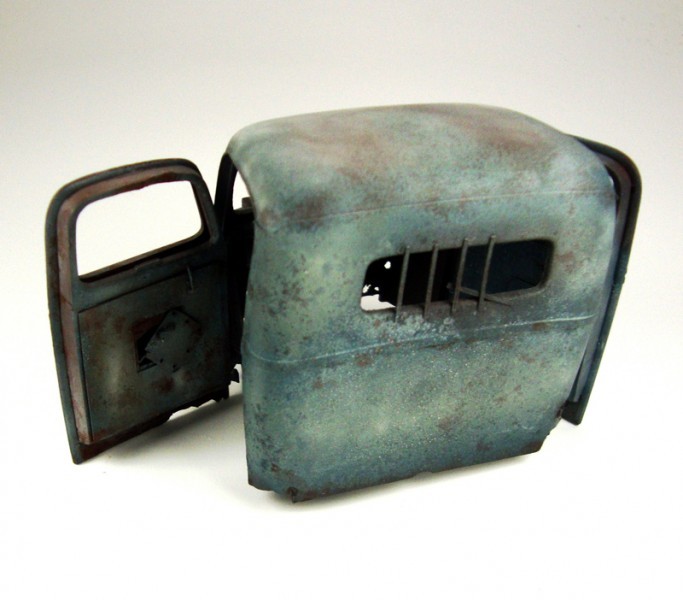
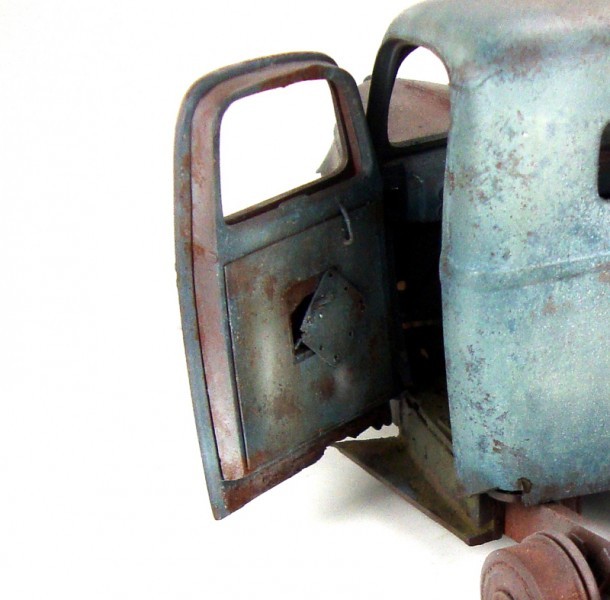
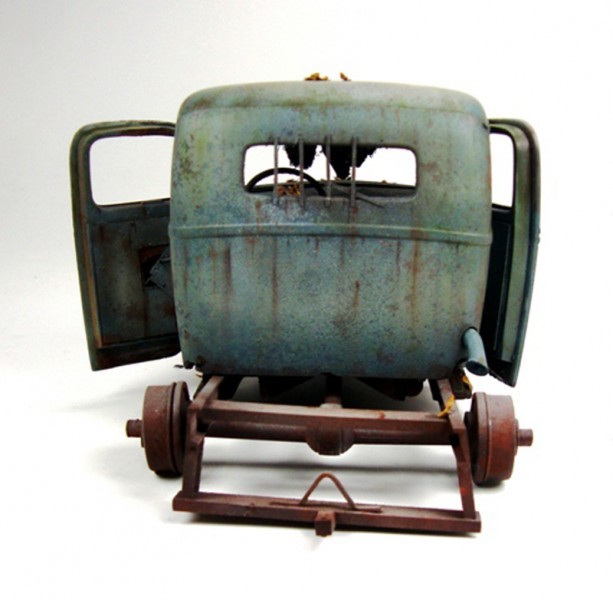
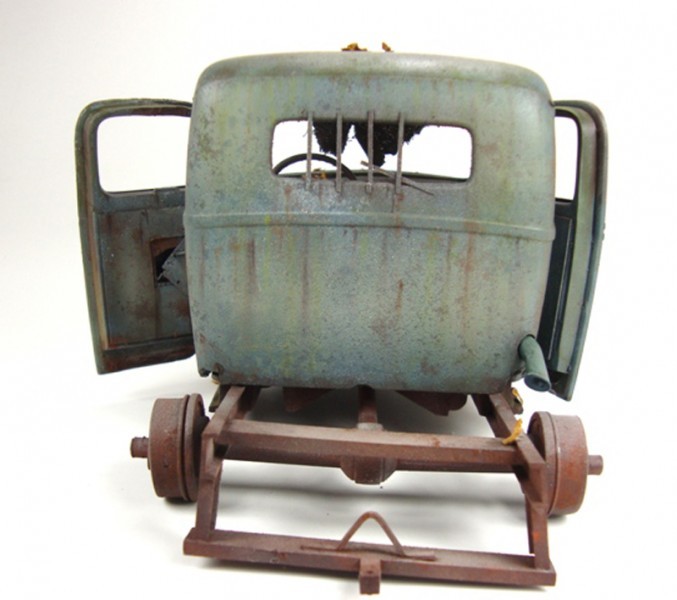
In the pictures there are a couple of distinct features I will try and duplicate somewhat. You can see the open driver's side door with the hanging panel and the bars on the rear window.

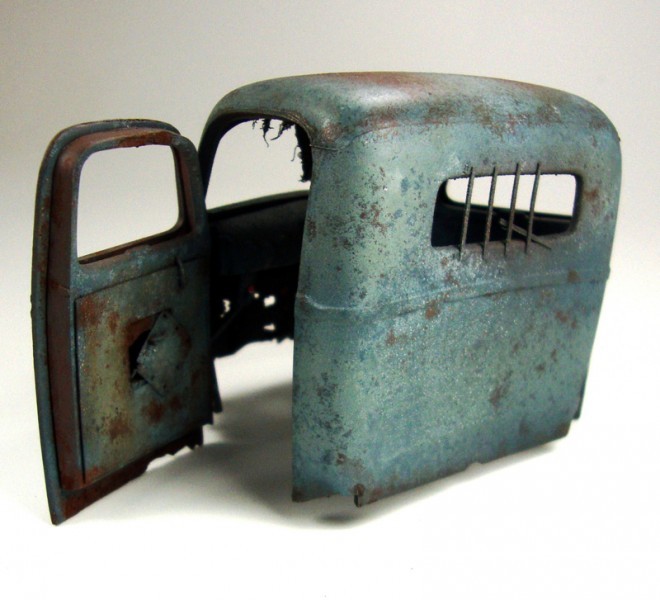
The rear window bars.
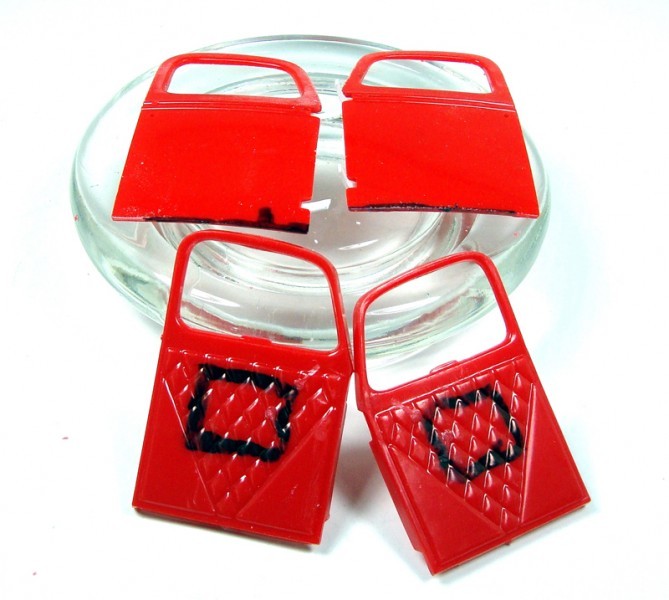
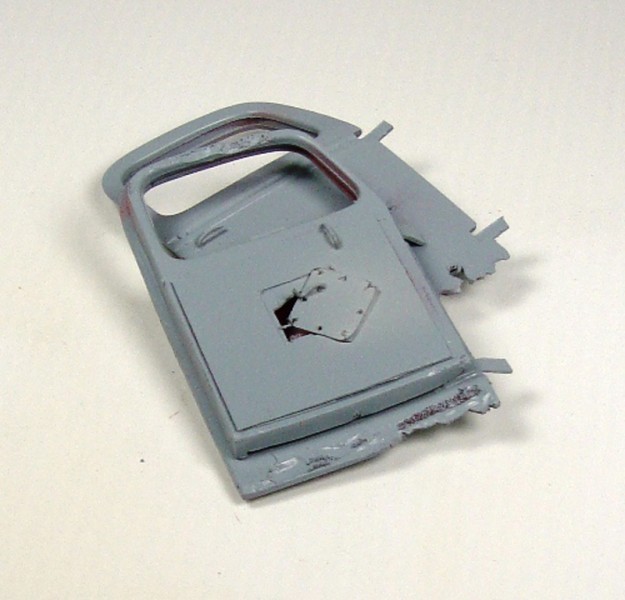
Last, I began chopping away at the doors.
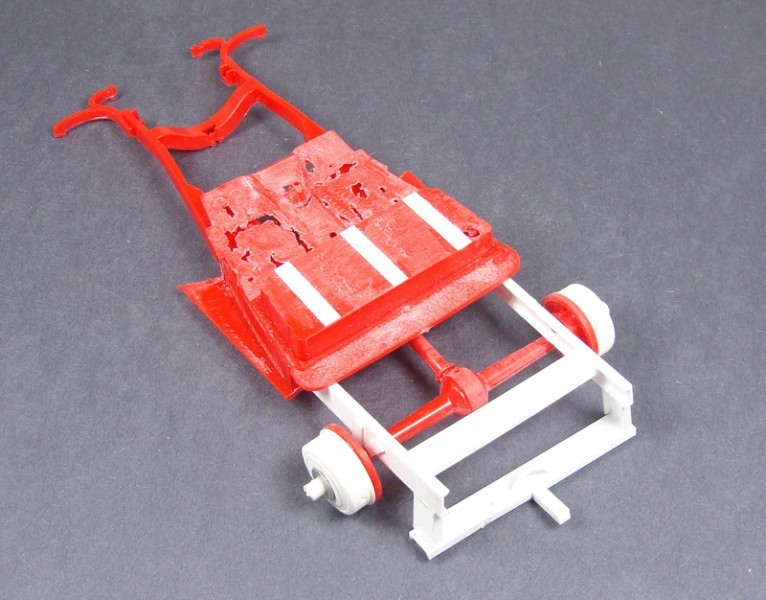
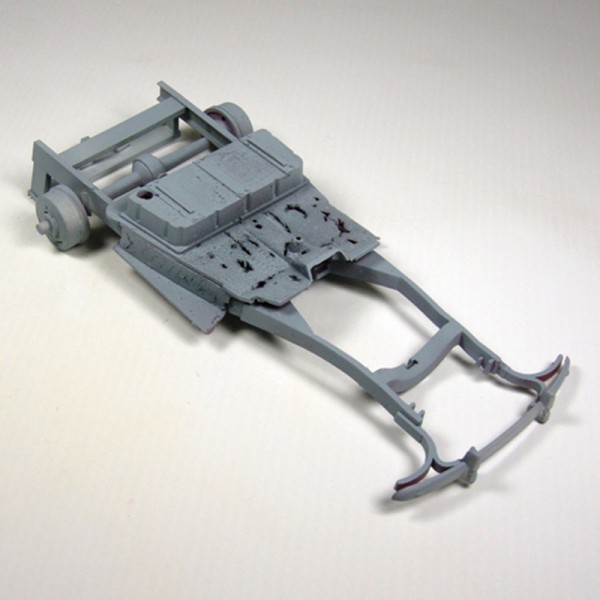
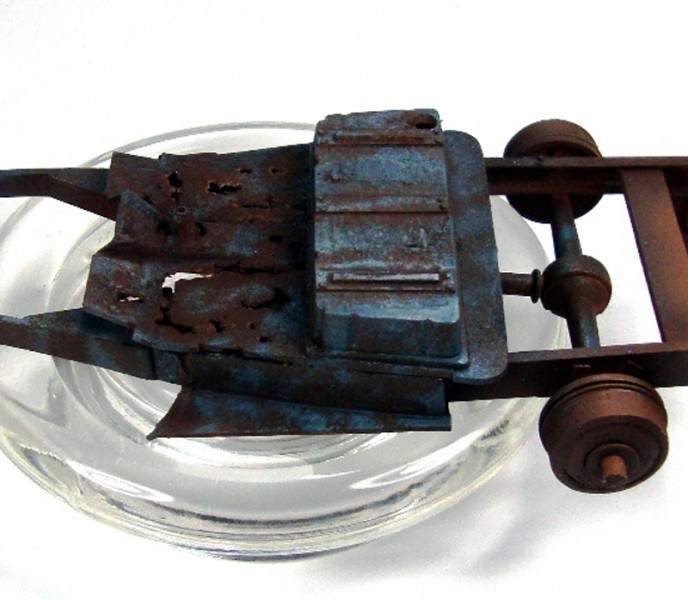
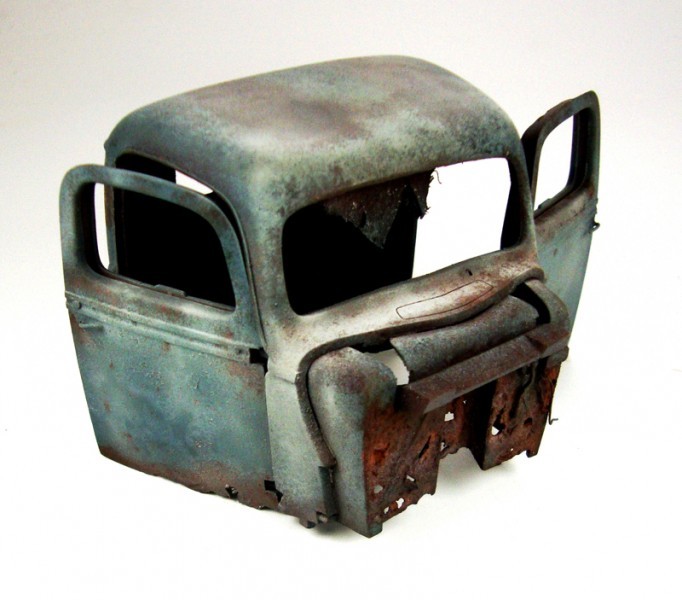
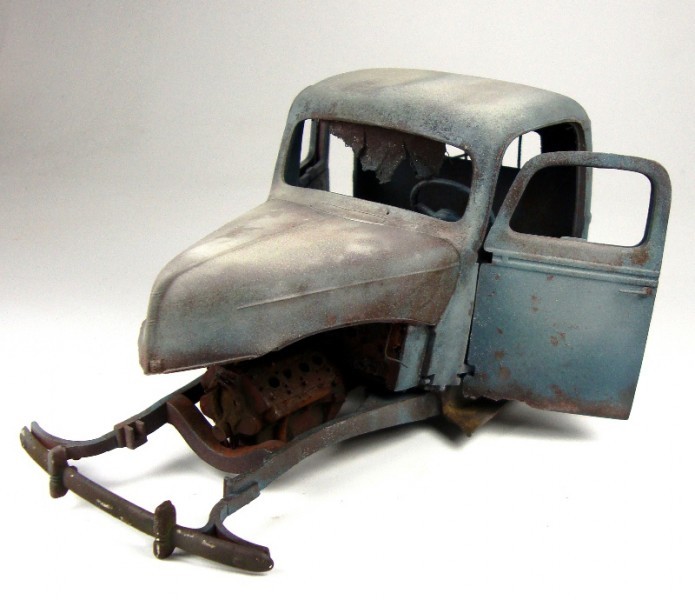
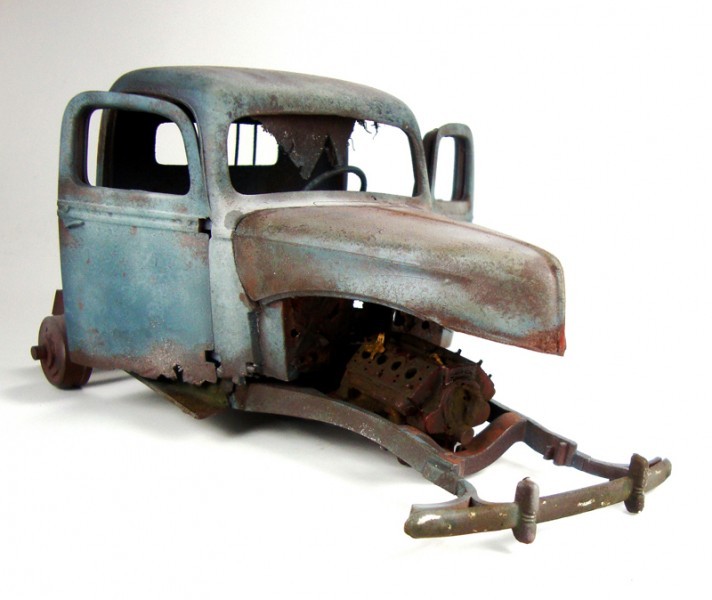
Finally, for the moment, the homemade steel framework that was added and then someone attached the rear axle to it. A little scratch work and everything is pretty much ready for some primer.
This is one of my favorite stages...Priming!! There something really nice about the clean appearance of the primer. What a great feeling to start slinging some paint.

Next up after the primer dries is laying down some base coat of rusting color. Any questions along the way on this, please feel free to ask. I will do my best to give, or get the answer!
It is time to apply a little base coat. This will be a rusty color that will show through in the form of scratches and chips and such. Here I started out with just Tamiya Flat Brown.
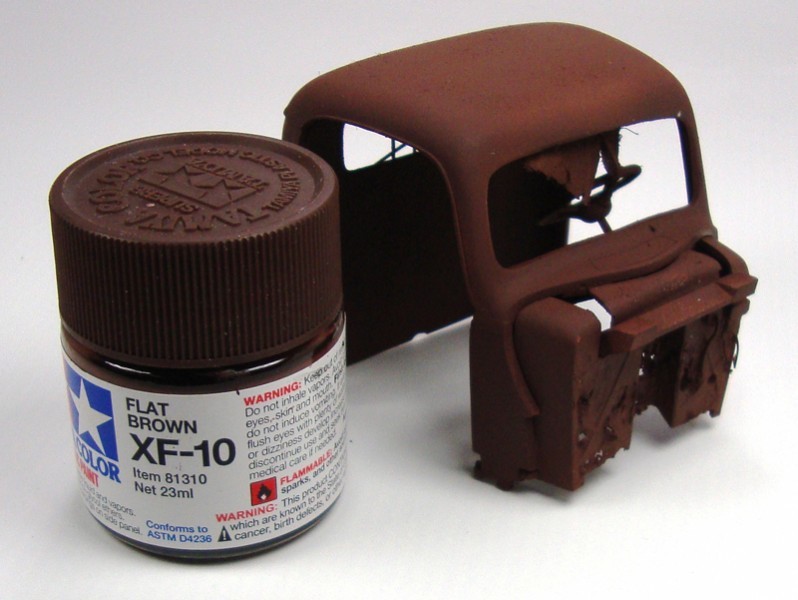
This is just a quick and easy rusty color straight out of the jar. Vallejo, Badger, LifeColor and countless other brands have this same color as well as specific "rust" colors. This is a preference call when choosing the color. Ask yourself if the rust needs to be lighter or darker, browner or more orange and so forth. This little planning will help later on when finishing your model.
The rust base color is merely a stepping stone at this point. Most dark browns will work to start. I like to mix right in the paint cup on the airbrush or a separate jar, a drop or two of white or orange...or even a drop of each just to lighten the initial coat. This modulation is similar to how metal will fade and weather without paint.
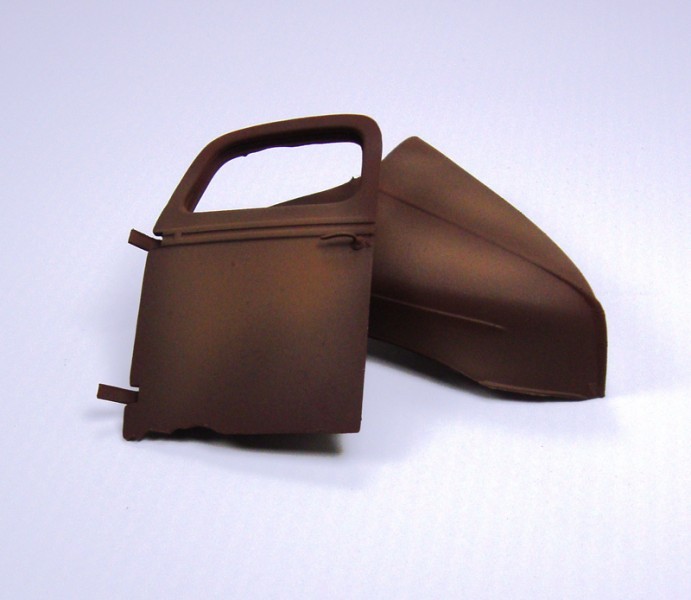
As you can see on the door and hood, the center of the panels are lightened. This is the same process as panel line shading with a black or dark grey and letting the darker section show to bring out the depth in the nooks and crannies.
In not spending a bunch of time on the base colors, as these can still be manipulated even more in later stages, we can move on to some important steps in painting and chipping. First, after your base has dried completely, you will want to protect the work you have done with a clear coat.
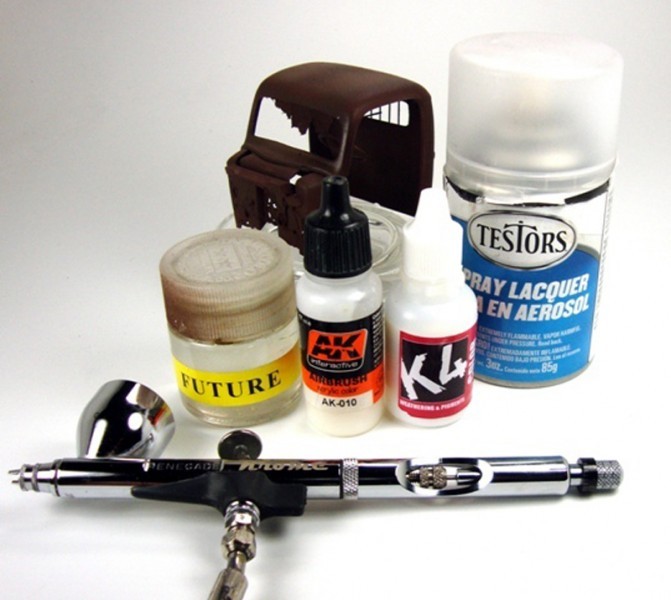
This is achieved many ways. Some like Future, others a matte finish and on and on. I like the old reliable Testor's in the rattle can. Whichever clear coat you choose, make sure it is fully cured before heading to the next stage.
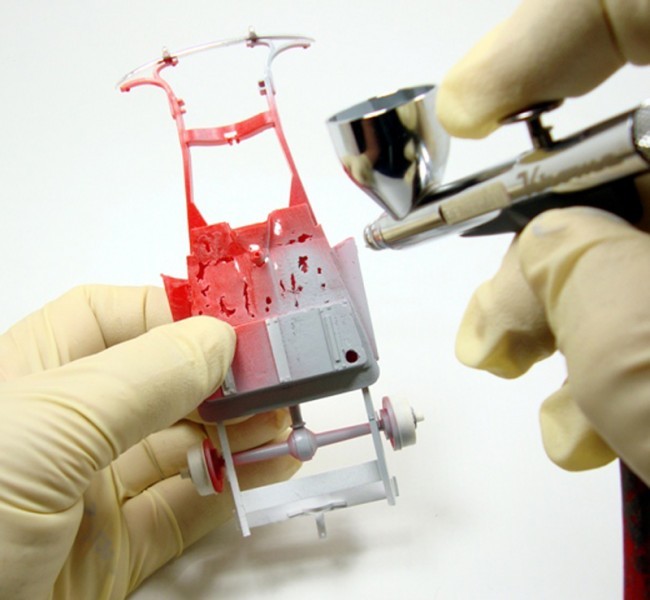
After a full cure of the clear coat, the fun can begin. This is where we lay down some chipping fluid to aid in the removal of the next stage(s) of paint to give the chipped, worn, weathered look we are trying to achieve.
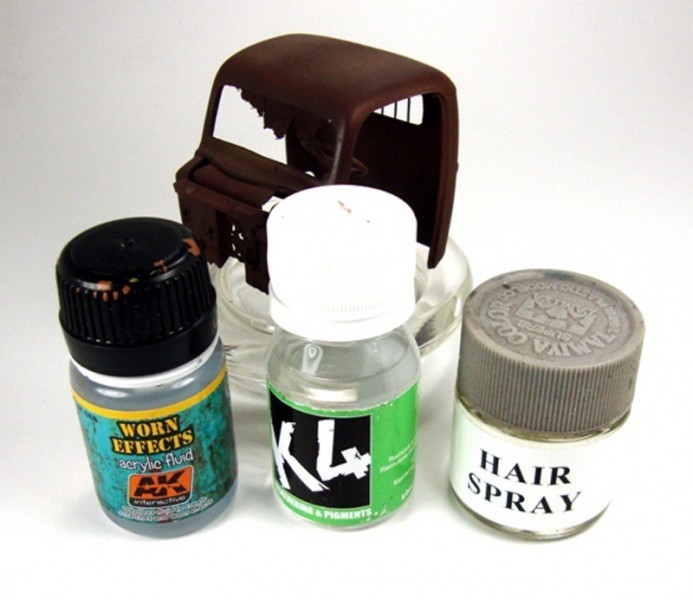
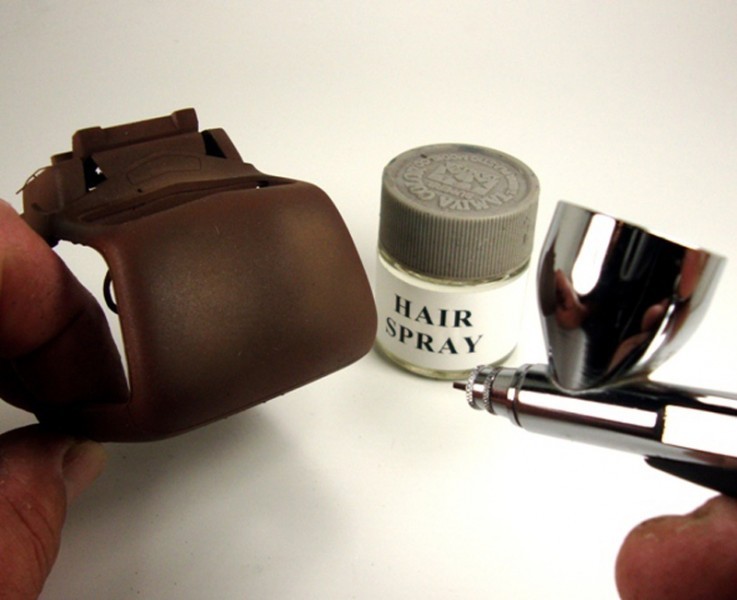
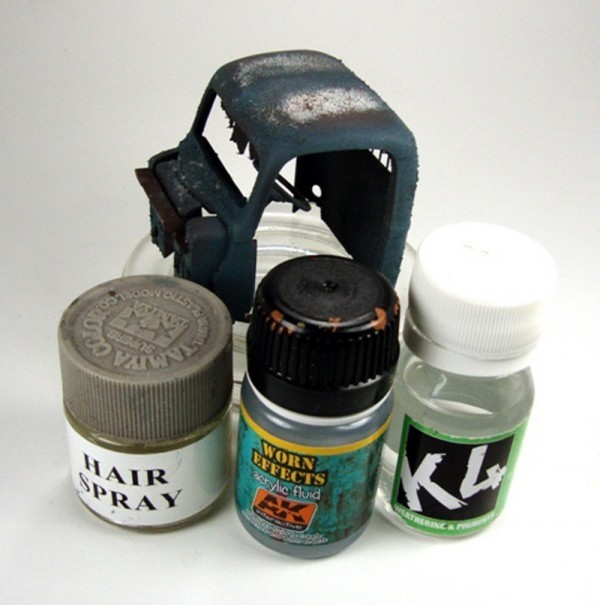
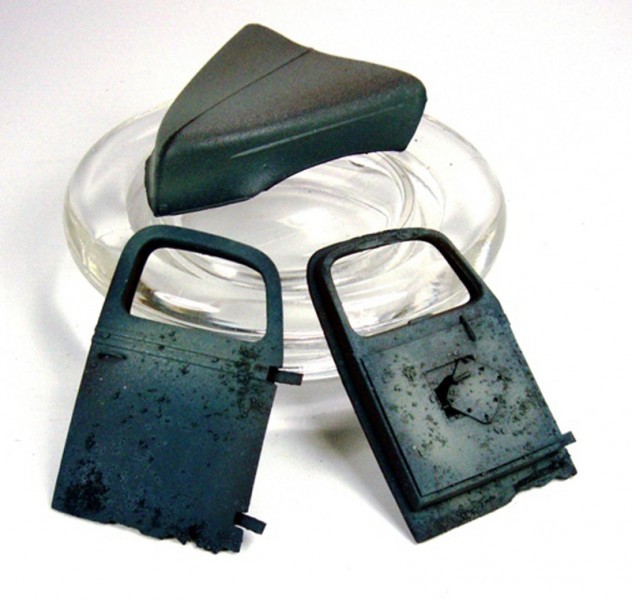
As you can see, I have 3 options to choose from at the moment. First is AK Interactive's Worn Effects, the second is K4's Paint Off and last, but certainly not least, common household hair spray. All should achieve basically the same results. The AK Worn Effects has been out for a while and works excellent. A couple of thin coats, then let dry, and you are good to go. The K4 is brand new to the market and works pretty much in the same fashion but is actually used more after the painting than before. Then there is the tried and true hair spray. I personally still like the Hair Spray (HS) method, but I can get old school a bit. The AK and K4 add a layer under the next paint stage so when you apply damp warm water to the surface of the covering paint work, you are able to chip away at the finish with various tools like cotton swabs (buds), stiff paint brushes and for the daring, the almighty toothpick. This is really easy to accomplish with these newer products and the best way to go for beginning the trip into chipping. The HS does the same thing with the exception that you can be a little more aggressive when removing the paint. Scrubbing of the surface is possible and picking away with toothpicks in the corners and edges can be done. Not to mention that I steal my supply from any one of the 3 girls that live in the house!!
OK then, after all that, here we go. I decided to use all three on this to show that there is relatively not much end result difference, only the ease to which you make the achievement.
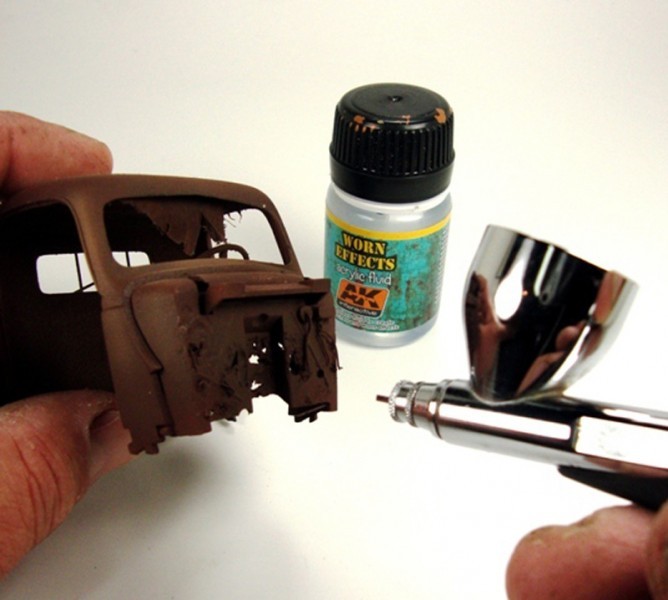
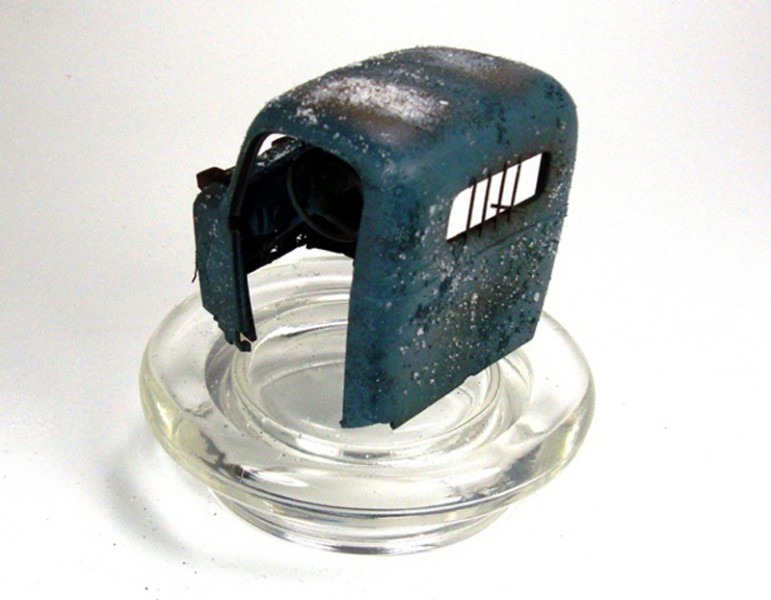
I applied AK's Worn Effect to the firewall and interior of the cab.
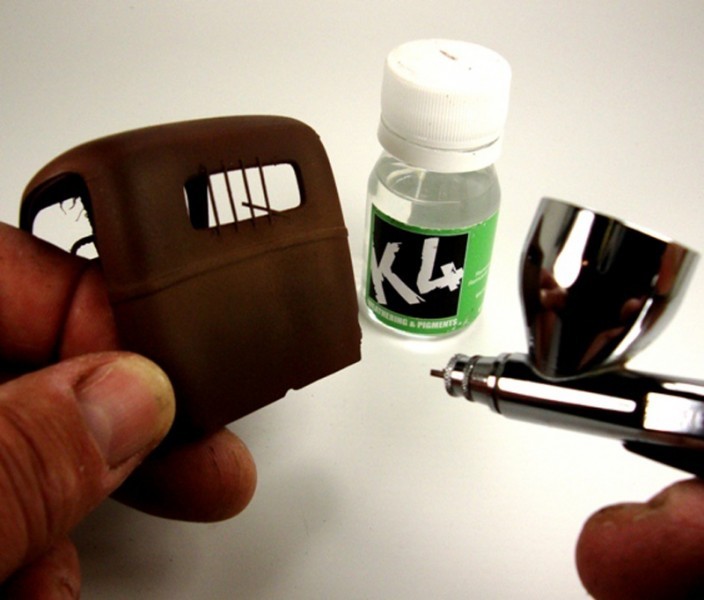
I next applied K4's Paint Off to the rear of the cab.
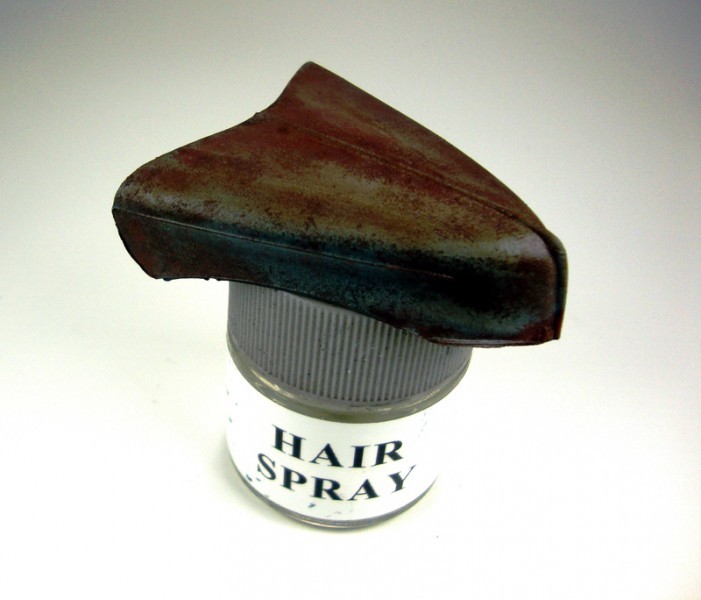
And lastly, I applied Hair Spray to the roof, doors and chassis.
With the chipping fluids in place the next step I will add in here will be some salt. Mind you, with all of these chipping fluids you do not need to use salt to get a desired chipping effect. Simply skip this part and proceed to the paint stage. The salt is used specifically to protect certain layers from being painted over and giving a really nice chipped effect by itself.
OK, I use Margarita Salt. Mainly because that is what I have in the shop and it is rather coarse. I crush the coarse salt with a hard object to reduce the size of the granules. You can simply use table salt for the finer granules. I like to spray a quick thin layer of Hair Spray and/or any of the chipping fluids to the surface that you want to use the salt on. This will dampen the area just so the salt has something to stick too. I have been known to use White Spirit as well. This will not break down the chipping fluids and still dampens the area.
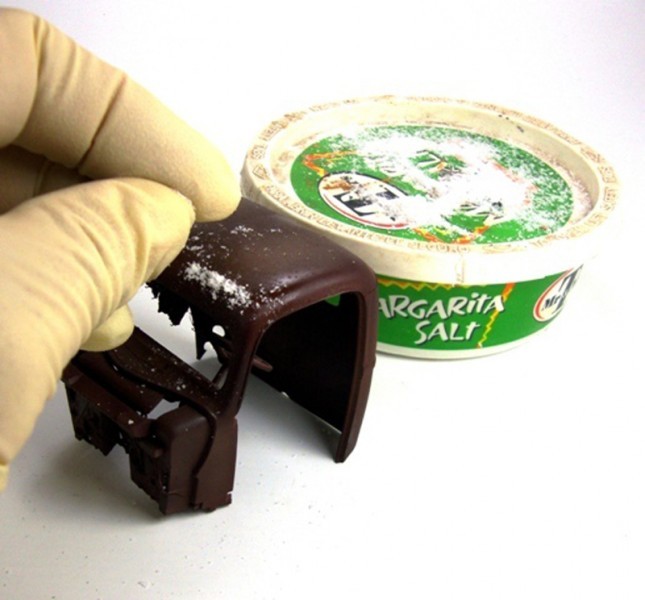
Here I am not being shy with the use. You, however, can apply in any amount you see fit to do.
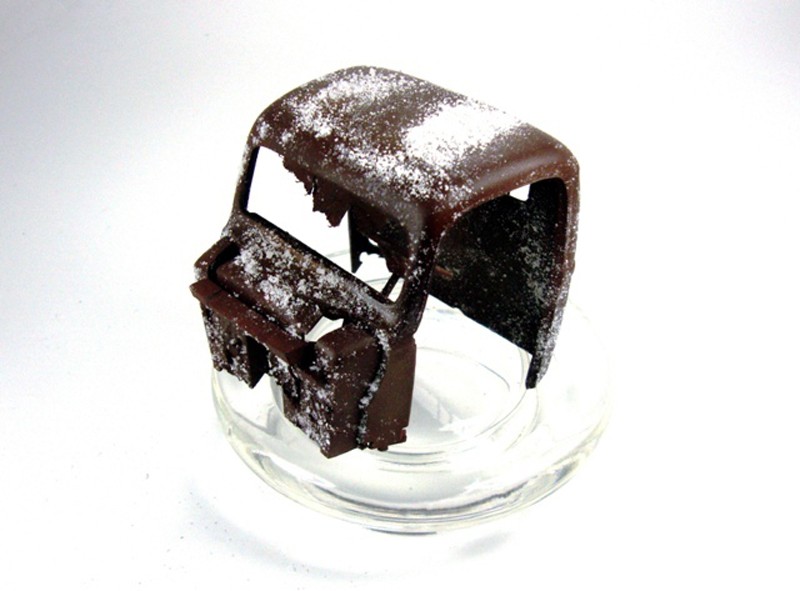
After the application of salt, you may want to add a thin layer of chipping fluid again to the top side of the slat. This will help keep the granules in place when you lay down your paint layer.
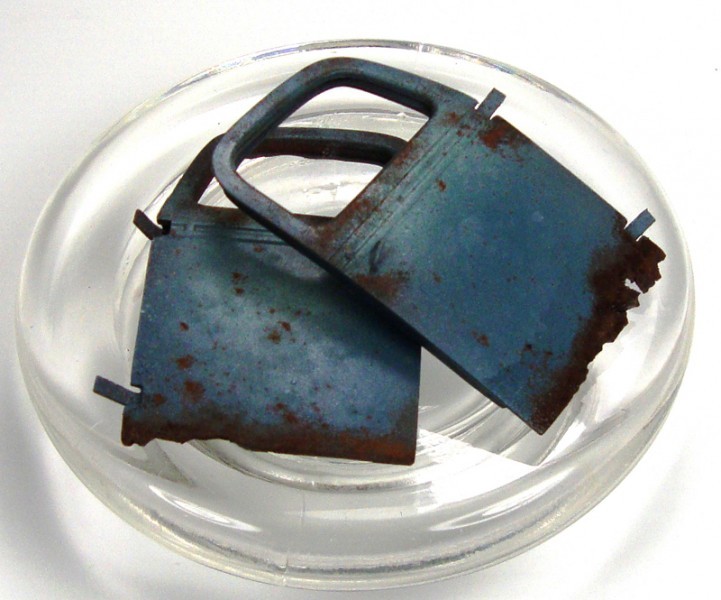
The best part!!! PAINT!!! I have decided to use a 2 color system of painting. This means that I will lay one layer of paint, chipping fluid and salt again and then paint with another color. This will enhance the depth a lot.

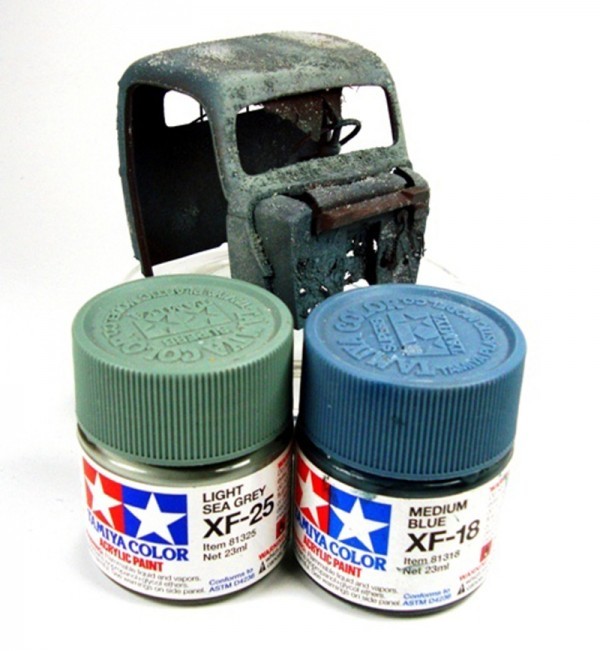
Using Tamiya's Medium Blue first, I laid down a coat making sure to be a little heavier in the areas I wanted shaded darker, and a lighter coat to just a dusting in the sun bleached top and flat surface panels.
You can see in this last shot that the salt does react a bit with the paint and has a slight faded appearance. This will actually help me later.
Next I will be adding more chipping fluids, in the same placement as the first time.
While still wet, I applied a little more salt to some areas.
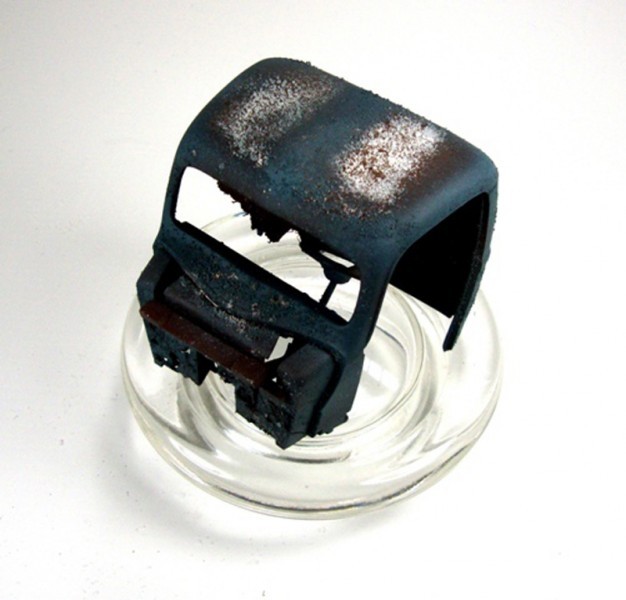
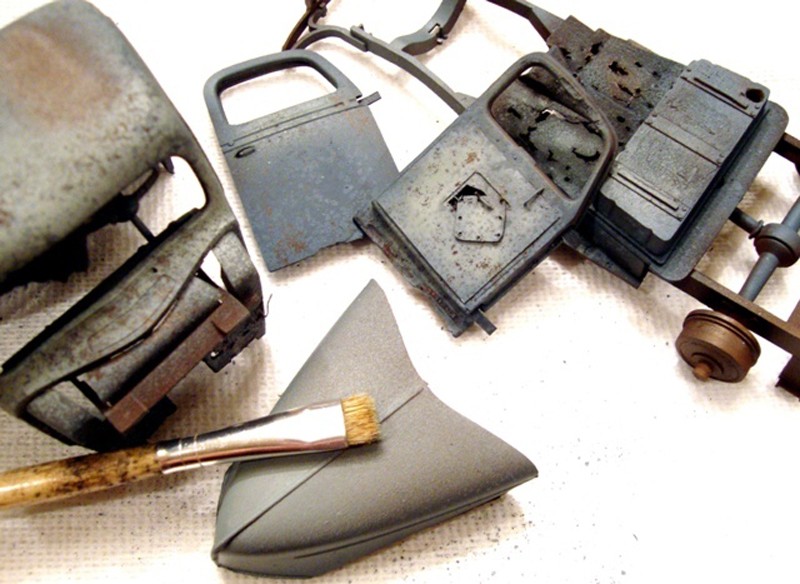
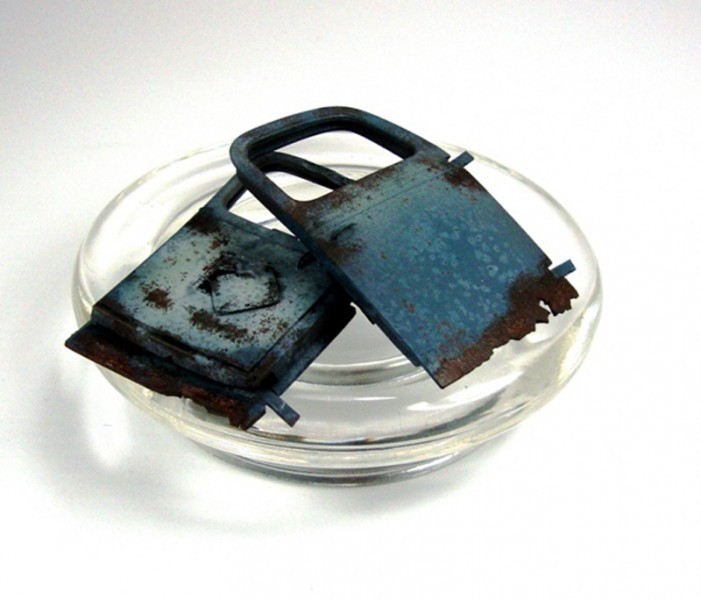
Now it is time to add the second layer of paint. For this stage I decided to use Tamiya's Light Sea Grey. This was laid down where I wanted to accent and/or highlight panels and mostly top surface panels and areas that would be bleached from the sun.
Up next I will be removing the salt and exposing the multi layers of paint and rust. in this next picture we see the doors before the salt is removed, and the hood. I chose not to salt the hood. I will hit this section with a stiff bristle brush to show this effect.
Up next I will show the removal of the salt and some heavy chipping to the hood.
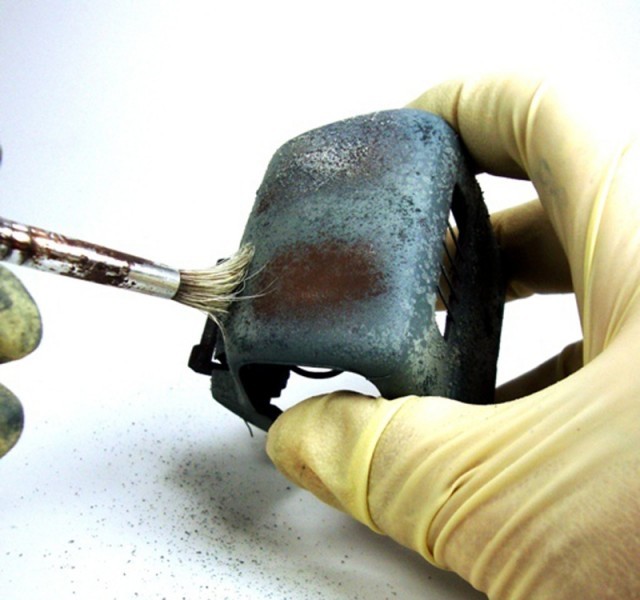
With a good, stiff bristled brush to brush and somewhat stipple the granules of salt away. If they become stubborn and problematic, a damp (not wet) brush should loosen it up and knock it away.
Next, I do want to more or less wet the area I want to chip and scrub.
Using the stiff bristled brush again, I stipple, scrub, stab pick away at the paint as the water softens the layers of color.
In nooks and crannies you will need to detail the water into the crevasses. If the paint is being stubborn or it has been a day or so from the time of painting, some aggressiveness will be needed. I suggest mixing some standard alcohol with water 50/50 for starters. With a fine tip brush use it like a pin wash on the area you wish to remove. Then a little scrub with a cotton swab (bud) or stipple with a brush and the lovely rust color will begin to show through in the crack.
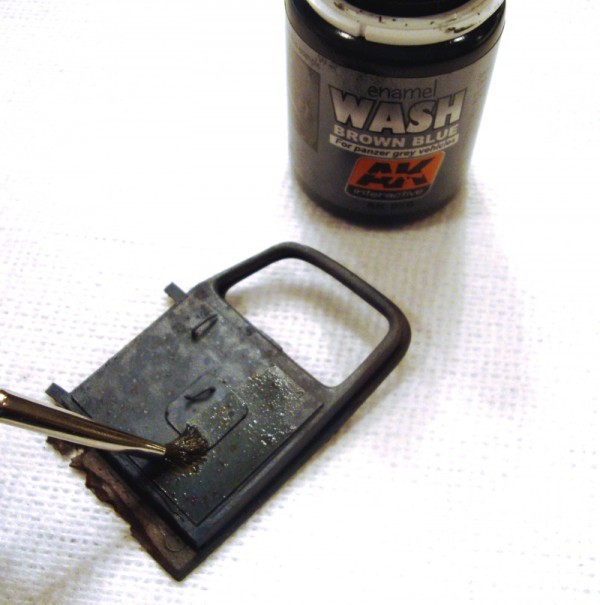
With a nice collection of unsalted model pieces I chose to run a filter of sorts over everything. This blends some colors and brings others out, not to mention cleaning up the whole salting mess. Remember that you want to apply just a filter, not a wash. This is thinner than a full strength wash. You can always run more coats if you think it is needed. I only applied one using AK's Brown Blue Wash. I did not fully mix the contents. You can get the same result from mixing oil paint with thinner between 60% and 80% thinner to paint. You are just blending the color with this coat.
This is what this looks like with the chipping complete and one filter applied.
Here is a mock up to check if I am on the right track here.

OK, pigment application! This is another one of those interesting areas where there are several styles of application and countless products to choose from. If just starting out don't worry too much about filling 8 cabinets with 7000 jars of pigs and washes, trust me, you will end up there soon enough.
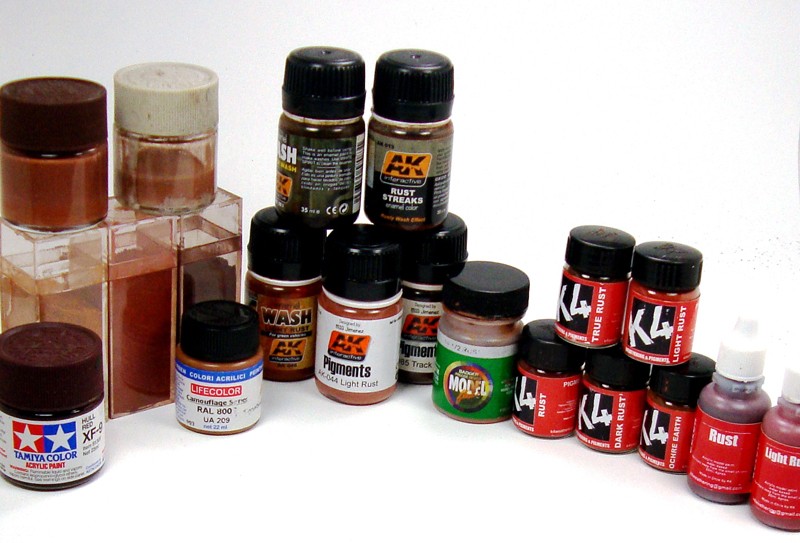
This is only the tip of the iceberg. What I am showing here, besides a confusing mess of stuff, is a starting point of some items you can use from this point on in the project. For the most part I will be using the pigments located in the far left of the picture in the square cylinders but always play around with whatever comes to mind. Nothing special about these pigments, they are just the ones I chose.
One thing to remember about pigments is to first be comfortable with what you are using and second, quality. There are several on the market that are, let’s say, not up to snuff. The big kids on the block....AK of course, and Mig, along with the new kid, K4 which is just getting to the market, are all great! A small amount goes a long way. They can be applied with alcohol, spirits, and water or pigment fixers. These all have a great consistency and stick well to most surfaces.
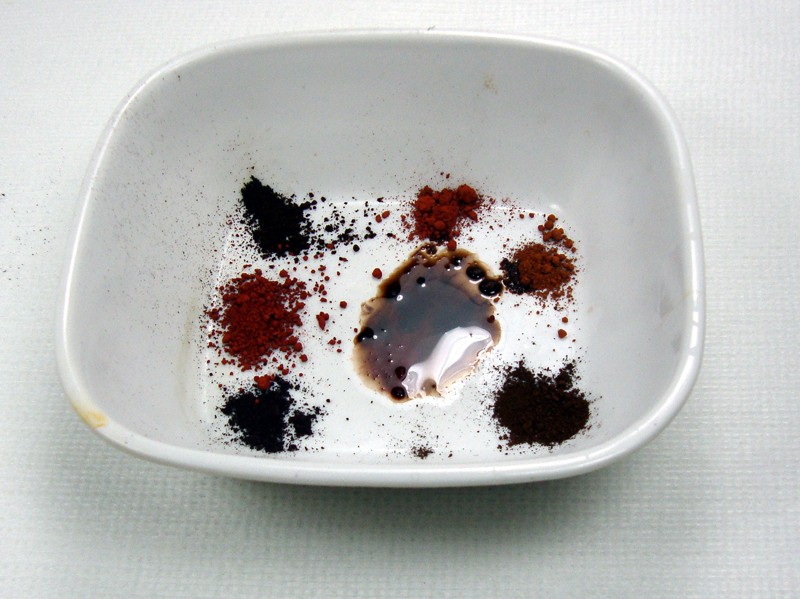
Here is my pallet.
Armed with a little bit of pigment (lol...more than I said I would use) lets dig in!
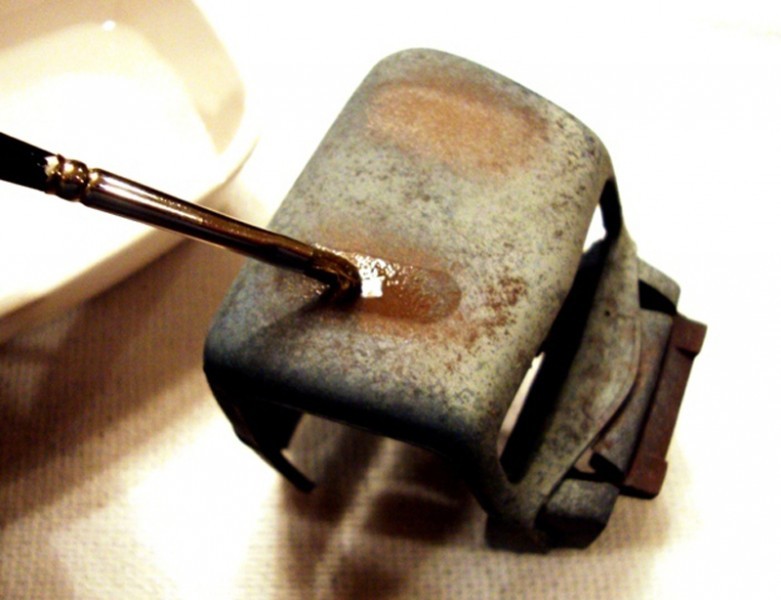
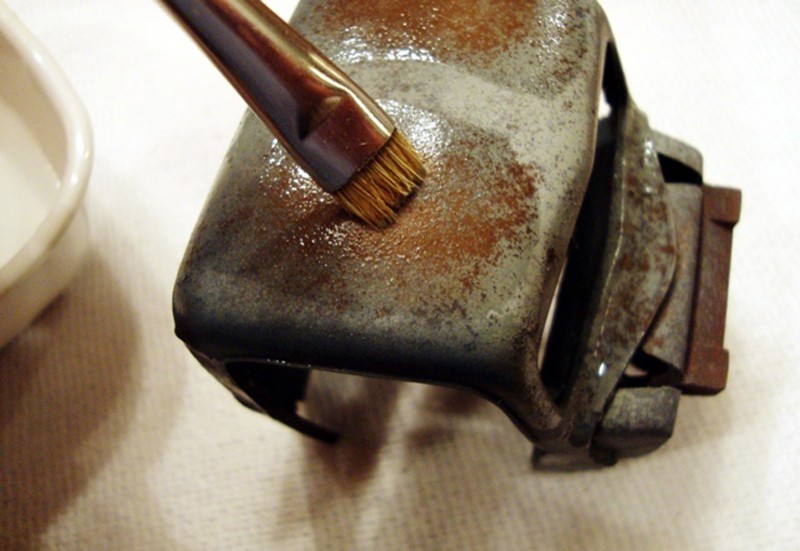
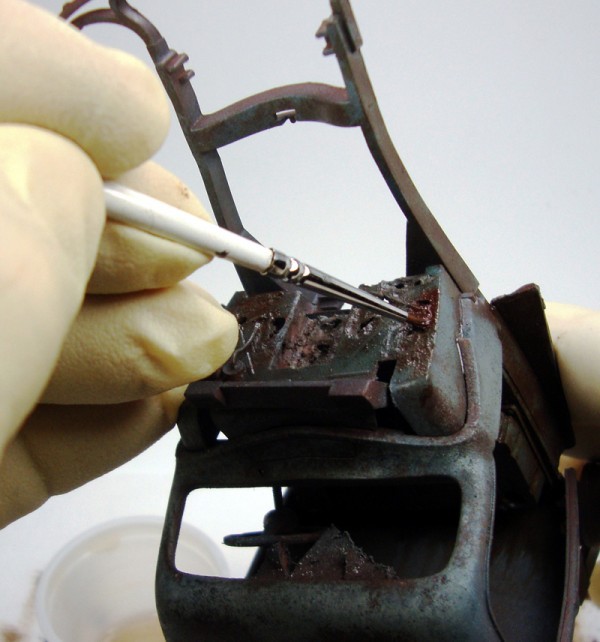
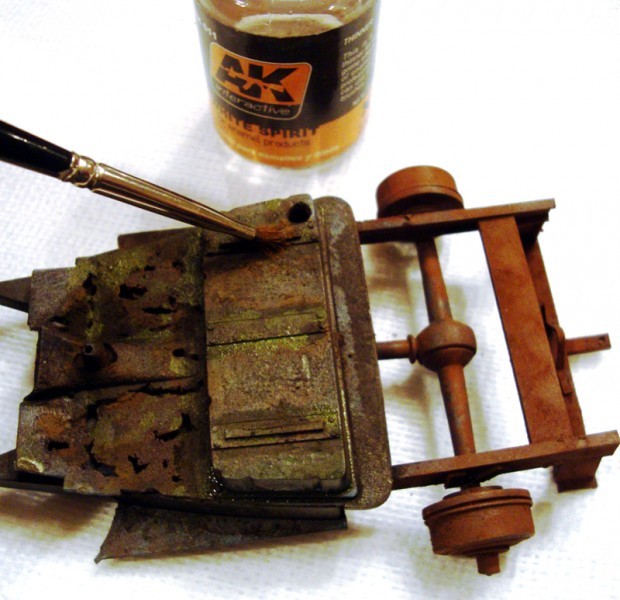
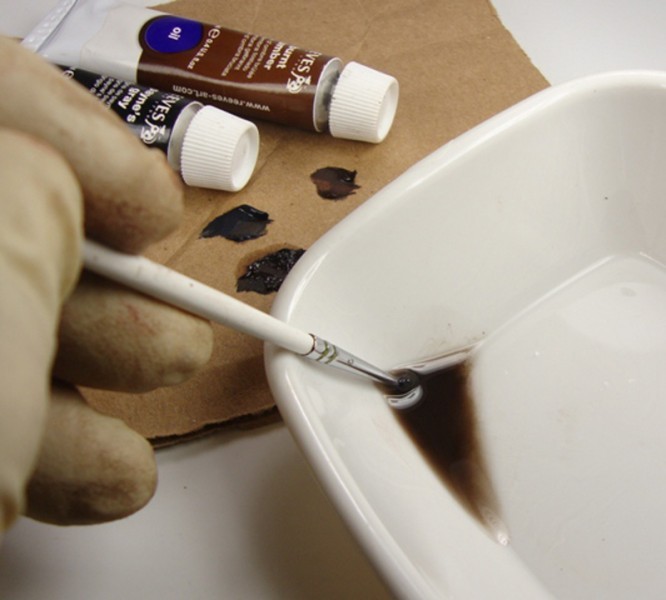
First, I like to wet the area with some pre-mixed enamels.
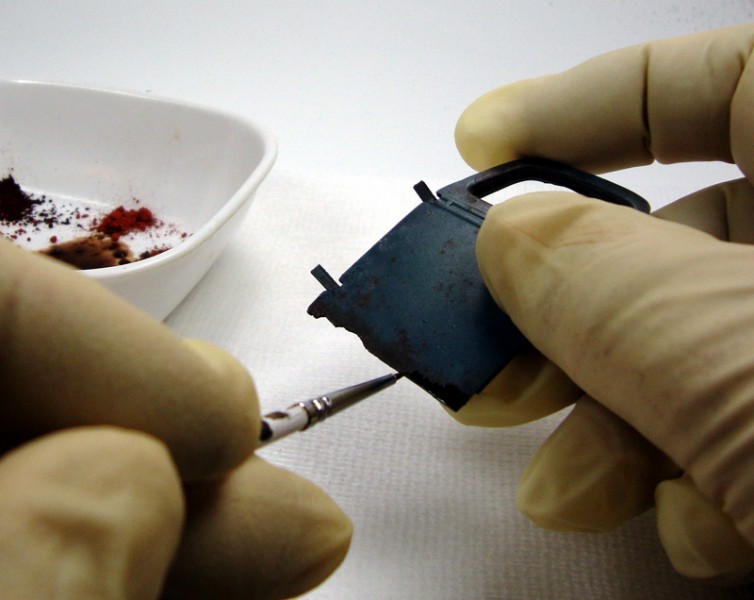
For this I actually use AK Interactive's Streaking Grime or Track Wash, NOT mixed. If you do not mix these up they make great pin washes and of course a great base for pigments. This can also be achieved with just spirits or a real thin wash of whatever, like Burnt Sienna or Umber.
After you dampen the area, take your damp brush and grab some pigment. For this I want the rust to remain darker. Being left in the woods in a damp environment the rust will be moist and dark on most areas. Then blot lightly into the pre-mix you just applied.

With a fine tip brush, pin point some spotted rust areas with just the dampened mixture. REMEMBER...less is more always! It is always easier to add more of anything, not always easier to remove some things.
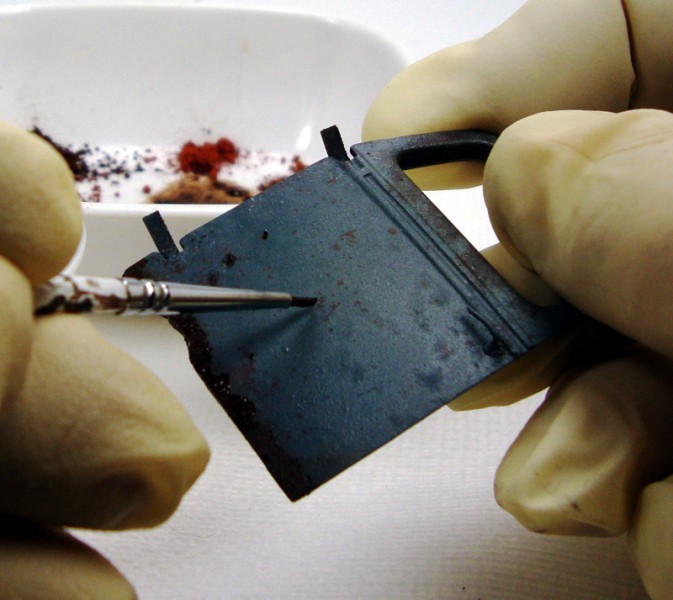
After the dry pigment has been added to selected areas, take your clean brush and dip it in some spirits and wipe off the brush on the edge of the bottle or container, leaving the brush wet, just not soaking and dripping.
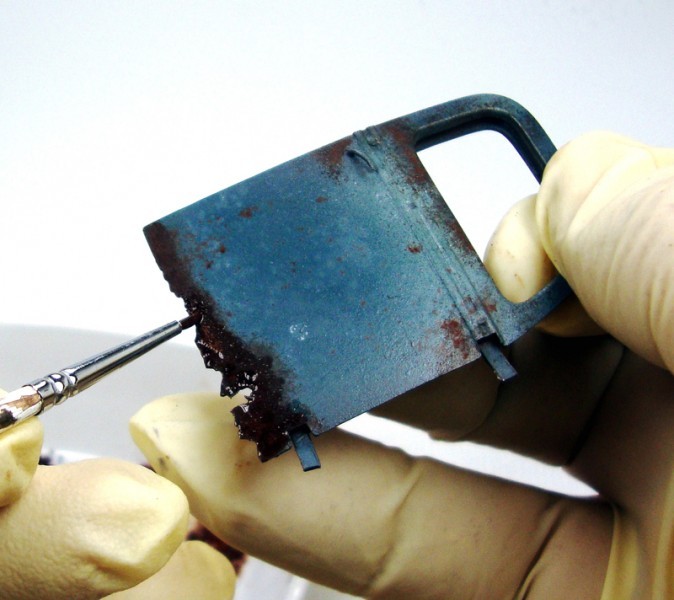
Apply this to the area where you put your pigments. What I am doing here is softening the look to the pigments I just put down and effectively feathering out the pigment and giving the rusted area a more natural appearance.
This is repeated for each side of each door and so onto the rest of the model.
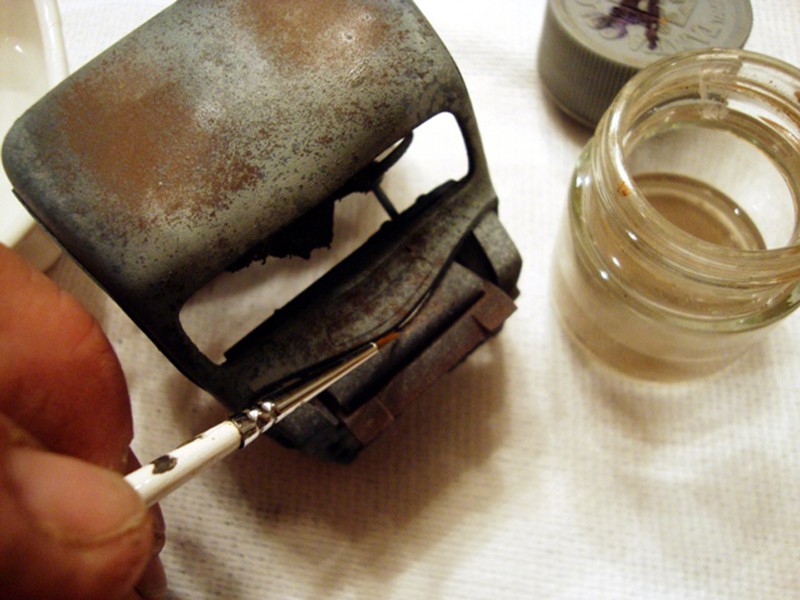
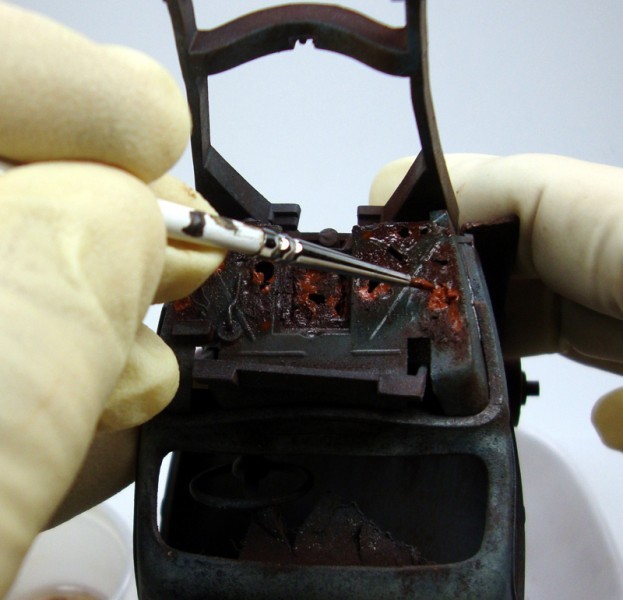
In this next picture, I added a wash using AK Interactive's Track Wash to the inside of the cab. This area would be dark and damp, so this is a great base to start with. After applying the wash, I took a clean brush with spirits and went back over the area to remove residual wash exposing my rust base and paint.
Next up I wanted to hit the firewall. I stated with the same approach as the base to the doors. Dampen the area and then apply some dark pigment. I feel it is always good to go dark to light when applying these pigments. You obtain a much better blend I think.
Next I used slightly lighter rust coloring. This looks really bright when it is wet, but it will dry much lighter. It is always good to test things out on a separate piece of plastic if you are ever unsure.
Here is what it looks like while it is still wet. You can see this is a bit shinier and brighter at the moment.
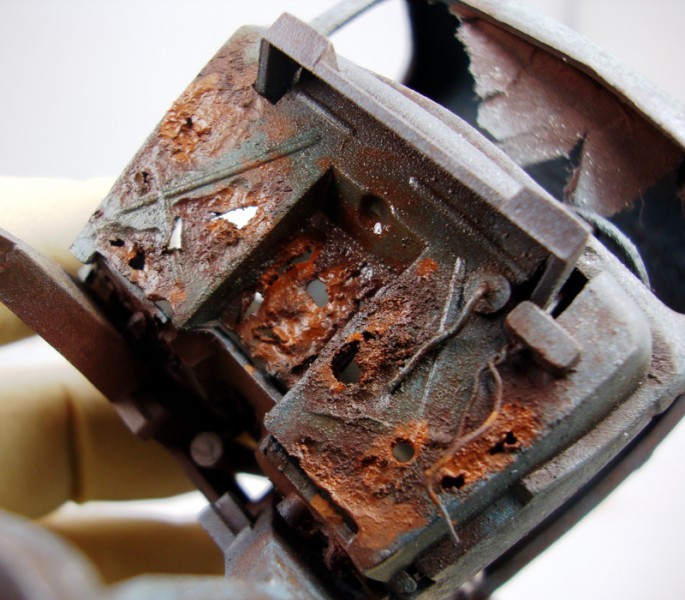
Once dry though, we can take a stiff bristled brush and lightly stipple the area. This will blend the colors nicely.
And this is what you end up with.
Up until now this has moved along really well. I will be finishing up the first round of pigment application and getting ready to move on to the next stage of weathering.
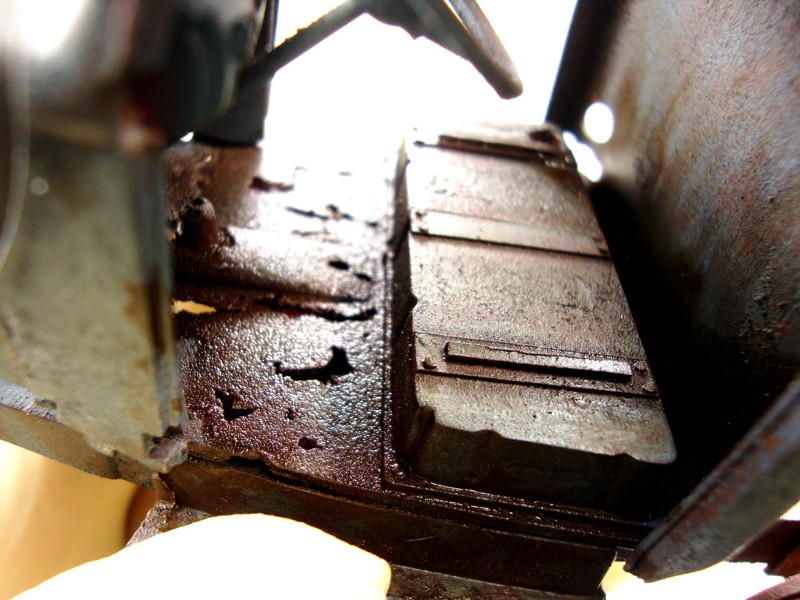
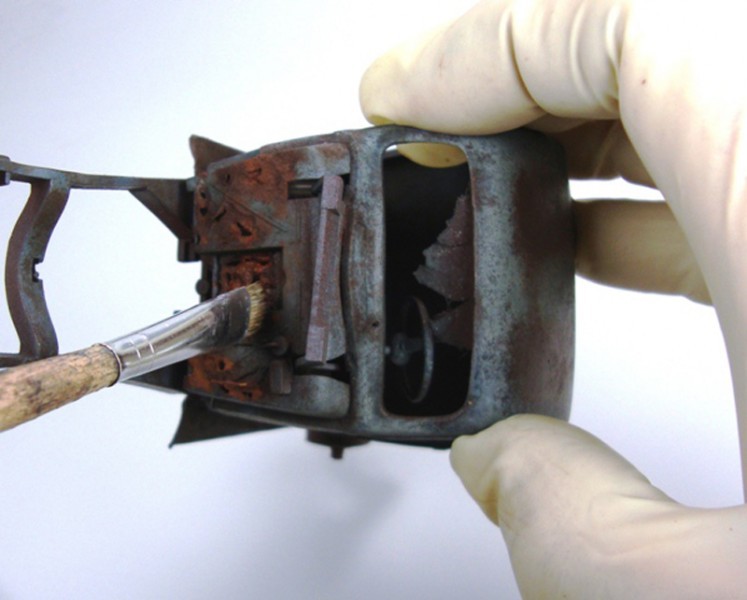
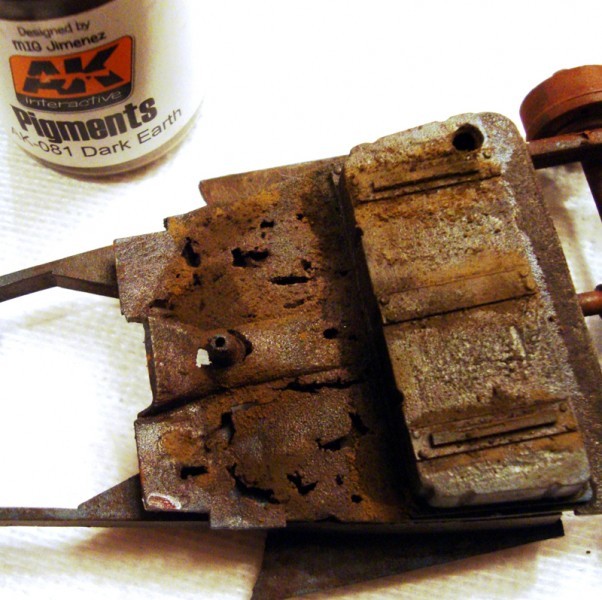
In wanting to get some part put together here, I turned my attention to the interior floor. This will be a damp, moldy and neglected area. Since this is covered...for the most part, it will be much darker and well, damp!
I need to first lay down some substance. I chose to start with AK's Dark Earth pigment. Using some White Spirits to dampen the corners, I began to stipple the pigment in to the corners and where I think things like dirt, rotting leaves and other junk would build up.
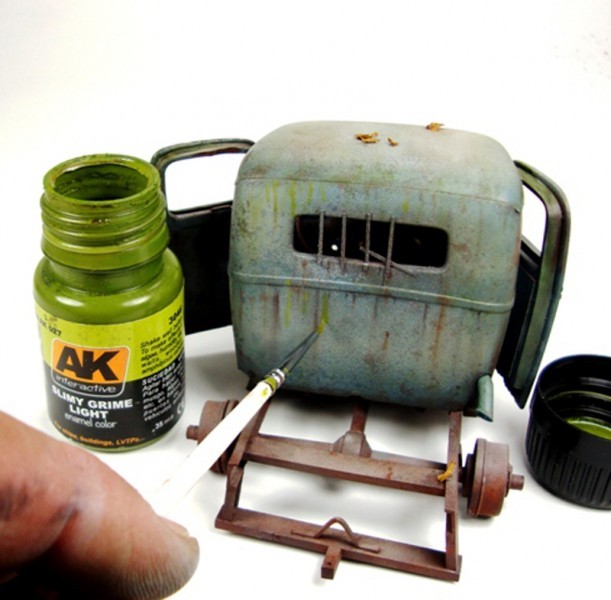
Next I wanted to add some of the moldy coloring I believe would be seen in this damp area. Using AK Dark Slimy Green, I applied this in the corners where you would see some ponding from water.
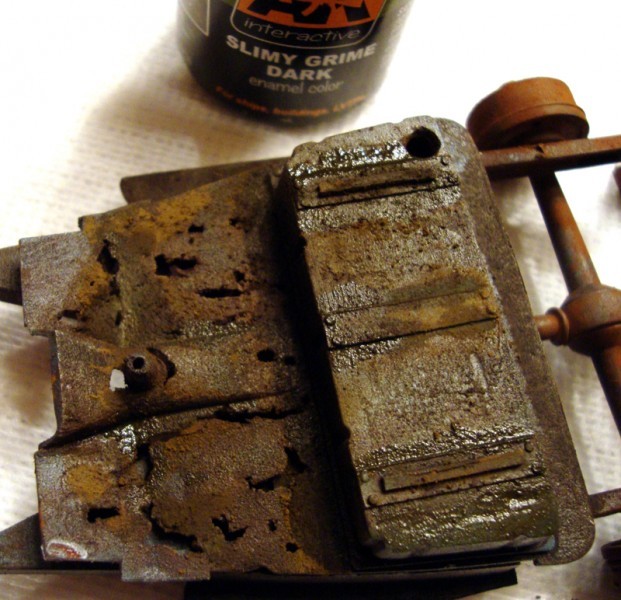
This was quickly followed up by some AK Slimy Green Light.
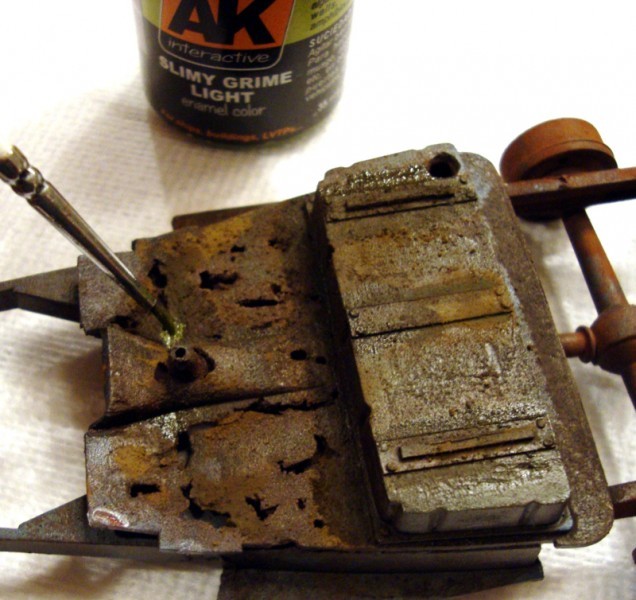
After applying the Slimy Greens, a quick light wash down with White Spirits to soften the looks. This is done with a "humid" brush. Dip the brush and quickly dab 1 to 2 times on an absorbent towel and run the brush lightly over you work.
The very next application was with some AK Wet Effects. I will have another coat going on here and there, before I am done.
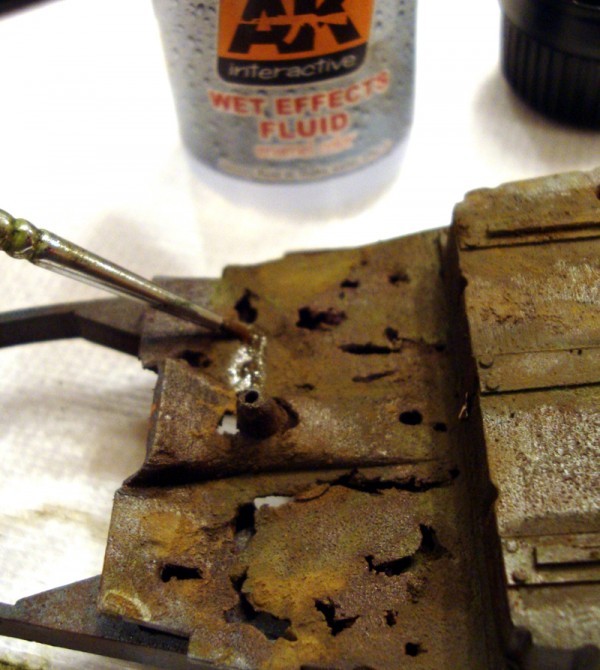
After a little drying time, the chassis is starting to come alive.
I have made some headway on the hood as well. Using the same process I used on the exterior of the cab to reveal the rusty color beneath.
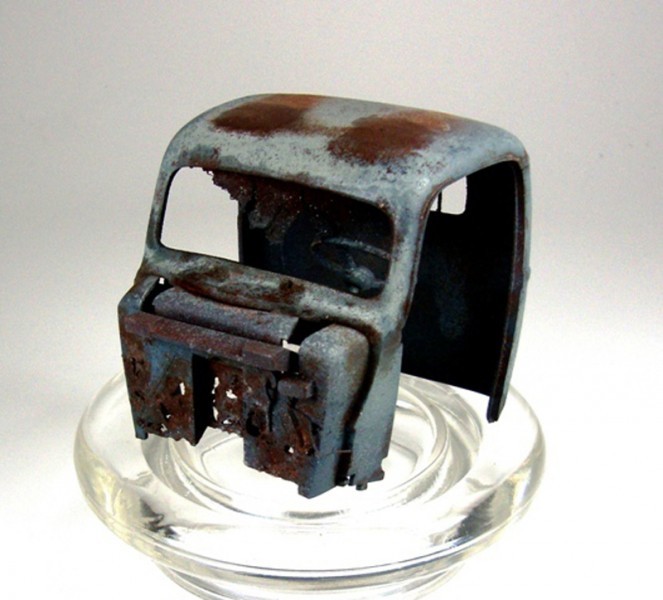
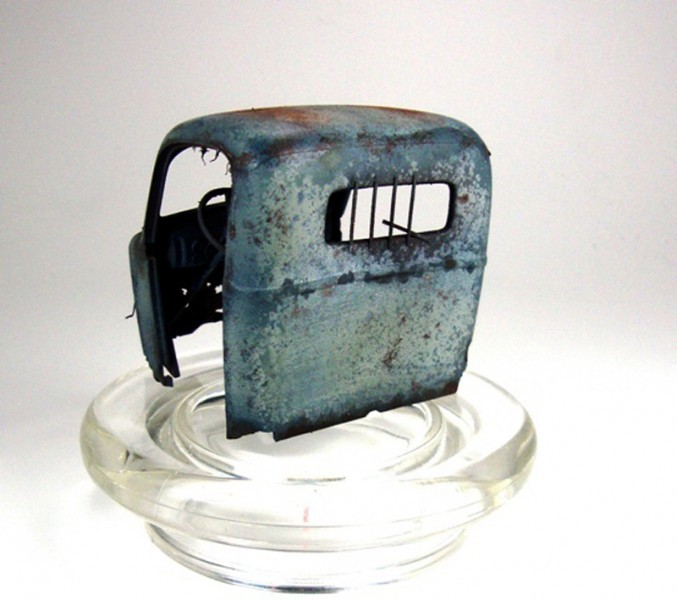
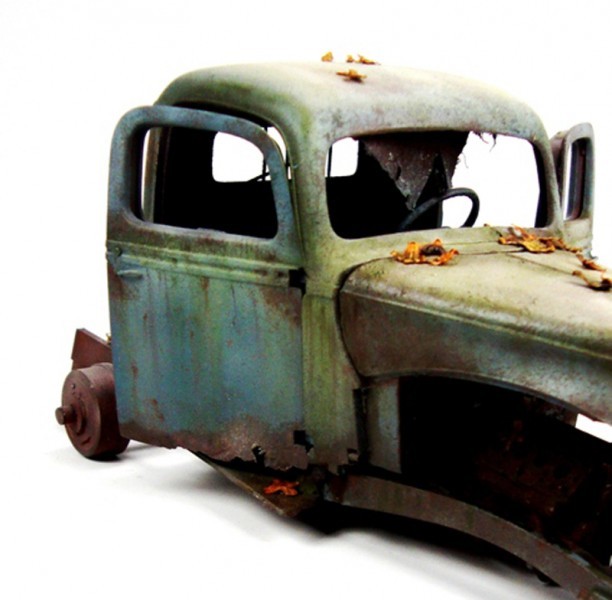
Here we will take one last look at the cab after the first round of chipping and before the next stage of weathering.
I think at this point I could say "OK, I'm done"....nope!!! There is still plenty to go. The next stage will bring out the faded look the exterior would get from UV (Ultra Violet) rays from sitting in the sun.
Just before I get started on the next stage, I laid down a real thin layer of clear coat to yet again protect the layer below. This ever so slightly modifies the colors of the rusting as I did not spray a lot. This next stage will lighten things a bit.
Here is, yet again, another layer of hair spray/chipping fluids. This will allow me to manipulate the fading I am applying next.
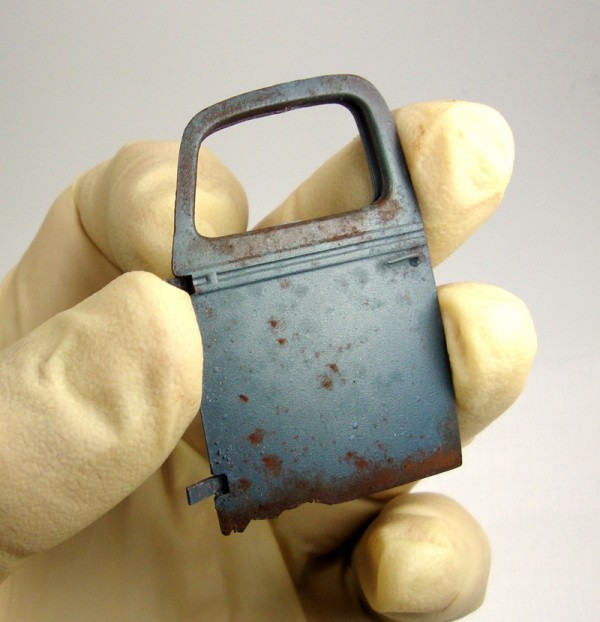
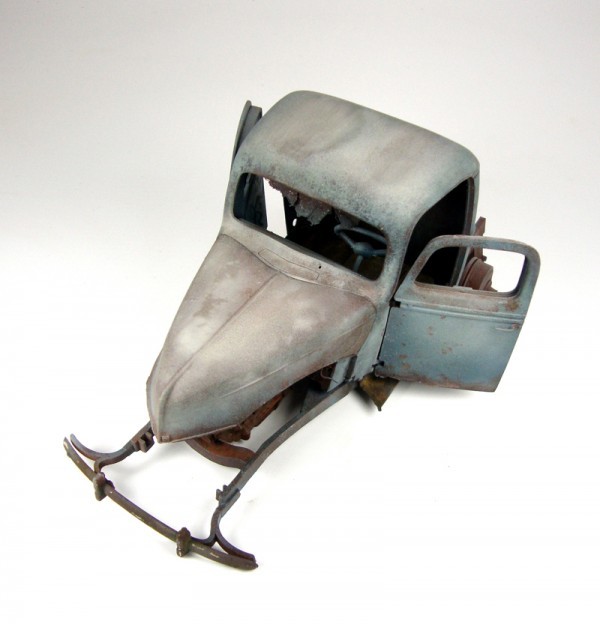
After allowing this to dry I choose some Tamiya Deck Tan and Light Sea Grey. I mixed these colors to 15% tan, 15% grey, with about 70% Thinner. So this is almost to wash capacity but will still react like paint.

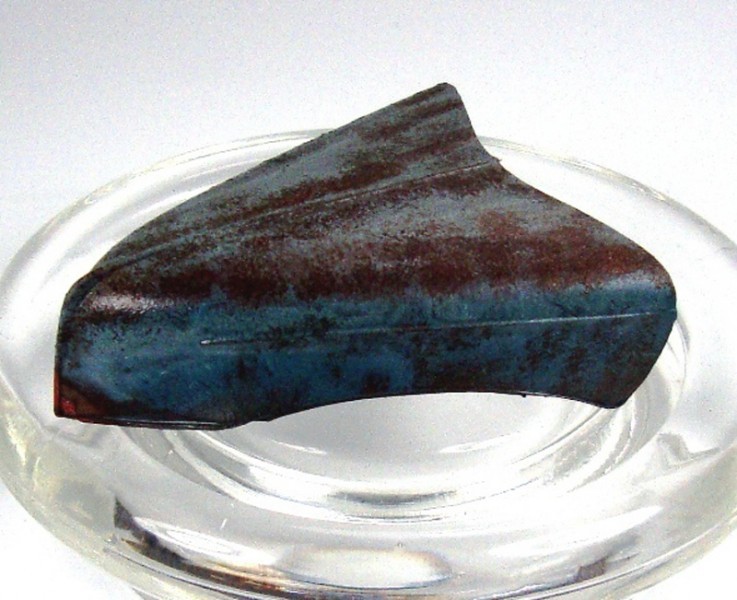
You can see how the underlying paint and rusting immediately lightens in tone.
Allowing this to cure for the night, I will be chipping and scrubbing very little of this away, to make room for more weathering layers. Building up layers is key to the depth of the weathering. I will be getting back to this in later updates.
Onward to the Motor!
After laying down some clear coat it was onto the AK Worn Effects as I went to town on the forgotten power plant.
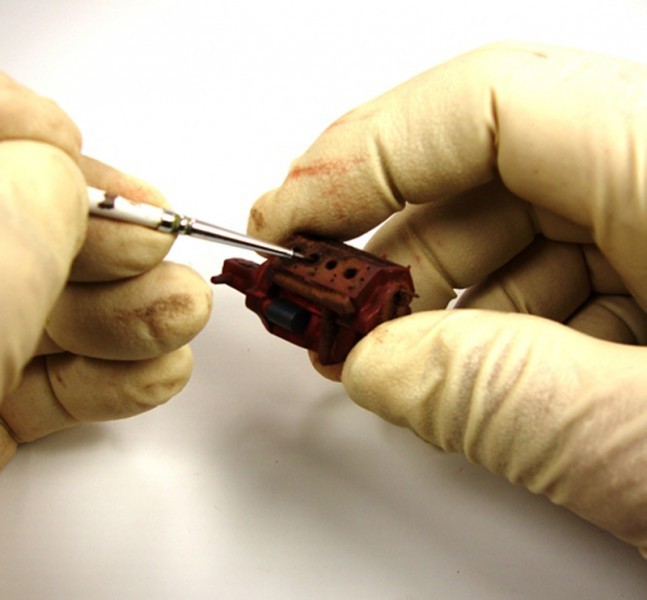
I decided to use some Tamiya Flat Red to add a touch of color. Most of this will most likely not be seen but I know it there and the tiniest of accents sometime will surprise you.
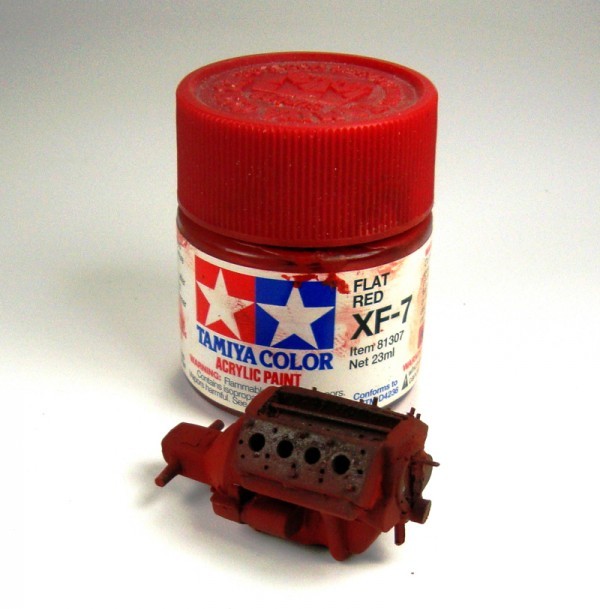
You can see I left the manifold areas where the heads were installed, untouched.

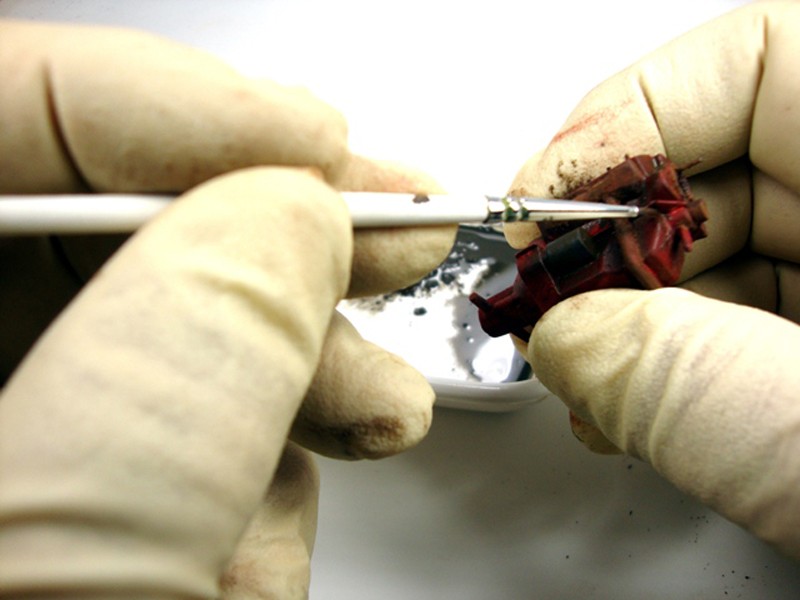
Now we need to chip, chip and chip away again. Taking a small tipped brush I applied a little warm water mixed with a touch of thinner to the freshly painted motor.
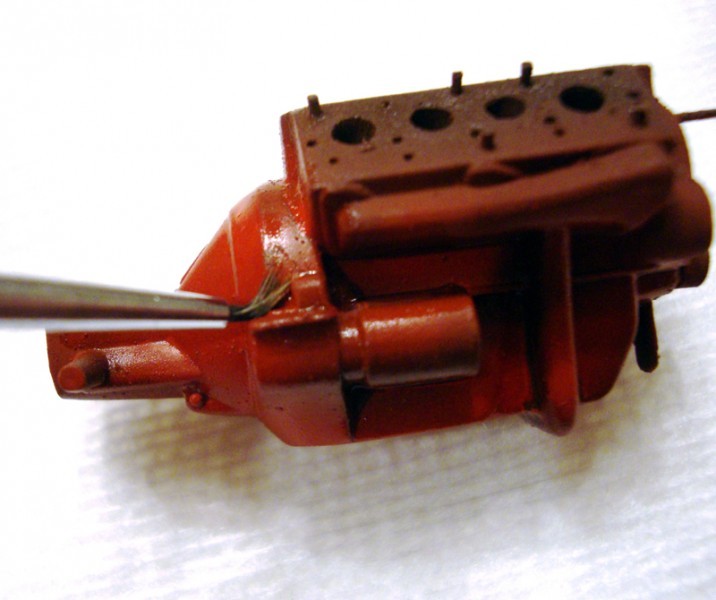
Following the same process on other parts of this kit, I used a stiff bristled brush and lightly stabbed the painted section of the motor trying to hit areas that I think would show through the rustiness below.
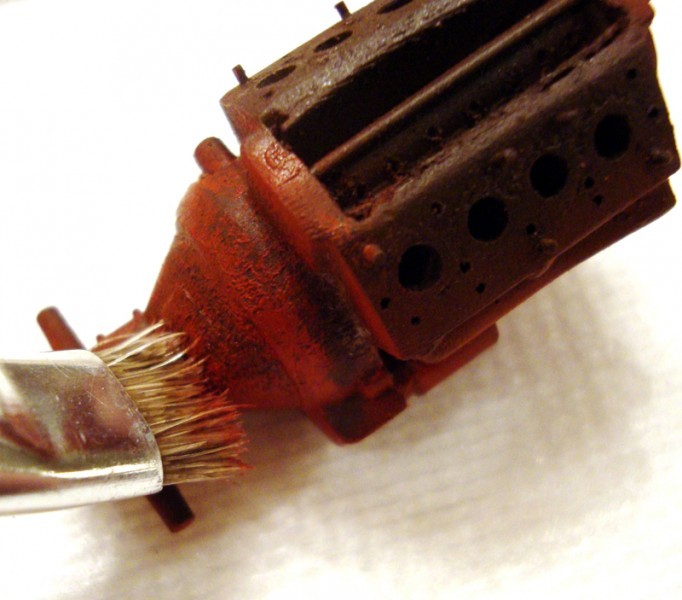
You can see the depth from just this chipping and it only will get deeper.
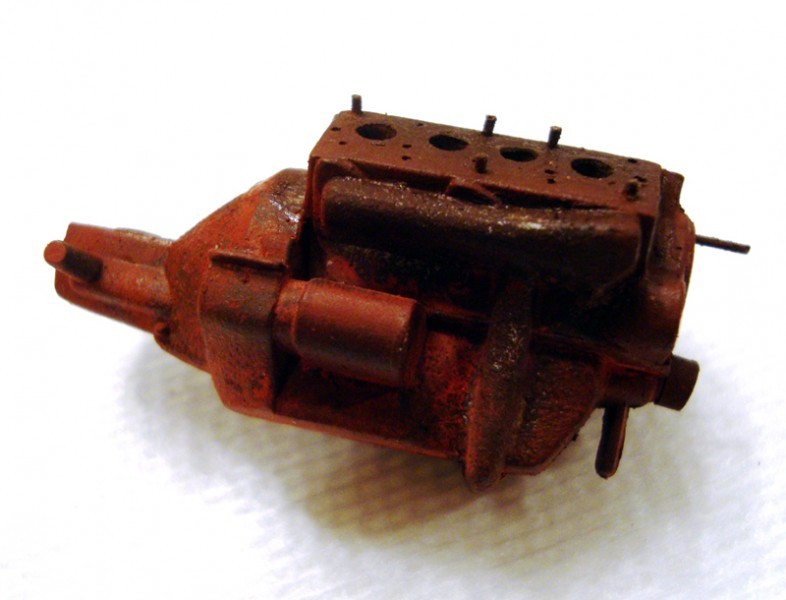
I need to dirty up the motor and make a little bit of greasy, oily mess, glue some parts together and add some more layers to the cab and frame.
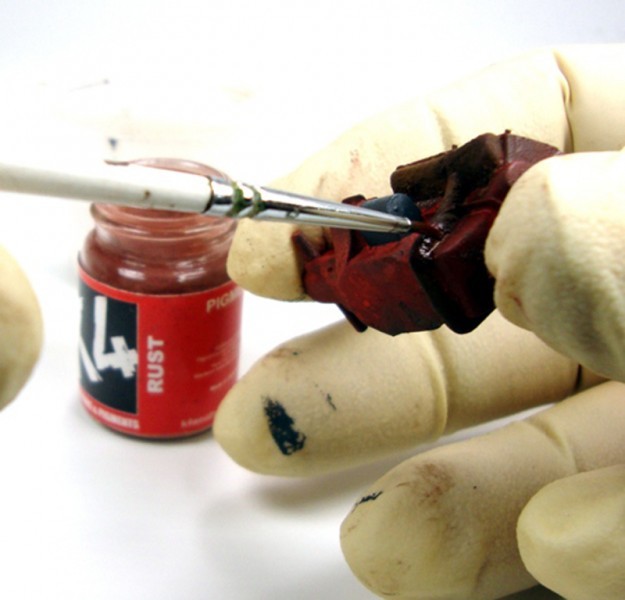
Beginning where I left off, I moistened the molded exhaust section with spirits and began to add some pigments. To change things up a bit, I am using some K4 True Rust for starters.
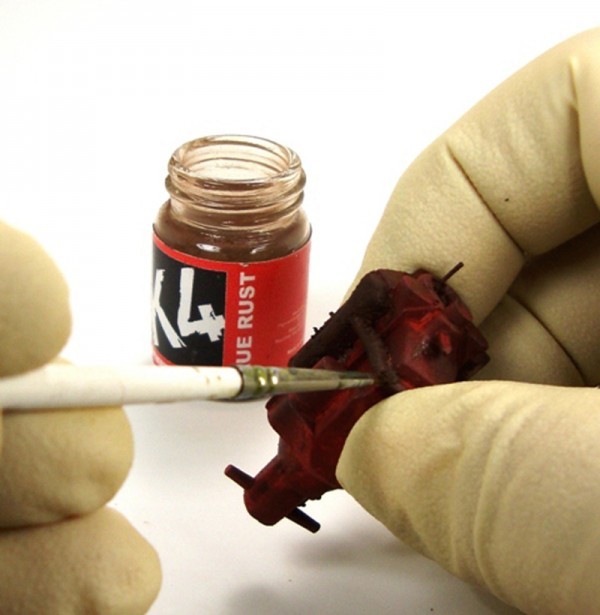
True Rust is nicely colored. I say this, because it is a pigment made from actual rust. I repeated the same process of spirits again and then added a couple random dabs of K4 Rust, which is slightly lighter to the reddish orange scale.
We need to add the dirt and grime in the corners. Now, on a working engine, there may be more dusty areas that have more fresh that are wet with oil. For this, the motor has been neglected for a while and will have some oily sections but most will be oil stained dirt and rust.
Starting with some AK Dark Earth and Engine Grime, I made a sort of slurry. This will be applied in to the corners.
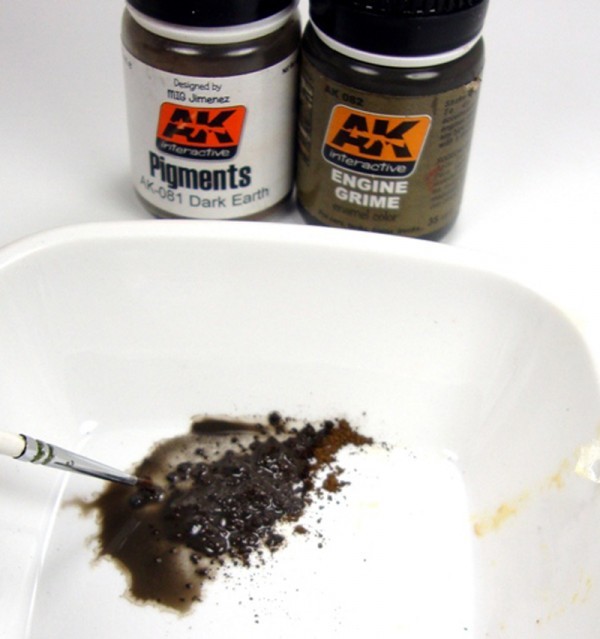
You do not have to have the Engine Grime. Similar slurry can be created with Burnt Sienna and Paynes Grey oil paints.
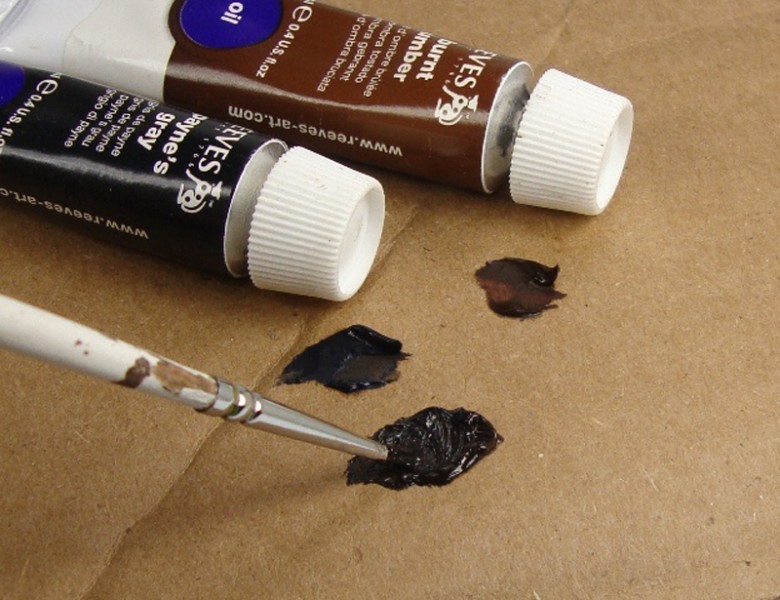
Mixing the two will give the grimy color and the oil is thicker and can fill the cracks on the engine nicely. You can even add any dark pigment to the oils as well. This will give the oily dirt effect. By adding some spirits to the oils you can make the oily grime wash as well.
Make sure to dab the grime mixture into the tight corners and areas that oil and dirt would have collected.
Next I felt I needed to add a little wetter looking oil staining. I have a couple choices, AK Engine Oil and K4 Old Engine Oil. Again, this can be achieved with the oils. Don't wick the oils out on cardboard but rather leave the oils still with the pigment. This will keep a bit of shine to the mixture leaving a slightly damp appearance.
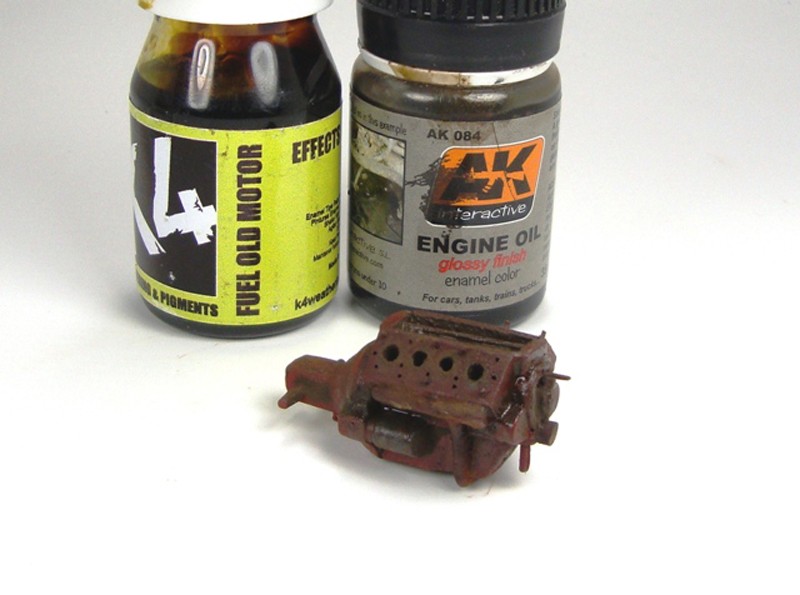
I still have a couple more little things to add here, but basically that is the engine block!
Assembly & Details
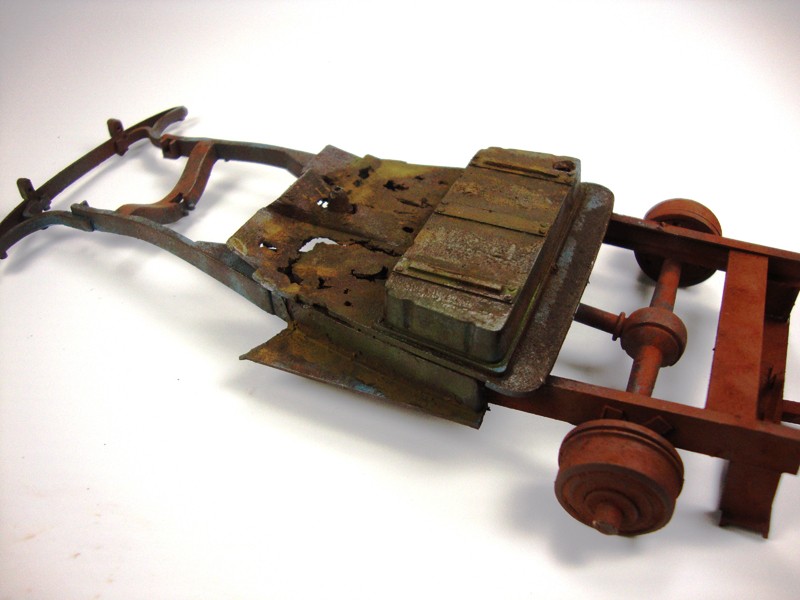
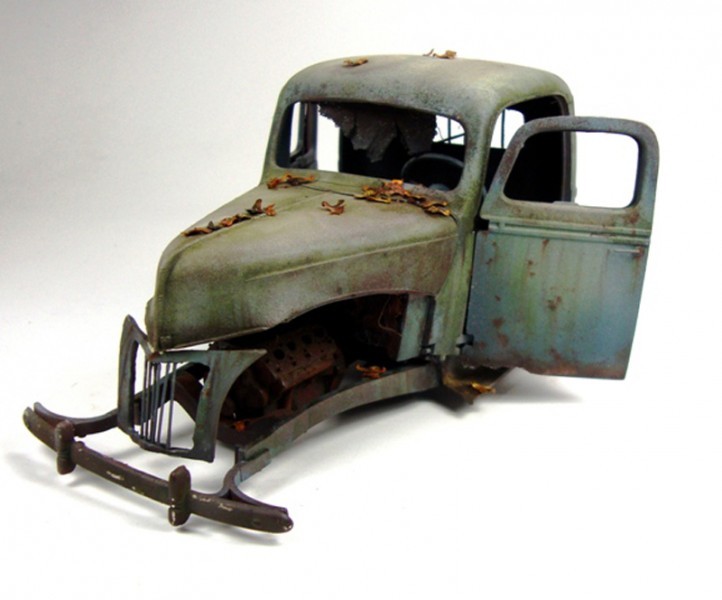
I am at the stage where it needed to come together so the weathering will be blended fairly evenly over the entire model. I mounted the engine and of course the hood. You cans see I was impatient and began adding some leaves to the block.
After installing the hood, I went back to the airbrush and dusted lightly another thin coat Deck Tan/Light Sea Grey as I did earlier. This blends the fading from the hood to the cowl and onto the rest of the piece.
Just about ready for some washes and streaking...grime that is. I also need to come up with a "quick-n-dirty” base too.
In the next picture here, is a shot of a selection of items I will be using...
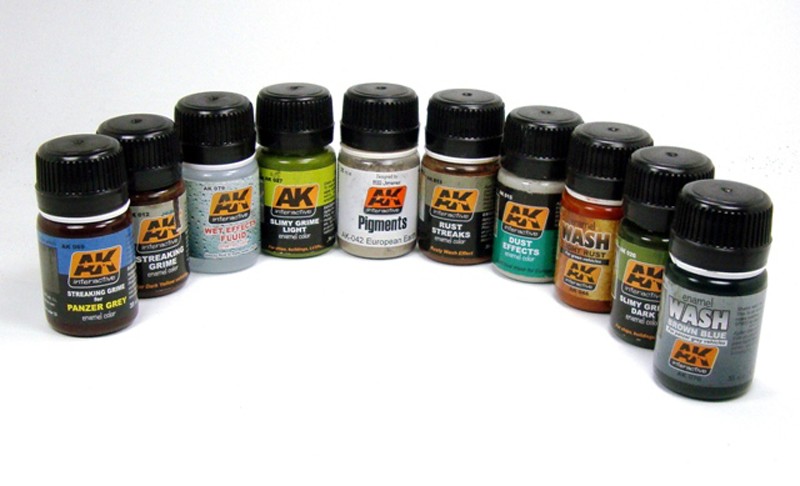
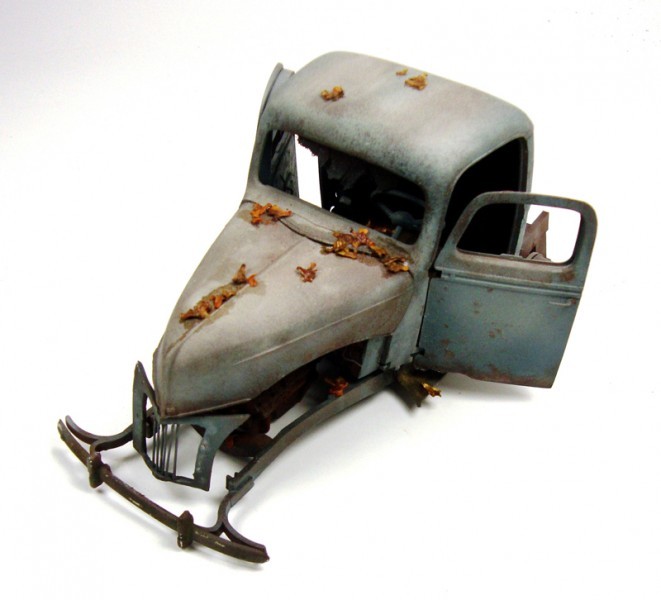
But, before I go too far, I need to add a few things that will help with the layering process. In some of my reference pictures there are clumps of leaves strewn around and jammed into corners and such. I will add these before the next weathering step as the leaves would weather too...in different stages.
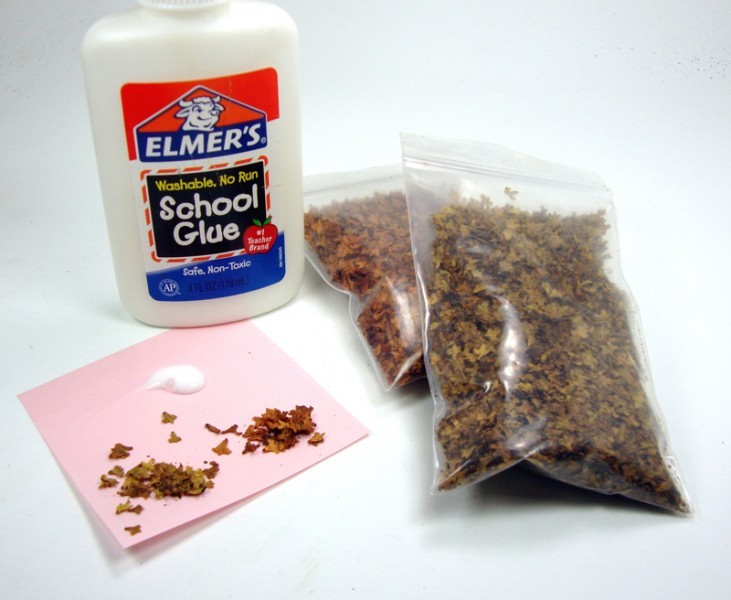
These "leaves" are just colored Birch seeds. I bought this as a 3 pack at a show for about $10USD. Sorry I have forgotten the actual name of the supplier. However, with a little time and very little skill, you can cultivate your own from some Birch trees and add a bit of color to get the more natural look.
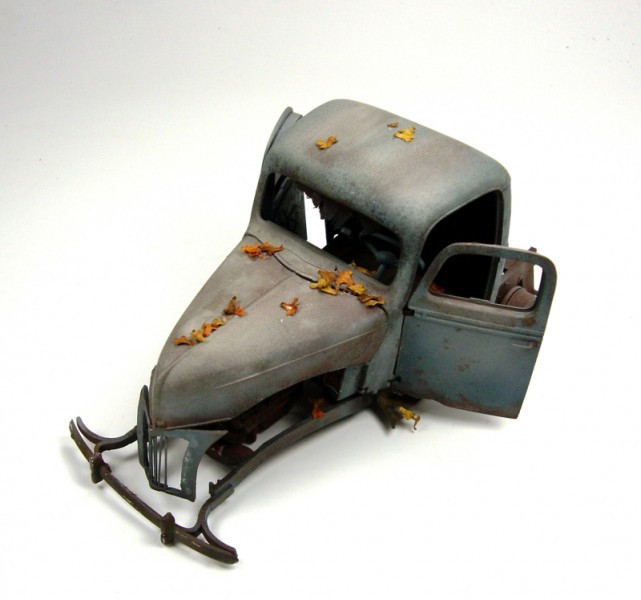
So using a little white glue, I applied these faux leaves to various areas.
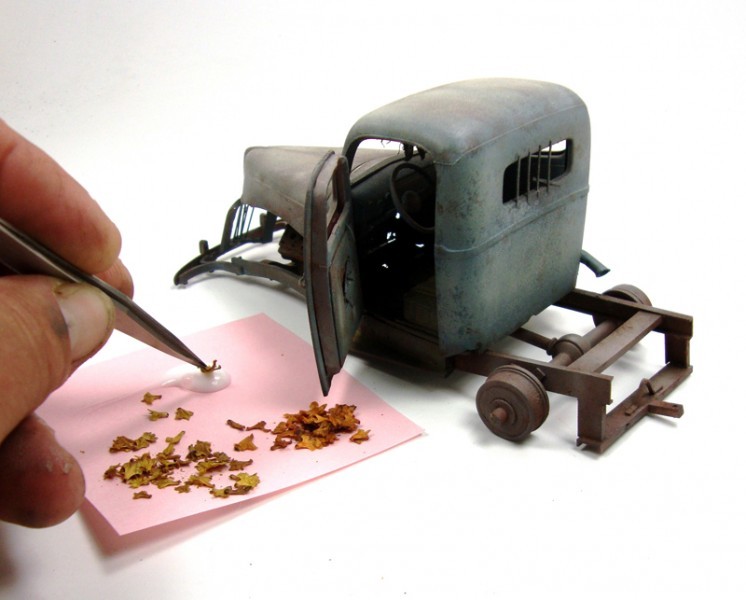
Later on, I will add a few here and there at different points in the weathering process. Naturally leaves will fall and decay, and more fall, and so on and so on.
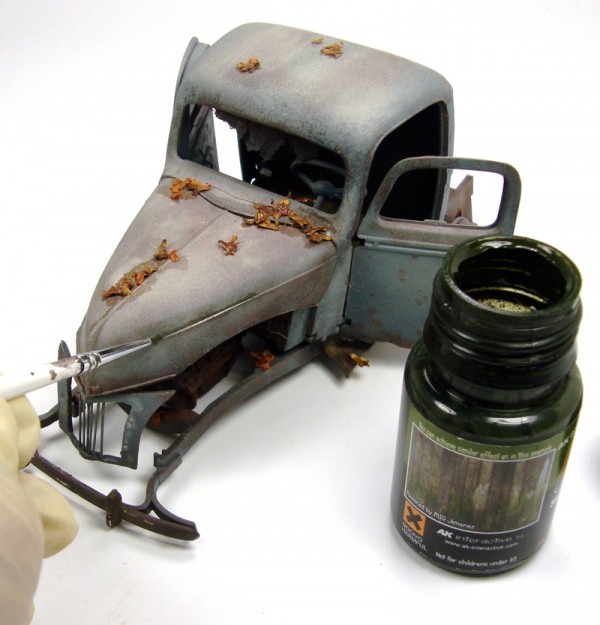
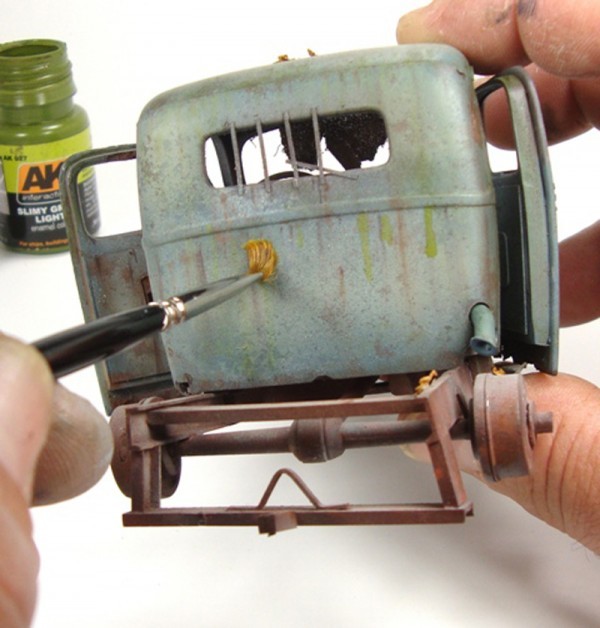
Next, taking some AK Streaking grime, I applied a dark wash to, and around, the leaves I added.

Letting this dry just a little, I grabbed some AK Slimy Grime Dark. Similar to a pin wash I placed some dark wash into the creases and corners, mostly on the horizontal plane as the moldy green slime would settle in to these areas. The keen eyed modeler would notice that I actually would need to turn the bottle around when taking the picture!
In this next shot, I went directly to a light wash using the same Slimy Grime Dark. Putting a little of the grime on the brush and a quick dab in some white spirits to thin, I lightly wash the area and then making sure to take care not to disturb the leaves, apply some of the grime to them as well.
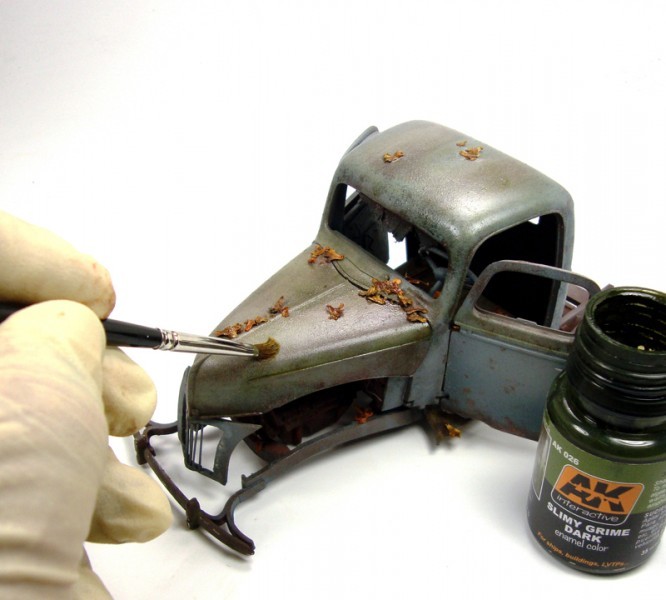
I will let this sit for a day or so to dry completely. After a little cure I will be ready to add a few more steps.
Finishing Up
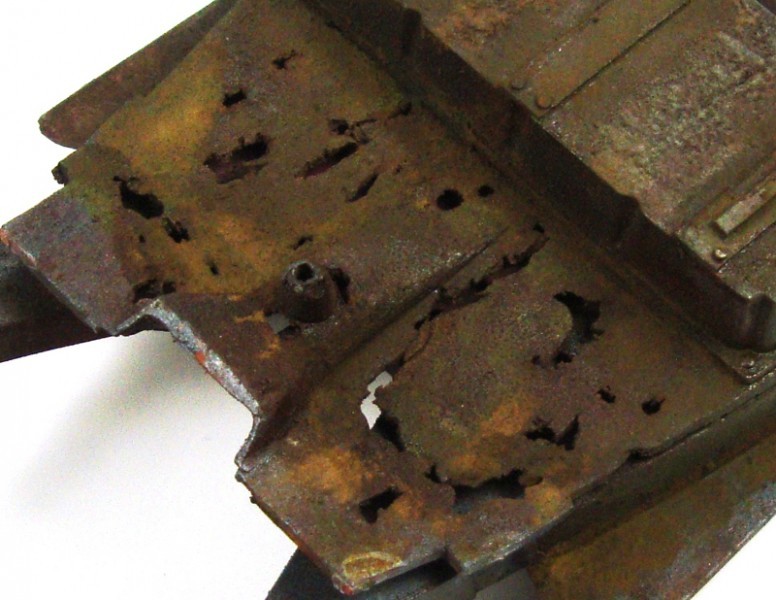
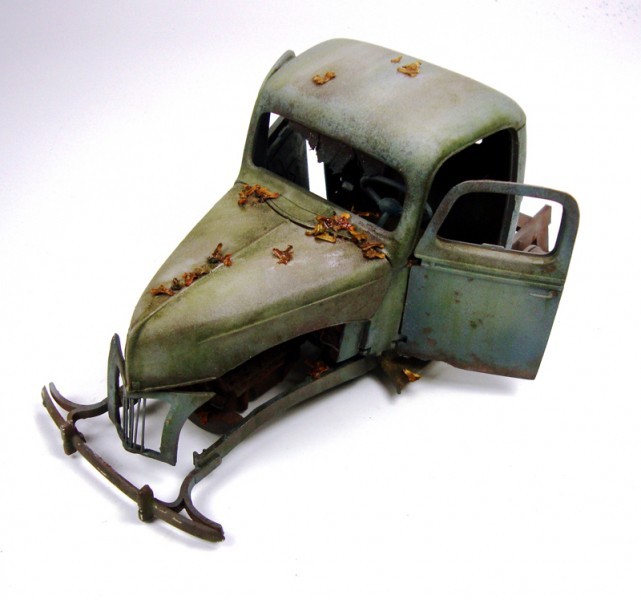
At this point you begin to see the "aged" weathering begin to show. Up next will be some more streaking and washes. So, I took some shots tonight showing the first of a few steps to more weathering. I added some streaking Rust and Grime from AK.
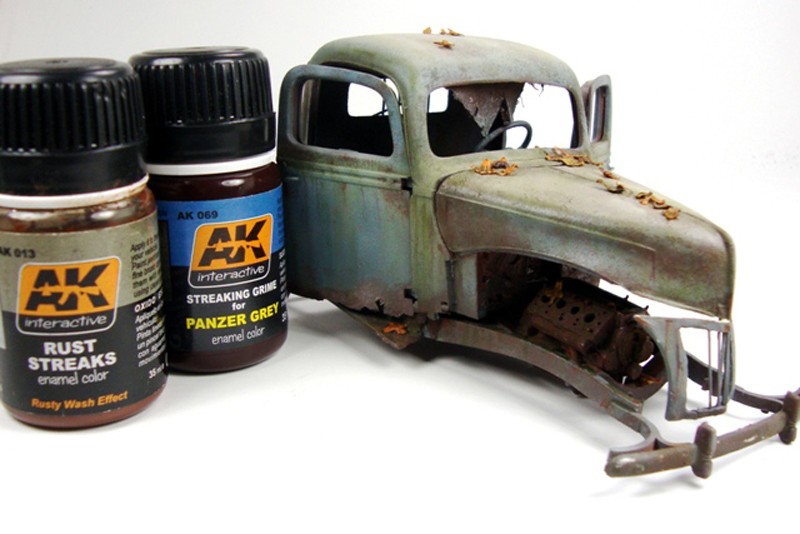
As you can see in these pictures, the light streaking rust is added to the chipped rusty sections.
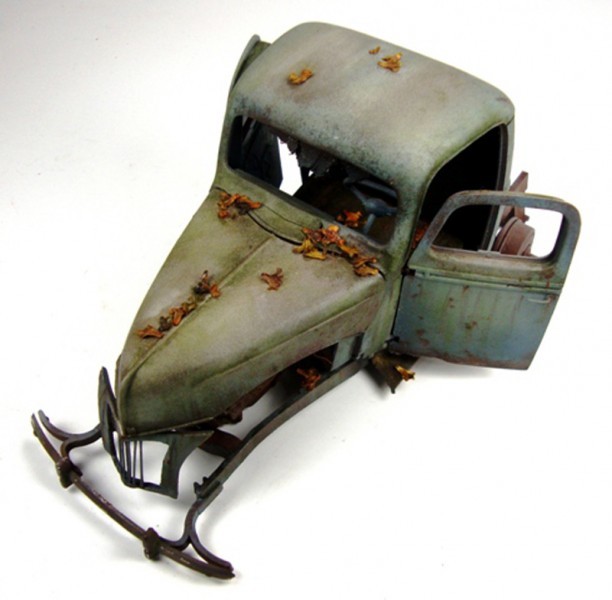
After laying down another quick clear coat to protect my work I am adding a little more color. Using Slimy Grime Light, I ran some streaking in a downward motion. Normally I would make these streaks as really fine lines; however, I am blending these for some color balance rather than just streaking.
Next I take a flat and slightly wider brush "humid" with spirits, draw downwards thinning the streaks making sure to clean the brush regularly. What is meant by humid is dipping your brush in the spirits and blotting quickly once and then flipping and blotting the brush again on your paper towel or rag. This removes most of the thinner leaving a trace still on the brush. This will help stop tiding, ponding and complete removal of what you just put on.
After, there is a nice blending with the previous streaking.
I will let this sit for a day or so and apply yet another clear coat. Then the final stages of this project. Adding another light wash, some dust effects and a pin wash or two.
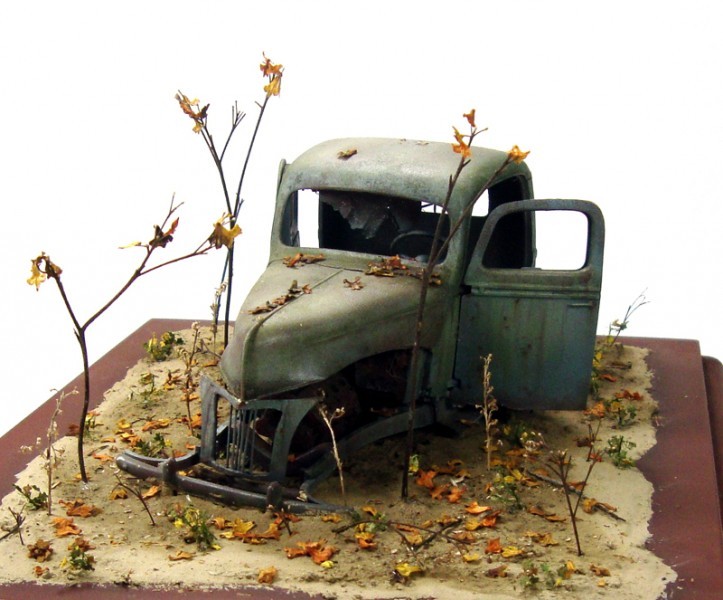
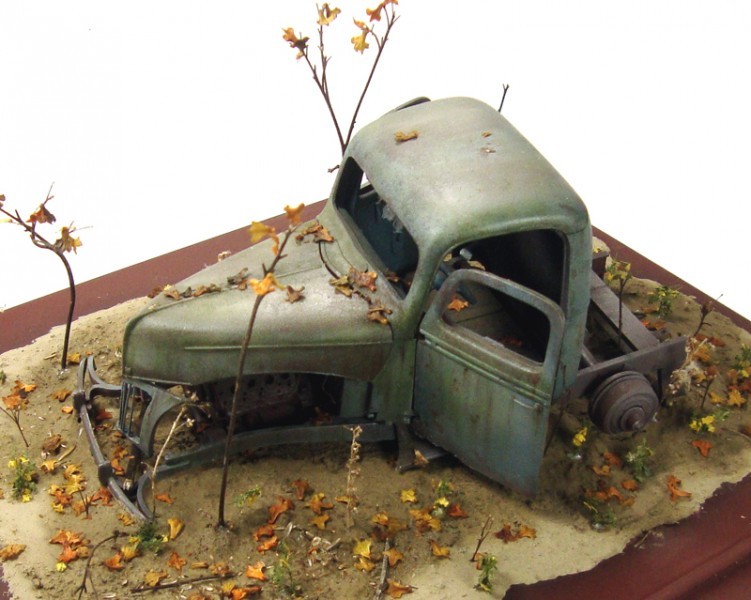
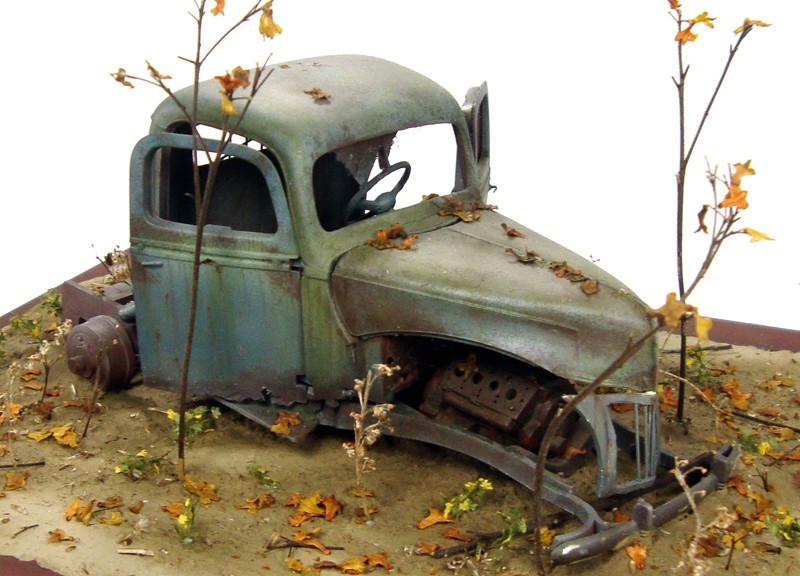
Only the final step of mounting the truck to a simple little base and this is complete. Thank you for joining me along this ride into a little Rusting and Weathering.