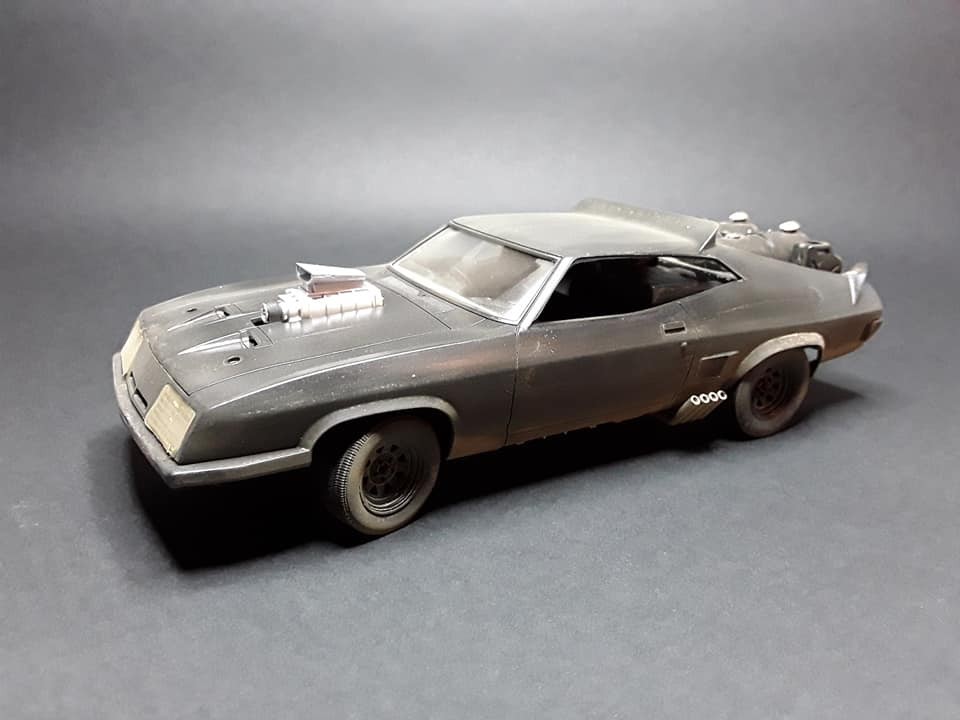


I’ve always been partial to drifting, both the style and the skill it takes to have precise control over a vehicle while sideways at speed, yeah sideways. And besides, who doesn’t love lots of engine noise and plumes of tire smoke?
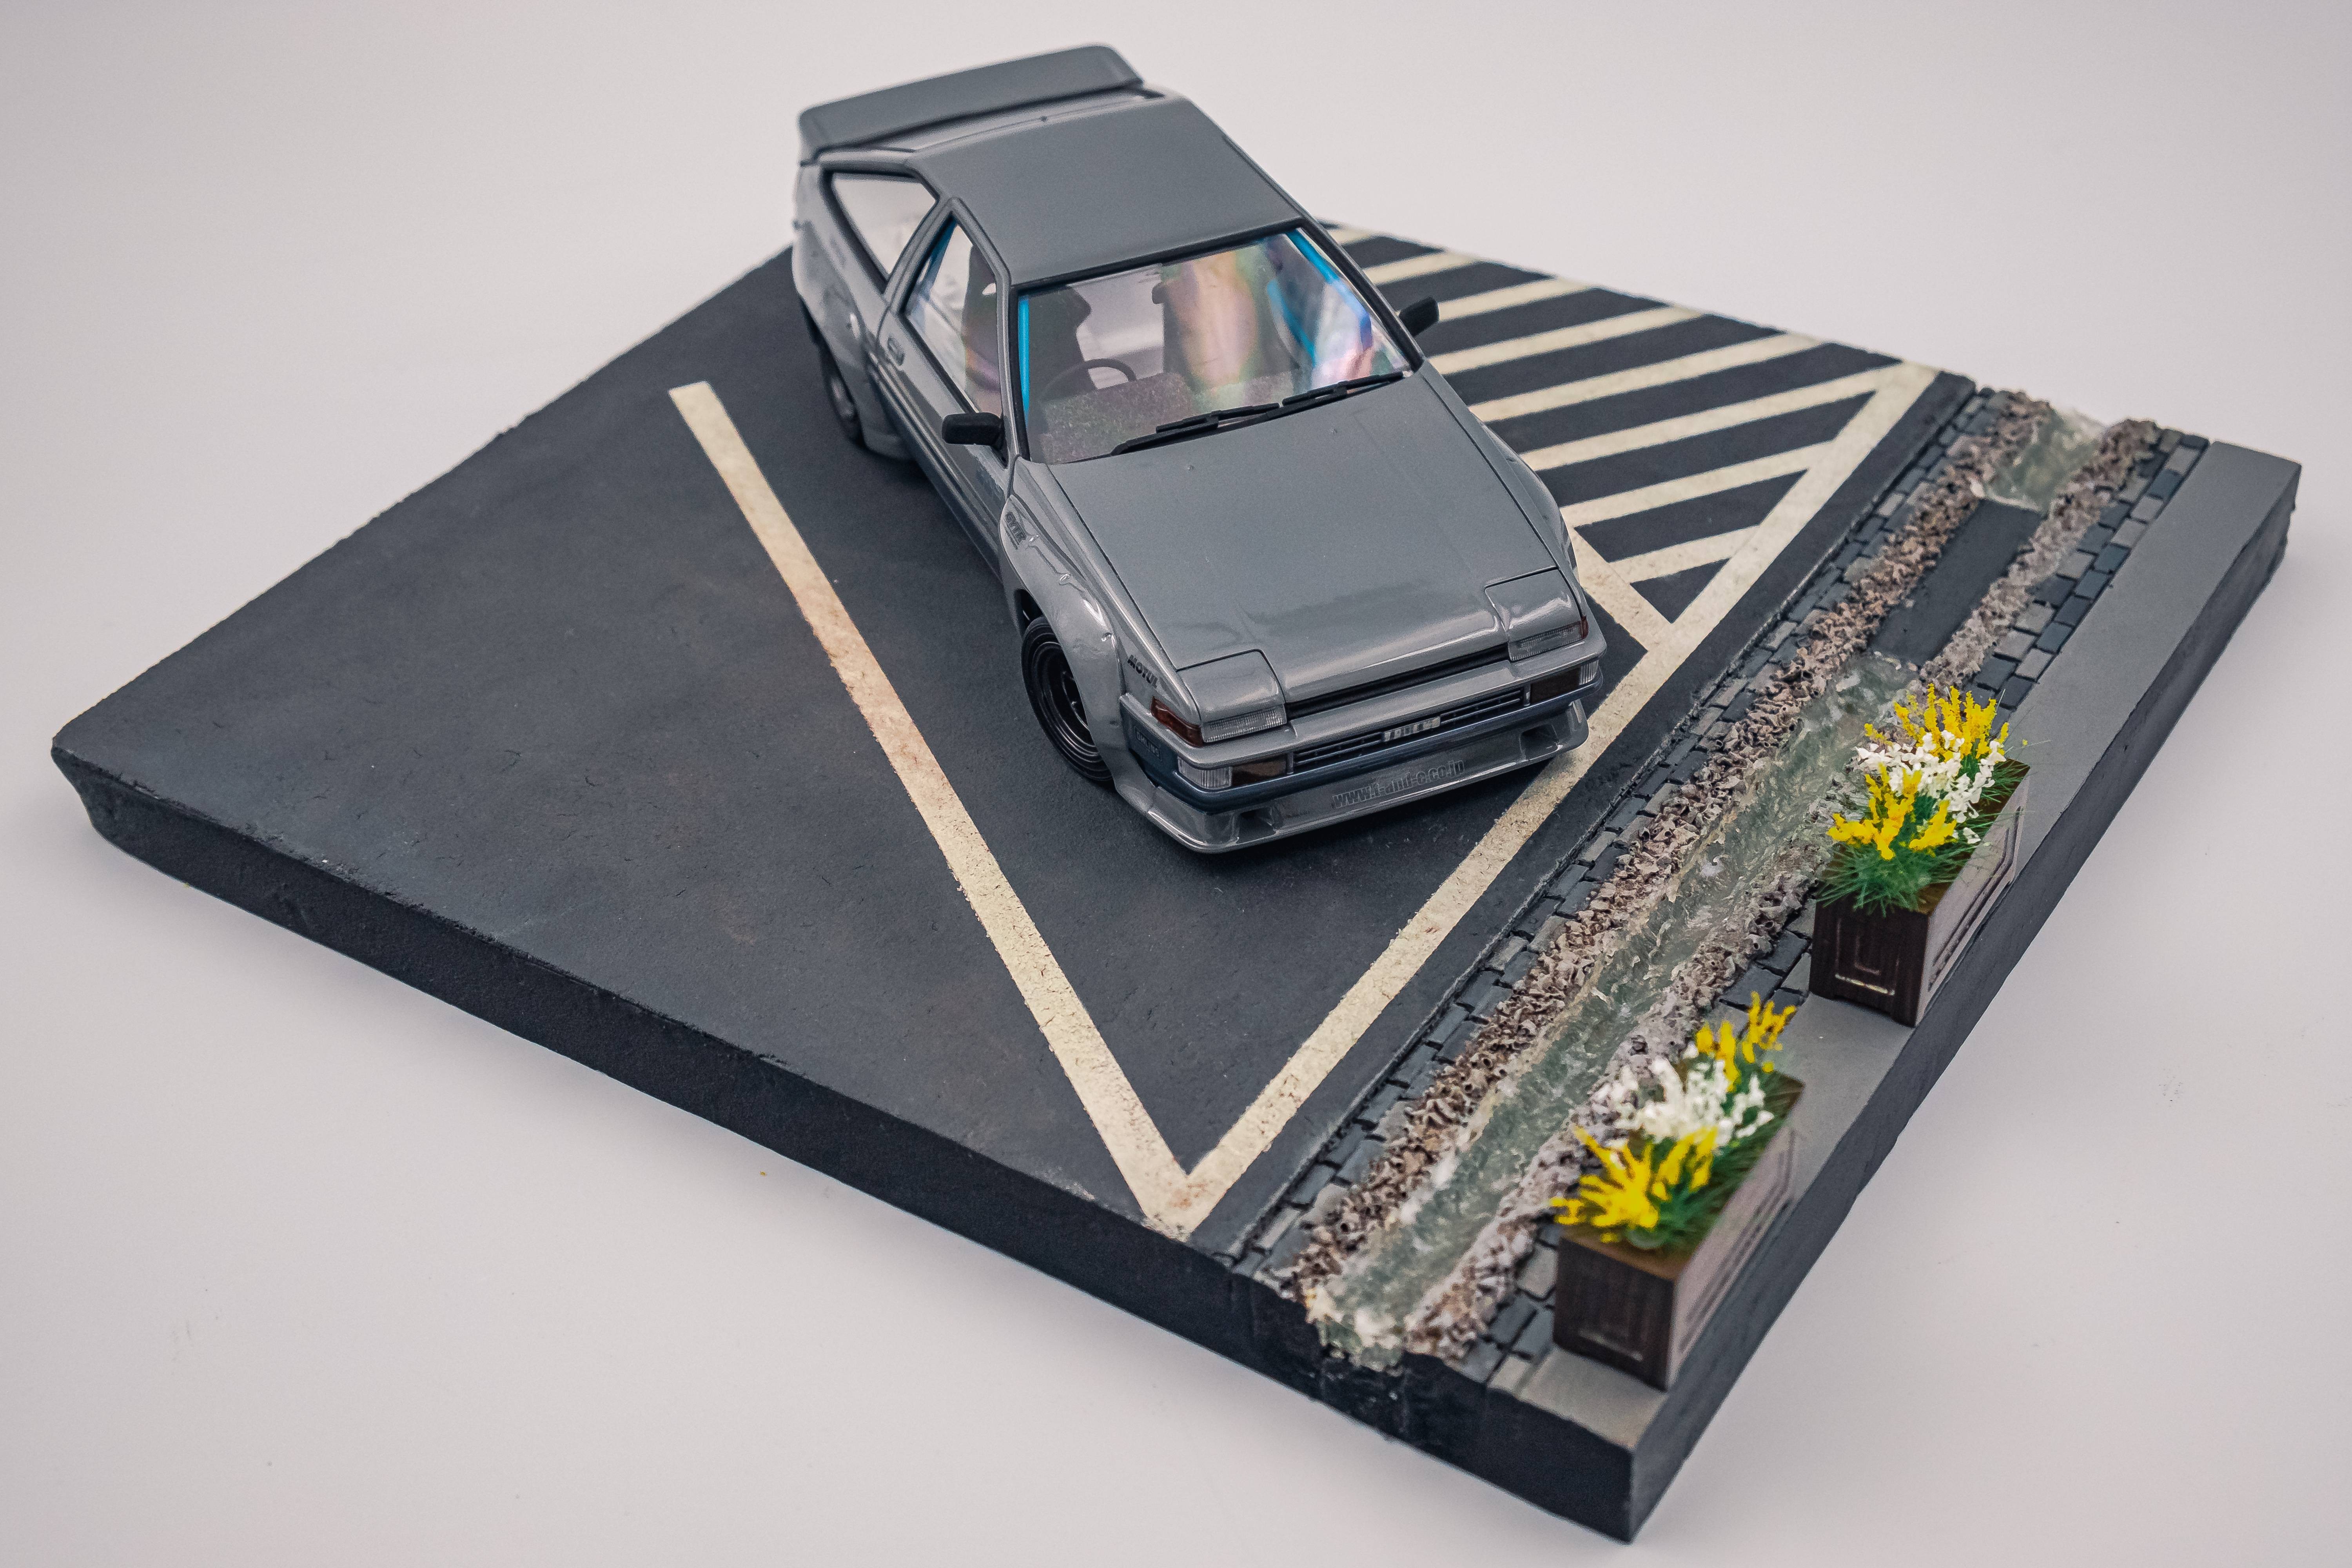
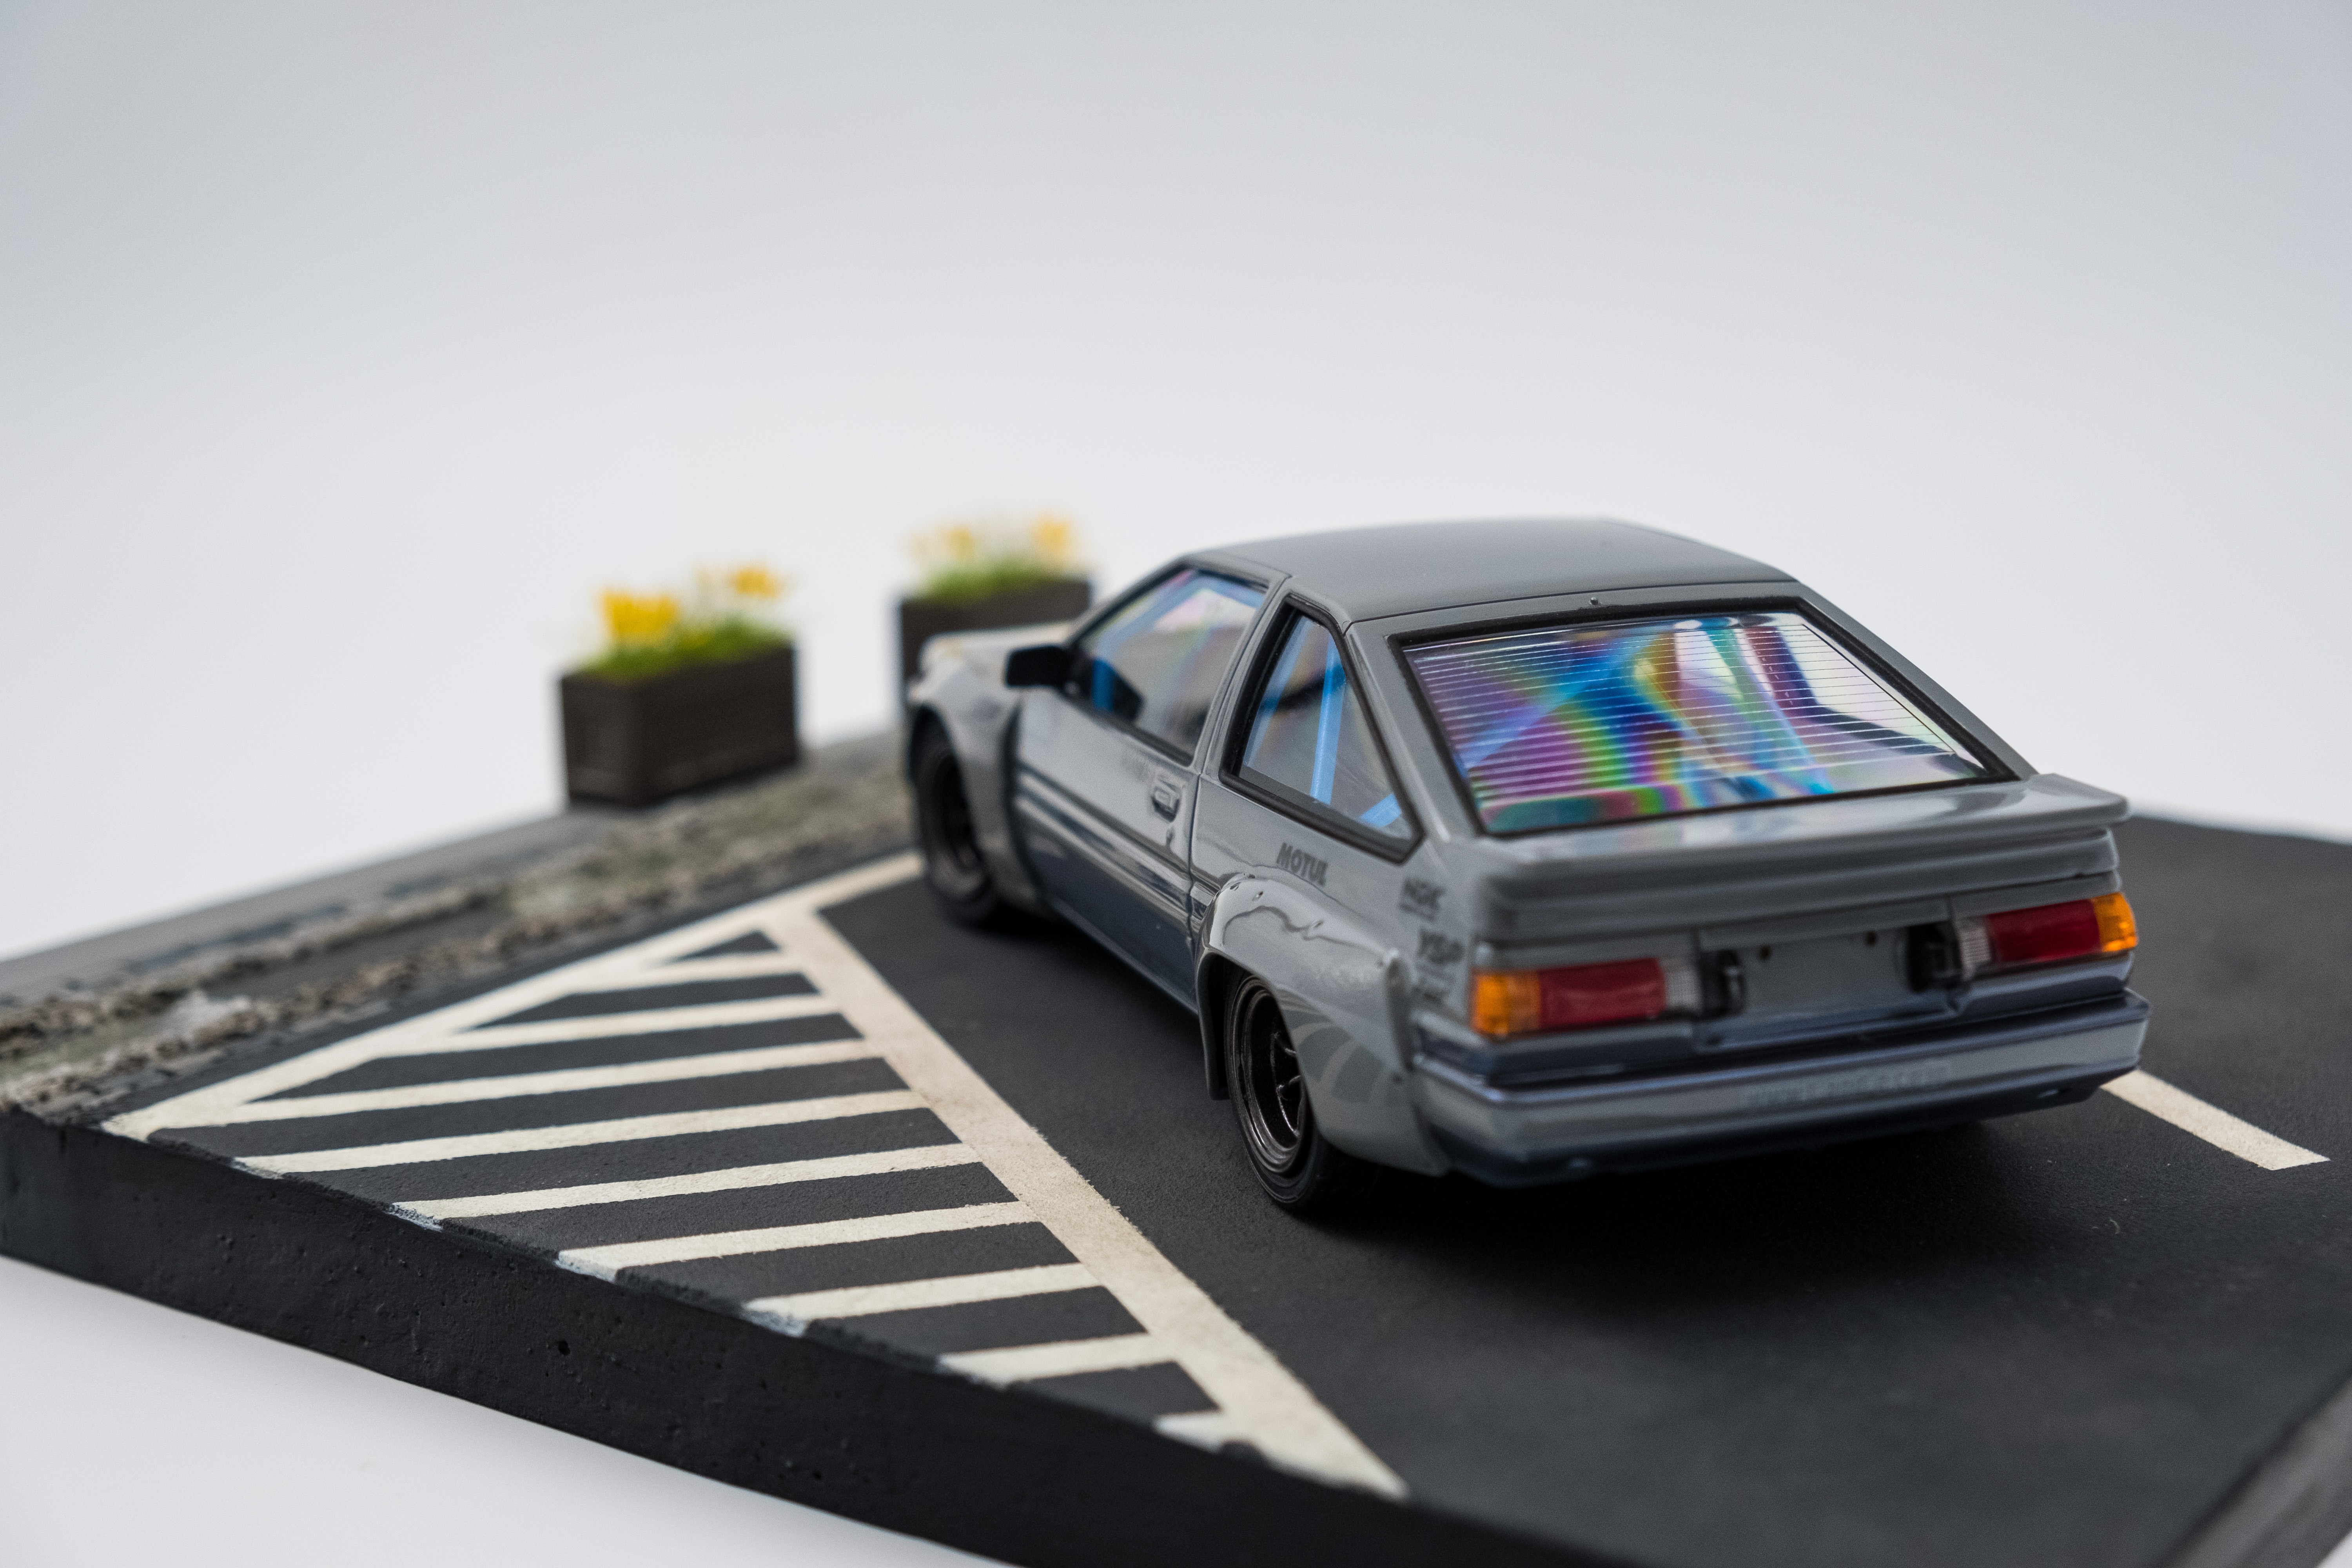
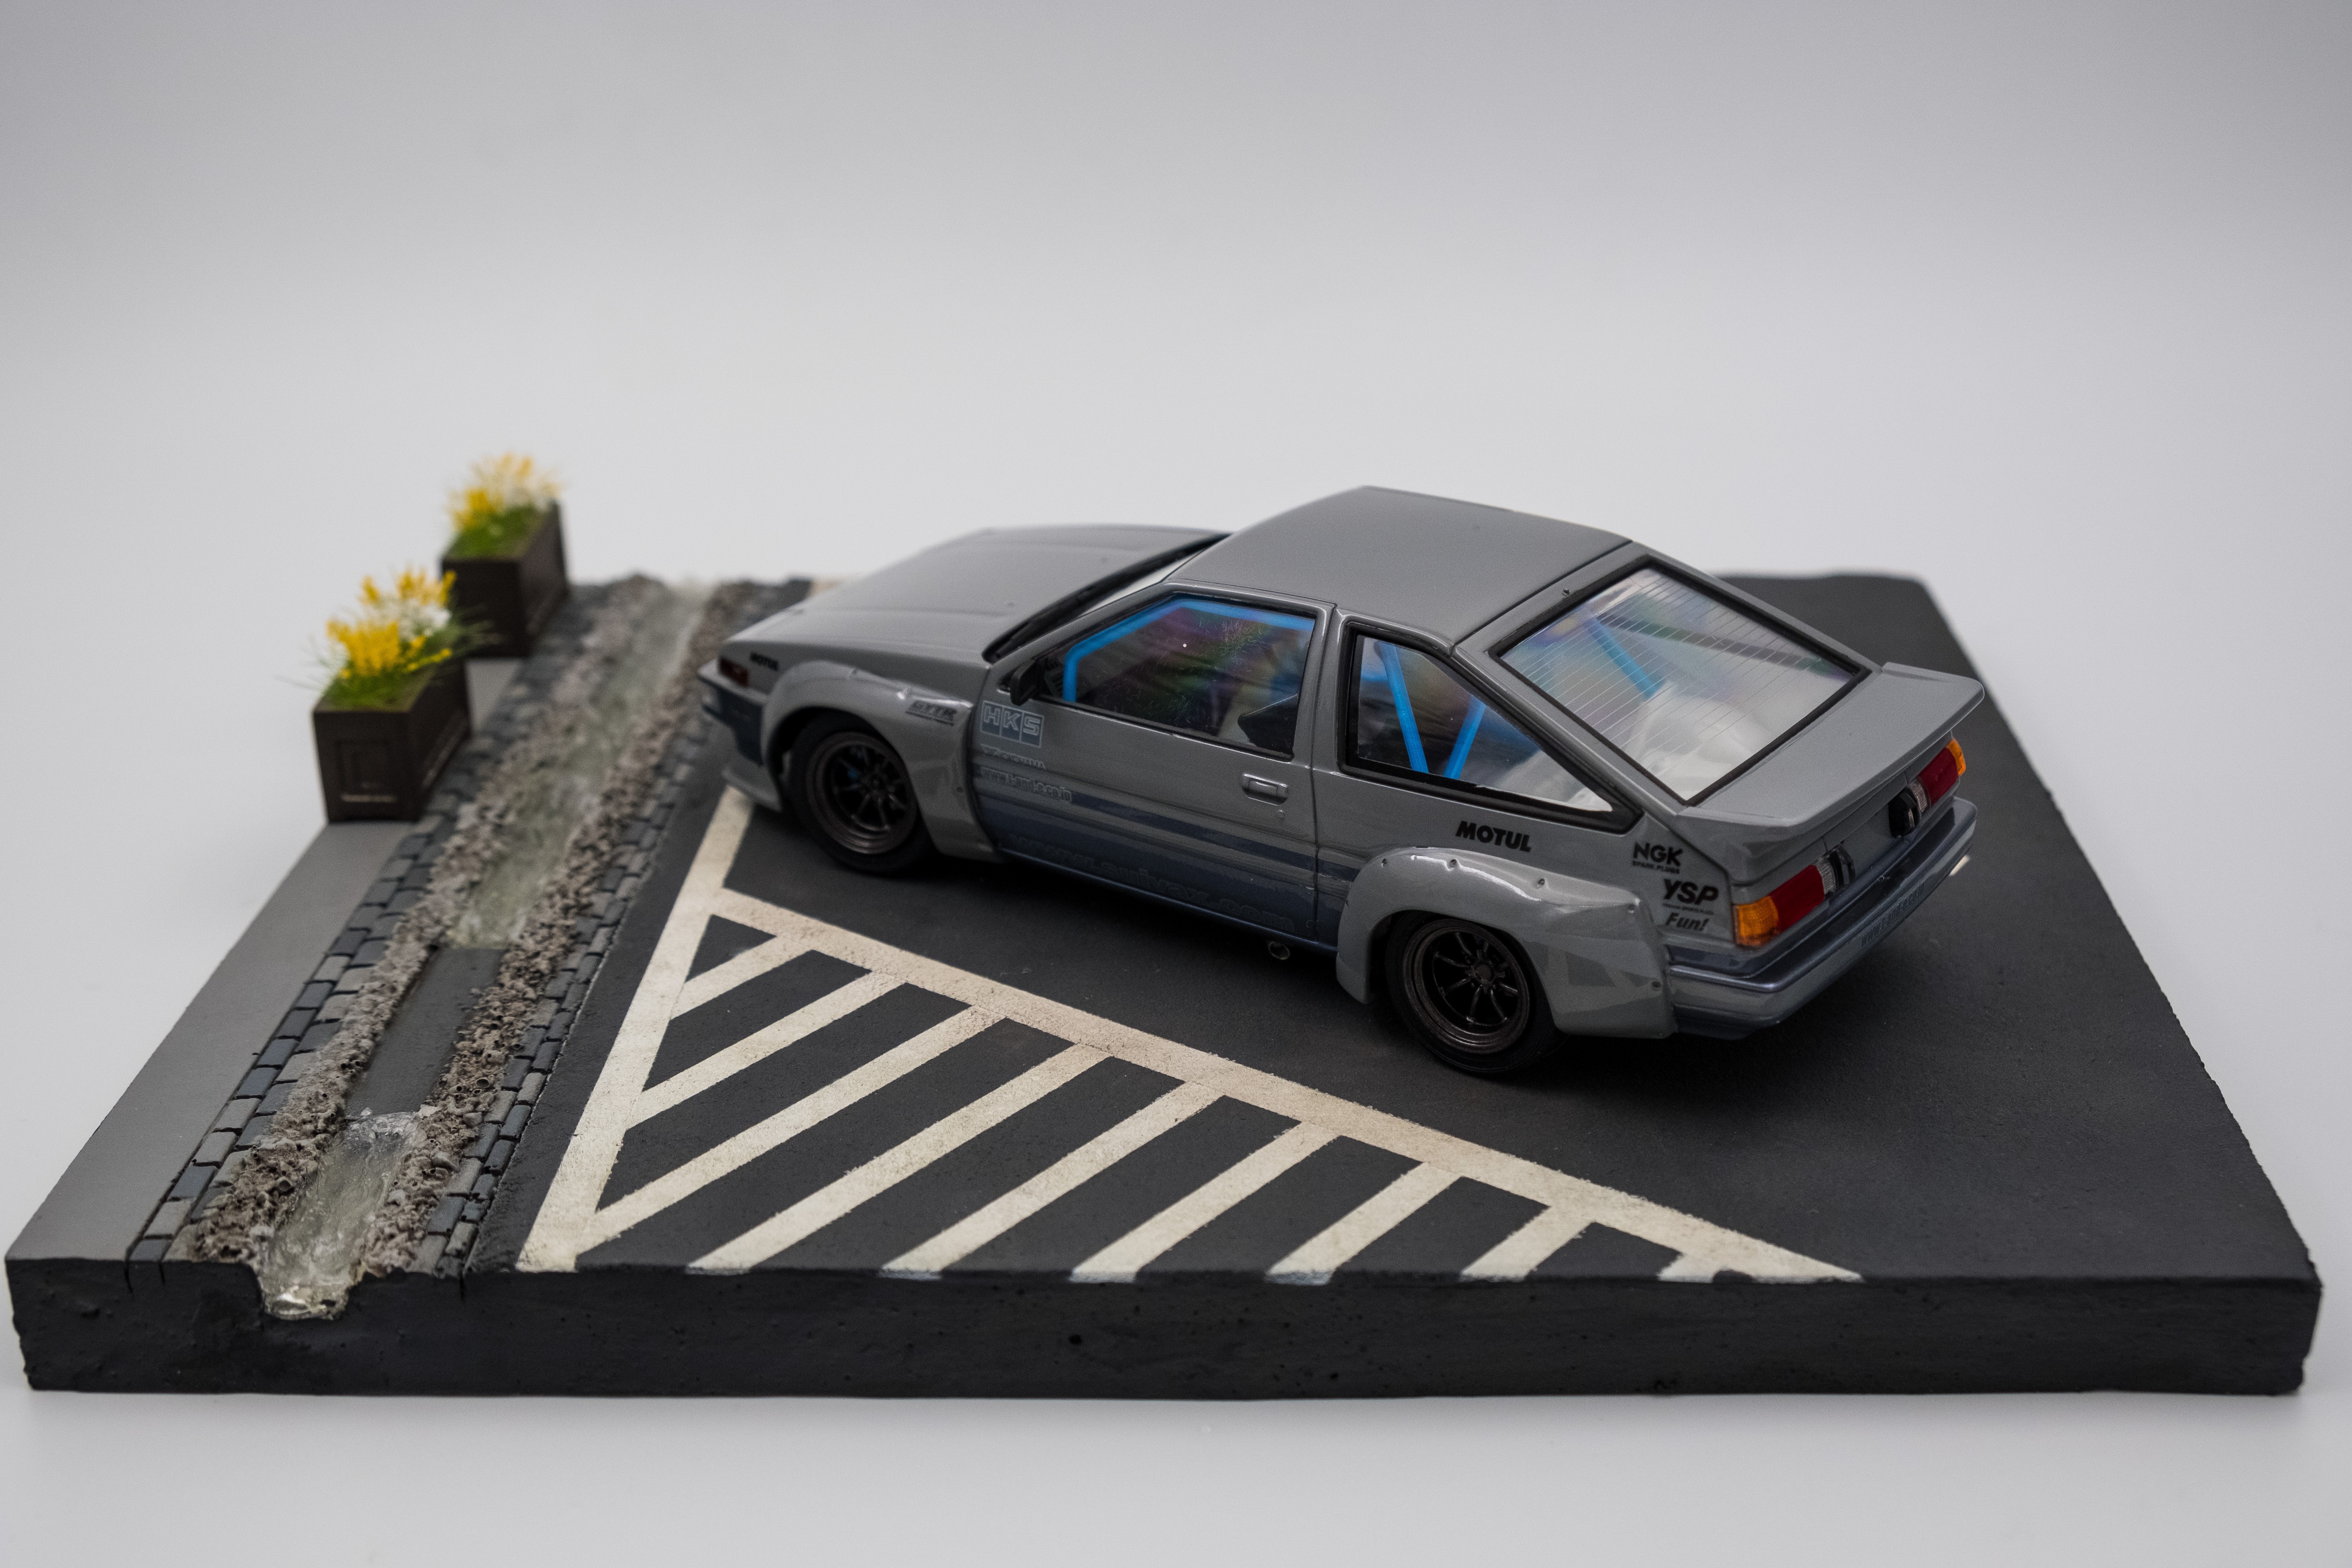
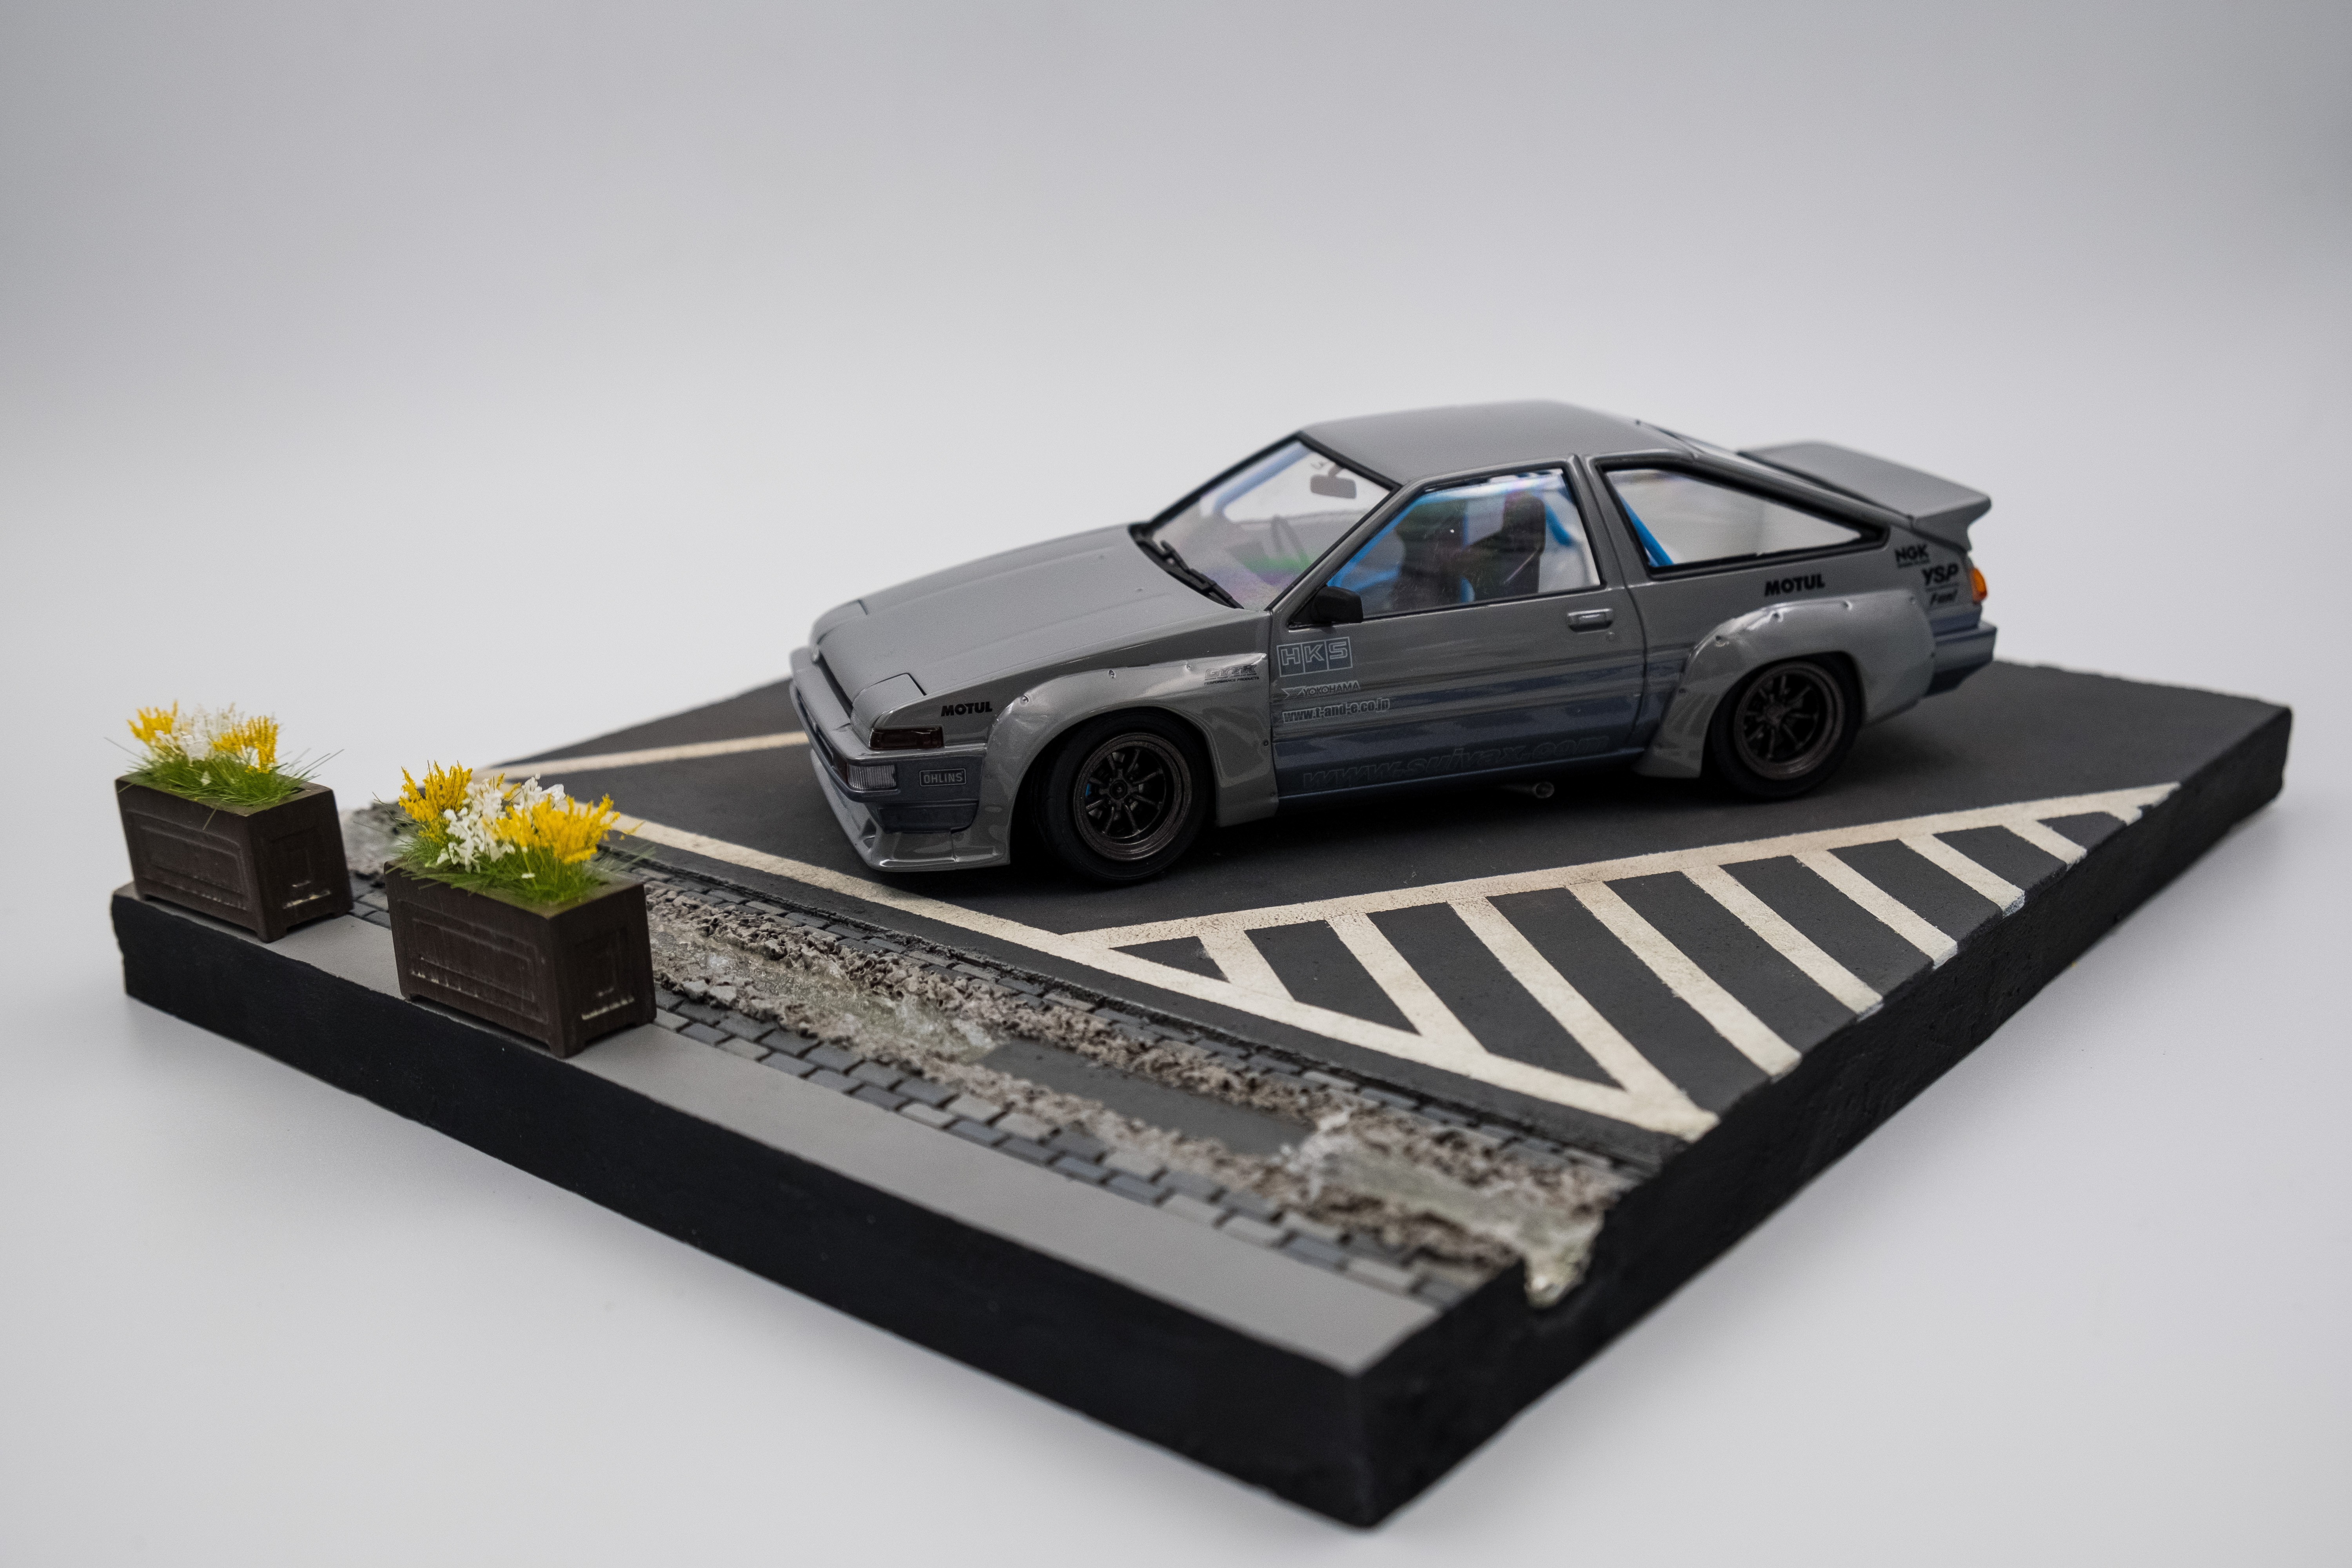
Watching the TV show “Initial D” as a teen I’ve always found the AE86 generation of the Toyota Sprinter Trueno to be a legend of sorts, with its great balance, a classic FR chassis layout, and light weight it’s the perfect base to build something awesome. With a little work into the generation you can have a great performer for sliding around the corners, especially downhill. The “N2” racing spec only adds to the ability of the AE86, a stripped-out interior drops a few pounds from its already light curb weight and the chassis is stiffened for better response. The N2 spec also widens the fenders to allow for wider wheels and a wider track width, which you know is desirable for any go-fast car.
Kit Contents
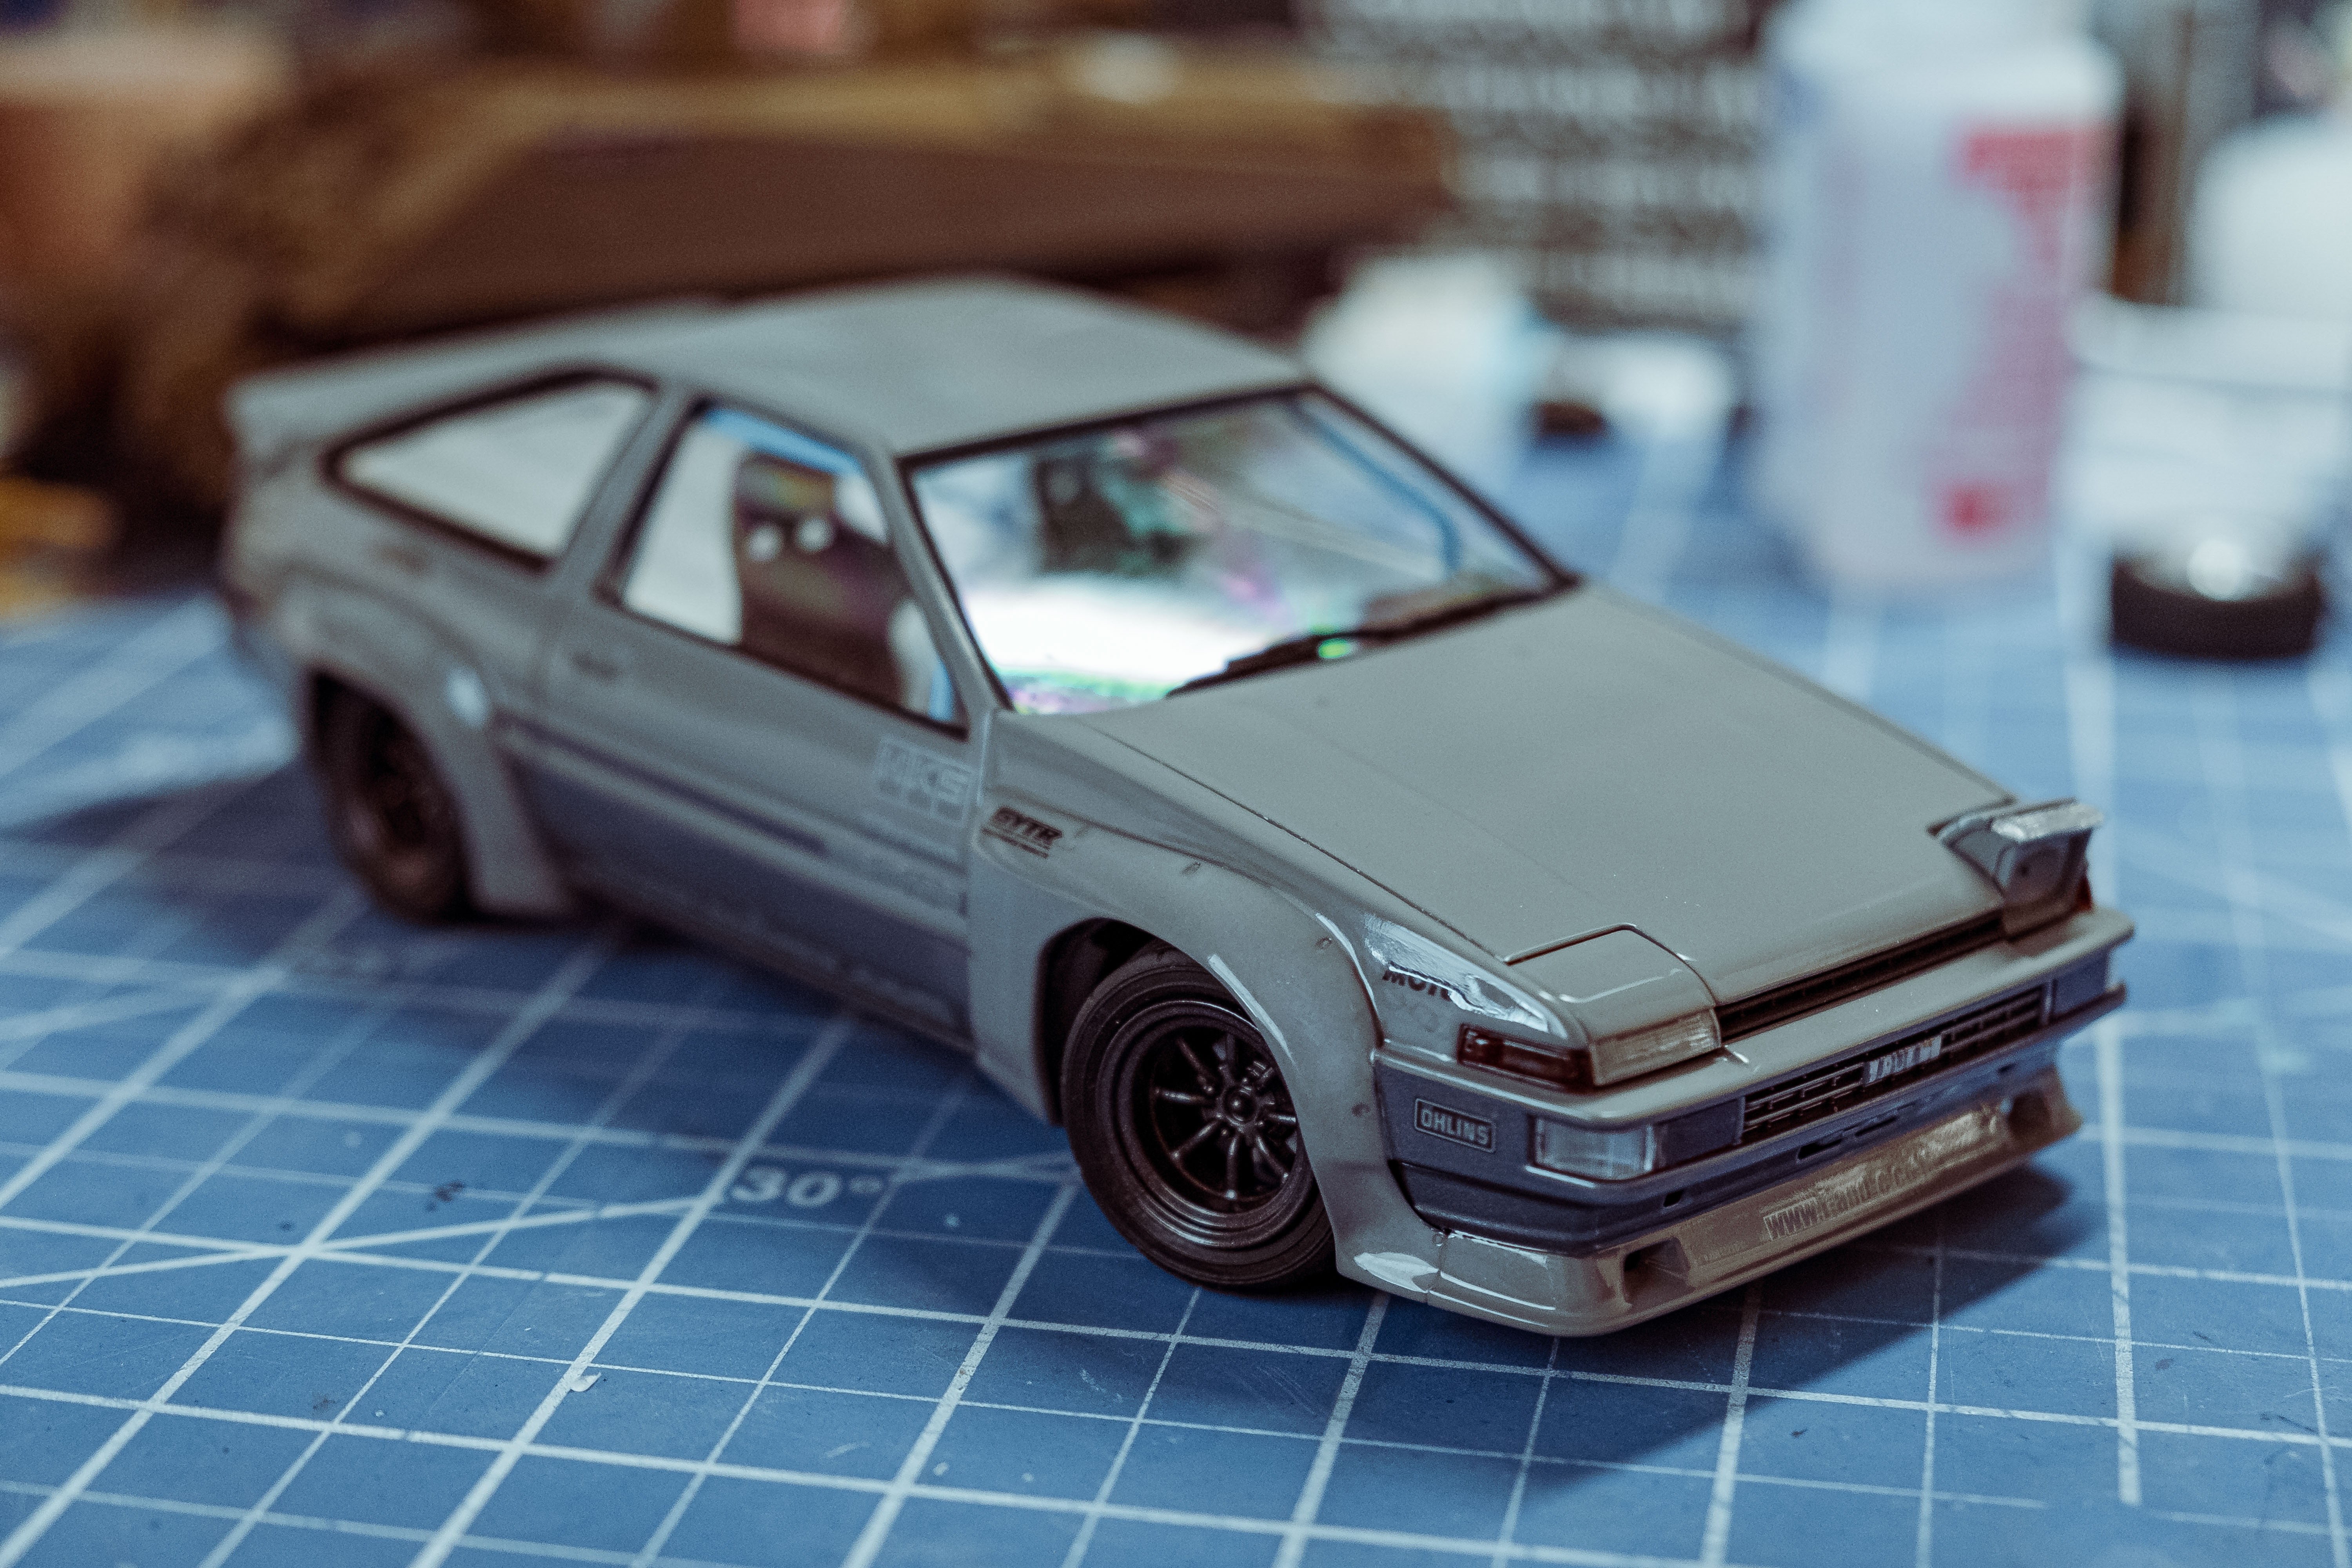
The kit is straightforward with no modifications required to get the “over fenders” to fit properly. The factory fenders have been pre-trimmed by Aoshima for the “over fenders” and the modified bumper is provided as one piece to replace the factory stock bumper. The front fenders use this modified bumper to locate them and are as simple as aligning front edge of the fender with the bumper’s splitter and gluing them in place. The rear fenders require a little bit of measurement as far as front to back positioning goes and a little trimming of the body once they are in place. Nothing a quick pass with a hobby knife can’t fix.
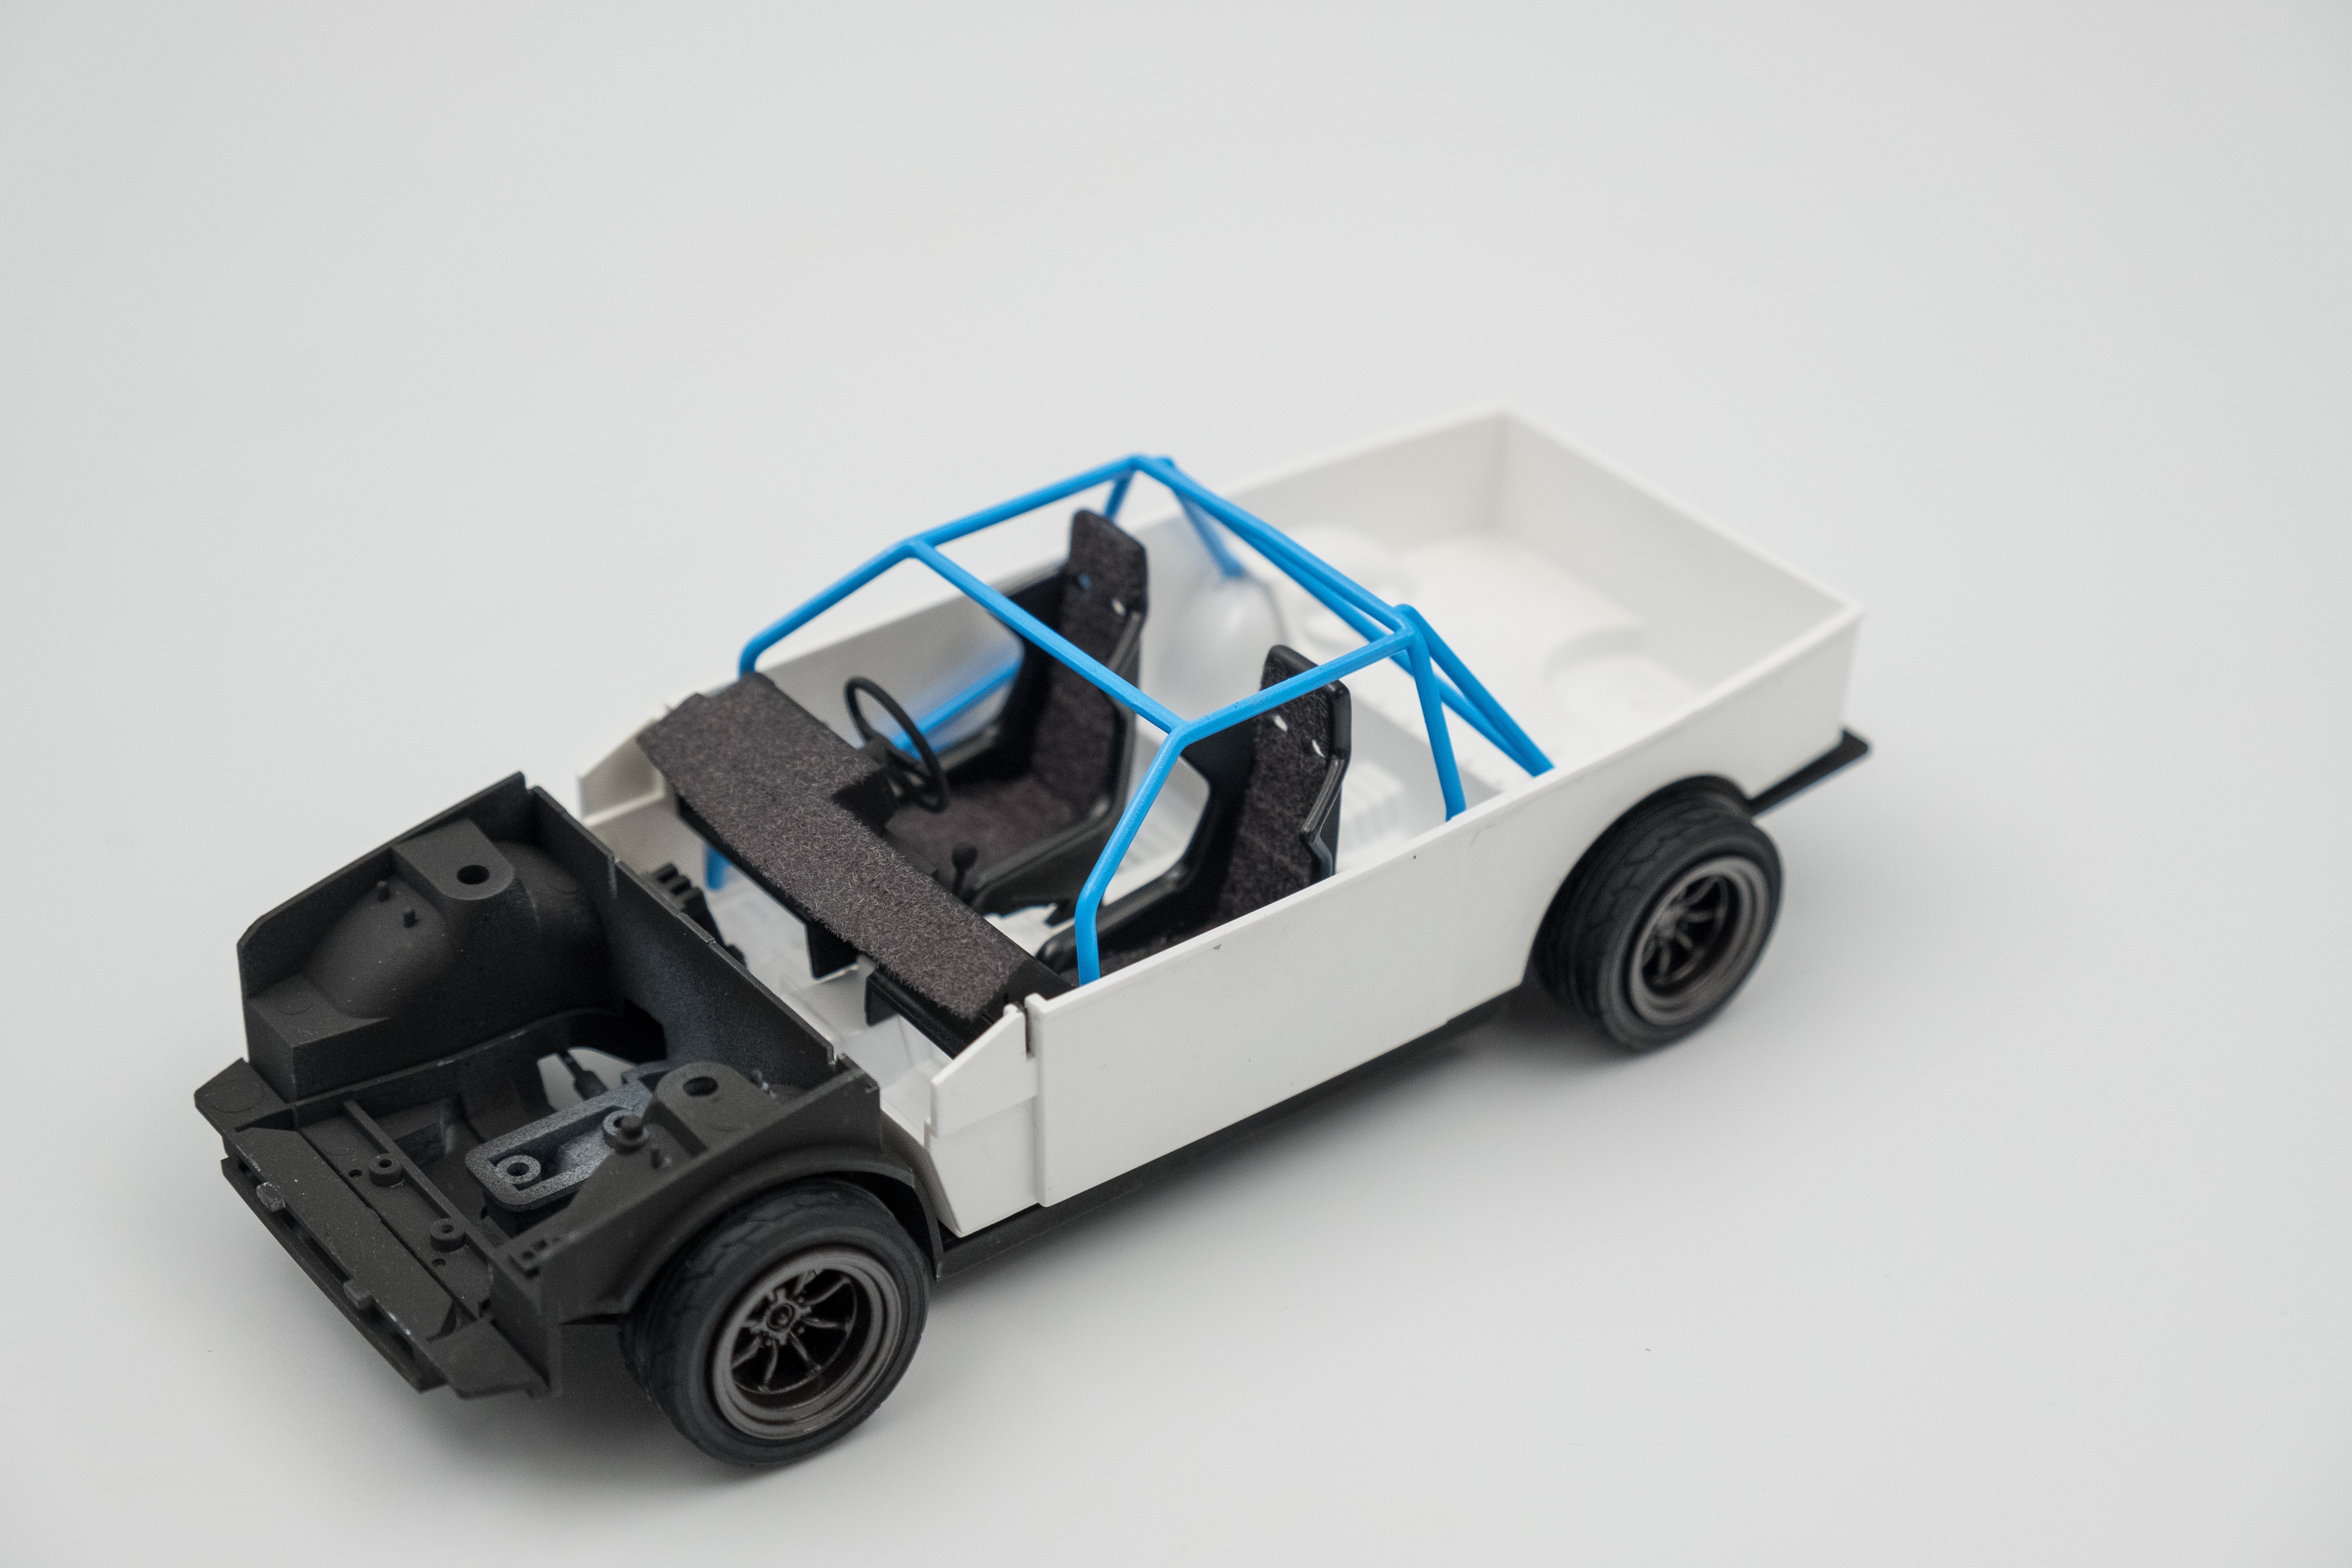
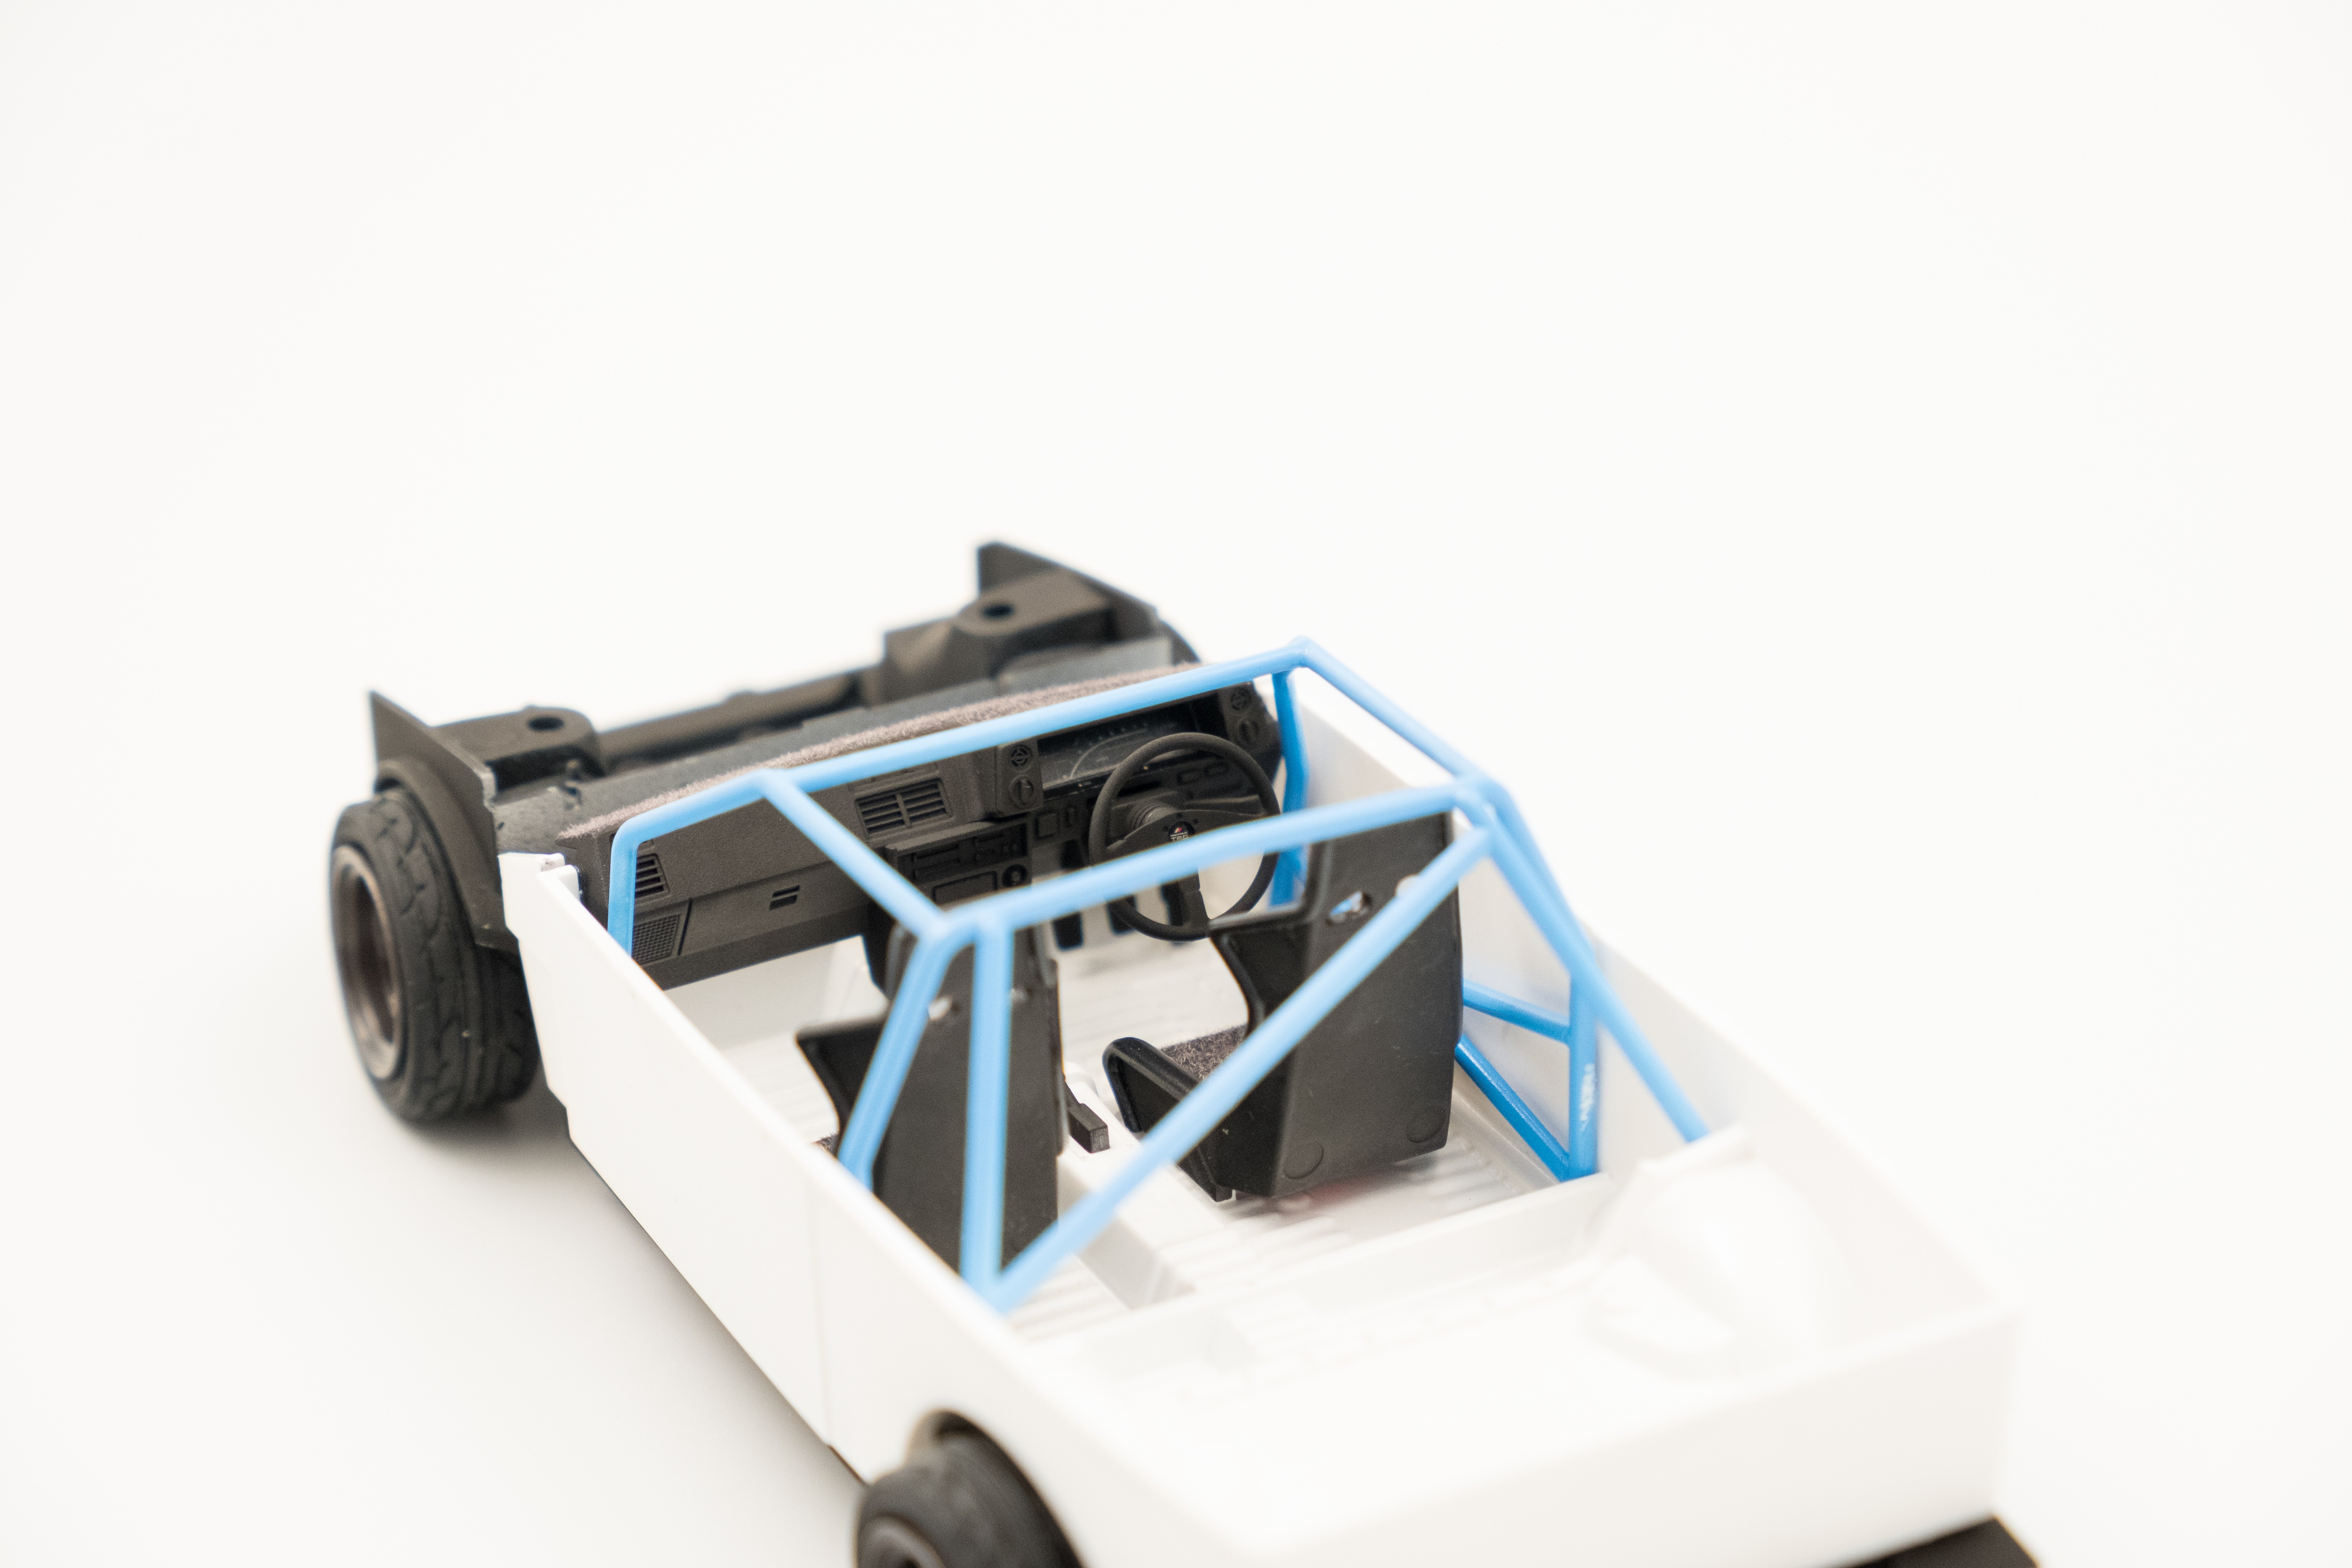
The kit includes racing bucket seats and a roll cage to finish off the racing aesthetic along with a set of timeless “RS Watanabe” wheels. The hood is intended to be positionable, but with this being a curbside kit there is no engine to be shown, so I glued mine shut.
Everything goes together smoothly with no monkeying around required, that monkeying around begins when you want to mask the two-tone paint scheme.
Painting
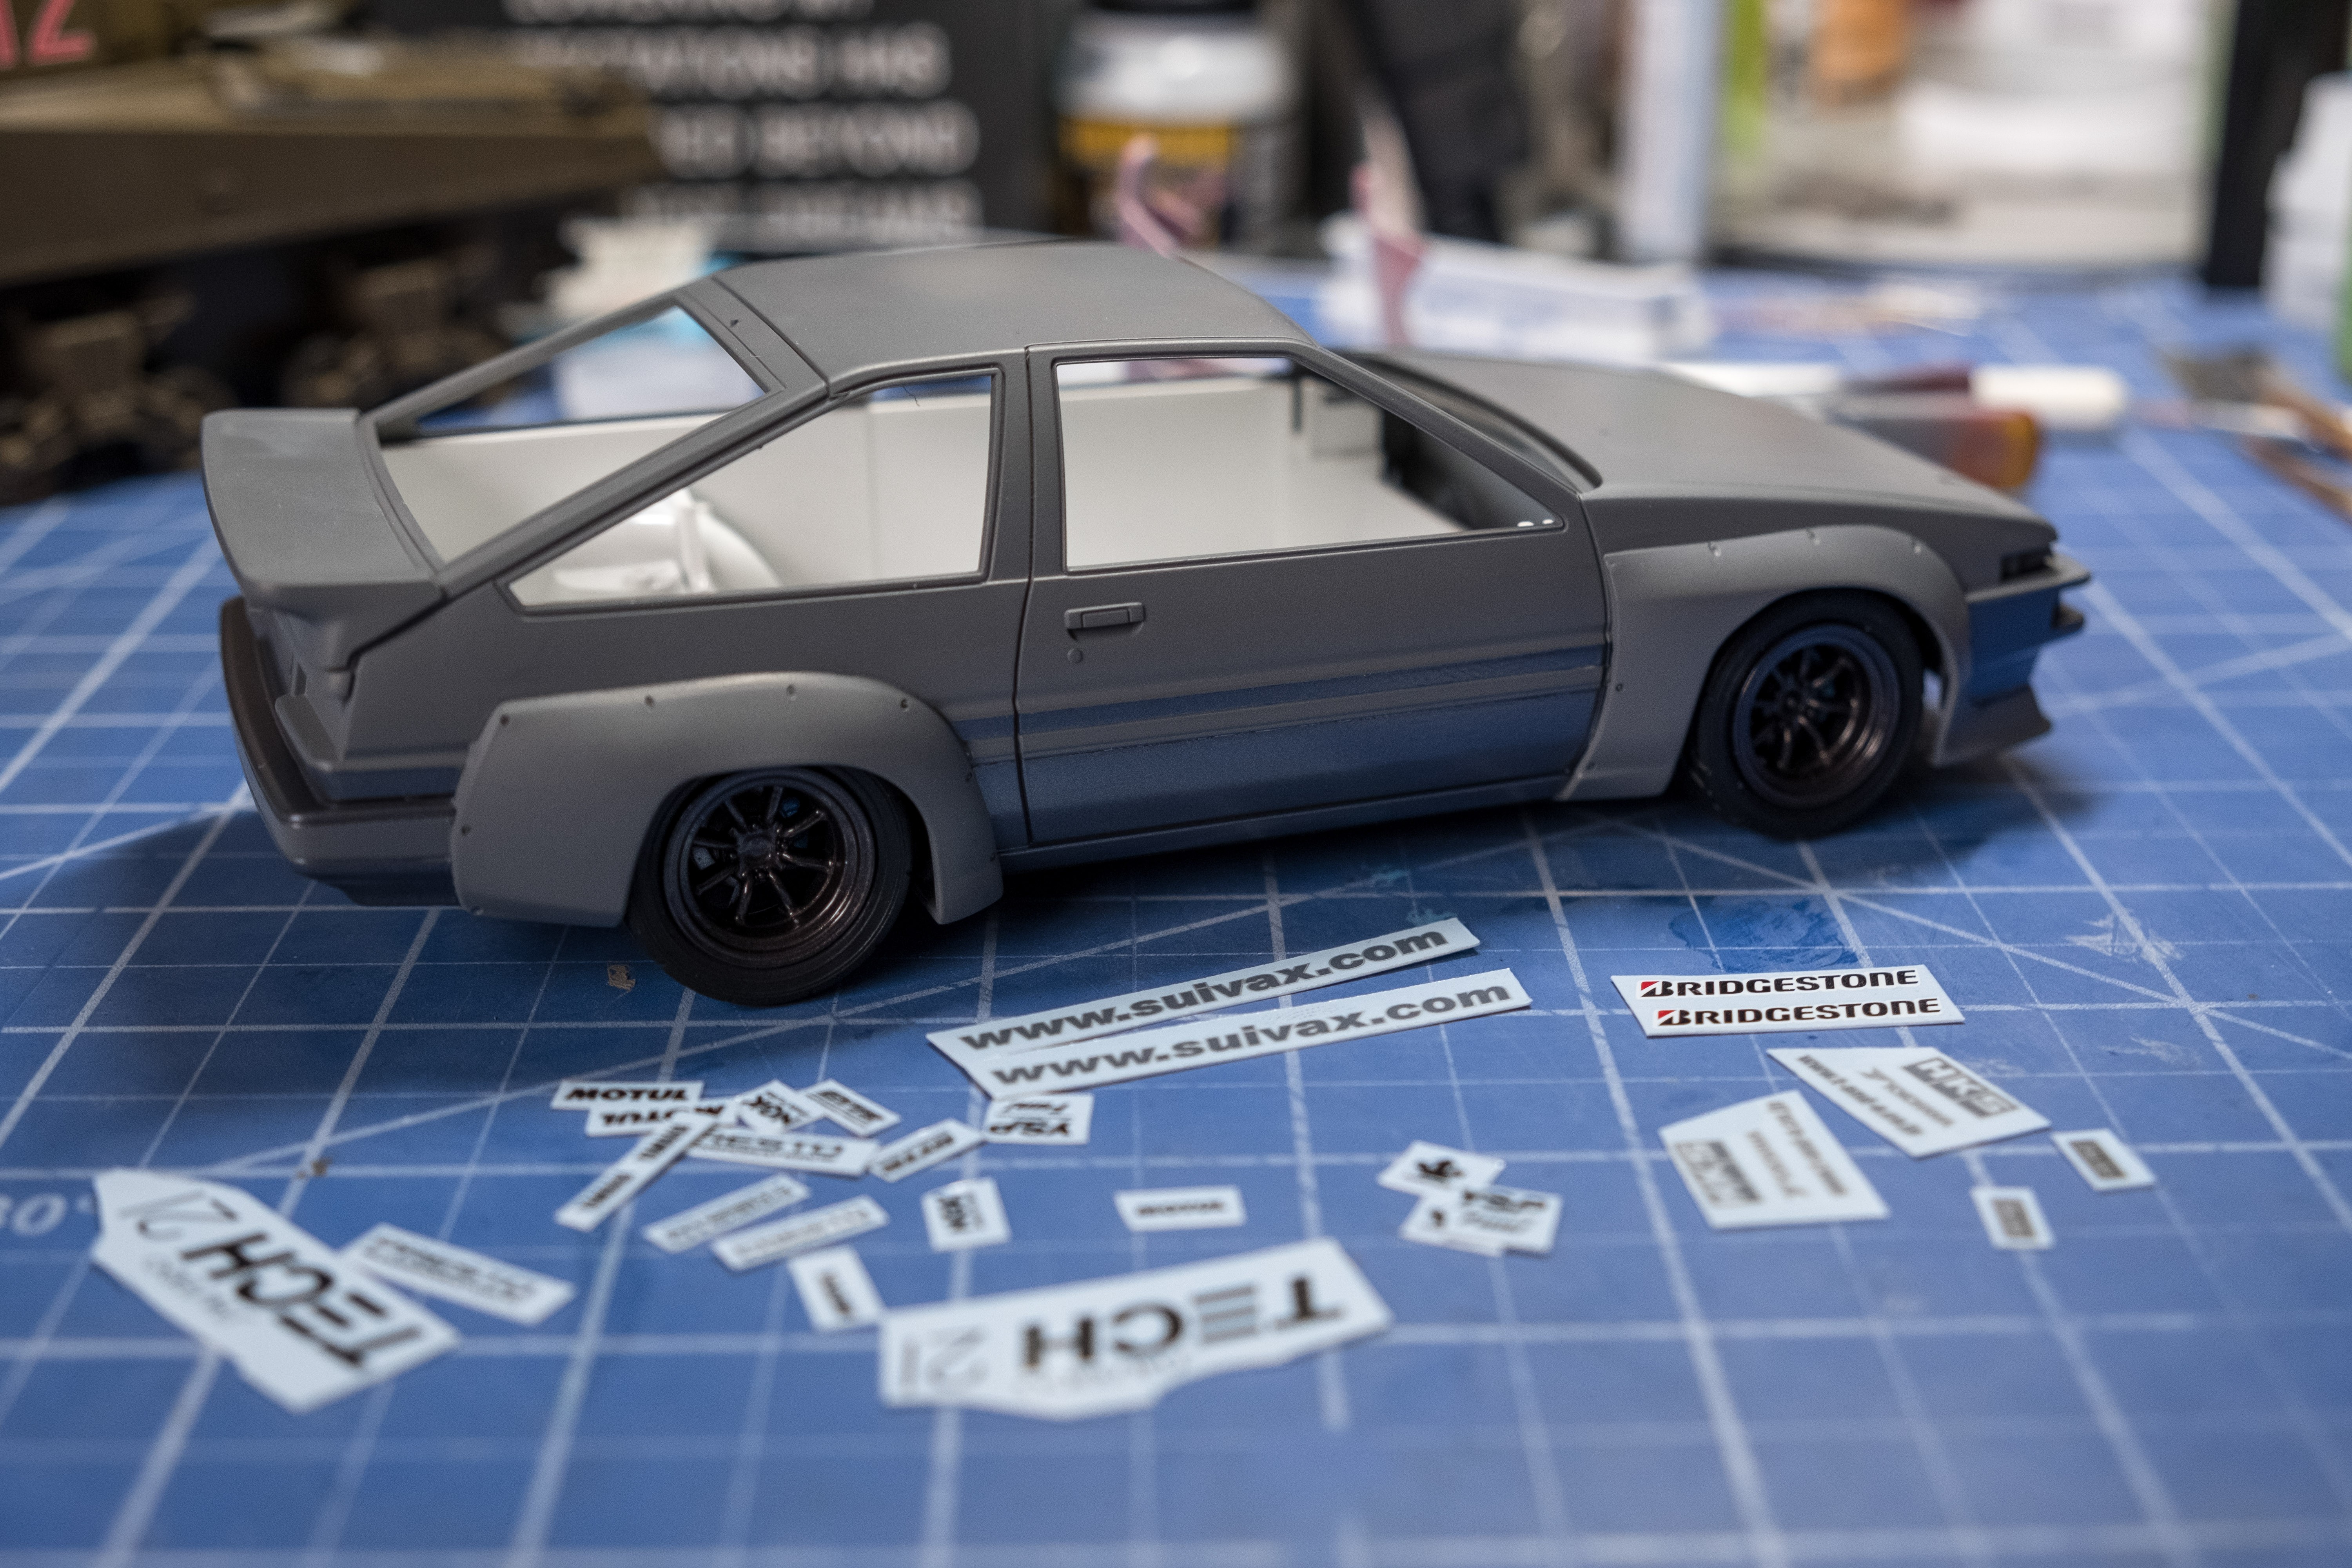
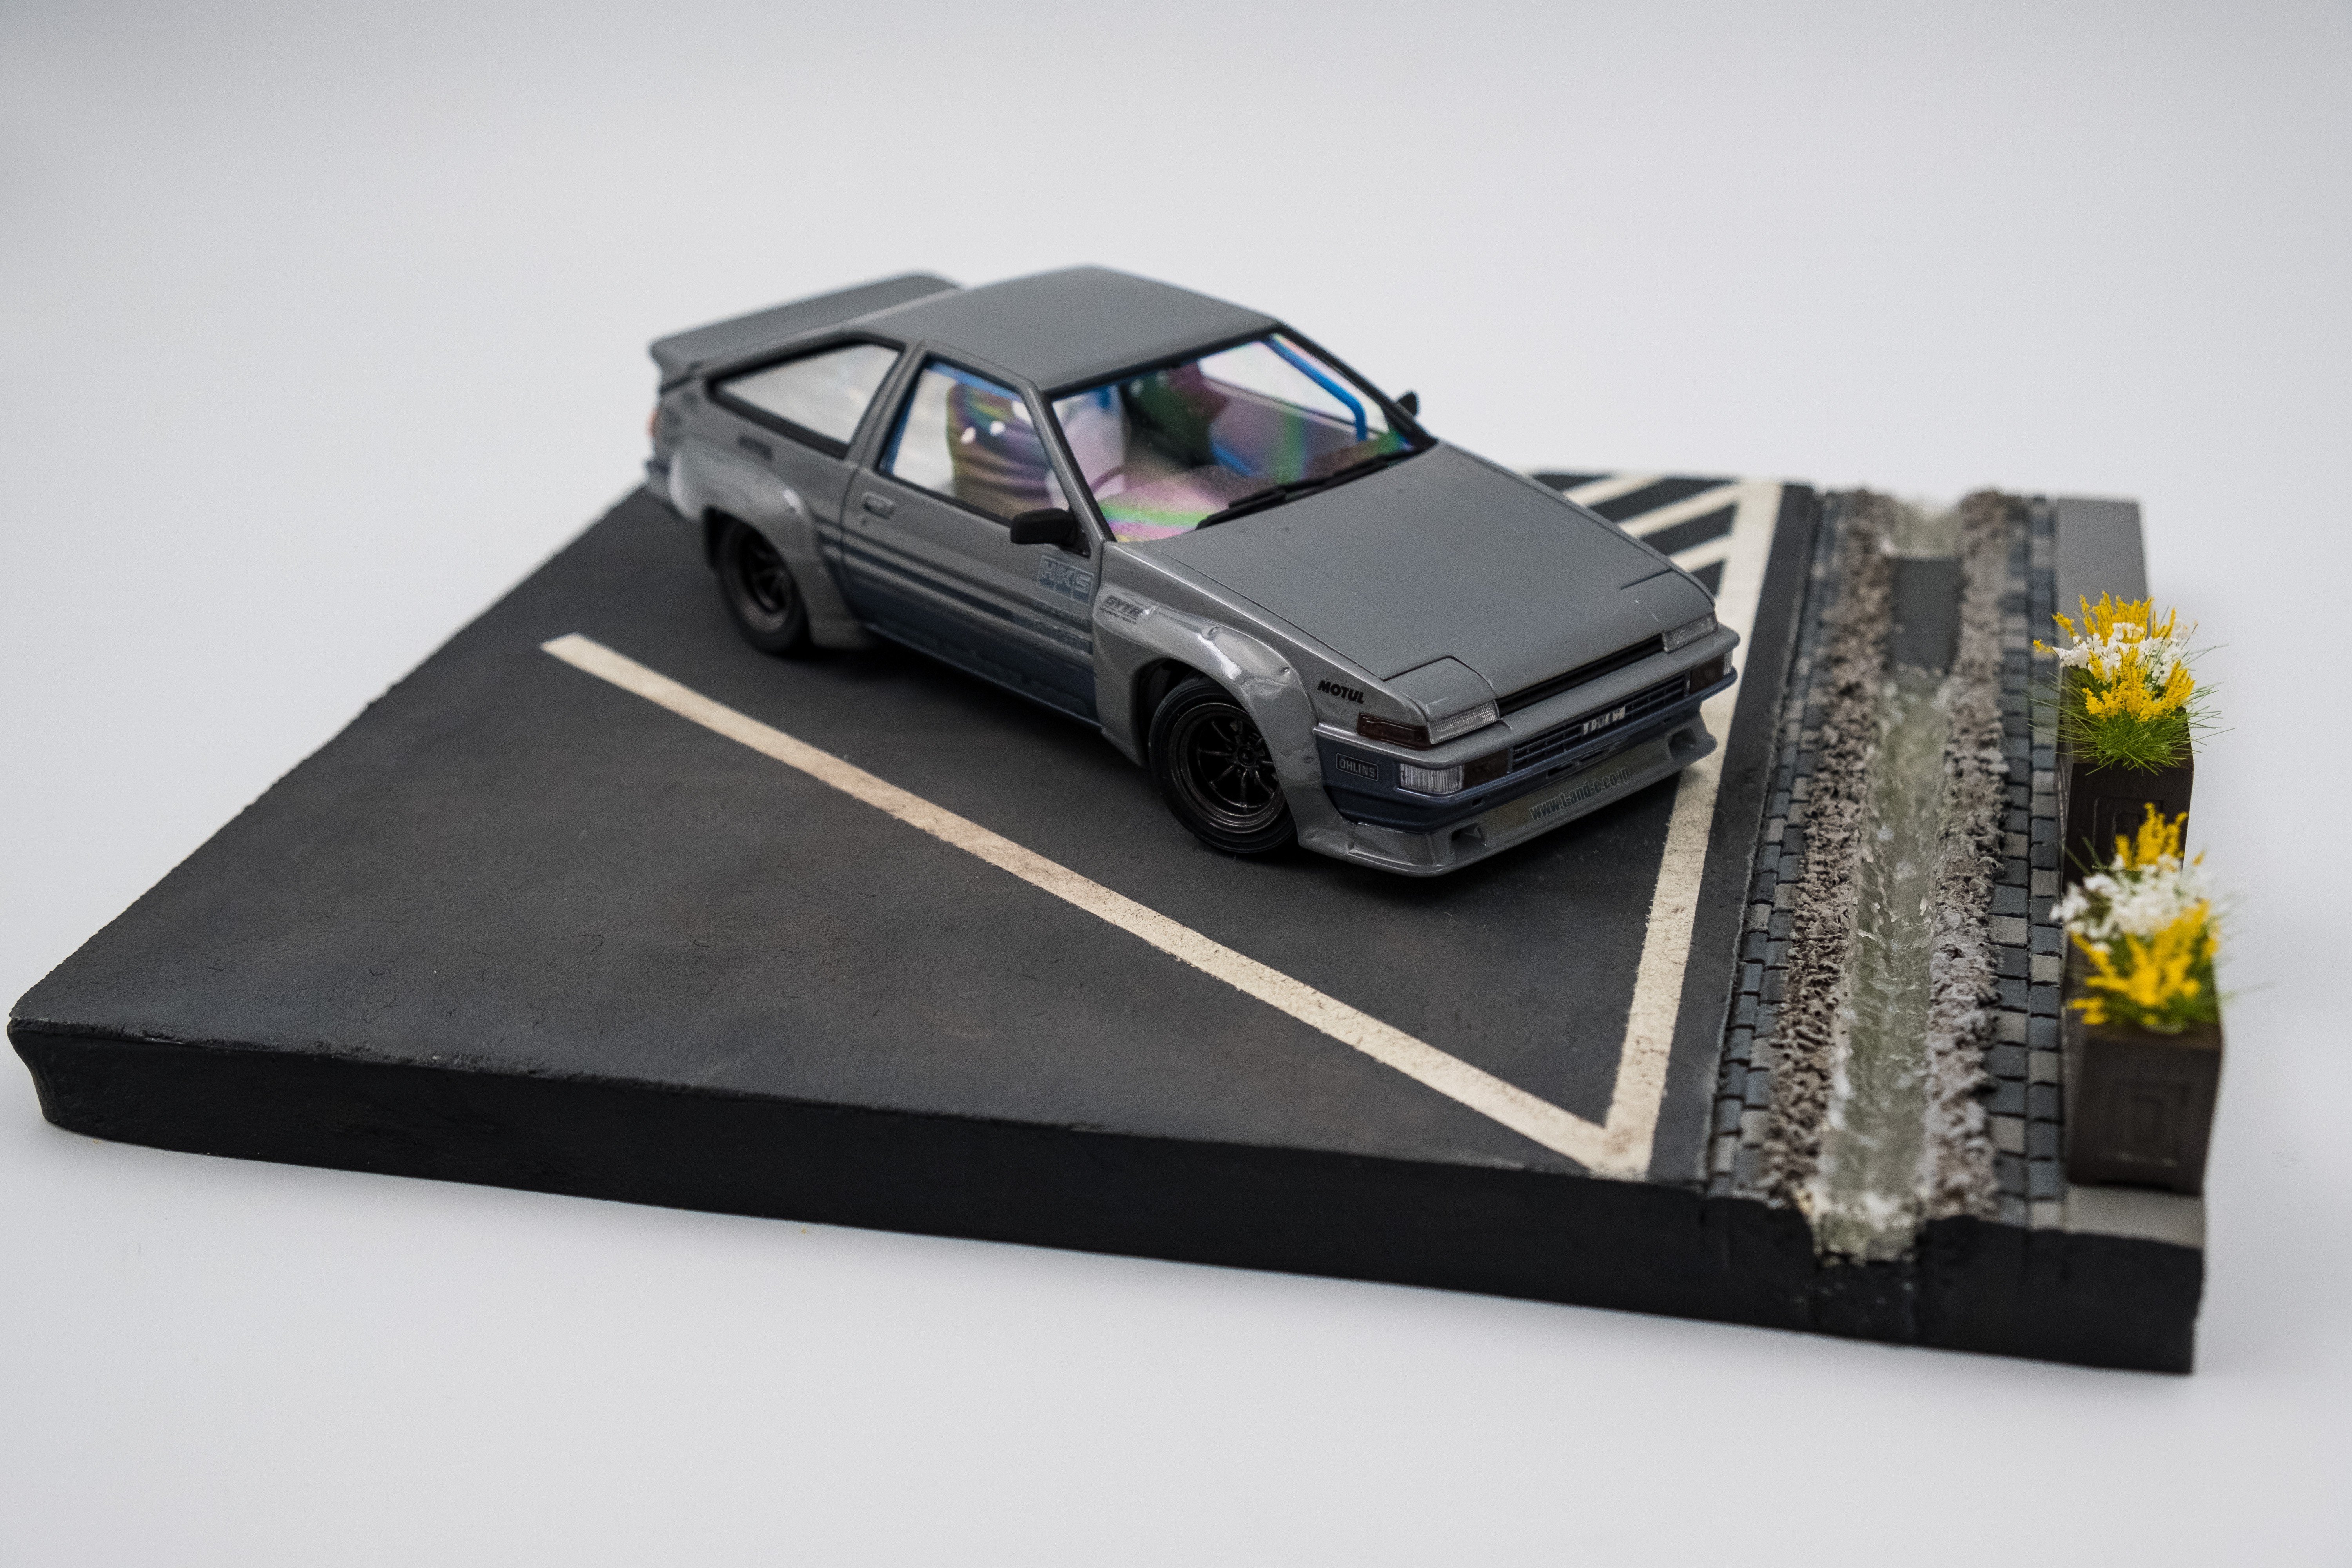
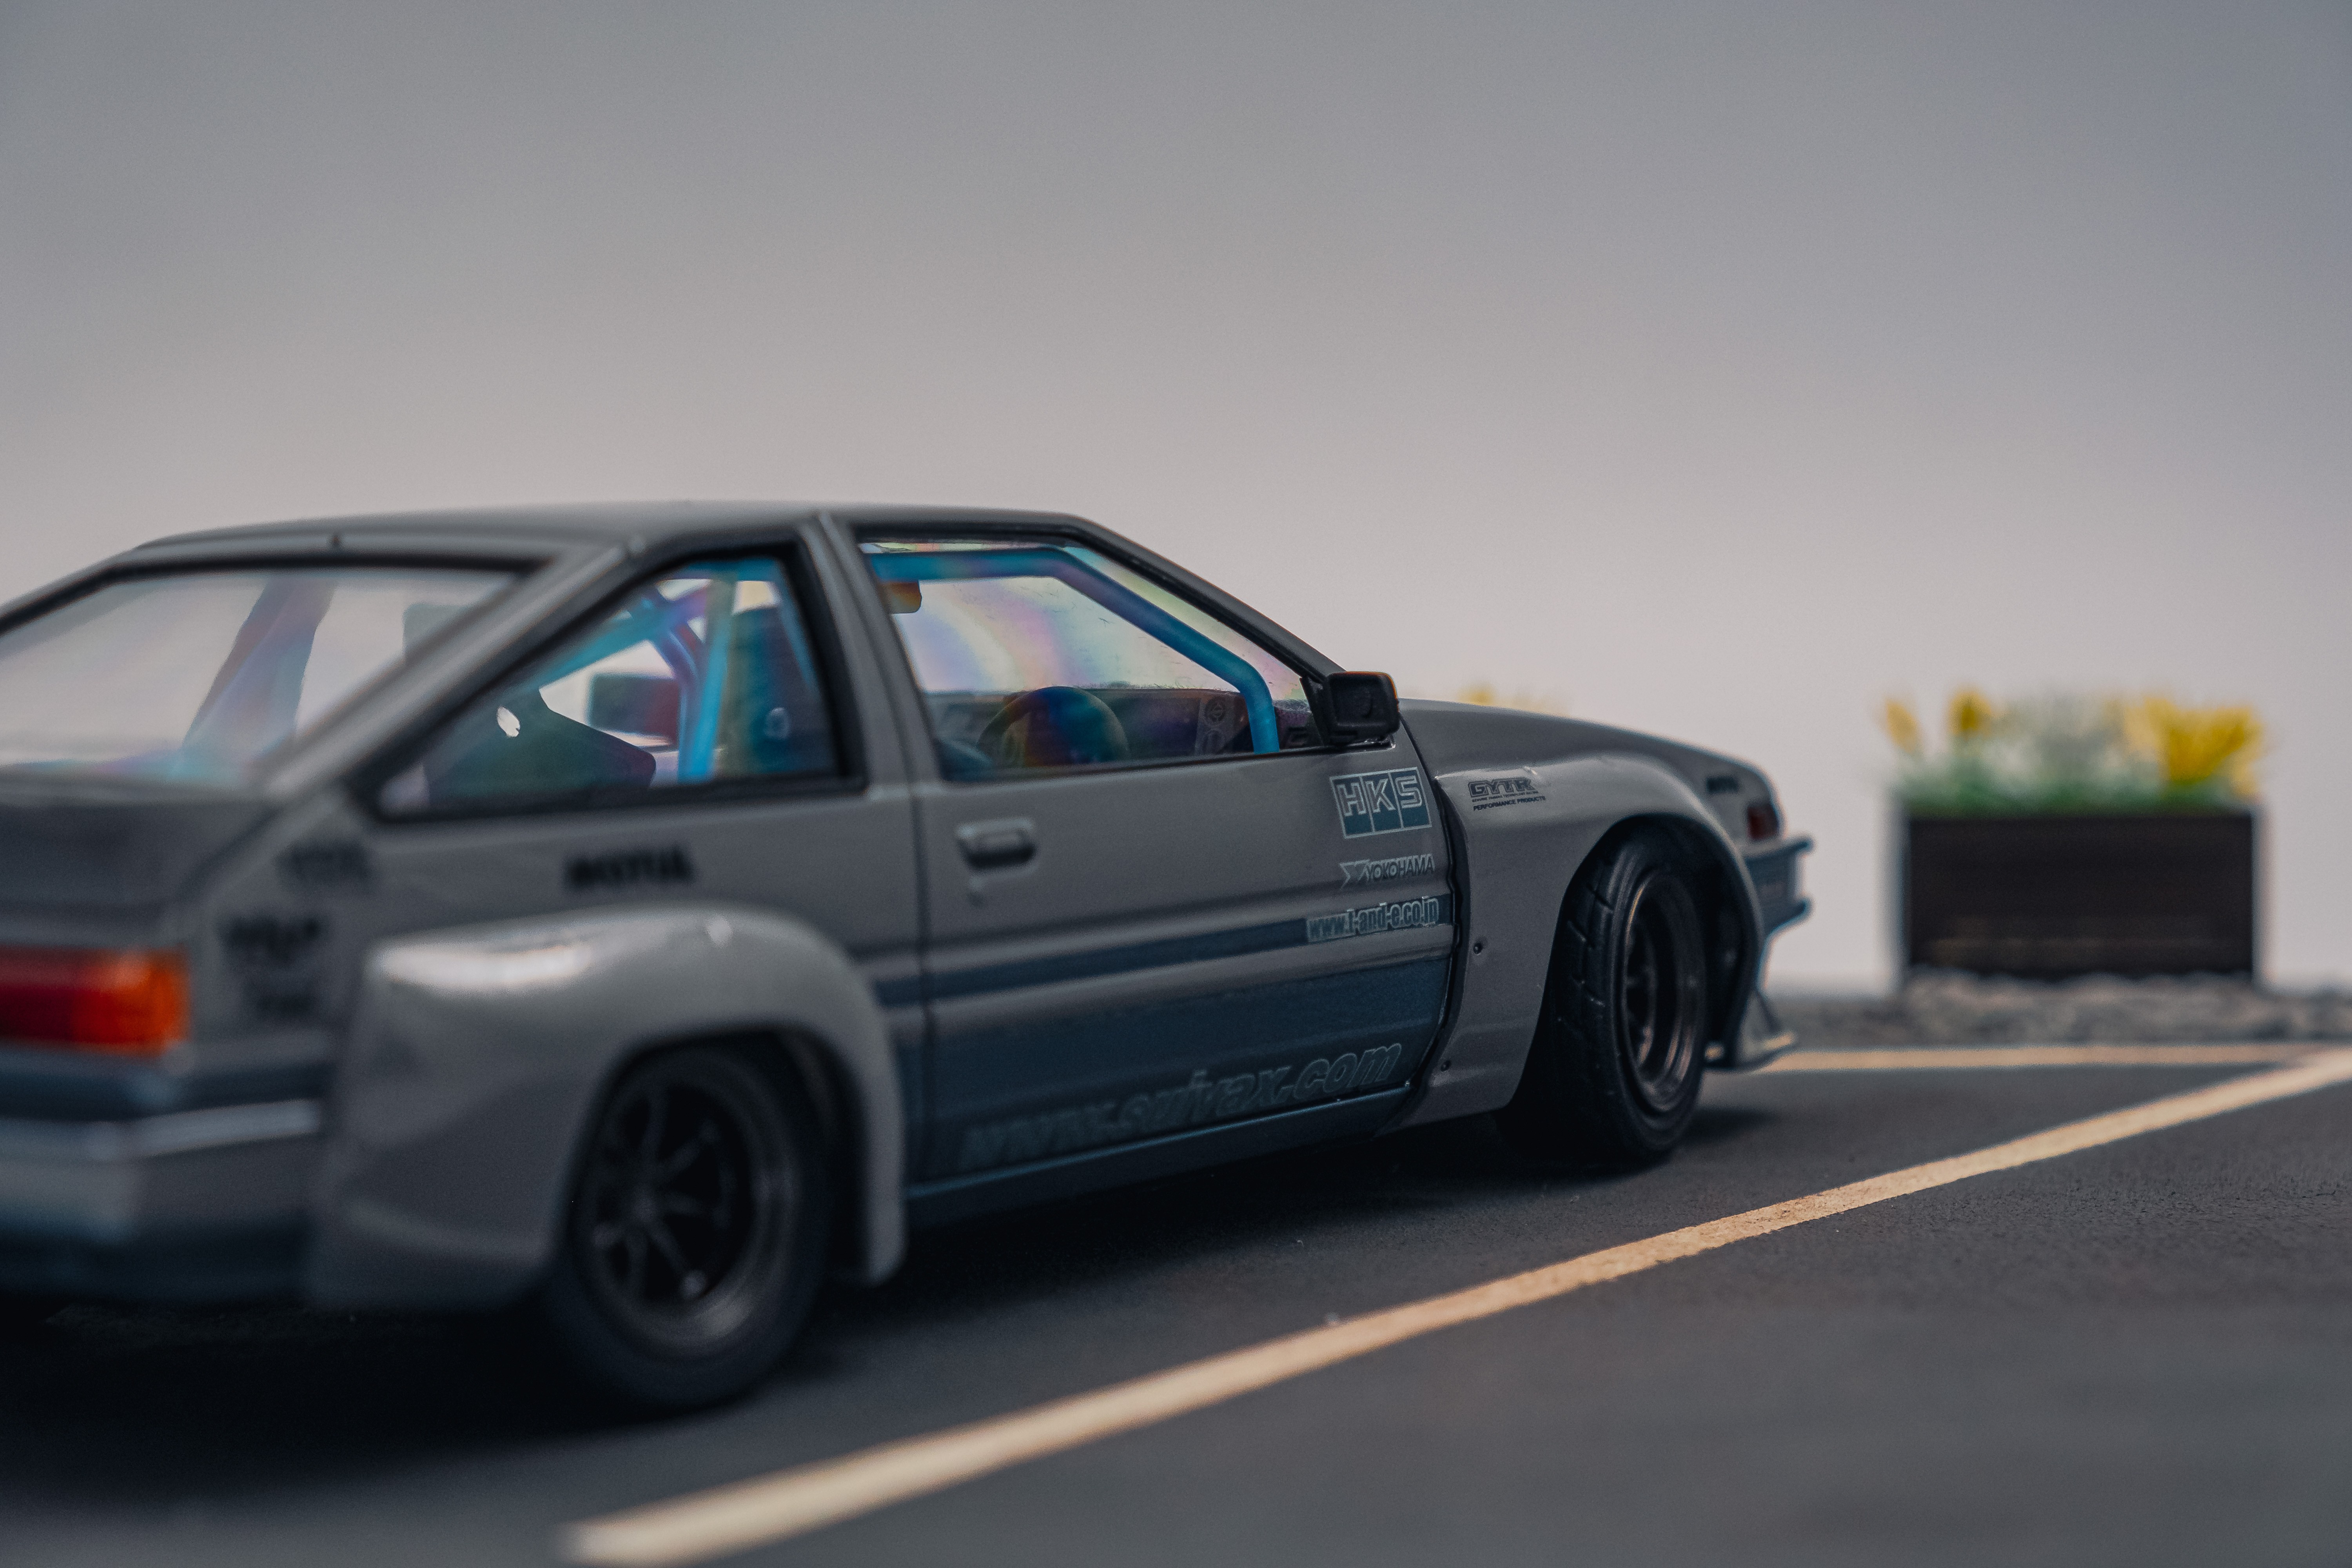
While a classic “Panda Trueno” scheme is displayed on the box, I wanted to go for something a little different than the black-on-white. After rummaging through my spare decal drawer, I came up with a somewhat racing inspired scheme for this car and settled on the paint colors to match the decals. Using Zero Paints, the body was sprayed in a basecoat of Nardo Grey and left to dry while I conjured up ideas of how exactly I was going to mask the panda’s stripes. After laying down lots of 6mm Tamiya masking tape (where has all the 10mm gone?!) I set off to painting the stripes in their first color, McLaren Graphite Grey. To match the blue accents of the roll cage and brake calipers I sprayed some Lamborghini Blu Cepheus Pearl over the Graphite Grey to give it a toned-down blue that comes to life in the light.
With a big pile of masking tape in the bin, I set off to laying down my decals which proved to be more of a creative challenge than I initially thought. Wanting to create a scheme that was reminiscent of both a professional race team and a street-racing team drew me to the “less is more” approach. After a little bit of planning and mental mockups I settled on positioning the decals and got to work.
Interior Painting
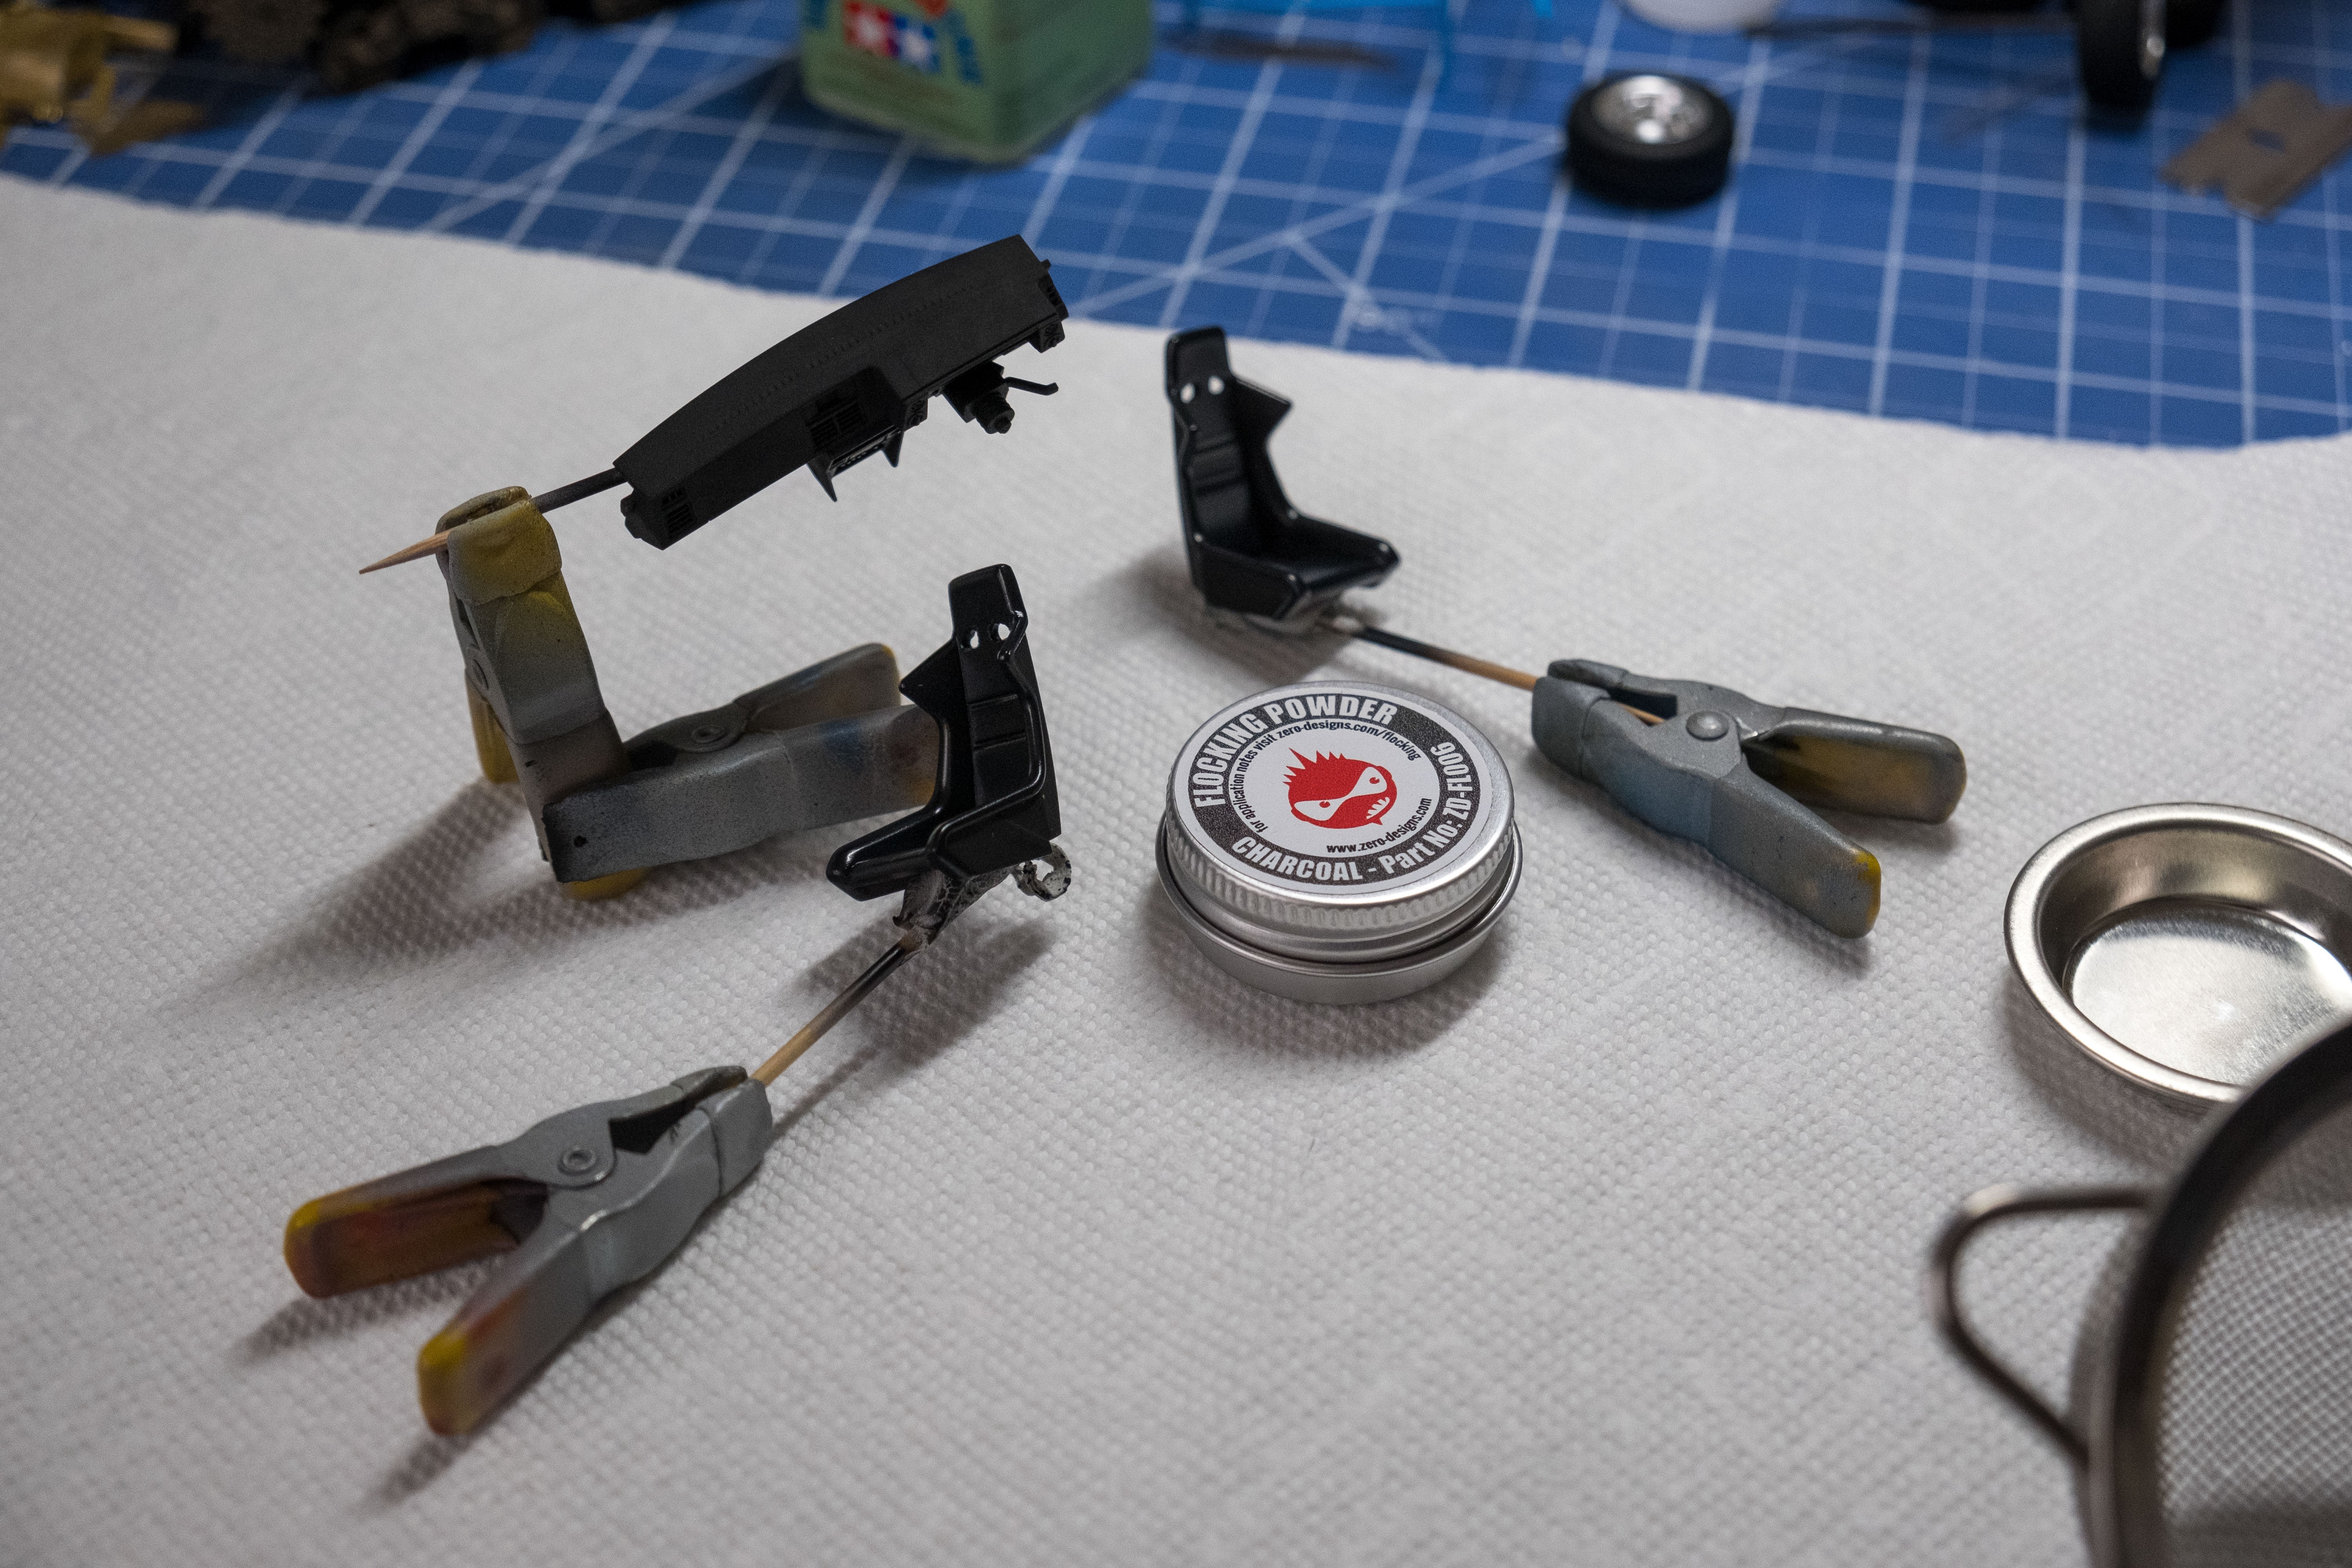
Keeping in line with the racing theme I painted the stripped-out interior in white. There’s not much else to paint in the interior, only the dash, roll cage, and seats. With the dash and seats painted black it was time to flock both – this was accomplished by watering down some white glue and brushing it on where needed before using a fine sieve to dust the flocking on. I painted the roll cage when I painted the brake calipers, so it was just a matter of installing everything and the interior was done.
Creating the base
The idea for this base came from all of those scenes in Initial D. The start of the race takes place at a rest area that leads to a scenic overlook up in the mountains. A perfect place for everyone to meet up to start the Touge Battle or a place to take a break after a practice run. I wanted to create an area in the diorama base to showcase a car before a night of battles or the following morning as the sun rises and the car is covered in bits of rubber.
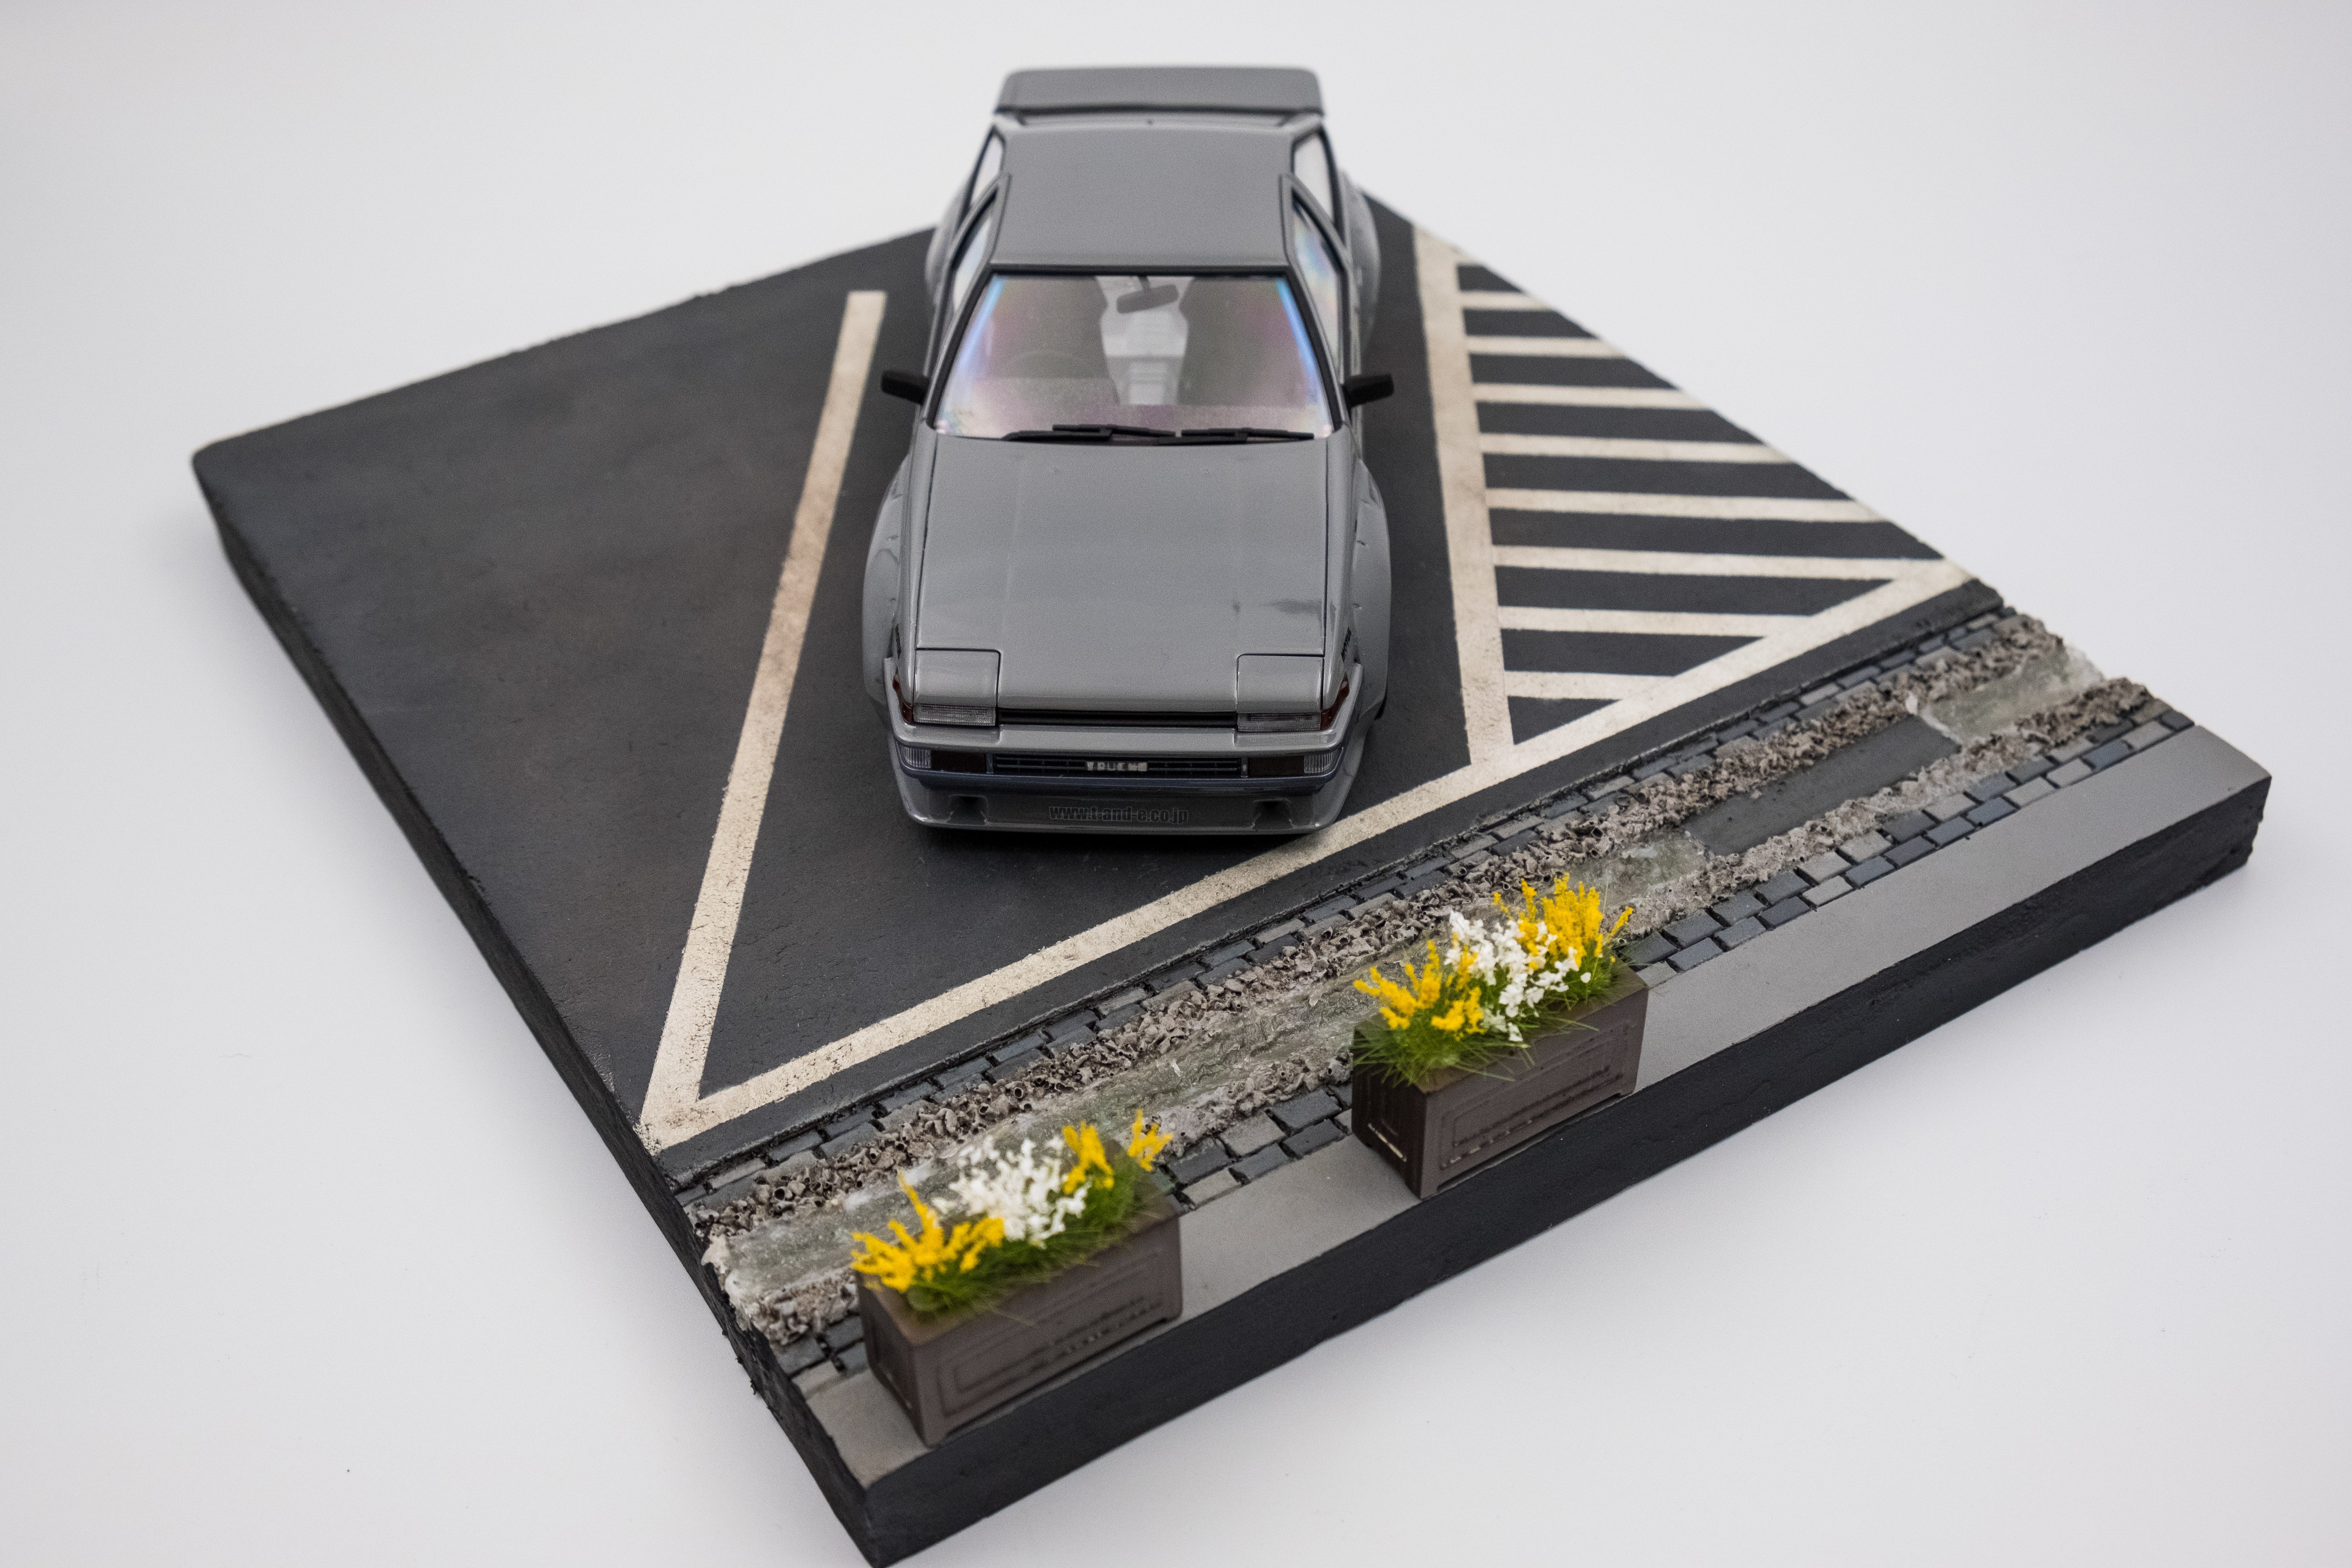
Next, I set out looking for reference images to base the scene off of. Getting drawn to the rest areas that had drainage canals, which separated the parking area from the pathways, I decided to incorporate this. I’ve always wanted to try out water effects, yet haven’t had the chance in any of my armor builds. If you’ve ever wanted to try out water effects, like me this base provides an easy way to give it a try.
Smashing some plaster chunks to bits provided a stand-in for large gravel which was glued on the edges of the canal to simulate the Coarse Filter that gravel creates in real life. The bottom of the canal was lined with the same gravel and the walls were textured to mimic concrete.
All that was left now was to recreate the look of asphalt in the parking area before the silicone mold was made of the master.
When I wrapped up construction it felt like there was something missing. All my reference photos didn’t have parking blocks or bollards so there was no luck there. After some brainstorming with Matija, I set out to scratch building some rectangular planters that would sit across the parking area in the walkway to the scenic area. Many thanks to H.G. Barnes for listening to us bounce ideas around and being adamant that the scene needed something vertical to wrap it up.
Painting the base
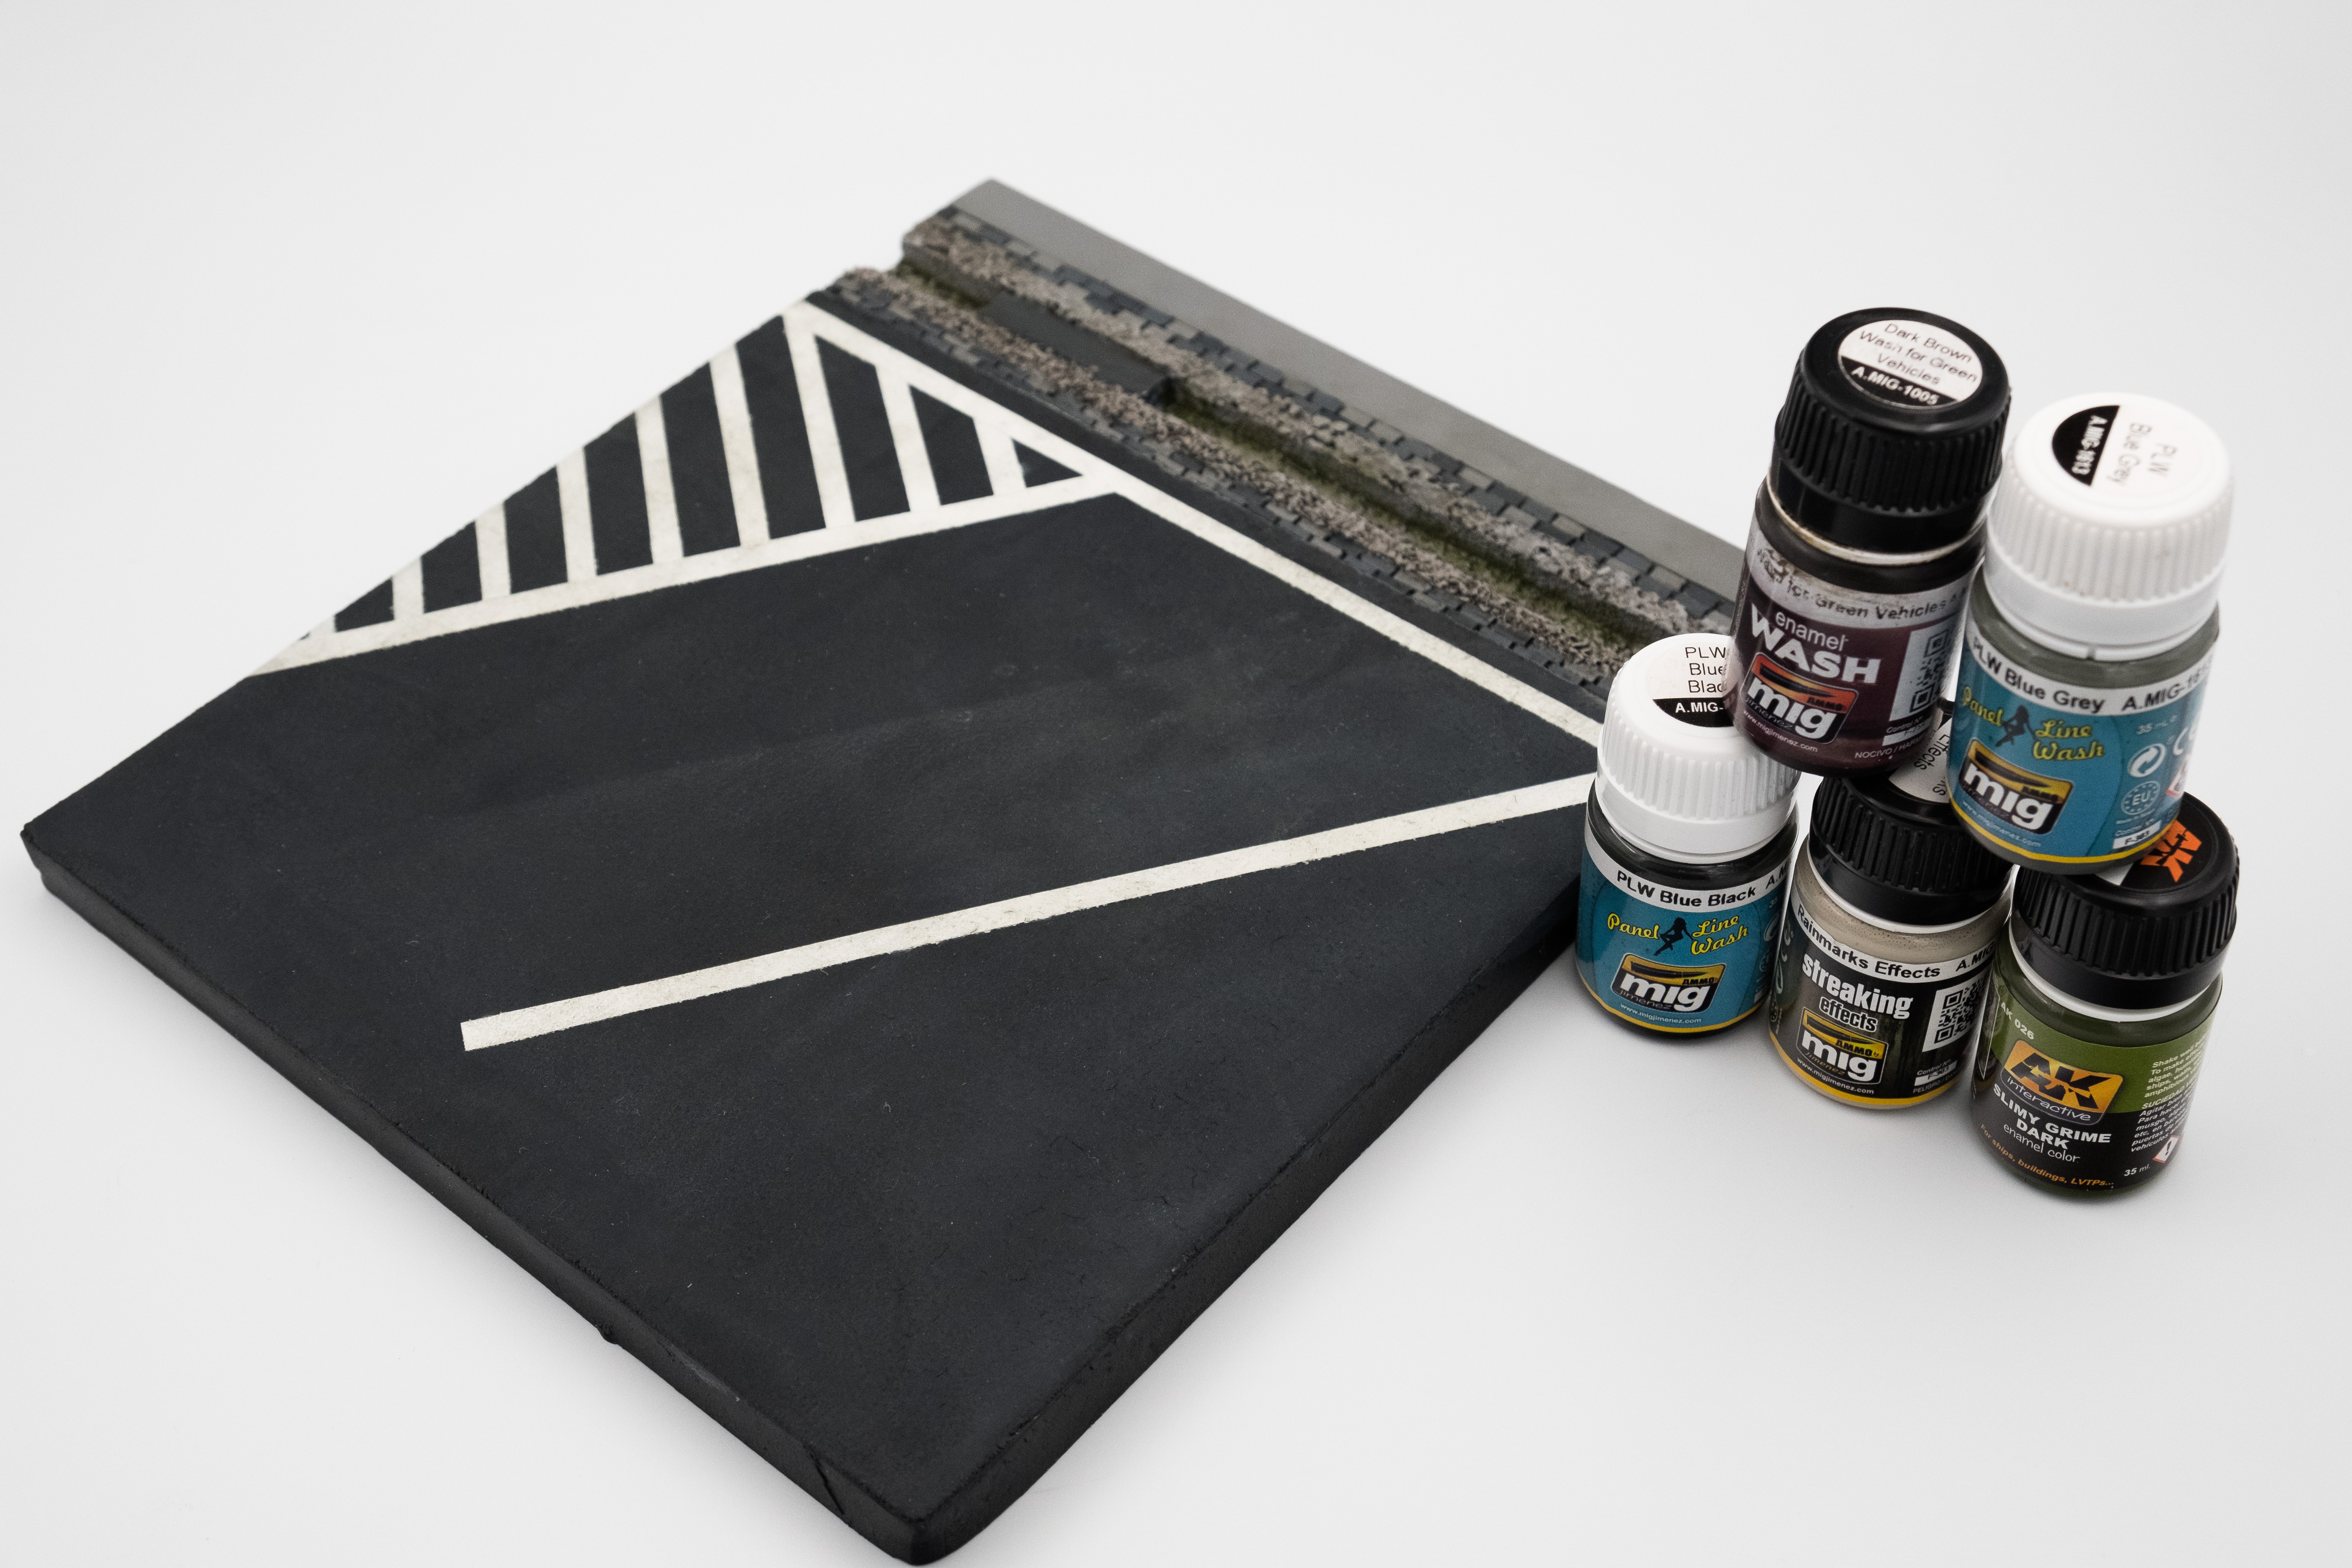
The parking area can be set up in a multitude of ways, parallel parking, angled parking, or square parking. With the parking set up square, two cars can be displayed side by side. I wanted to showcase my AE86 on its own, so I went with an angled layout. With some more 6mm masking tape in hand I laid out the lines for the parking spots. Then I moved on to the no parking zone in front of the crossover to the scenic area. After getting everything painted it was time for some weathering.
What I didn’t want was the rest area to look brand spanking new, but I also wanted to avoid a rundown and overtaken by nature look. You decide if I achieved the desired look by using different washes. A pale brown wash, to differentiate the gravel stones, another shade to tie the colors of the cobblestones together, and finally one to dirty up the parking area but just ever so slightly. Because the water level in the canal is never constant and the climate is perfect for moss to grow, I used some slimy grime weathering effect to mimic the moss that forms in a canal. Note, the light and dark colors were mixed on the base itself.
With the weathering finished it was time to pour the water. After stealing some of the plastic from a weathering set box I hot glued the squares I made to cap off the ends of the canal, so the “water” wouldn’t spill out. Then, using AK Interactive’s “Still Water”, I opened the floodgates. Drop by drop, with the help of a toothpick, popped all the air bubbles “I” had made. A bit of advice, don’t continue to “squeeze and release” the bottle as you will get air trapped in the fluid.
Once the water had dried I removed the end caps and had my very first water element complete. It went surprisingly well and was much easier than I’d initially thought it was going to be. All that was left now was to paint the planters and put some flowers in them.
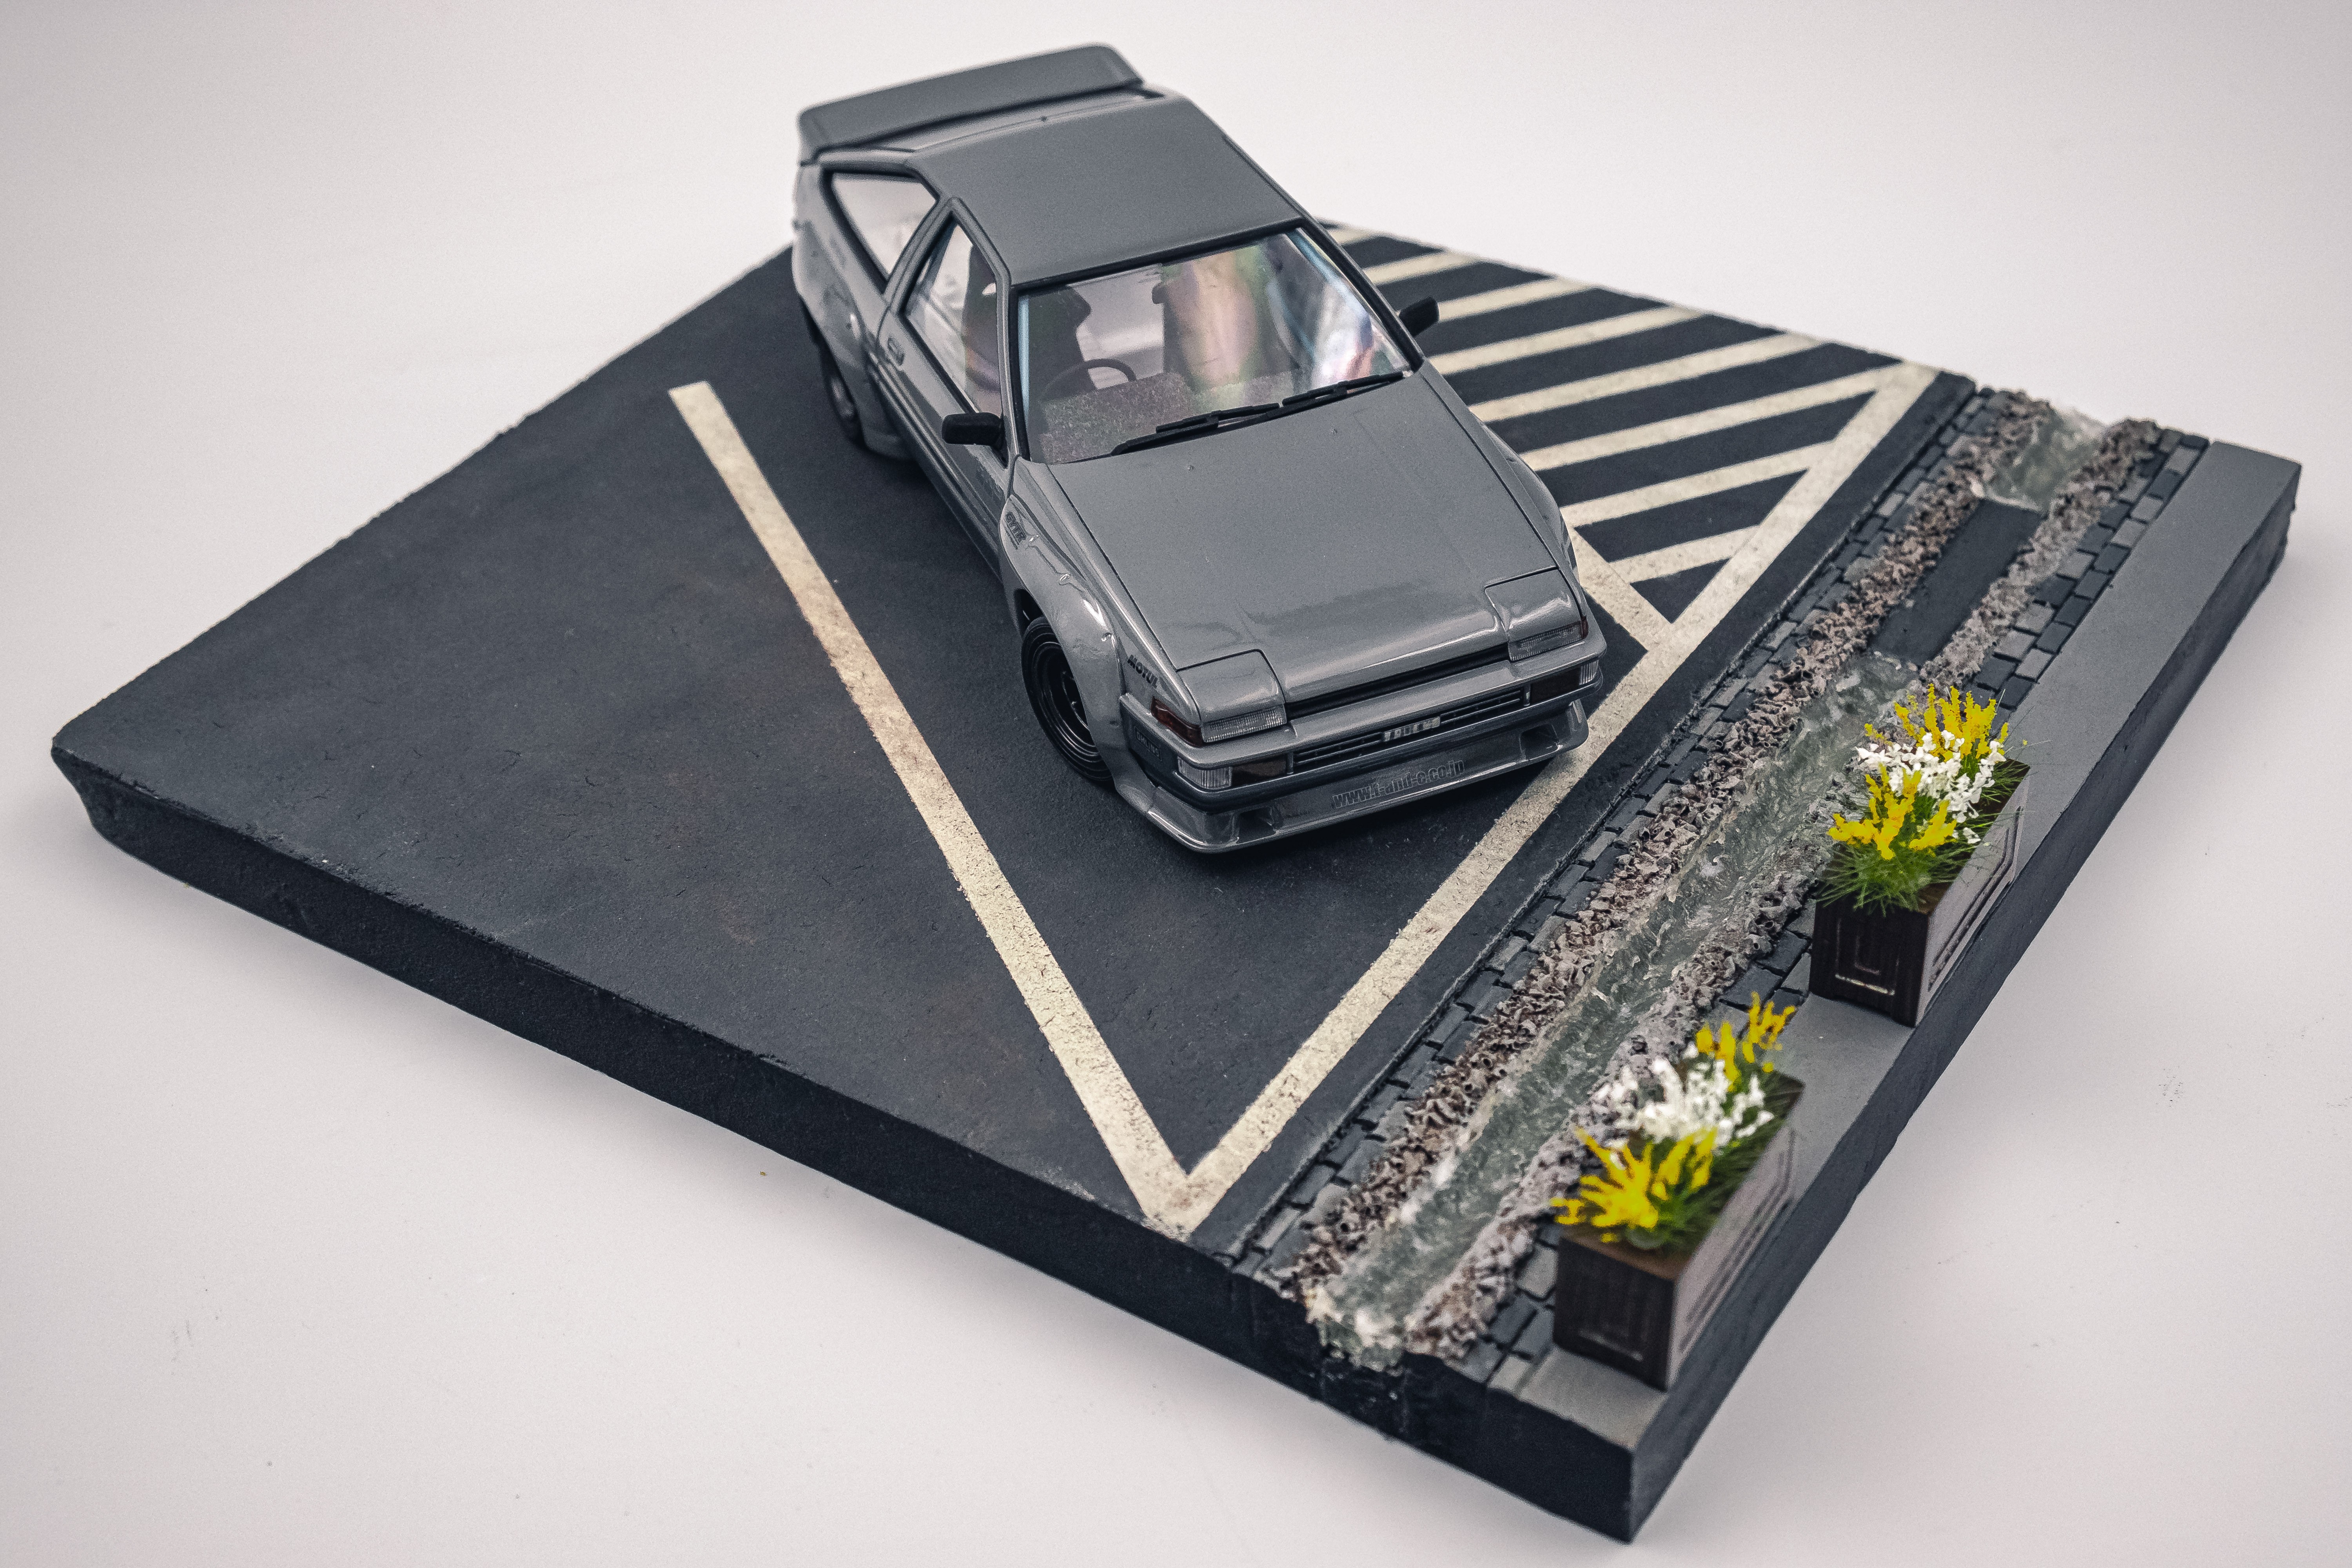
With the base now finished it was time to put the car on it and take some final photos. I’m really satisfied with how this scene came out. It captures the idea I had in my head; the sun rising over the mountain after along night of racing. If you want to try out water techniques and materials, or just want a base for your latest build, visit us at www.mamodelworks.com to get your own Touge Rest Area or have a look at our other bases.
Thanks for following along and seeing the thought process that goes into how Matija and I come up with some of our bases. Let us know if there are any bases that you would like to see as we’re always looking for more ideas.