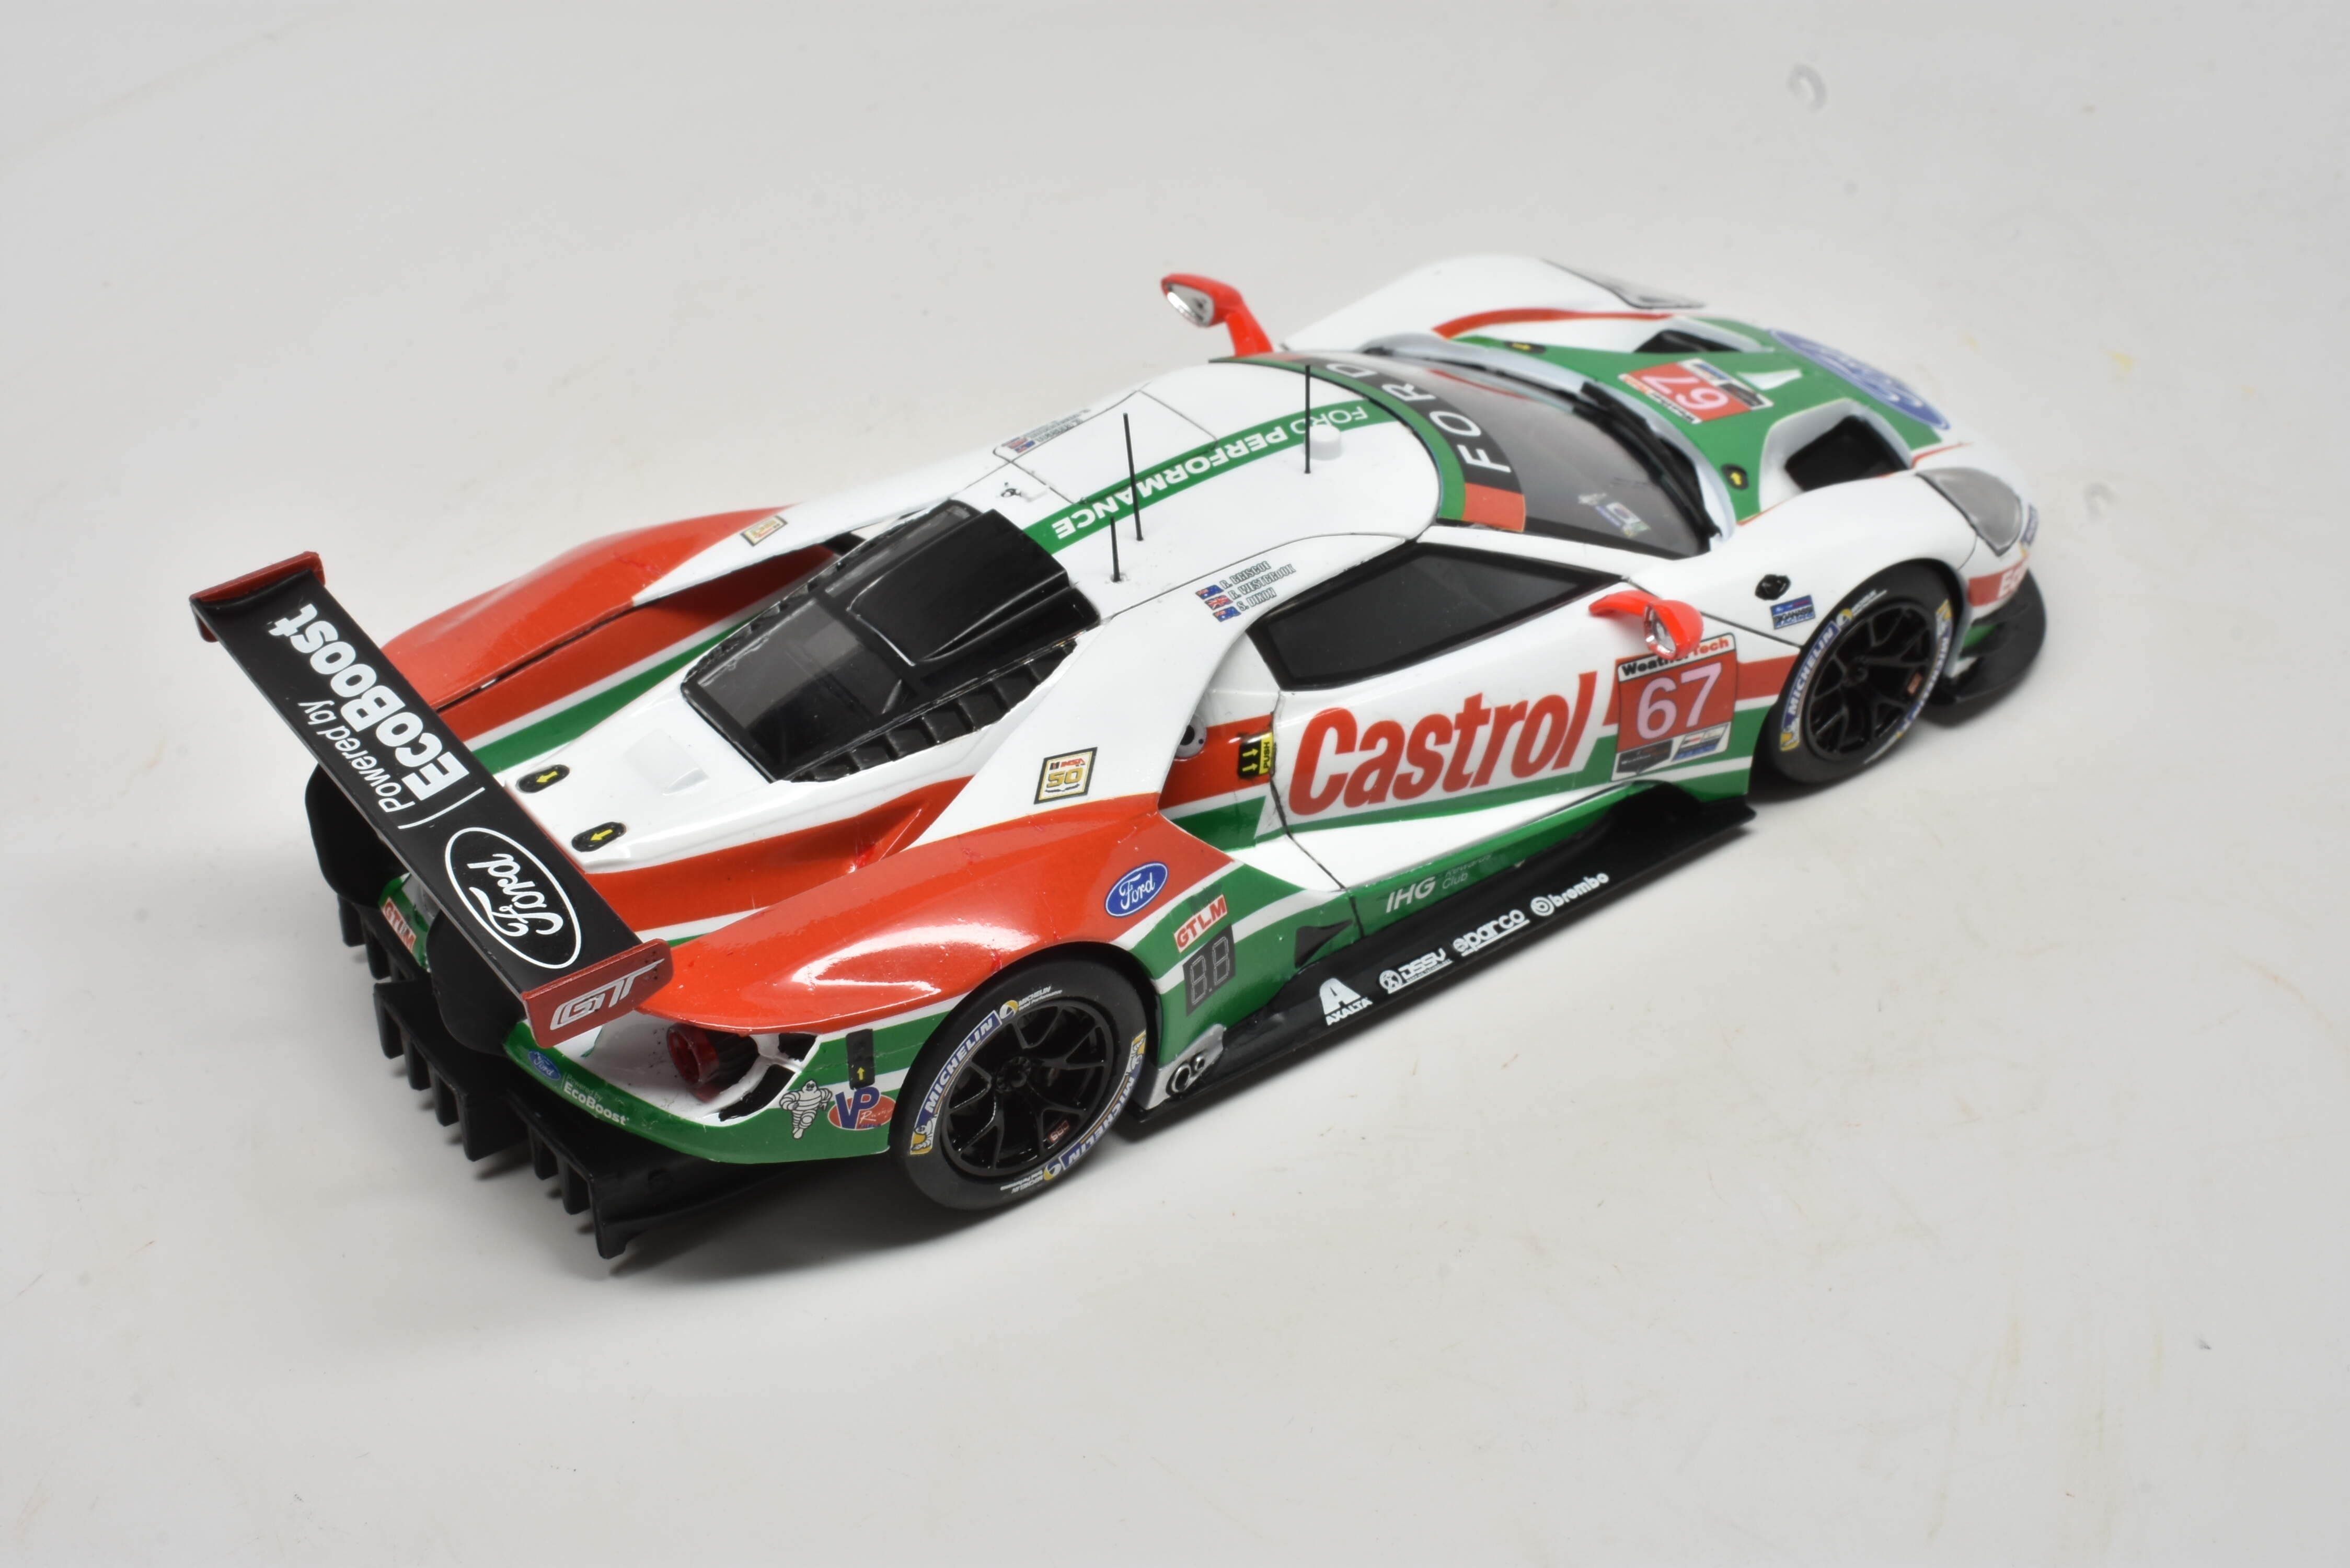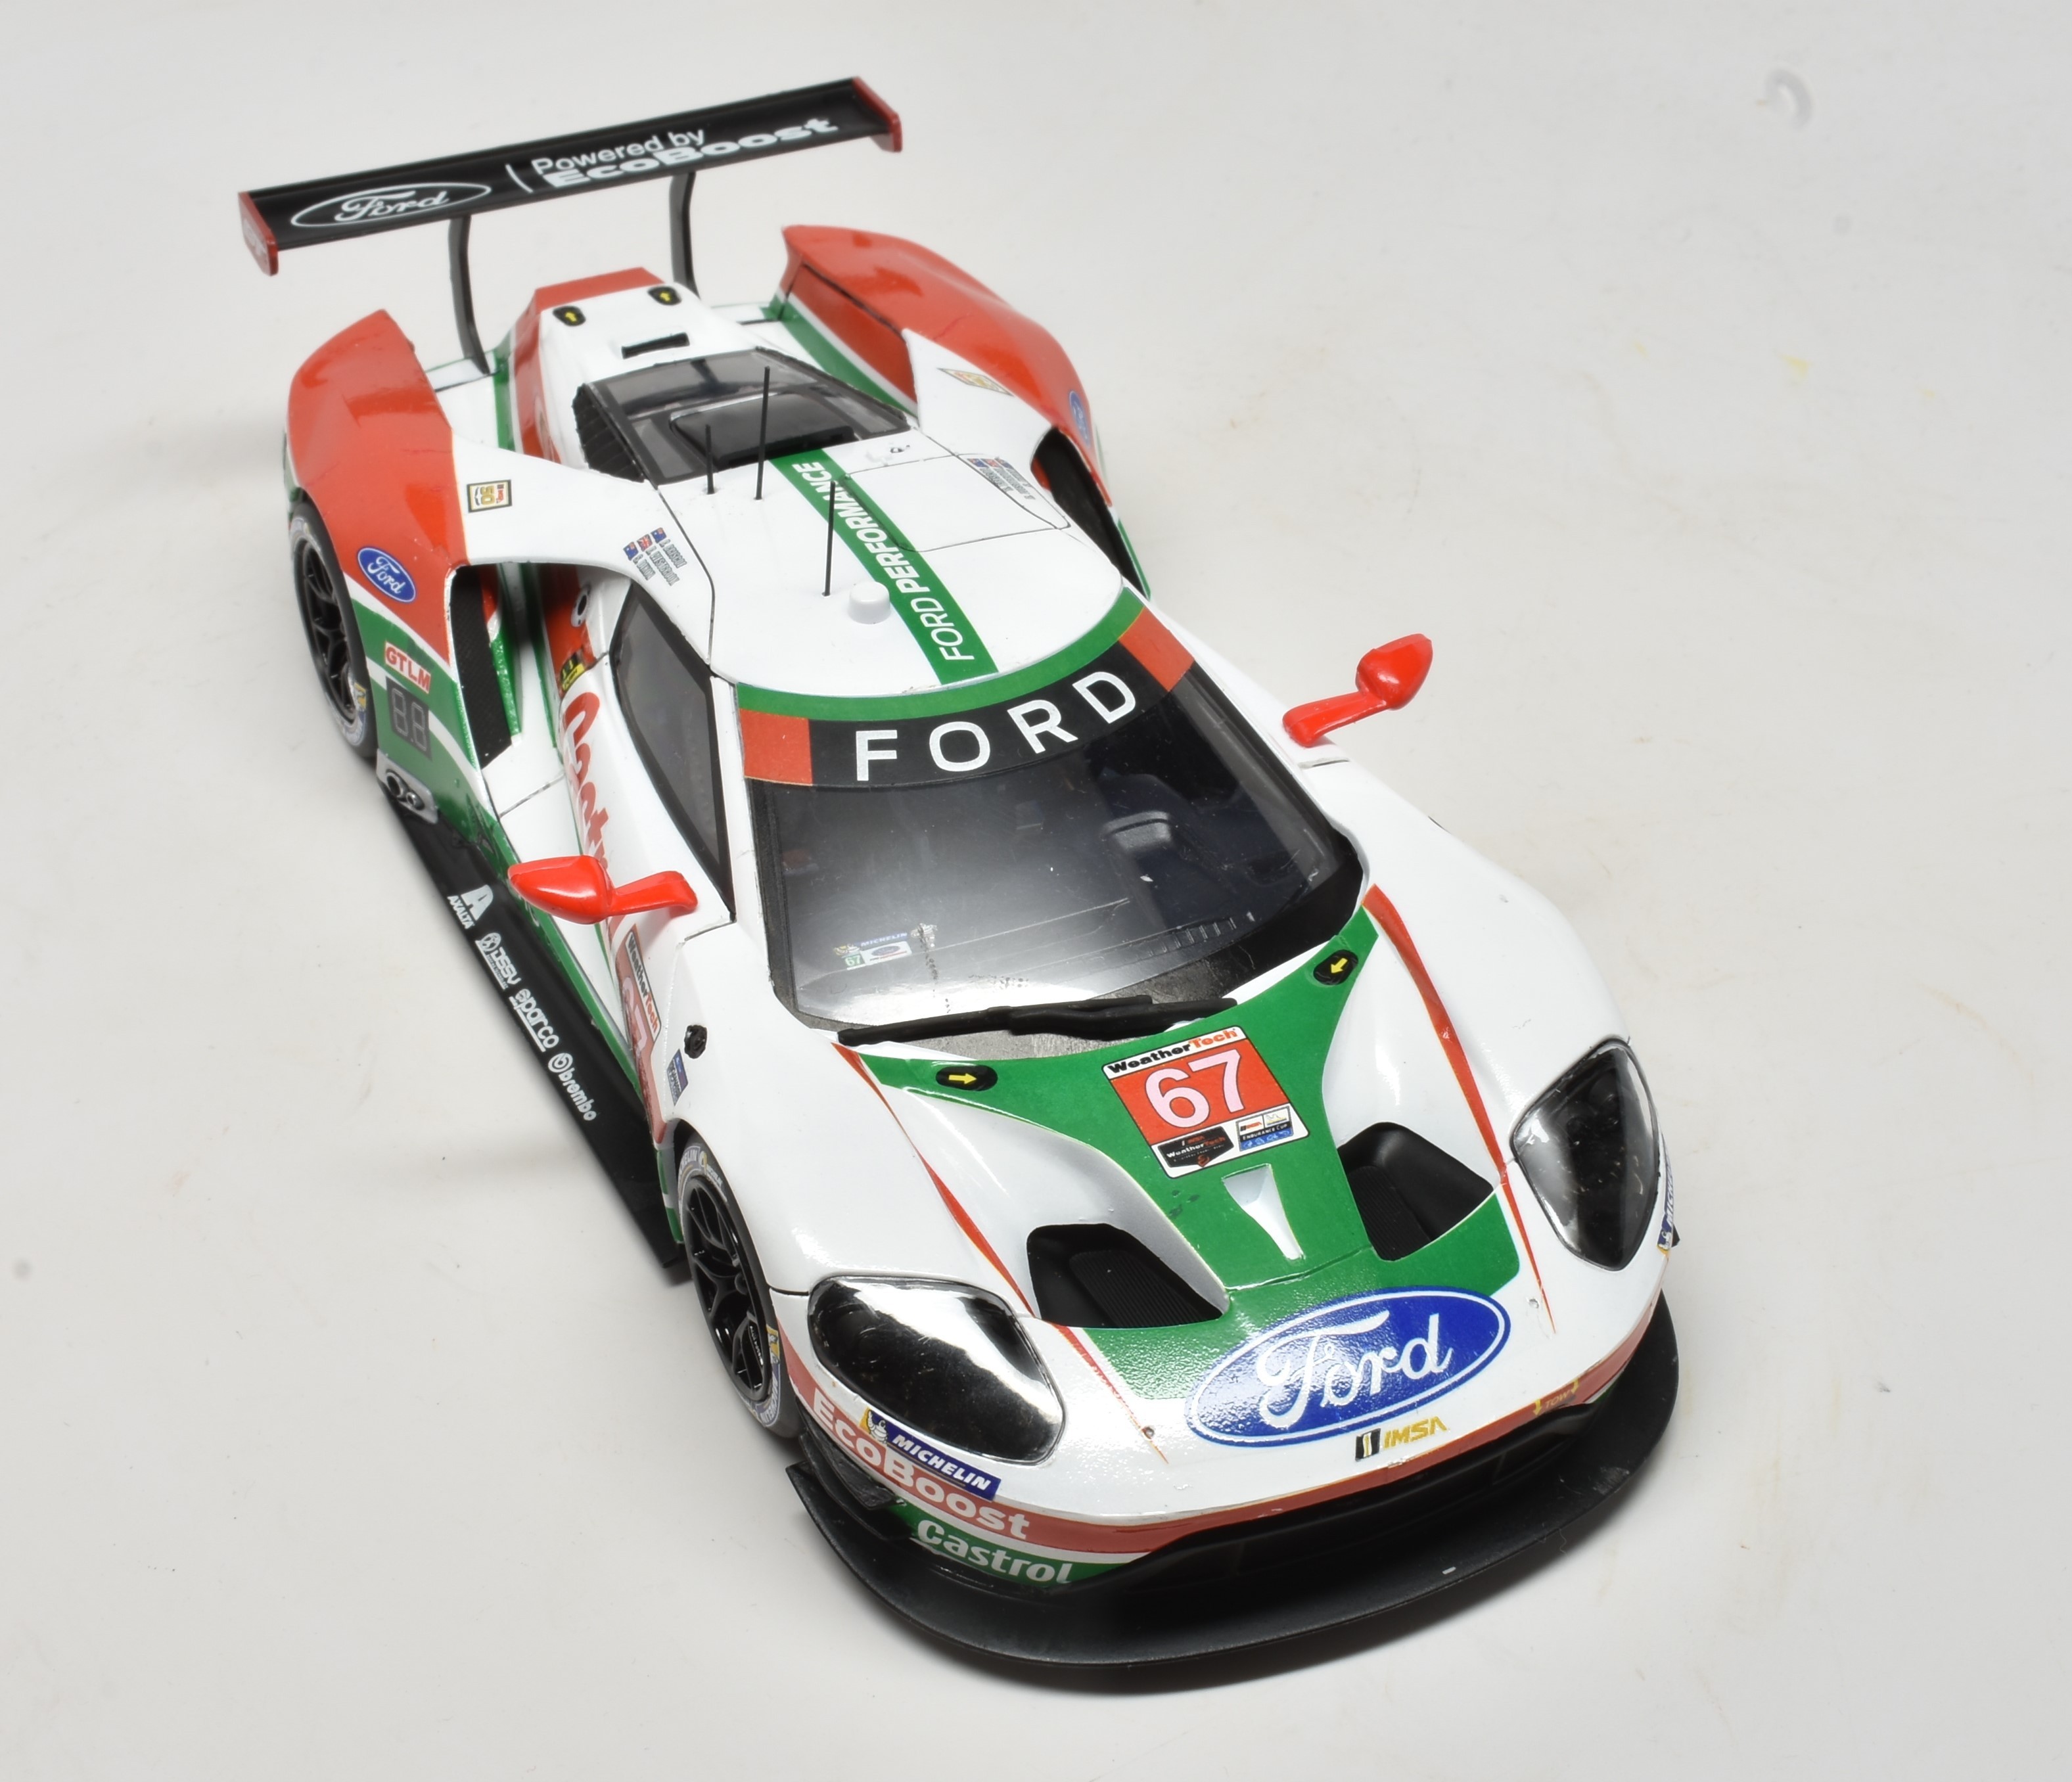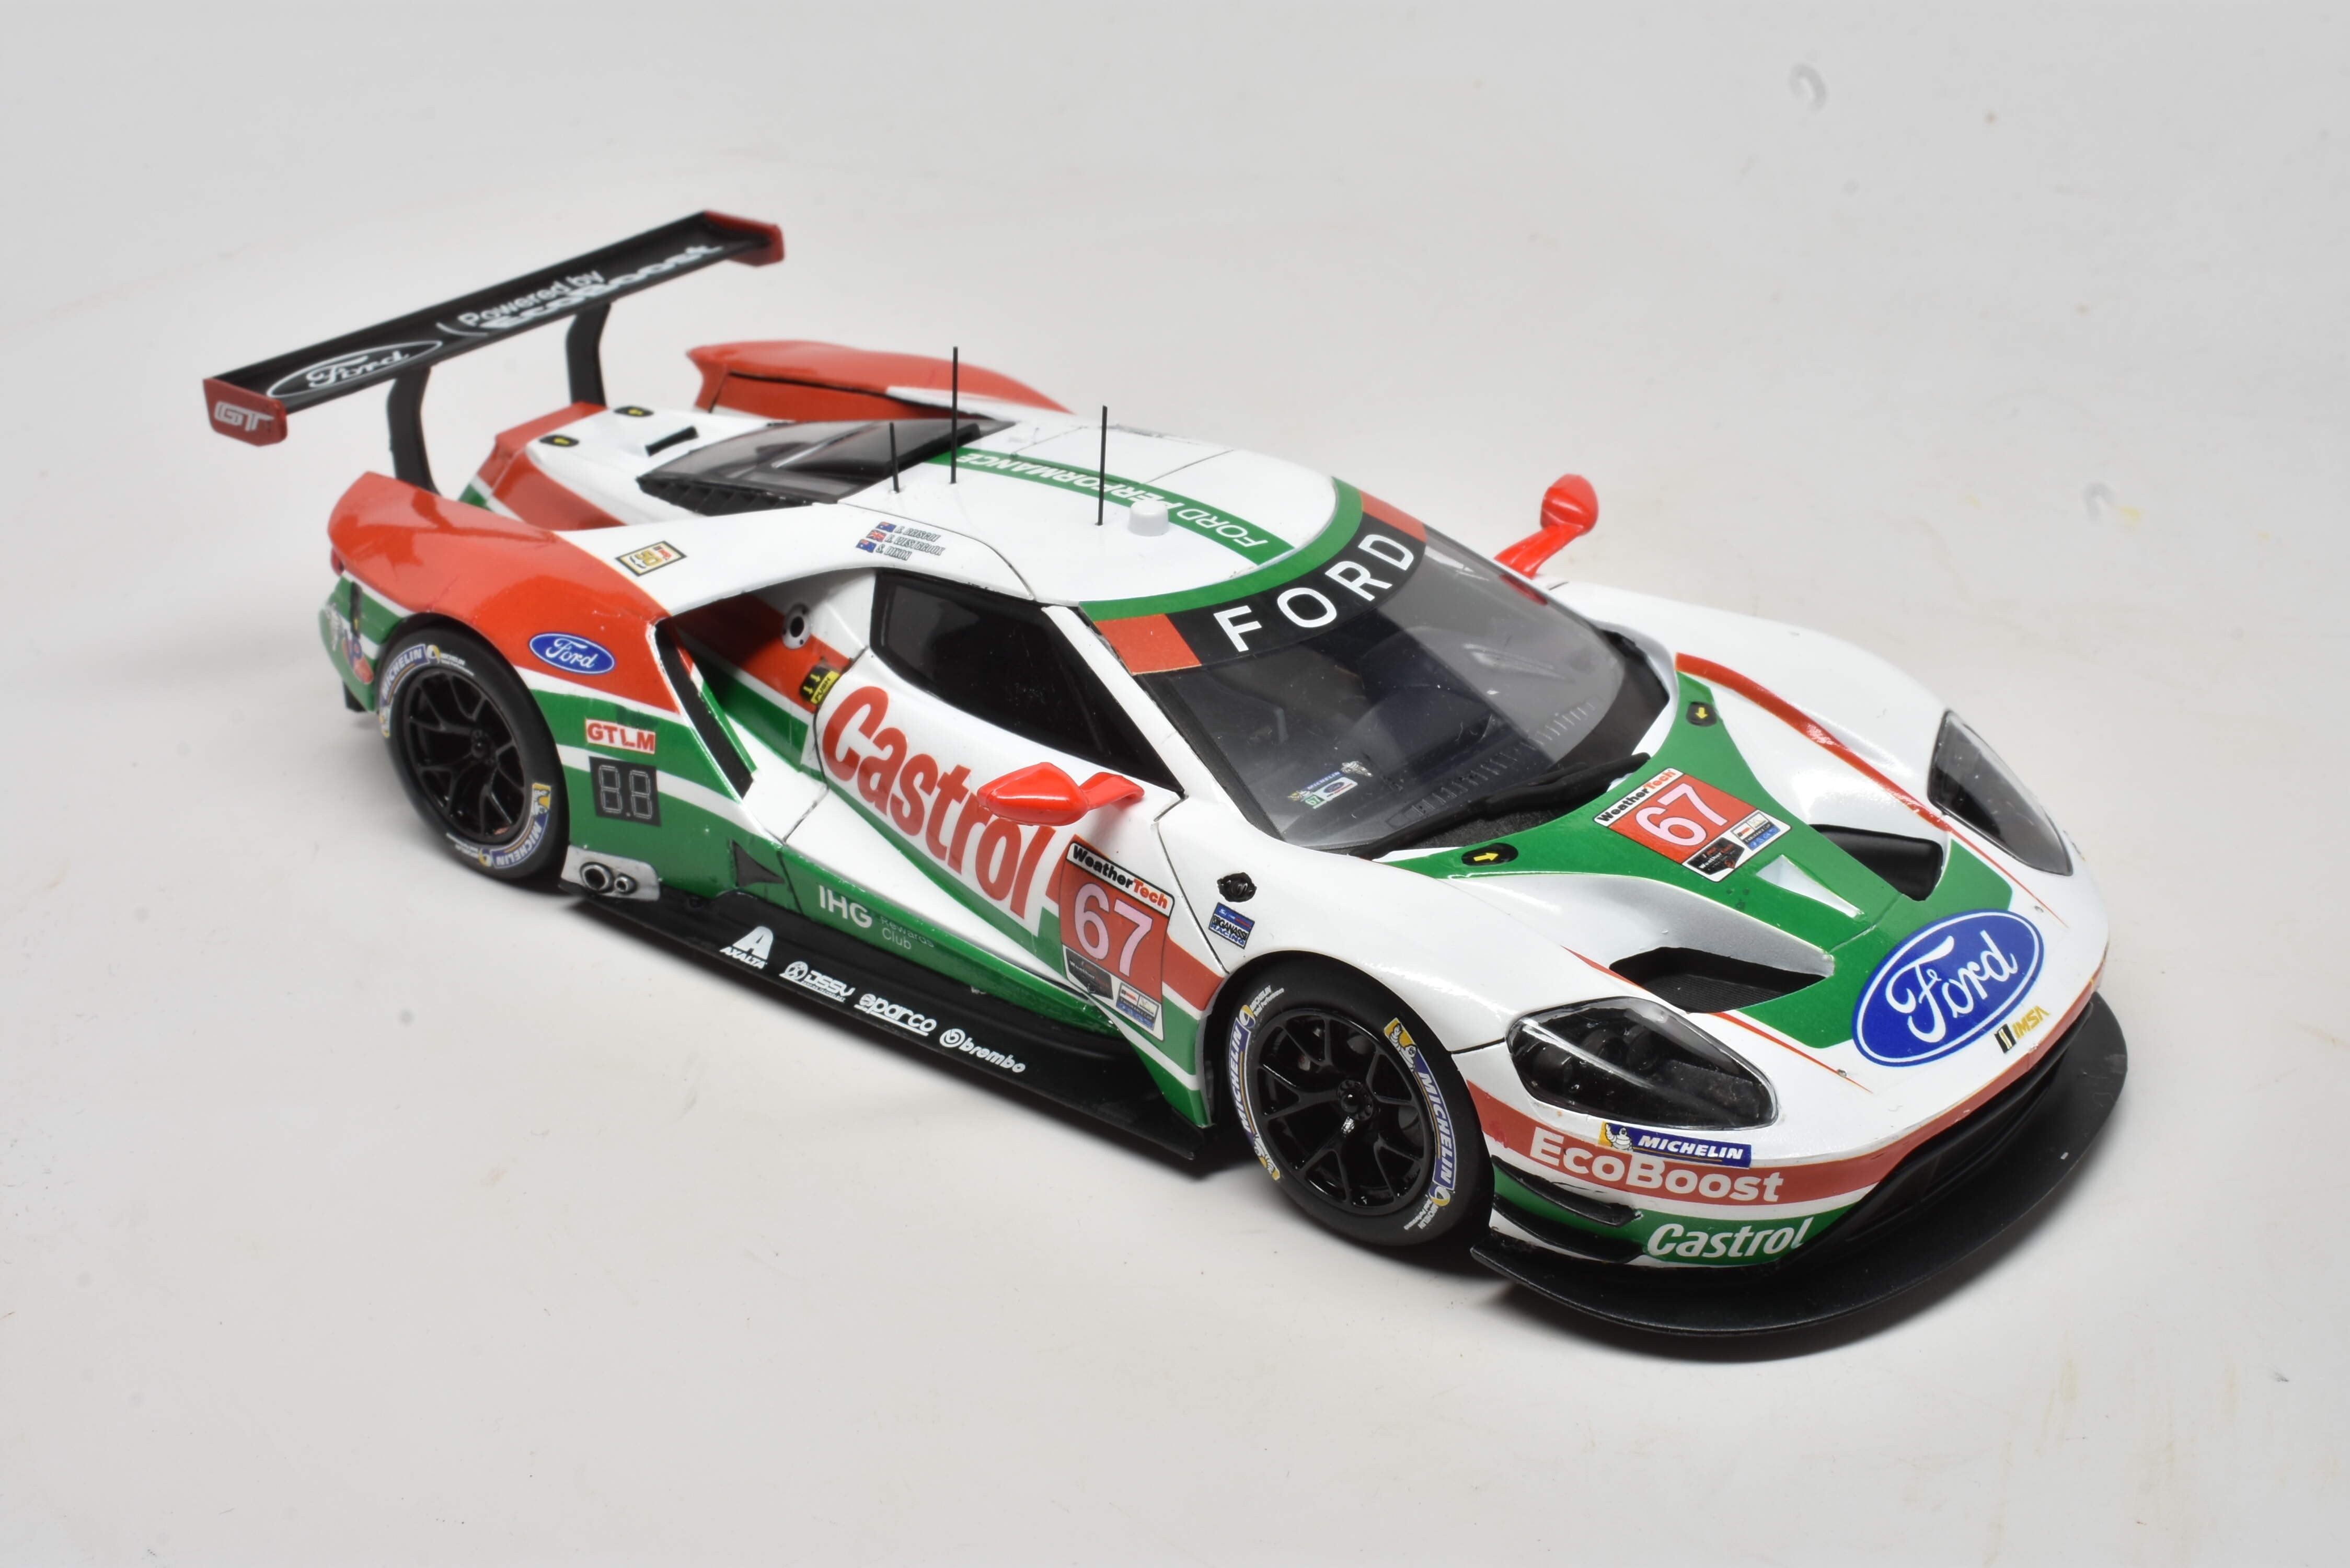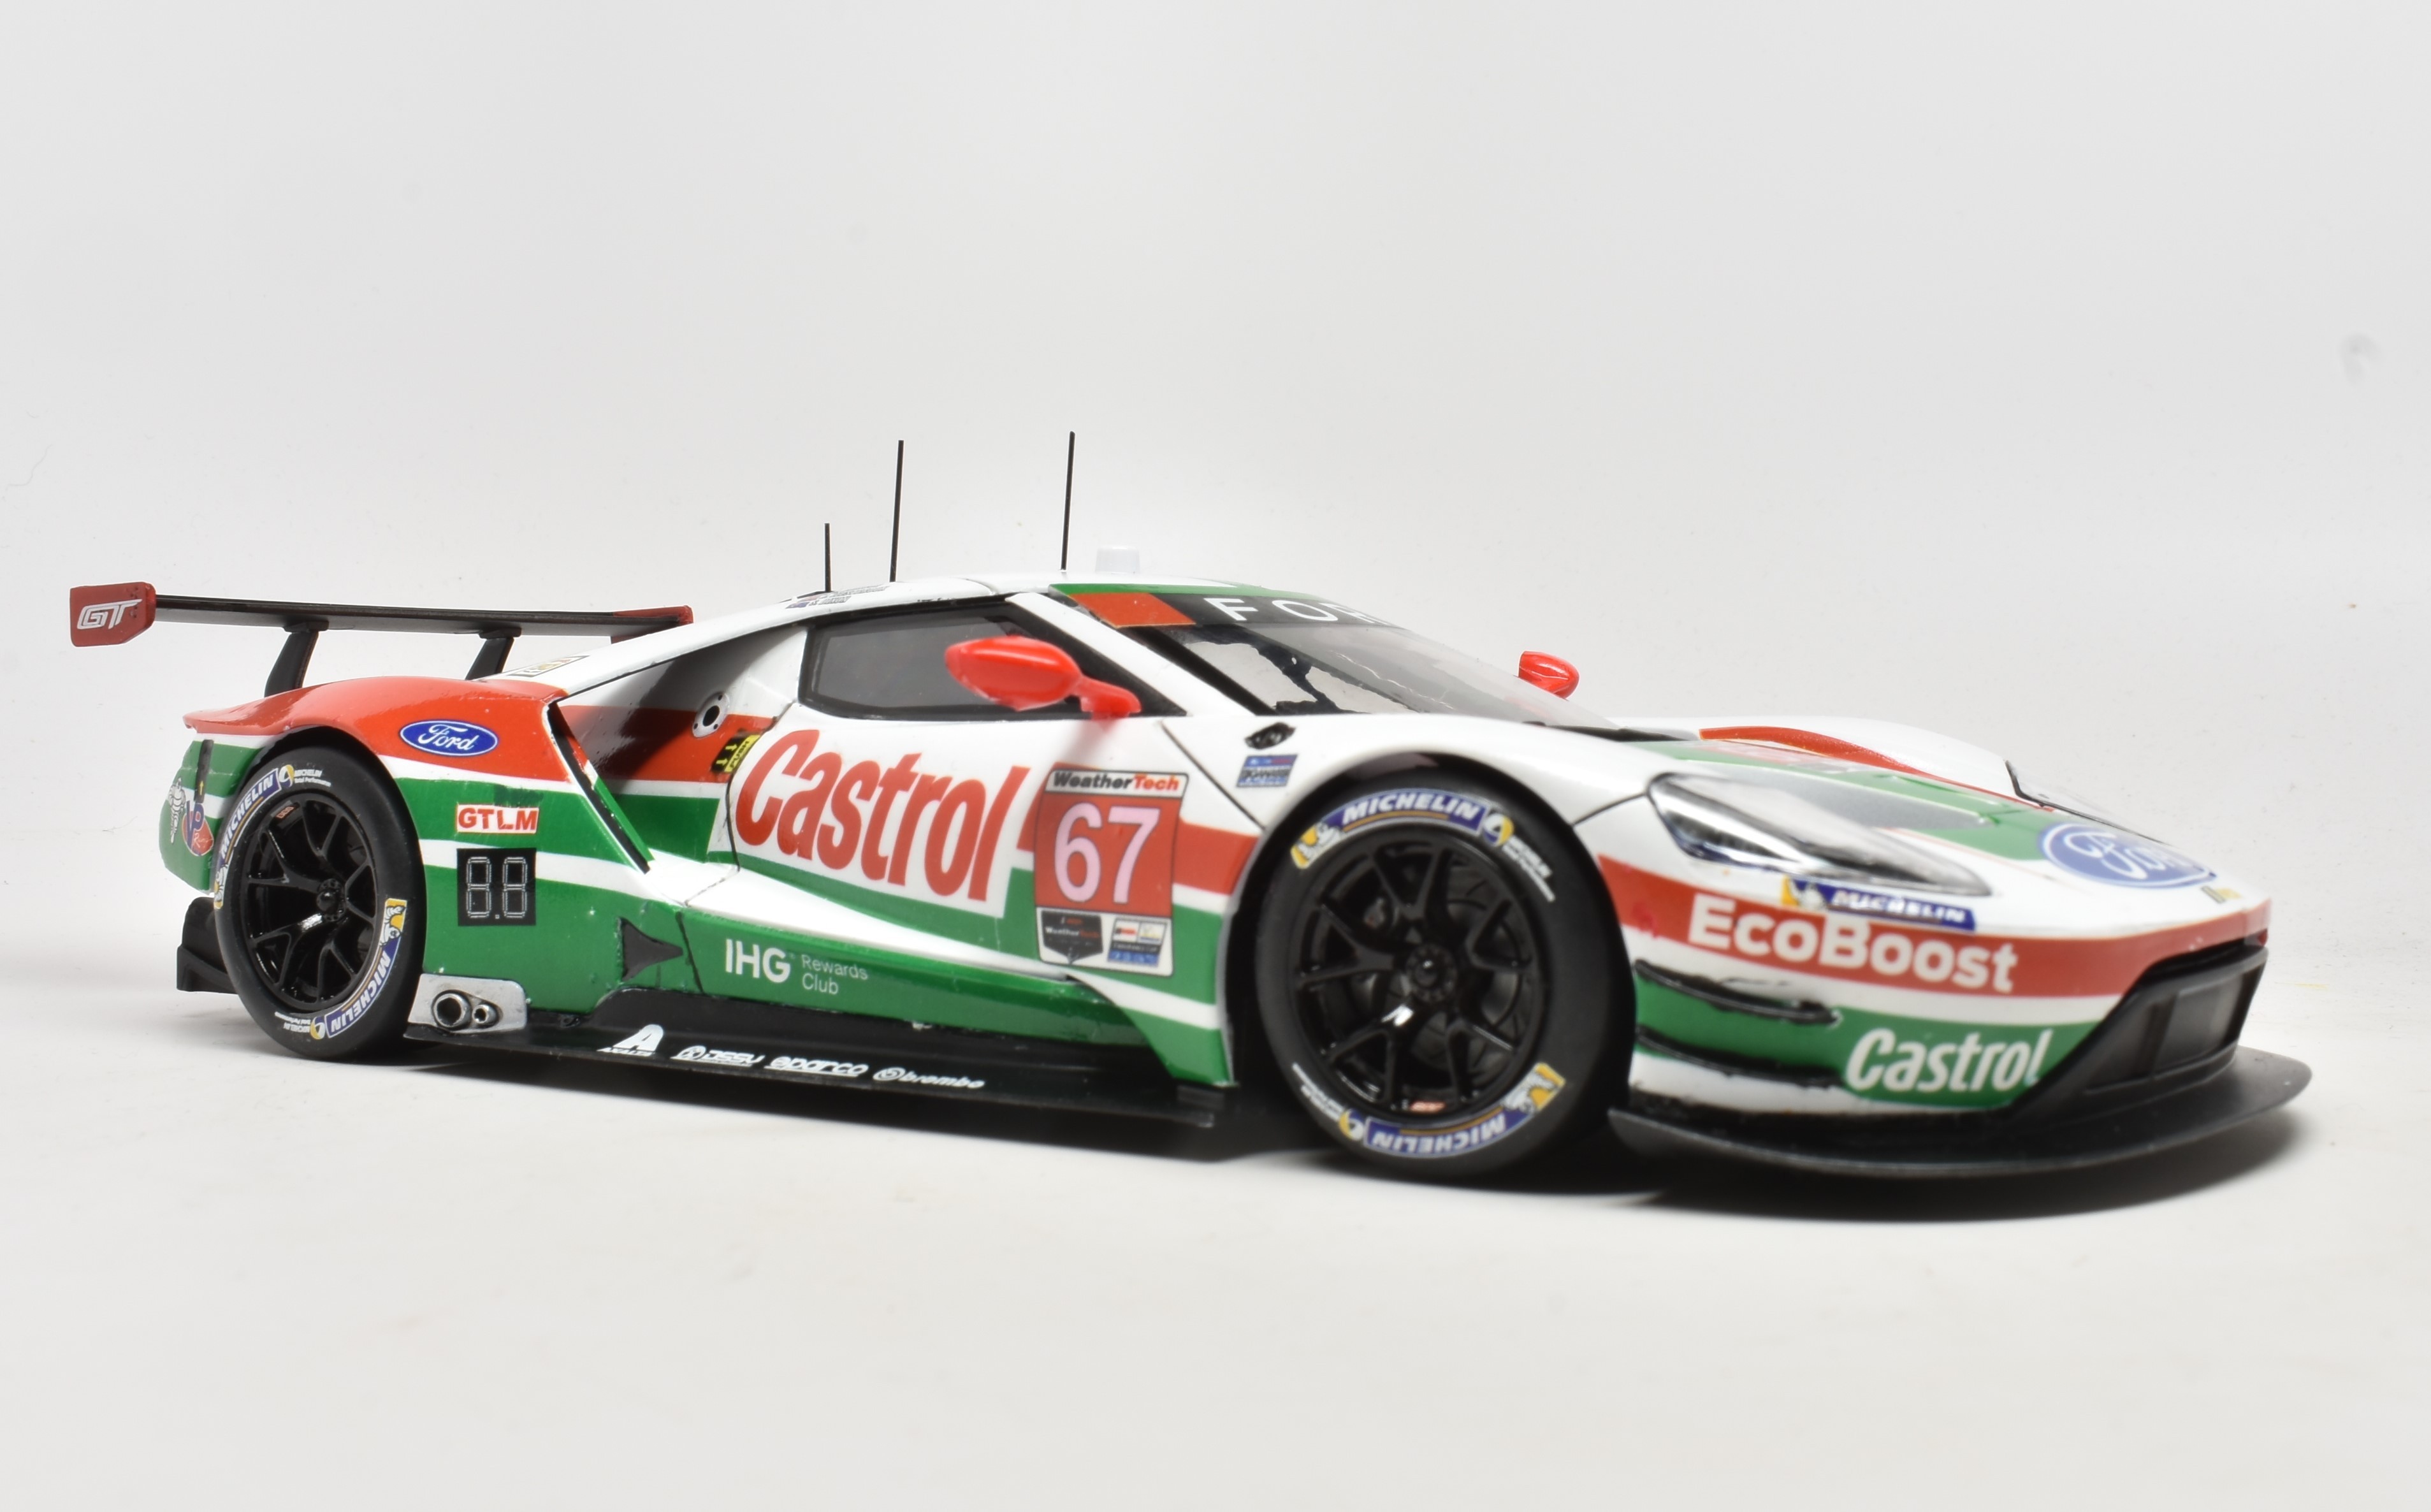

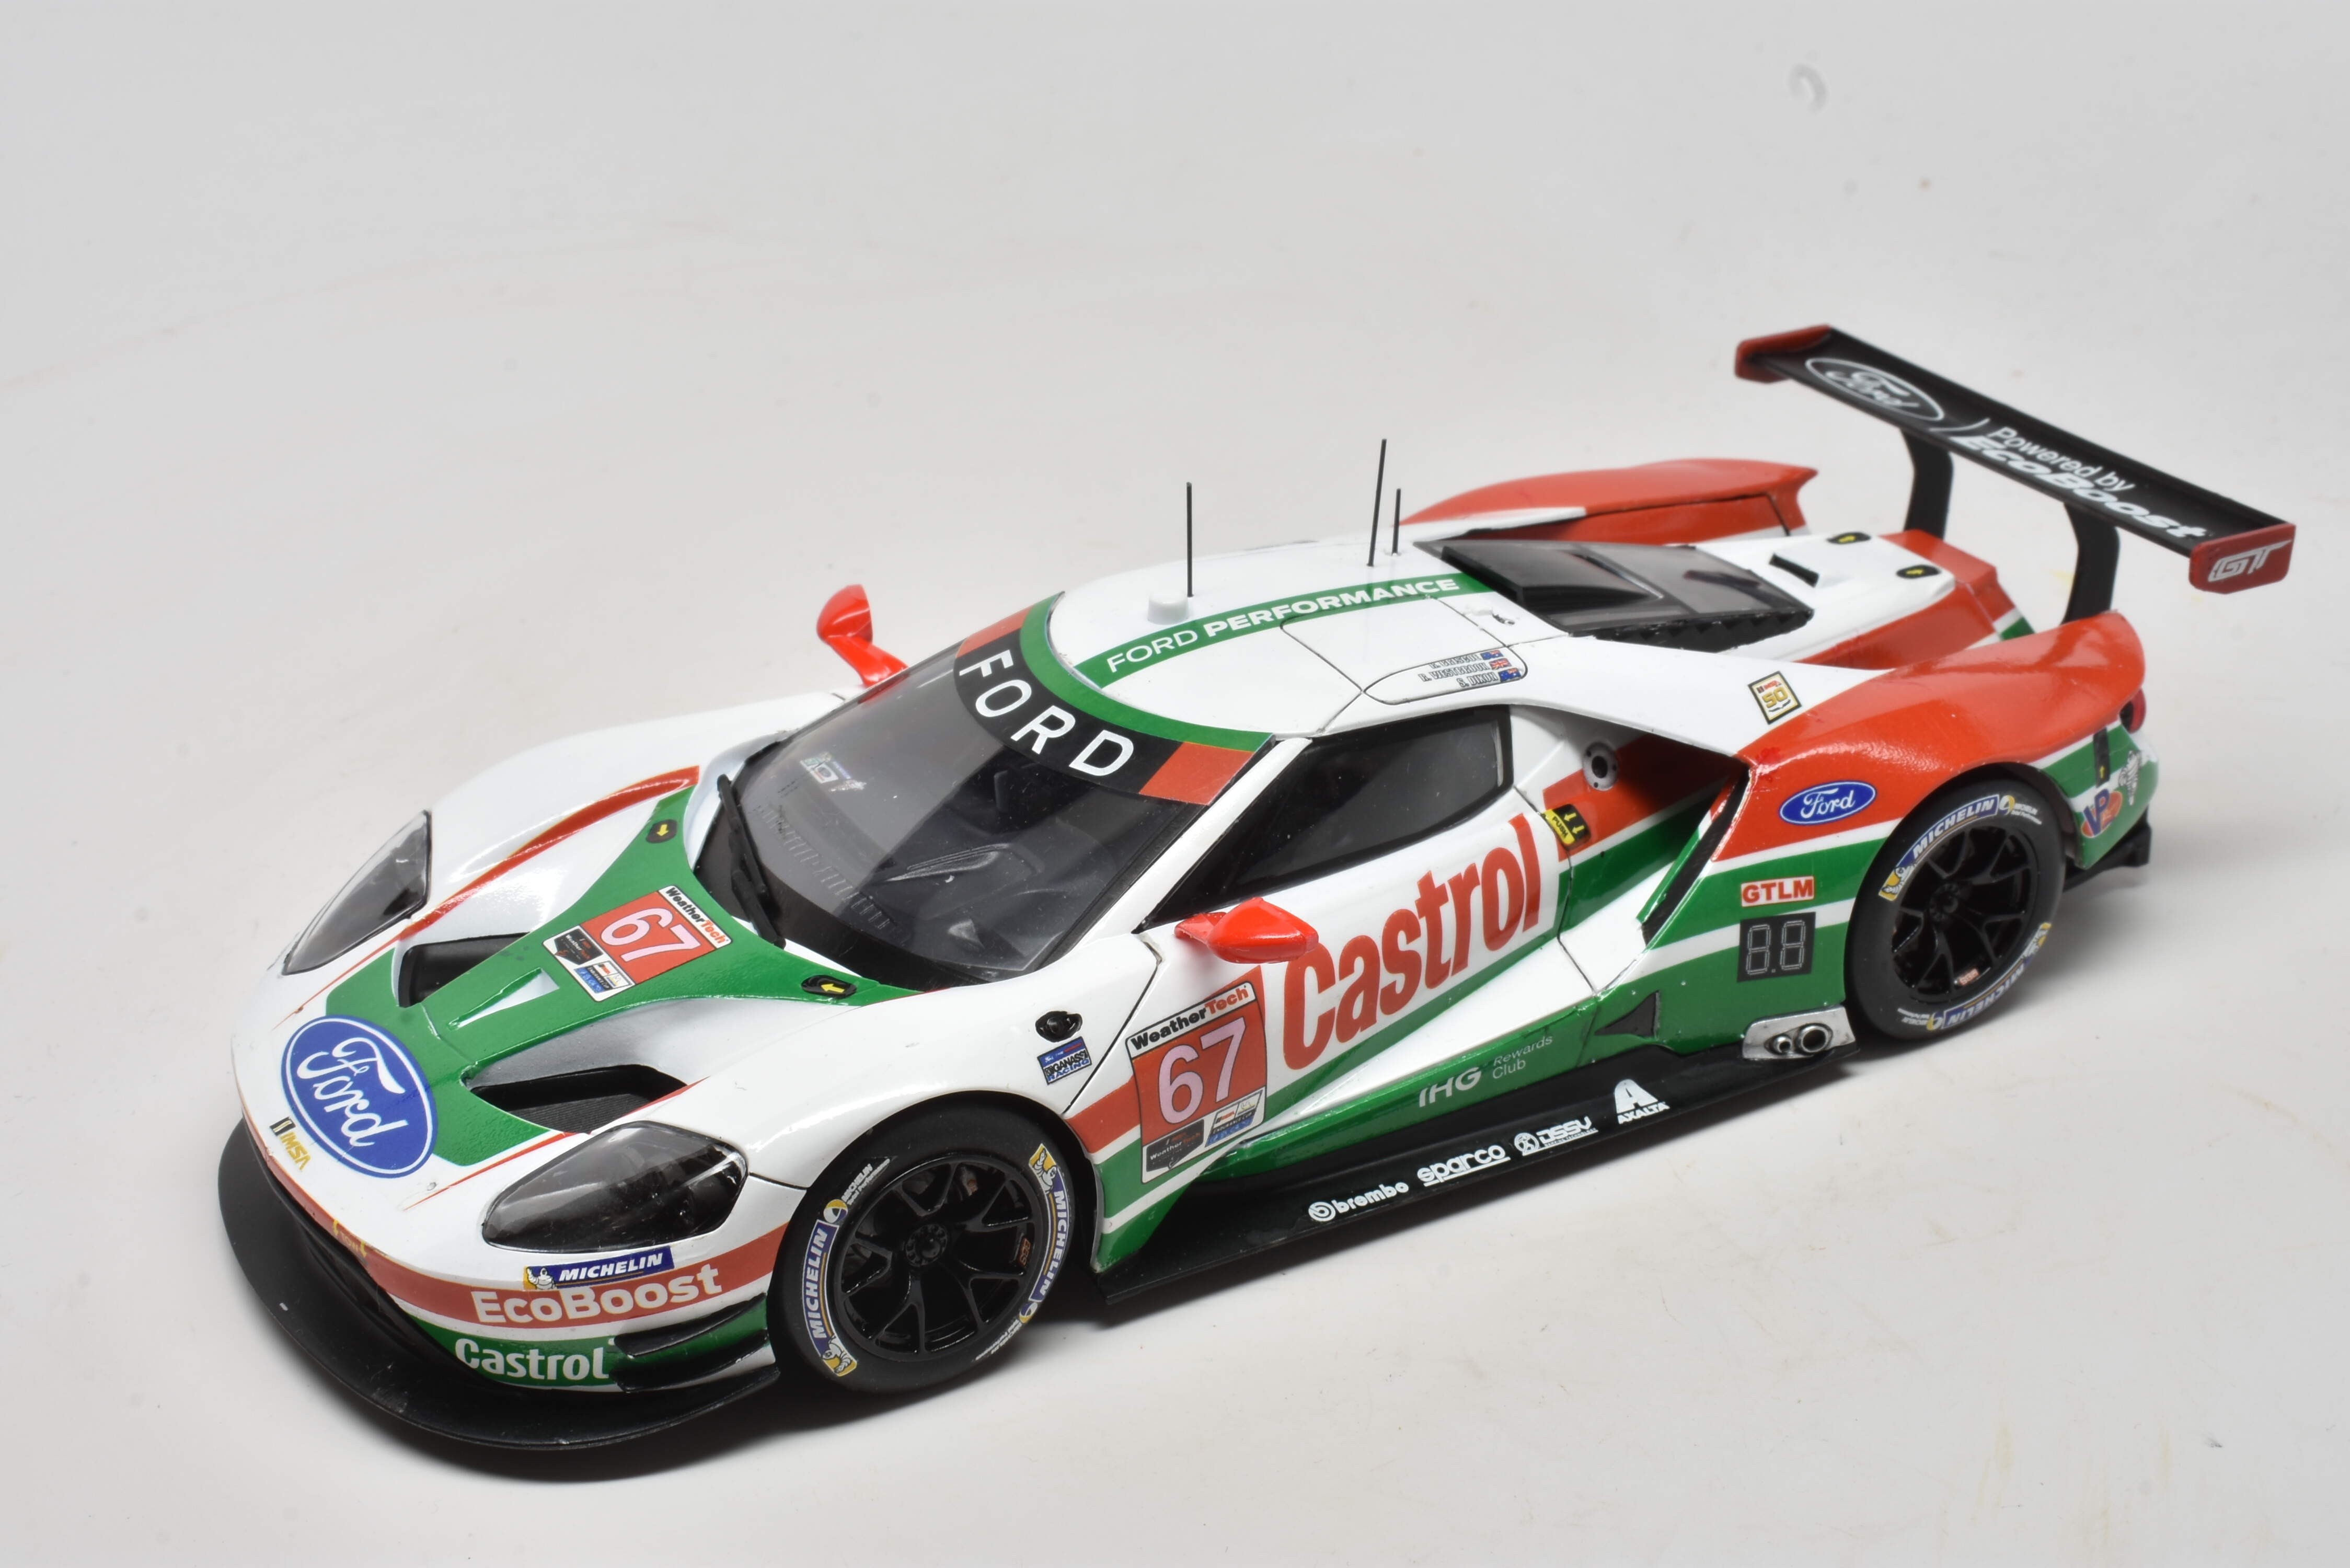

I’ve had two Ford GT kits in my stash for a while now; the Tamiya street version and Revell race version. I wasn’t crazy about the livery on the race version and the challenge of doing a multicolor paint job on the multipiece body shell. When I went to the Indycals website for decals for my Mustang GT4, I found several interesting schemes for the GT, and chose the Castrol GTX paint scheme which involved simply painting the body white, and letting the extensive decals do the rest.
My current model car mojo starts with the body; only when the body is complete do I start on the rest of the kit. After some mold line clean up and Tamiya white primer, I put down a few coats of Zero Paints pure white, followed by a coat of MCW clear to prepare for the decals. Thank goodness there are a lot of reference photos for this car on the internet; if not I probably could not have figured out where all those decals go, and I used every single decal on the two sheets. Particularly well done are the position markers ahead of the rear wheels.
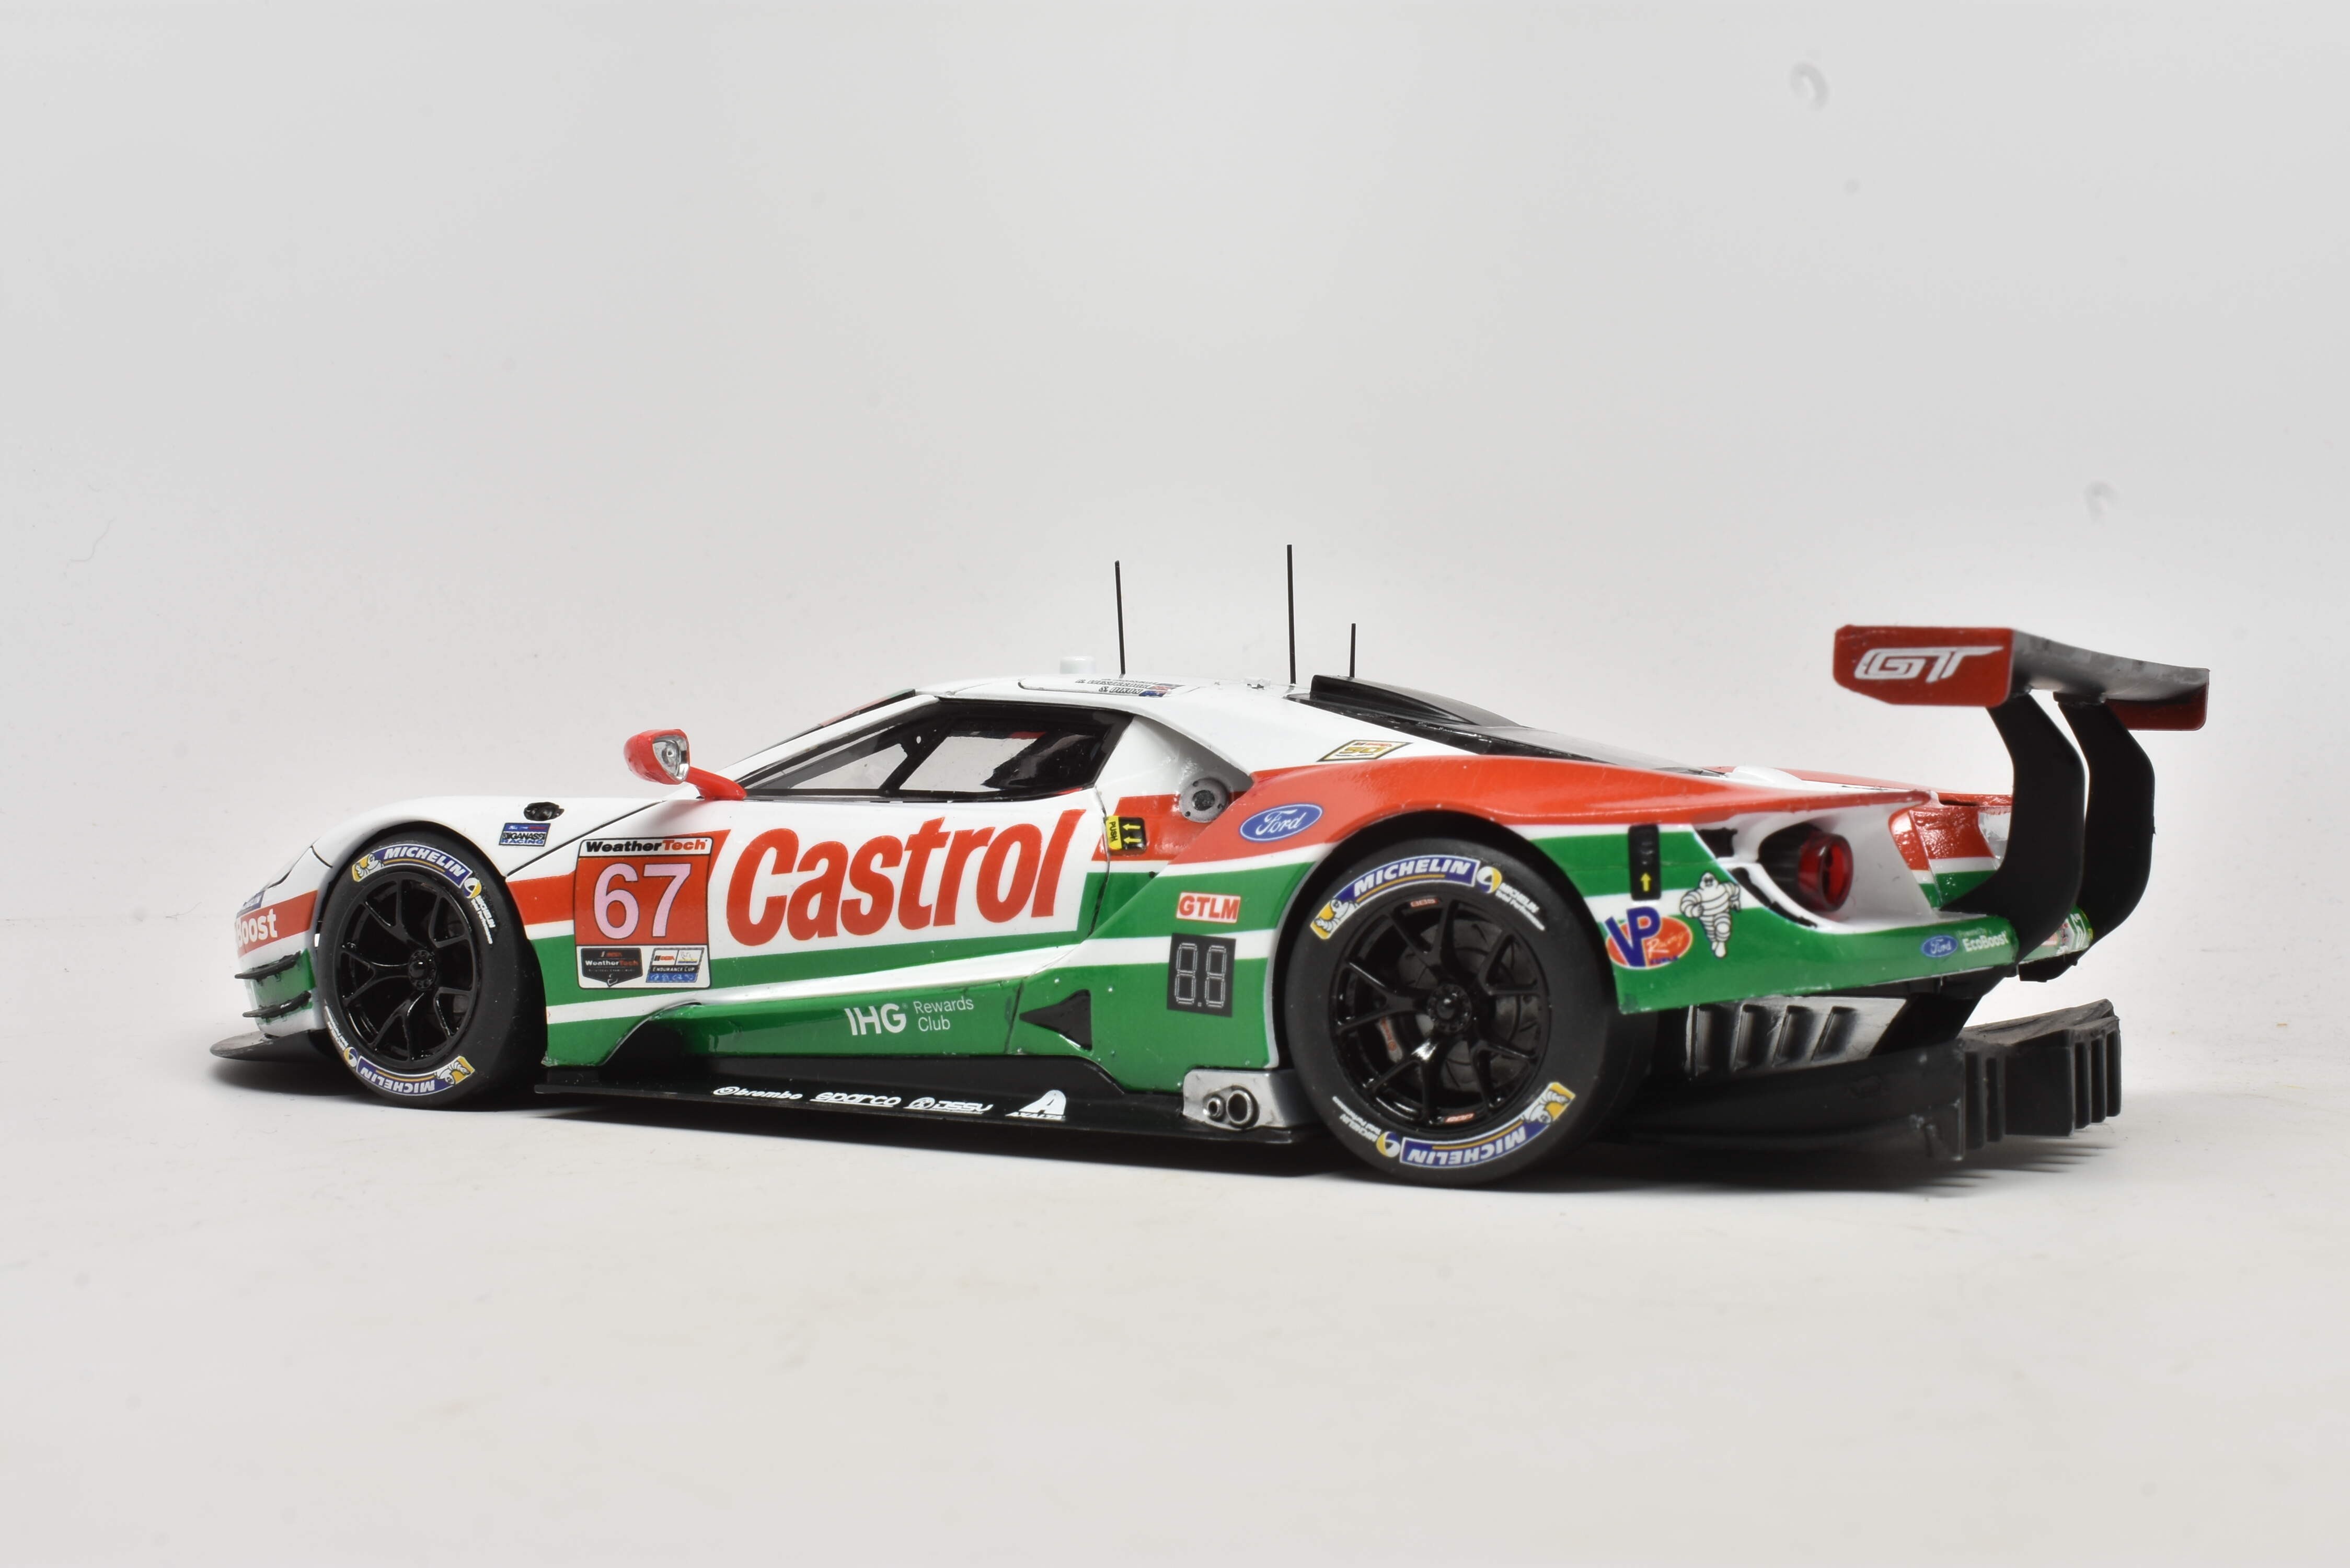
The Indycals worked really well for this application. The decals are very strong, yet respond well to solvents and heat. It really helped them go around some of the curves, like the red areas on the rear fenders; they also fold over well to adhere to narrow ridges. Just remember Rule One: You cannot cut these decals when they are wet! You cut them before or after, but not during as they’ll stretch, but not cut. Applying the decals took several nights, and as you can see they worked very well, and were sized perfectly for the kit. When done, I overcoated the body with Zero paints Diamond clear, and that gave me motivation to take on the rest of the kit. The body is only two pieces; a simpler design than the Tamiya kit, and they fit together in a trouble-free manner.
Detail painting, and then the windows finished the body. They had pre-painted borders, which is a good idea; however, despite being individually bagged, several were scratched, and the windshield had some errant black paint on it I wasn’t able to completely remove. I waxed them to make them more presentable, and attached them with Aileen’s Tacky Glue, which works great for this application. Attach the rear window after the chassis has been attached with the twin air scoops.
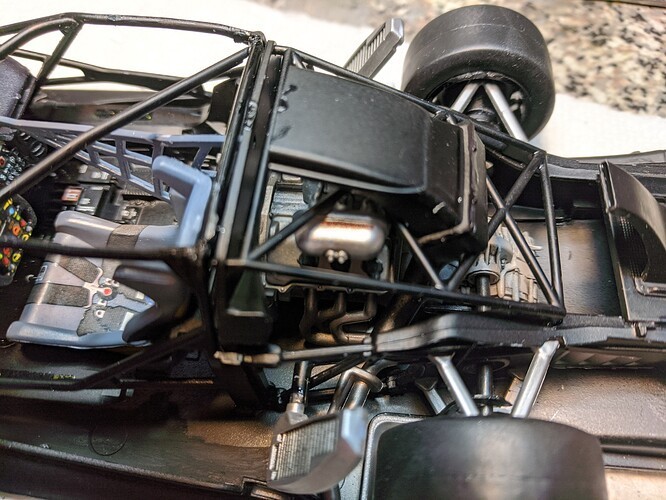
The chassis is quite detailed given the low parts count. It’s complete albeit with a very simplified suspension and drivetrain; in fact, the turbos are missing. Don’t fret! The way the kit goes together without opening panels means most of the chassis can’t be seen. For example, I normally use 3D harnesses on a car like this. The Indycal sheet had some nice harness decals, and I used them, as well as a bunch of decals for the electronics boxes inside….and…you can’t see them at all now the build is done. You could go the other way, super-detailing the chassis, but if you do, you’ll need to open some panels to see your work.
I had one problem on final assembly; if you build one of these there is a two-piece radiator that mates up with the two deep ducts on the hood. This unit is too tall and kept the front end from seating just right. If you build one, glue the part with the radiator directly to the bottom of the body ducts, and leave the 2nd part which goes to the chassis out, and that way it will work perfectly! Otherwise, the overall fit was excellent, although neither the moldings nor the fit was as exquisitely precise as a Tamiya kit.
Other than that, the build was glitch-free, and I really like the way the finished car looks. If you have one of these kits, go to Indycals.com and check out the great decal schemes for this vehicle; you’ll have a number of choices to make your swoopy GT unique!